Crochet Heart Headband Pattern Free
A row of connected hearts gives this headband its charm, while the delicate white edging and long ties turn simple crochet stitches into a wearable accessory with a polished finish.
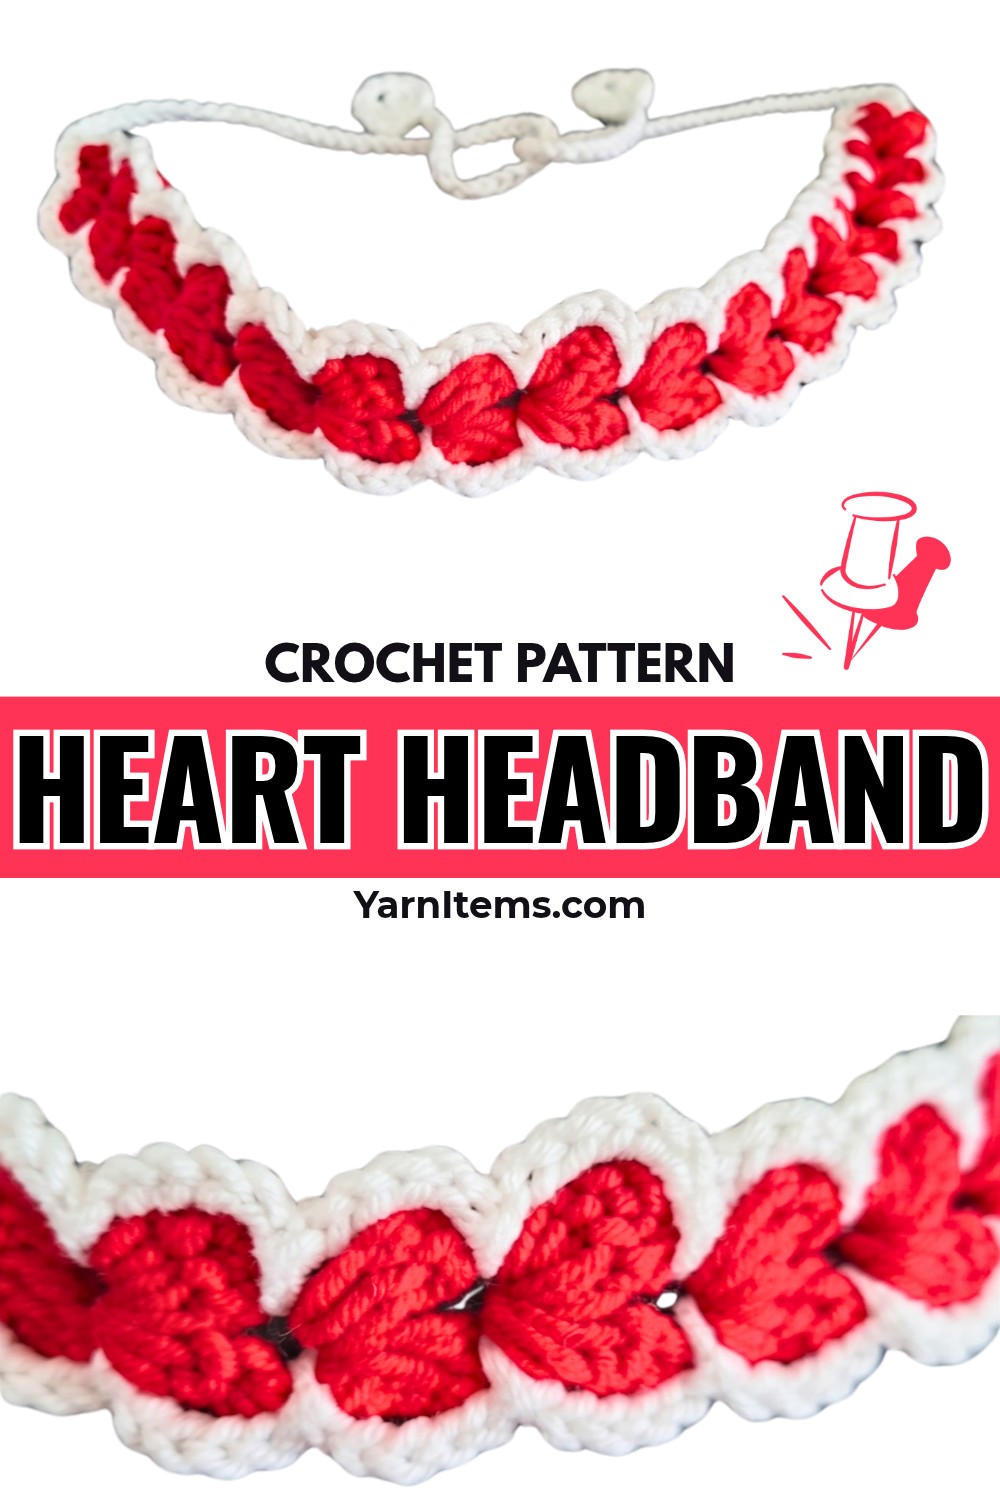
The heart motifs are built directly into one continuous strip, so the crochet design looks more intricate than the stitches actually are. The main challenge is keeping each heart balanced while repeating the same base-stitch sequence across the band.
The white edging then changes the character of the crochet piece completely. Those small chain arches define the heart shapes, while the long side ties make the finished headband adjustable. This is also a useful pattern for practicing decreases such as dc2tog and dc3tog without working a complicated shaped crochet heart headband piece.
Materials & Tools Needed
- Yarn: Cotton Milk 5-ply yarn in red and white.
- Crochet Hook: No. 5 / 3.5 mm crochet hook.
- Tapestry Needle: For weaving in yarn ends.
- Scissors: For cutting yarn.
- Optional: Blocking pins or a suitable flat surface for shaping the finished hearts.
Pattern Abbreviations & Terminology
- ch: Chain
- sl st: Slip stitch
- sc: Single crochet
- dc: Double crochet
- dc2tog: Double crochet 2 stitches together
- dc3tog: Double crochet 3 stitches together
Before You Start
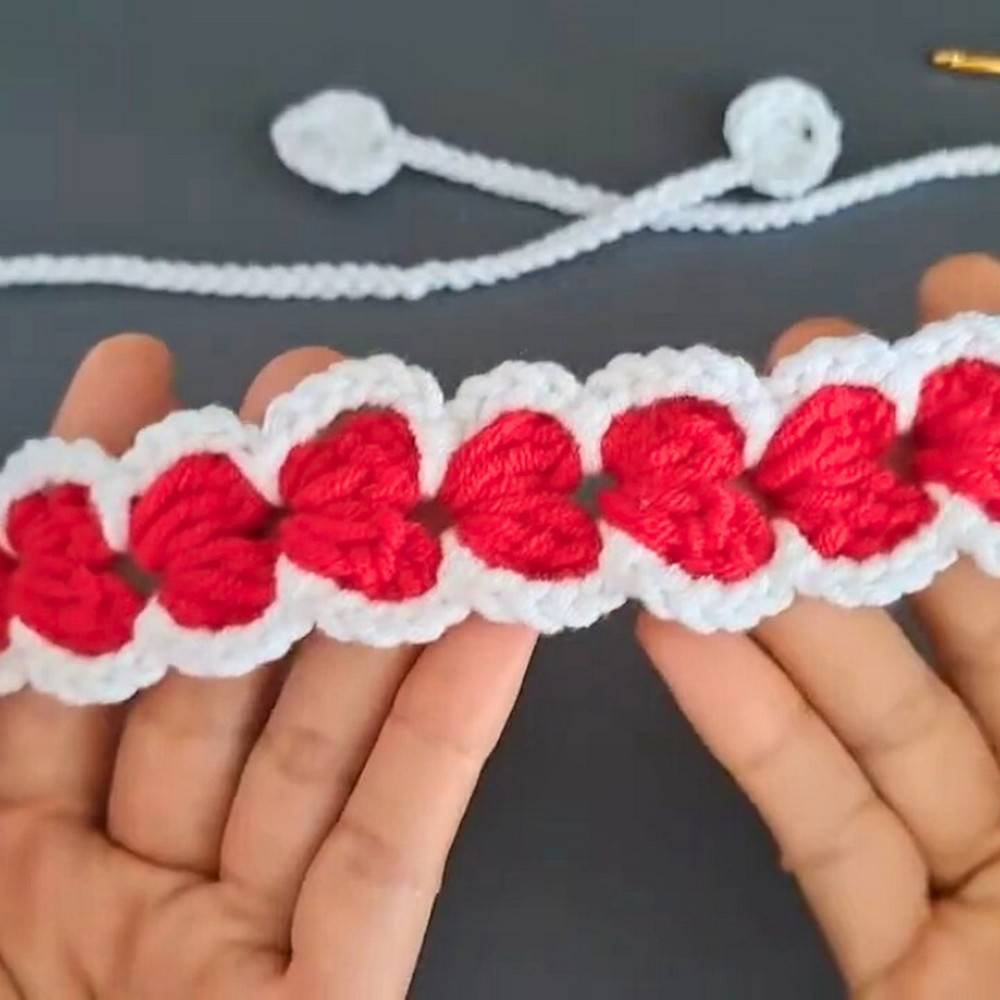
The most important part of this pattern is the base stitch space. Both halves of each heart are worked into the same base area, so losing that space or accidentally moving into the next chain can make the heart look uneven.
Before continuing across the whole band, make sure your first heart has two clear rounded upper sections and a defined center dip. Once that shape looks right, repeat the same sequence for the remaining hearts.
Step-by-Step Pattern:
Crochet the Connected Red Heart Band
Work the heart motifs in red yarn. The tutorial creates a continuous strip of connected hearts rather than making each heart separately and sewing them together.
Foundation: Make a slip knot with red yarn and chain 4.
Heart Half 1: Work dc2tog into the 4th chain from the hook, ch 1, work dc3tog into the same base stitch, ch 1, then sl st into the same base stitch to complete the first half.
Heart Half 2: Ch 3, work dc2tog into the same base space, ch 1, work dc3tog into that same base stitch, ch 1, then sl st into the base to secure the second half.
Repeating the Heart Motif
Repeat the complete heart-unit sequence across the foundation until you have the desired number of connected hearts. The tutorial demonstrates a continuous band containing 16 heart segments.
The key point here is not to rush the repeated sections. Each new heart should begin from the correct base space so the connected motifs remain evenly spaced.
Finish: Fasten off the red yarn once the complete heart strip has been worked.

Add the White Decorative Border
The white edging gives the red heart band a cleaner outline and makes the individual heart shapes easier to see.
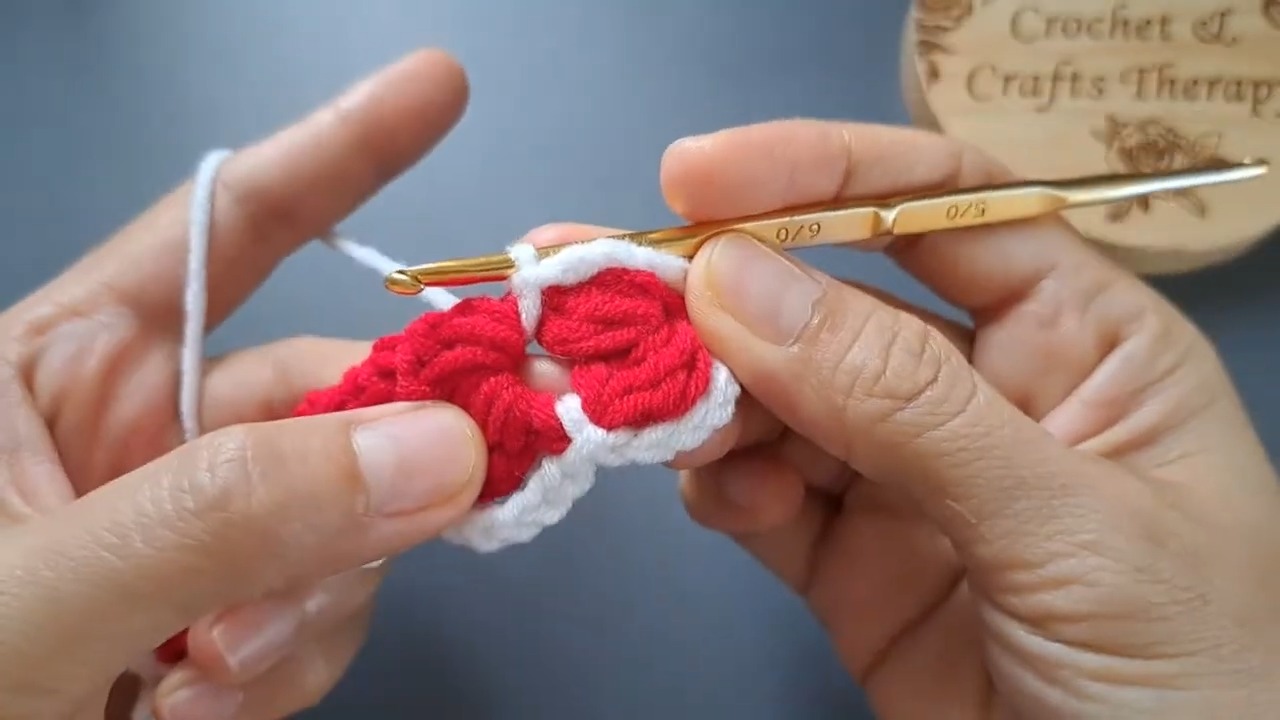
Attach white yarn with a slip stitch at the top point of the first heart.
Border Start: Ch 1 and work 1 sc into the top point.
Top Edge: Ch 5, then sl st into the dip between the first two hearts.
Repeat: Continue working ch-5 arches followed by a sl st into each heart valley across the entire top edge.
Watch the Heart Valleys
The slip stitch should land in the dip between two hearts, not on one of the raised heart points. If the arch is attached too high, the white border can pull the motifs together and make the hearts look less defined.
Continue the same edging idea around the remaining contours and along the lower edge of the connected heart strip so the white border frames the central band.
Finish: Fasten off the white yarn and secure the end.
Create the Adjustable Headband Ties
The long ties allow the headband to be adjusted comfortably rather than relying on one fixed circumference.
Join white yarn to one end corner of the completed heart panel.
Tie: Chain 50 to form the long adjustable strap.
Small End Accent
The decorative end piece is made from a few stitches and gives the tie a finished appearance.
End Accent: Ch 3, work dc2tog into the chain, then dc3tog, ch 3, and sl st back to form the small rounded decoration.
Fasten off and secure the yarn end.
Repeat the same tie and decorative accent on the opposite side of the heart band.

Troubleshooting: If the Hearts Do Not Look Even
A heart that appears too narrow, too open, or slightly twisted usually comes from one of three things:
- One half of the heart was worked into a different base space.
- The chain between the decrease groups was missed.
- The final slip stitch was placed somewhere other than the original base.
Instead of undoing the whole band immediately, check the first completed heart. If the first one is symmetrical, compare the next heart directly against it. This makes it much easier to locate the point where the stitch sequence changed.
Shaping and Finishing the Headband
Once both ties are complete, gently arrange the heart motifs so that they sit evenly along the band. The hearts can naturally curl slightly after crocheting, especially with cotton yarn.
Use your fingers first to flatten and arrange each motif. If needed, lightly block the finished piece so the heart points and white arches settle into place.
Weave in all loose yarn ends securely with a tapestry needle.
Assembly & Final Touches
After blocking and weaving in the ends, tie the two long straps around the head to find the most comfortable fit. Adjust the tension so the hearts remain flat without pulling the center band too tightly.
The finished crochet heart headband is now ready to wear, gift, or personalize with your preferred yarn colors.