
How to Crochet a Stylish Clutch Bag
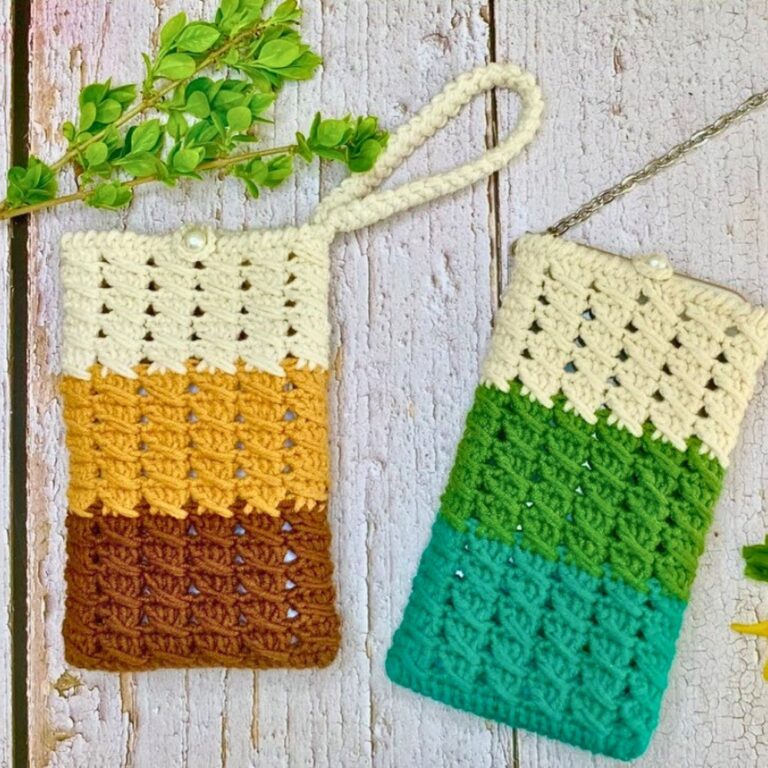
A crochet clutch starts with simple stitches that gradually become a neat, handmade bag with a shape and purpose of its own. As the design grows, each section comes together to create a compact piece that holds your essentials while adding a personal handmade touch. In this guide, you’ll discover how the crochet clutch takes form from the first stitches to the final finishing details.

Creating this clutch is a fun way to explore basic crochet techniques while building a practical accessory step by step. The crochet process includes shaping the bag, adding small details, and customizing the design with your choice of colors, closures, or embellishments. Keep reading to follow the making process and bring this crochet clutch to life.
Credit Felicia Andronic
Materials & Tools Needed
- Yarn:
- Scrap yarn in 3 different colors.
- Any yarn weight is usable depending on preference.
- Crochet Hook:
- 10 mm crochet hook.
- Optional Accessories:
- A card or object to wrap yarn for fringe (optional).
- Scissors for cutting yarn.
Finished Size & Customization Ideas
- Finished Size:
- The size will depend on the number of rows you decide to crochet and the yarn weight.
- In the video, the clutch has 11 rows woven together and includes a long chain handle for versatility (as a crossbody or regular clutch).
- Customization:
- You can fully customize the piece:
- Choose one single color or multiple colors.
- Adjust the rows for a larger or smaller clutch.
- Add fringe details (optional).
- Make the handle longer or shorter depending on your needs.
- You can fully customize the piece:

Pattern Abbreviations & Terminology
- ch: Chain
- sc: Single Crochet
- dc: Double Crochet
- st(s): Stitch(es)
All terminologies follow U.S. crochet conventions.
Step-by-Step Detailed Crochet Instructions
Base of the Clutch
- Step 1: Create the foundation chain.
- Start with a slip knot on your hook.
- Chain 19.

- Step 2: First Row (Single Crochet).
- Begin single crochet (sc) in the second chain from the hook.
- Continue making 1 sc in each chain across the foundation row.
- At the end of the row, decide if you would like to change the color (optional).
- If changing colors:
- Finish the last stitch by pulling the new color through the final yarn-over.
- Pull gently to secure the color change.
- Step 3: Second Row (Alternating Stitches).
- Chain 1 (this is a turning chain). Turn your work.
- Begin alternating stitches across:
- Single Crochet (sc) in the first stitch.
- Double Crochet (dc) in the next stitch.
- Continue alternating between sc and dc: sc, dc, sc, dc, until the end of the row.
- Step 4: Repeat the Pattern for Rows 3–10.
- For each subsequent row, repeat Row 2:
- Ensure each sc is placed on top of the dc from the previous row.
- Ensure each dc is placed on top of the sc from the previous row.
- Carry unused colors of yarn along the edge without cutting after every row.
- For each subsequent row, repeat Row 2:
- Step 5: Final Row (Row 11).
- Chain 1 and complete the row using single crochet (sc) in every stitch.
- This mirrors the first row and provides symmetry.
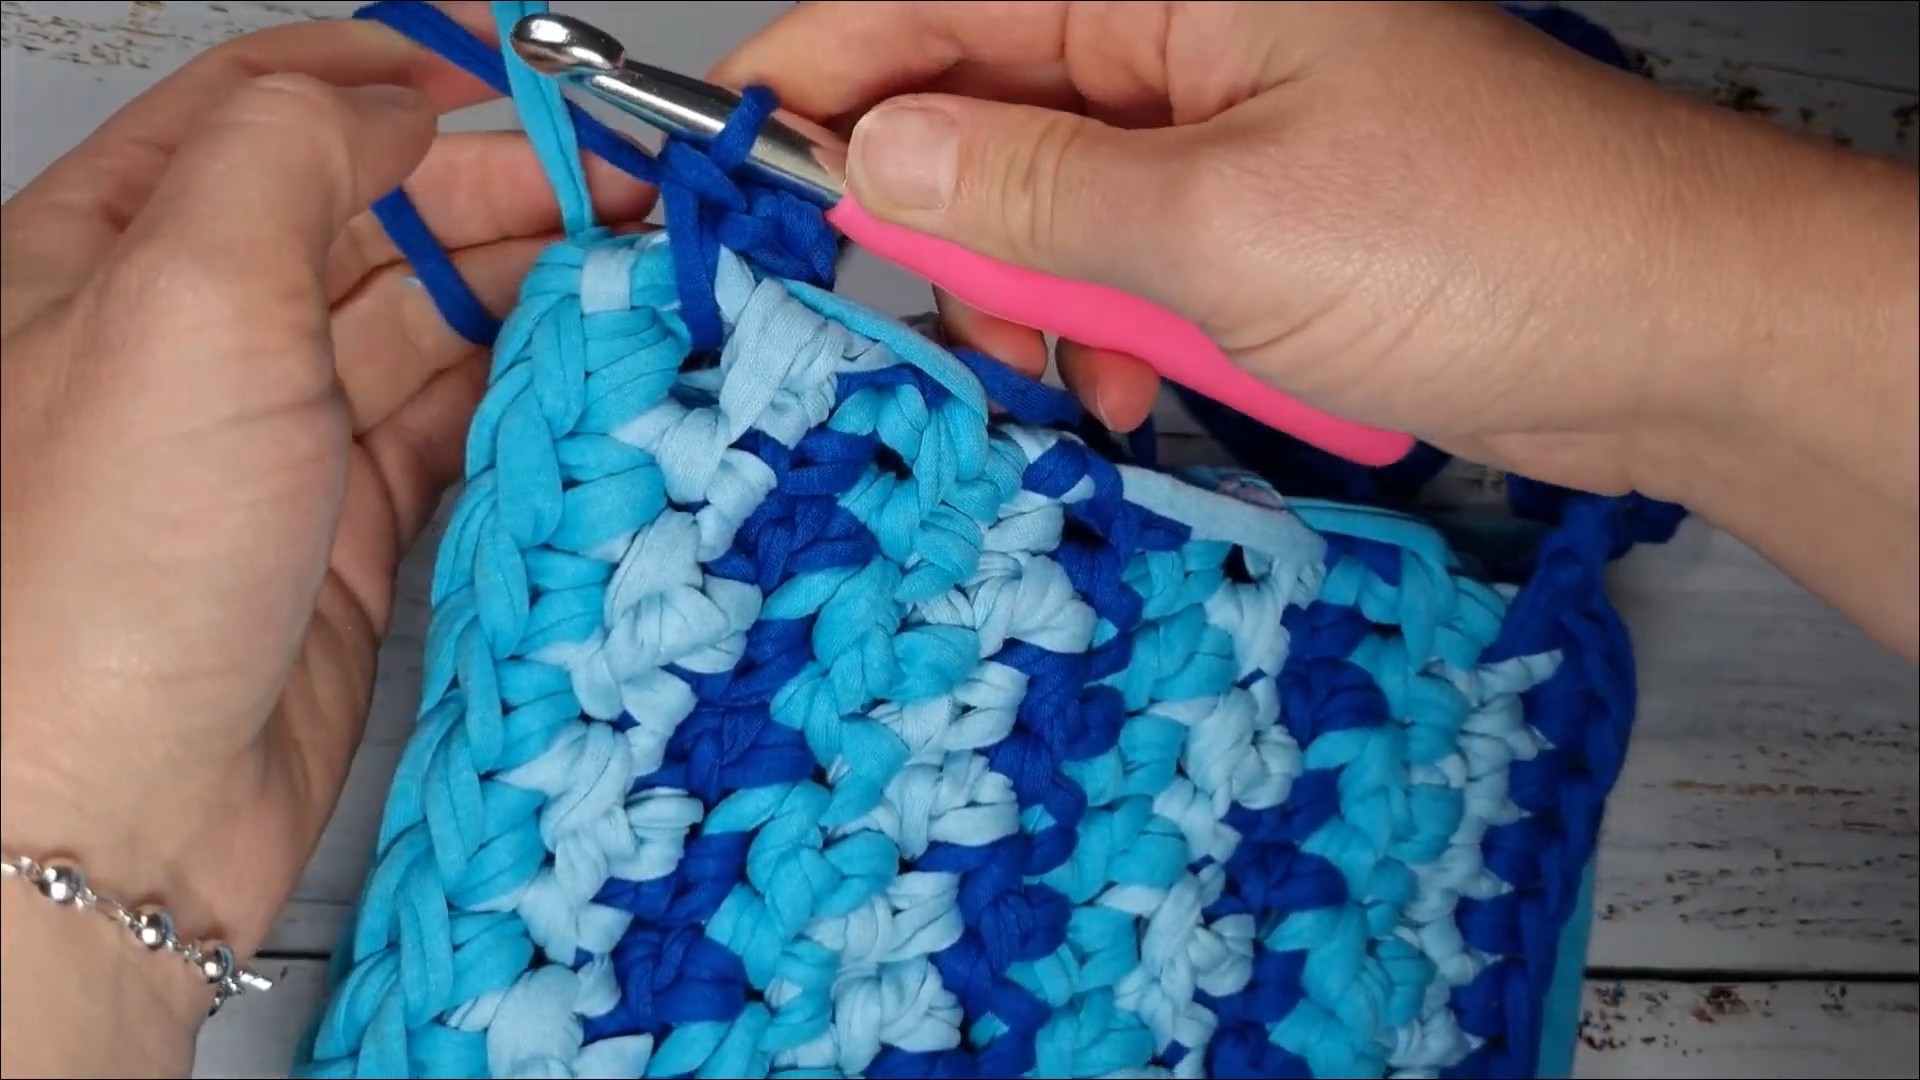
Shaping and Seaming the Clutch
- Step 6: Fold the piece in half.
- Align both edges to create the folded clutch shape.
- Step 7: Seam the sides.
- Using one of the yarn colors (in the video, the darker blue).
- Begin connecting the sides.
- Work through both layers of the clutch edge:
- Insert your hook through both aligned stitches of each layer.
- Make a single crochet (sc) to secure them together.
- Repeat this until the entire side is closed.
Creating the Handle
- Step 8: Crochet the handle.
- Continuing from the seam, create a long chain.
- The number of chains depends on the desired length (long enough for a crossbody strap or shorter for a clutch handle).
- Once the chain is completed, attach the end of the chain to the opposite side of the clutch.
- Ensure the chain does not twist while attaching.
- Step 9: Reinforce the handle.
- After connecting the handle to the opposite side.
- Work single crochet (sc) along the entire length of the chain to thicken it.
- Once you’ve reached the end of the chain, turn your work and repeat another row using sc.
- This ensures the handle is sturdy and durable.
- Step 10: Work around the handle.
- Instead of inserting your hook into the chain stitches, you’ll now crochet around the handle:
- Insert your hook under/through the handle.
- Pull up yarn and create a single crochet (sc).
- Continue working this technique around the handle for additional thickness.
- Instead of inserting your hook into the chain stitches, you’ll now crochet around the handle:

Adding Fringe (Optional)
- Step 11: Add fringe to customize (optional).
- Wrap any of the yarn colors around a card or small object multiple times.
- Cut one side of the wrapped yarn to create strips.
- Insert your hook into the clutch edge where you want fringe and pull the yarn strips through.
- Tie the strips to create fringe along the edge.

Finishing Techniques
- Weave in the ends:
- Using a tapestry needle, tuck in any loose ends from color changes or cut threads.
- Shape the clutch:
- Stretch or block the clutch gently (if needed) to create clean edges.
- Test your handle:
- Ensure your handle is securely attached, symmetrical, and the crochet stitches reinforce its durability.




One Comment