How to Crochet a Spiral Granny Blanket – Endless Granny Pattern
This spiral crochet granny blanket grows row by row without cutting the yarn, creating a mesmerizing staircase edge that eventually squares into a clean, finished blanket.
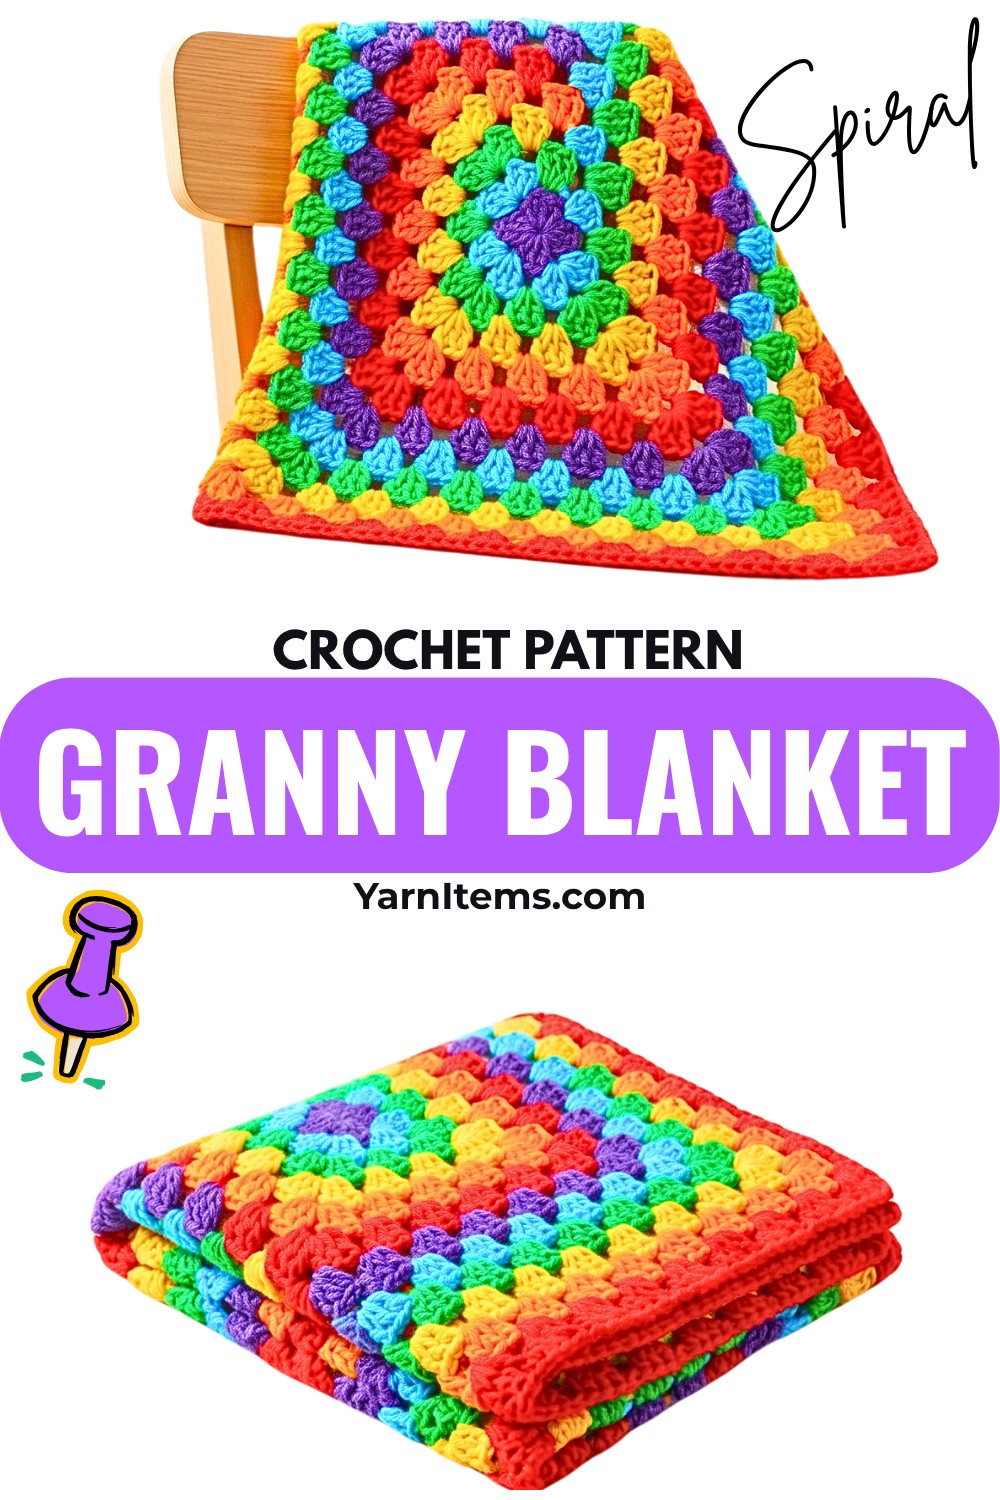
Instead of building separate crochet granny squares or closing every round, this blanket grows outward as one continuous spiral. Each new color begins from a dropped loop on the previous row, creating the unusual staircase edge that gives the crochet pattern its endless look.
Once that starting method makes sense, the rest becomes a repeat of side spaces and corner spaces. You can keep adding rows until the blanket reaches your preferred size, change colors for a bold striped effect, or stop earlier and use the motif as a smaller square for another crochet make.
Credit dreampls
How the Endless Spiral Works
Before choosing your yarn or beginning the rows, it helps to understand what makes this granny pattern different.
You will make the center ring first, but after that, you do not finish each new round in the usual way. Instead, each color works across one row, then its loop is dropped without cutting the yarn. The next color begins from the previous row, while the earlier color remains attached.
This creates a staircase of hanging loops along one unfinished edge.
That staircase is intentional. As the blanket grows, the older loops are periodically picked up and extended through the spaces above them. When you reach the desired size, those loops are worked one final time and finished with a special squaring stitch that turns the stepped edge into a straight boundary.
So the basic rhythm is: Work a row → drop the loop → start the next color → extend older loops when needed → square the staircase at the end.
Once you can recognize corner spaces and side spaces, the repeating section becomes much easier to follow.
Materials & Tools
- Worsted-weight yarn: Use as many colors as you like. The tutorial uses 6+ solid colors, but two colors, several shades, or a self-striping Batik yarn can also work.
- Crochet hook: Choose a size appropriate for your yarn weight.
- Scissors
- Yarn needle for weaving in ends
- Stitch markers, optional, but useful for securing dropped loops so they do not accidentally unravel
Size & Ways to Use the Pattern
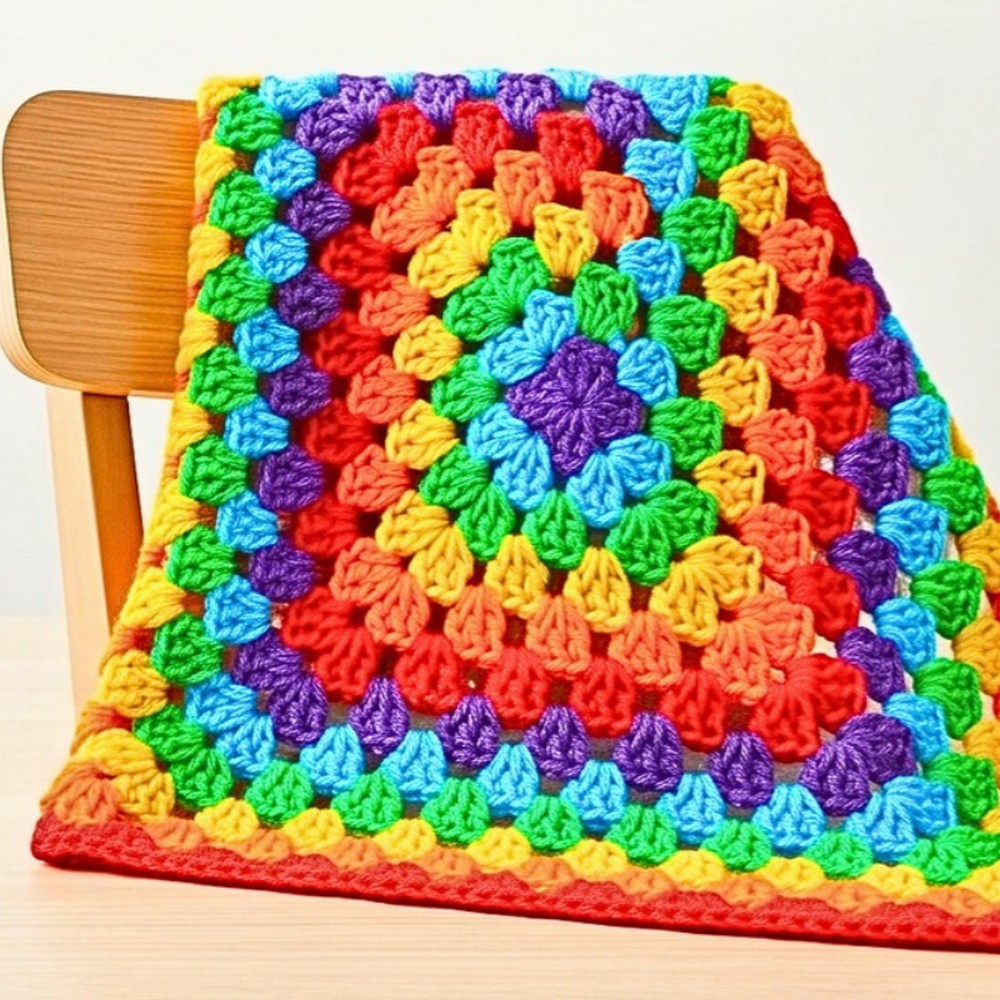
There is no fixed final blanket size. Simply continue adding rows until the piece reaches the dimensions you want.
Stopping earlier gives you a smaller square that can later be joined with other motifs. You can also use a finished smaller square for items such as a cardigan or another crochet piece.
Once the main shape is complete, a standard crochet border can be added around the straightened edge.
Abbreviations
- MR: Magic Ring
- ch: Chain
- sl st: Slip Stitch
- dc: Double Crochet
- sp / sps: Space / Spaces
- Cluster: 3 double crochets worked into the same space
Build the Center
The first round establishes the four corners that everything else will grow from.
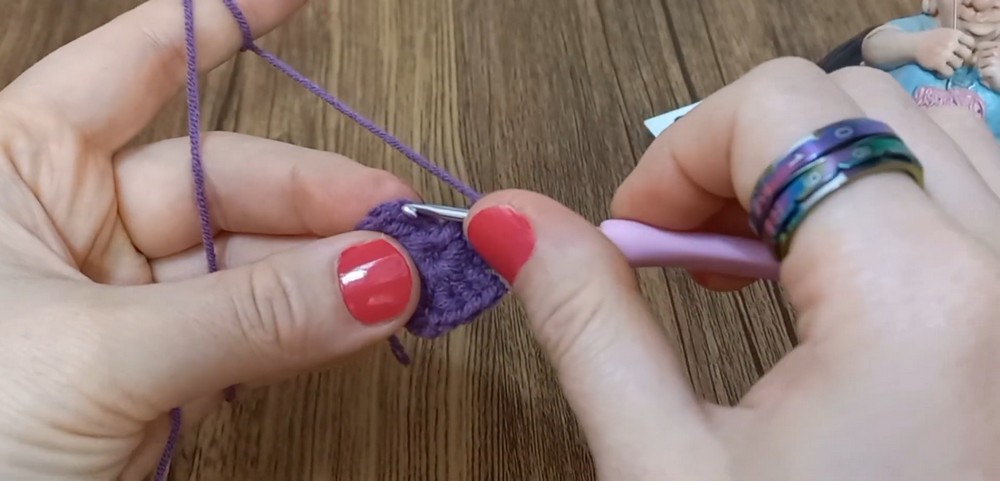
Round 1 – Color 1: Make a MR, or ch 4 and join with a sl st to the first ch to form a ring. Ch 3 (counts as 1 dc), work 2 dc into the ring, ch 2, then work (3 dc, ch 2) into the ring 3 more times. You should now have 4 clusters of 3 dc and 4 ch-2 corner spaces. Join with a sl st to the 3rd chain of the beginning ch-3, then drop the yarn loop without cutting the yarn.
At this point, do not try to close the row in the usual way or fasten off. The dropped loop is what allows the next color to begin from the previous row.
Begin the Endless Rows
Row 2 – Color 2
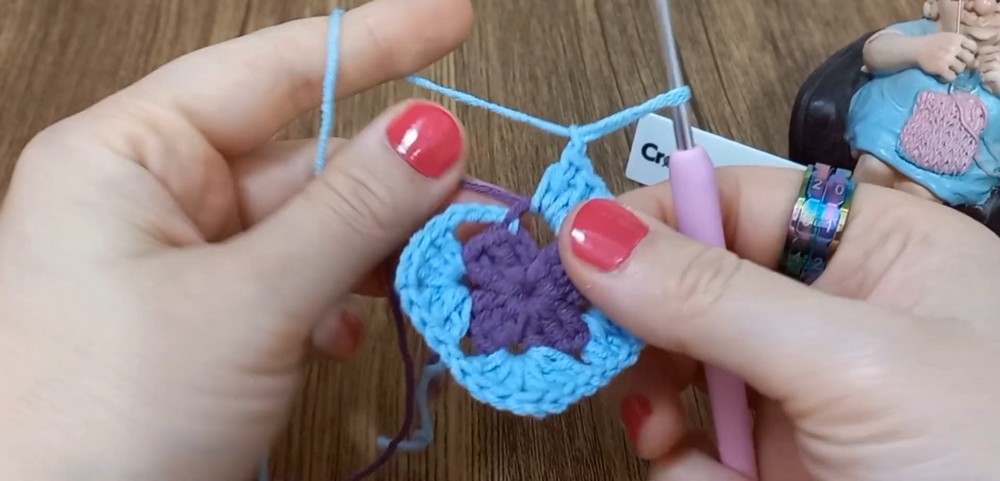
Join Color 2 into the same stitch where you made the previous slip stitch. Ch 4 (counts as 1 dc + 1 ch), skip the next dc cluster, and work the first corner into the next ch-2 space: (3 dc, ch 2, 3 dc). Ch 1, work (3 dc, ch 2, 3 dc) in the next ch-2 space, ch 1, repeat the same corner in the next ch-2 space, ch 1, then in the final space where the beginning ch-4 originated, work 3 dc, ch 1. Drop the loop without cutting the yarn.
The important point here is that the new color is not closing the round. You are creating a row with three full corners and a final partial section that will become part of the staircase.
Row 3 – Color 3
Return to the beginning of Row 2 and join Color 3 into the 2nd chain of the beginning ch-4. Ch 3 (counts as 1 dc), work 2 dc into that same chain space, then ch 1. In the next corner space work (3 dc, ch 2, 3 dc), ch 1; in the next side ch-1 space, work 3 dc, ch 1. Continue alternating (3 dc, ch 2, 3 dc, ch 1) in corner spaces with (3 dc, ch 1) in side spaces. In the final ch-1 space, work 3 dc, ch 1, then drop the loop.
The extra side space introduced by this row is what begins extending the blanket outward rather than simply repeating the original four-corner center.
Row 4 – Color 4
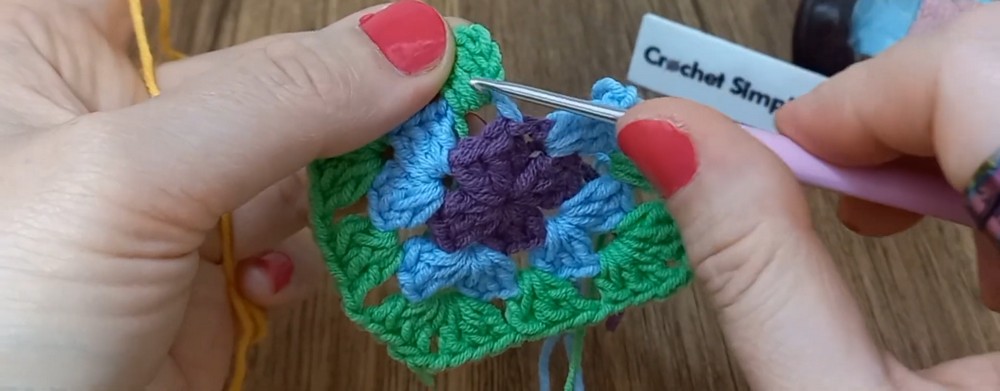
Return to the beginning of Row 3 and join Color 4 into the 3rd chain of the beginning ch-3. Ch 4 (counts as 1 dc + 1 ch). In the next ch-1 space, work 3 dc, ch 1. In the next corner space work (3 dc, ch 2, 3 dc, ch 1). Continue around the row, working (3 dc, ch 1) in every side space and (3 dc, ch 2, 3 dc, ch 1) in every corner space. Finish the row with 3 dc, ch 1 in the final ch-1 space, then drop the loop.
At this stage, look at the unfinished edge. You should be able to see the characteristic staircase of dropped loops rather than a straight outer edge. That is exactly what you want.
Continue the Spiral
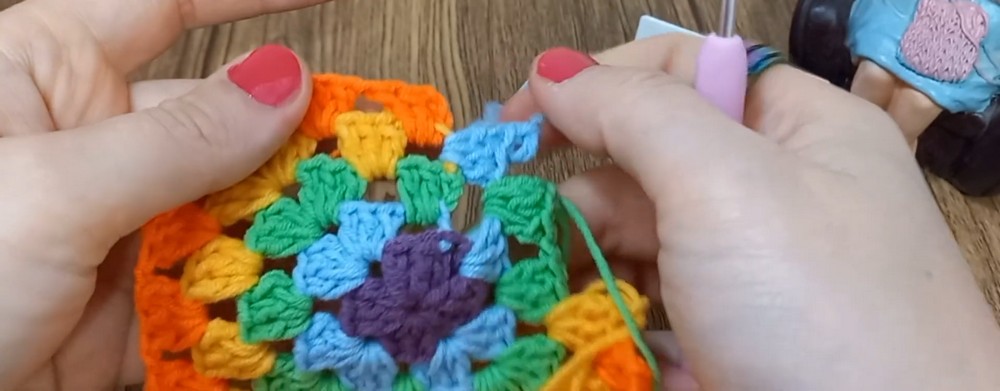
From Row 5 onward, the blanket follows the same two starting patterns.
When the previous row began with a ch-4: Join the new color into the 2nd (or 3rd) chain of that beginning ch-4, then ch 3, work 2 dc into the same space, and ch 1. Continue through the side and corner spaces using the established pattern.
When the previous row began with a ch-3: Join the new color into the 3rd chain, then ch 4. Skip the dc stitches, move to the first ch-1 space, and work 3 dc, ch 1. Continue through the remaining spaces.
The repeating rule throughout the blanket is:
- Side space: 3 dc, ch 1
- Corner space: 3 dc, ch 2, 3 dc, ch 1
- End of row: Drop the loop; do not cut the yarn
The blanket can continue growing as long as you keep following those space rules.
Keep the Older Colors Moving Up the Staircase
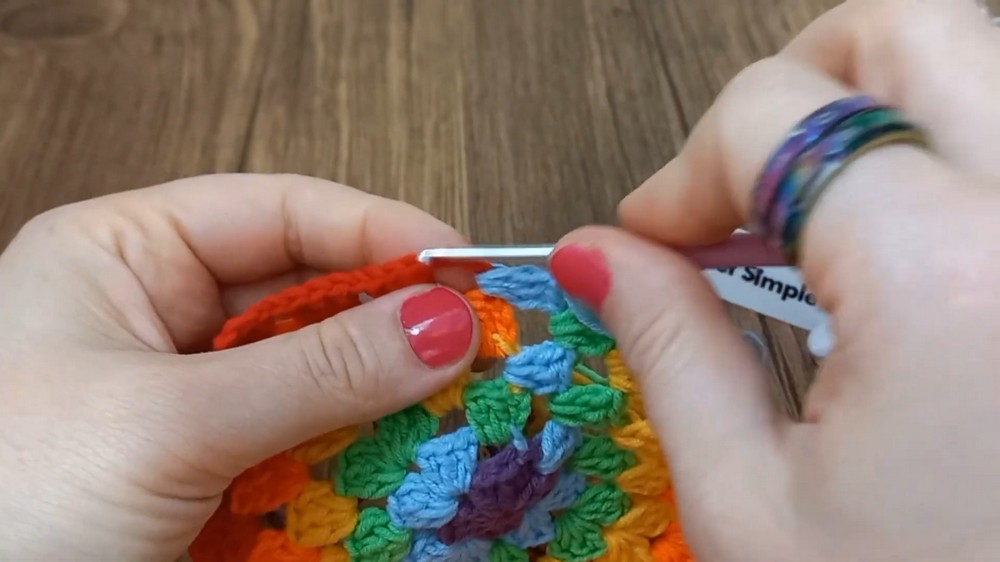
As more rows are added, the dropped loops will appear at different heights along one side. Eventually, the lowest loops need to be extended so they do not remain behind while the newest color continues outward.
This is the part that makes the pattern look complicated at first, but the movement is straightforward.
1. Pick up the oldest loop: Start with the lowest dropped loop on the staircase.
2. Work upward: Into each available ch-1 space in the rows above that loop, work (3 dc, ch 1).
3. Handle corners normally: When the loop reaches a corner space, work (3 dc, ch 2, 3 dc, ch 1) before continuing along the next side.
4. Reach the current top: Continue until that color catches up with the top edge of the staircase.
5. Drop it again: Once it reaches the top, drop the loop without cutting the yarn.
Then pick up the next lowest color and repeat the same process.
The useful visual cue is simple: the older loop should travel upward through the spaces rather than being pulled across the surface of the blanket. If you find yourself stretching the loop diagonally, stop and check which ch-1 spaces belong to that color’s path.
Grow to Your Desired Size
Continue adding new rows while periodically catching up the older dropped loops.
There is no required number of rows because the pattern is designed to be extended to the size you want. Keep checking the overall shape as it grows; the corner spaces should continue creating the four expanding corners, while the side spaces add length along each edge.
When the blanket has reached the desired size, stop adding new spiral rows and prepare to straighten the staircase edge.
Square Off the Staircase
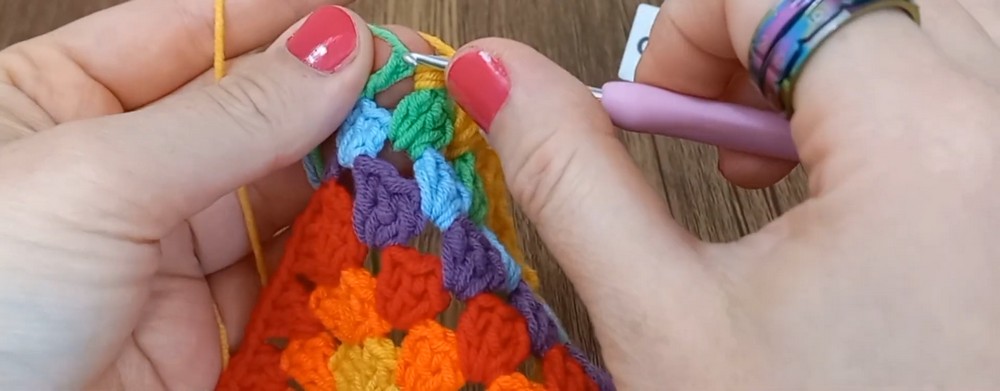
The final step changes the unfinished staircase into a straight edge. Instead of dropping the loops again, each color is worked to the top of its staircase and finished.
1. Start with the lowest dropped loop: Pick up the oldest loop at the bottom of the staircase.
2. Work upward: Make (3 dc, ch 1) in each available space until you reach the very last space for that color.
3. Square the final space: In that last ch-1 space, work 2 dc, then make 1 dc directly into the top of the double crochet from the previous row.
This extra dc is what helps fill the step and bring the edge into a straight line.
4. Finish that color: Ch 1, pull the yarn through to secure the loop, and cut the yarn.
5. Move to the next loop: Pick up the next dropped loop higher on the staircase. Again, work (3 dc, ch 1) through the available spaces, then use 2 dc in the final space + 1 dc into the top of the previous row’s dc.
6. Repeat across the staircase: Continue this exact squaring process for every remaining dropped loop until the entire edge is straight and flush with the rest of the blanket.
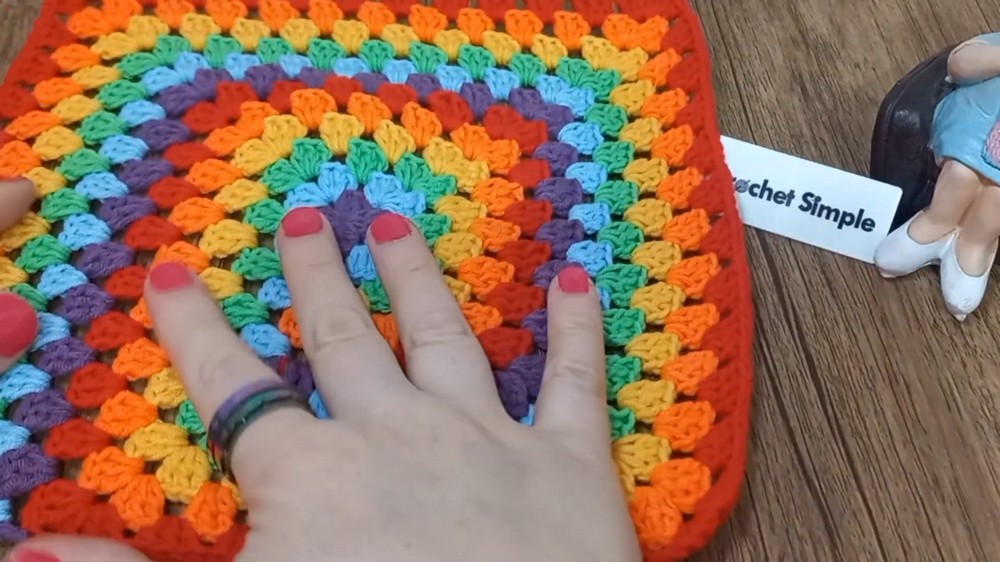
Before weaving in the ends, spread the blanket flat. The previously stepped edge should now read as one continuous straight boundary rather than a series of individual steps.
Finish the Blanket
Once every dropped loop has been squared off, thread the remaining yarn tails onto a yarn needle.
Weave each tail securely back and forth between the stitches on the wrong side, taking care not to pull so tightly that the edge puckers. Trim the excess after the tails are secure.
At this point, the endless spiral has become a finished square blanket, ready to use as-is or to receive a crochet border of your choice.