A stunning and breezy crochet crop top featuring delicate flower motifs joined together to create a charming and lacy effect, perfect for warm-weather wear or festival outfits.
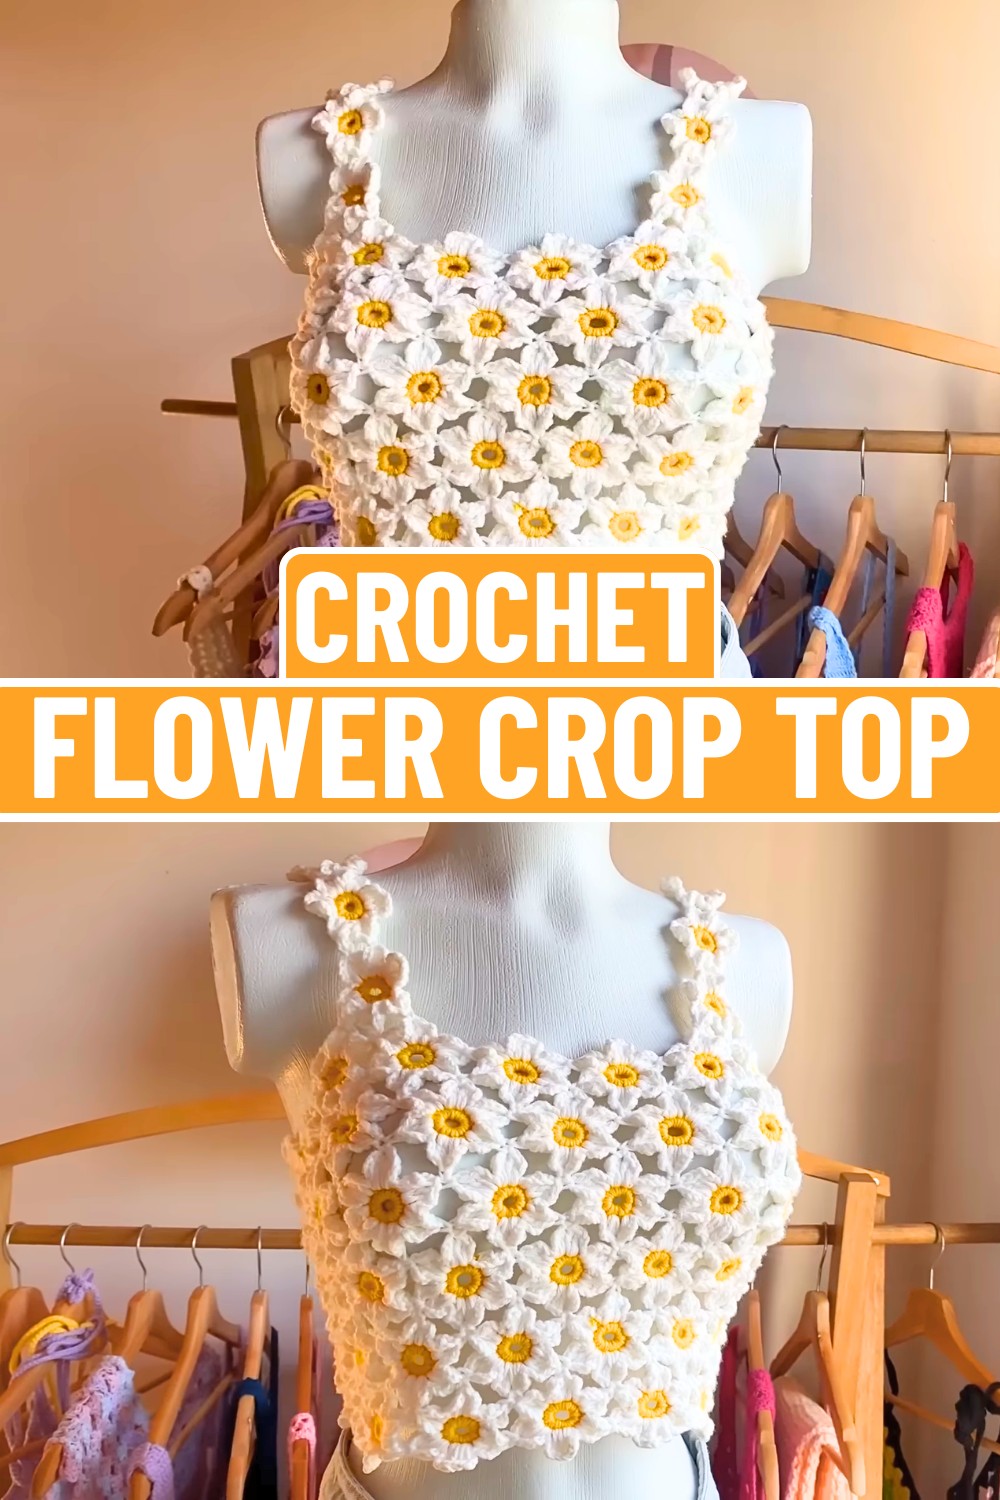
This crochet flower crop top is the perfect blend of style and creativity. Its delicate floral design makes it unique and eye-catching, whether you’re planning to wear it for a casual day out or dress it up for special occasions. Lightweight and airy, this top is not just fashionable but also ideal for warm weather.
Crochet an Elegant Flower Crop Top
Making this crochet top is as fun as it looks. The design uses small crocheted flowers that are joined together step by step. It’s a creative approach to crochet, focusing more on assembling little blooms to form rows and sections for the top. You can personalize the colors, size, and fit, adapting it to suit your preferences. This design is great for anyone looking to make something practical and stylish with their crochet skills.
Credit manos de crochet
Pattern Highlights
- Materials: Crocheted using medium-thickness acrylic yarn (Copito brand suggested) and a combination of 3 mm and 3.5 mm crochet hooks for flexible petals and durable structure.
- Techniques: The pattern employs slip knots, chains, single crochets, double crochets, and slip stitches to create flower motifs and assemble the crop top.
- Main Elements: Flowers are crocheted individually, joined seamlessly at key petals to form rows and sections, and arranged in a grid for both the front and back panels.
- Customization: The top’s size can be adjusted by varying the number of flowers in rows or adding embellishments such as colorful accents or unique petal designs.
- Final Touches: Straps are flower-based and are joined elegantly, while a hand-made cord threaded through the back adds adjustability and finishing charm.
This crop top starts with a simple flower motif, where a small yellow circle forms the center, followed by surrounding white petals. Using a slip knot, chains, and single crochets, the center ring is made, and 12 single crochets are worked into the loop. For the petals, double crochets and chains are worked into each stitch of the ring to create the raised floral structure. Each flower blooms with six delicate petals, hiding the thread tails neatly behind for a polished finish.

Once the foundational flower is complete, subsequent flowers are built and connected seamlessly with chains while finishing the last two petals. Positioning and joining flowers require attention, as rows alternate between 13 and 12 flowers to create the base panel structure. Alignment is key—flowers must be joined evenly in the center and outer edges to maintain symmetry.

The front section is tailored by strategically connecting six flowers in the front-center area while leaving part of the back panel free to create the crop shape. Each flower is interconnected at overlapping petals for structural integrity and a polished look.
For the straps, flowers are crocheted similarly but joined at specific petals to form narrow, elegant rows. The strap begins with one flower attached at three petals, while subsequent flowers are joined at only two points to achieve a flowing and wearable fit. The straps are then secured to the top at the back using a combination of slip stitches and meticulously measured placement.

Wrapping things up, a cord made of 300 chains is crocheted and threaded through the back panel, creating an adjustable yet decorative touch. Additional care is taken to hide all visible thread ends neatly, and the cord ends are lightly singed with a flame to prevent fraying.
Video Tutorial
Materials & Tools Needed
- Yarn: Copito yarn (100% acrylic, medium thickness). Primary colors used: yellow for the flower centers, white for the petals.
- Crochet Hook: 3.5 mm (matching yarn gauge).
- Wool Needle: For finishing ends.
- Scissors: For trimming threads.
- Lighter (optional): To secure the cord ends.
Finished Size & Customization Ideas
- Finished Size: The crop top can be adjusted based on the number of flowers in rows and columns:
- Back panel: Alternating rows of 13 flowers and 12 flowers, depending on desired width.
- Front panel: Six flowers centered by skipping 4 edge flowers on both sides of the final back rows.
- Straps: Composed of 7 flowers per strap, joined to the front panel.
- Customization Ideas:
- Add or reduce flowers for different widths or lengths.
- Use vibrant color combinations for the centers and petals.
- Incorporate beads for accents in flower centers.
Pattern Abbreviations & Terminology
- CH: Chain.
- SC: Single Crochet.
- DC: Double Crochet.
- SL ST: Slip Stitch.
- Yarn Over (YO): Wrapping yarn around the hook to begin a stitch.
Terminology based on standard US crochet terms.

Step-by-Step Crochet Instructions
Flower Component
Each flower is made up of a center (yellow) and petals (white). Follow this step-by-step guide to create one flower:
1. Create the Flower Center (Yellow):
- Start with a slip knot.
- CH 5, then insert the hook into the first chain and make a SL ST to form a ring.
- CH 1 and crochet 12 SCs into the ring. Ensure you work tightly to form the base of the flower.
- Locate the first SC you made and close the round with a SL ST.
- Fasten off the thread, leaving the yellow center complete.
2. Create the Petals (White):
- Attach the white yarn to any of the SCs from the yellow ring.
- Start with a SL ST, then CH 3 (counts as the base of the first petal).
- For each petal:
- YO and crochet 2 DCs into the next SC space.
- CH 1, then move to the next SC space: YO, crochet 2 DC.
- Complete the petal by working CH 3 and then a SL ST into the last DC worked.
- Continue the same process for each subsequent petal until the total equals 6 petals.
- Fasten off the thread and hide any loose ends with the wool needle.
Joining Flowers
- To attach flowers together, begin the fifth petal of the second flower.
- Instead of completing the CH 1, insert your hook into the chain space of a petal from the first flower. YO and draw through, making a joining chain.
- Proceed to finish the petal and complete the flower, attaching in three areas for the first flower.
- For subsequent flower rows, join the flower in four areas:
- Top petal of the previous flower.
- The center space between two flowers.
- Adjacent petals of neighboring flowers.
Back Panel
- You’ll create a total of 5 rows. Follow this pattern:
- Row 1: 13 flowers.
- Row 2: 12 flowers.
- Alternate rows of 13 and 12 flowers until the desired length is reached (about 5 rows).
Front Panel
- Skip 4 flowers on either side of the back panel to center the front.
- Attach 6 flowers in the center using the same joining method.
Straps
- For each strap, crochet 7 flowers total.
- First Flower: Attach in 3 places (front panel space).
- Remaining 6 Flowers: Attach 2 adjacent petals to form a chain.
Cord
- Using yellow yarn, make a slip knot.
- CH 300 (or more for added flexibility).
- Turn and work one SC in each chain until the row is complete.
- Fasten off, secure the end, and weave it through the back panel eyelets.
Finishing Techniques
- Weaving Ends: Use a wool needle to hide and secure threads.
- Securing Cord Ends: Tie the cord ends into knots and gently melt the tips using a lighter for durability.
Key Notes
- Adjust number of flowers and rows as needed for proper fit.
- The pattern is considered intermediate due to precision in attaching flowers and consistent tension for uniform petals.

Troubleshooting and Suggestions
Common Issues and Tips:
- Petal Shaping: If petals curl or lose shape, ensure tension is consistent while working double crochets; gentle blocking can help correct distortions.
- Joining Flowers: Counting stitches carefully during attachment is critical to avoid uneven rows or gaps. Using stitch markers can help keep track of connecting points.
- Cord Length: If your cord feels too short or long, test the fit before cutting the ends; extras can always be trimmed or tied decoratively.
Creative Modifications:
- Color Experimentation: Try mixing pastel shades or bright jewel tones for each flower motif to create a bold boho look.
- Extra Embellishments: Add beads, sequins, or embroidery to the flower centers for added sparkle or texture.
- Versatile Uses: Adapt the pattern to make decorative wall hangings, mesh bags, or a floral scarf by extending the grid or rows of flowers.