Crochet Boy Pencil Case Pattern with Spider-Man Applique
Give school supplies a superhero touch with this crochet boy pencil case, featuring a colorful pouch, secure zipper, and handmade Spider-Man face.
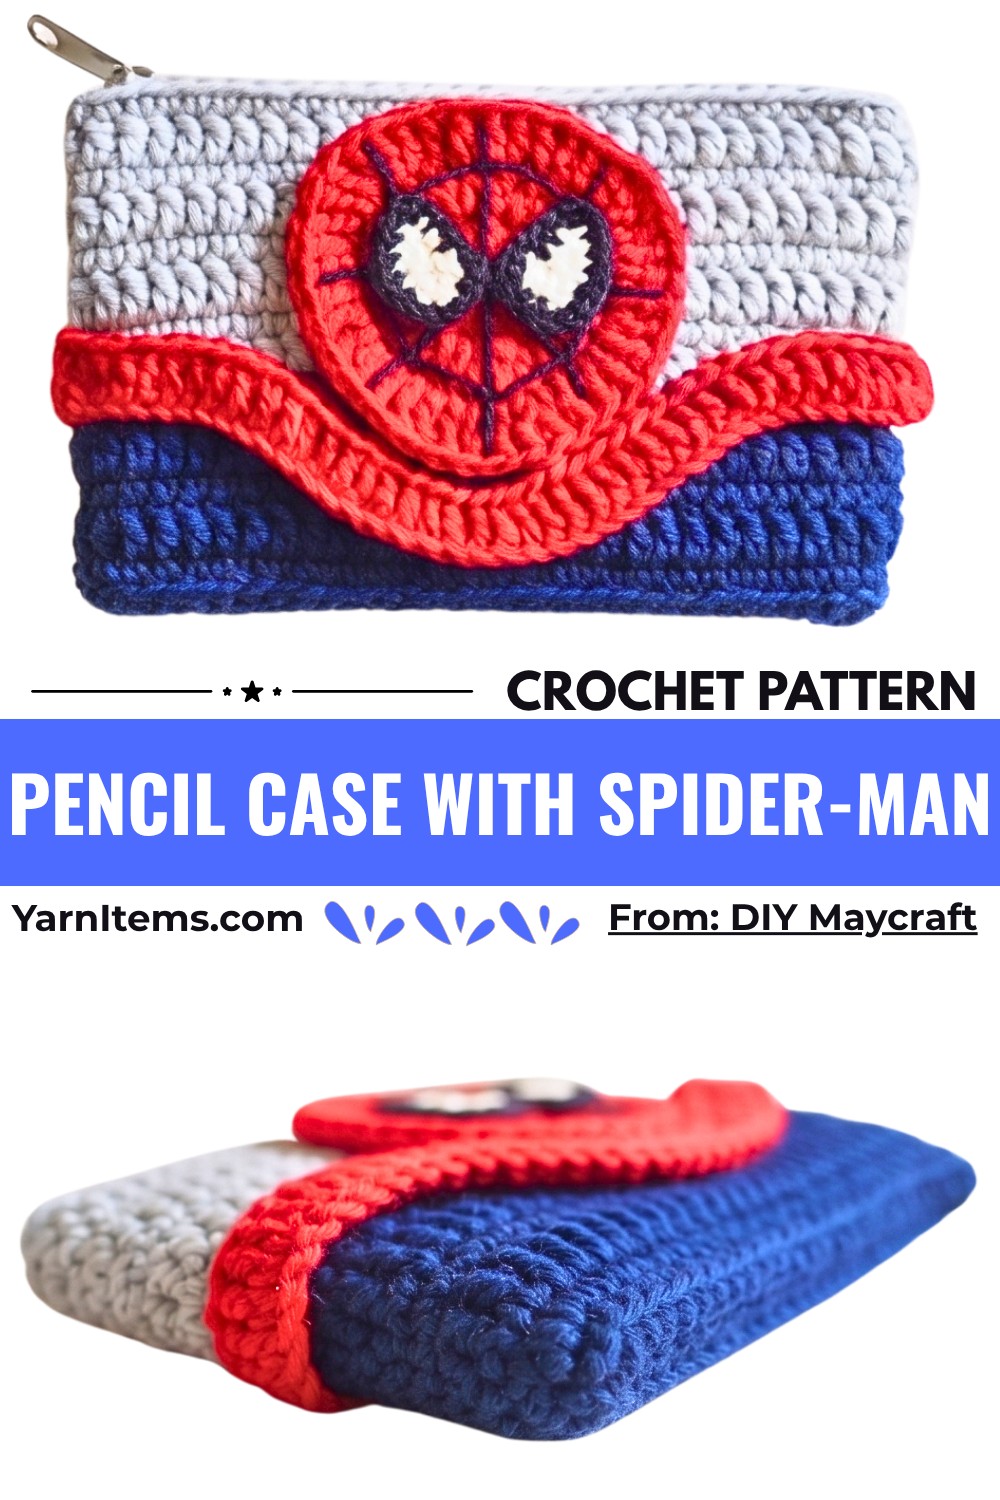
Bright colors and a recognizable superhero design make this crochet pencil case a fun way to carry everyday school essentials. Its rounded base and tall body create a pouch for standard pens, pencils, and erasers, while the contrasting accent rows add another detail to the simple crochet texture.
Instead of crocheting the character directly into the pouch, you’ll make the Spider-Man head, eyes, and bottom accent strap separately and sew them onto the front. The pattern starts with a foundation chain, builds the pouch in joined rounds, and finishes with a zipper and appliqués. You can also change the colors or replace the superhero motif with another favorite character.
Credit DIY Maycraft
Materials & Tools Needed
Gather the following supplies before you begin:
- Yarn: Indo Milky yarn or any milk cotton or sport-weight yarn in these colors:
- Primary Color: Blue or another main color for the pencil case.
- Secondary / Accent Color: Grey or another contrasting shade.
- Black and White: For the Spider-Man applique.
- Crochet Hook: 6/0 Tulip crochet hook (approximately 3.5 mm).
- Notions:
- Tapestry needle for weaving in yarn ends and sewing the appliques.
- Scissors.
- Sewing needle and matching thread for attaching the zipper.
- Pins or stitch markers.
- Fabric glue, optional, for temporarily positioning the appliques.
- Zipper matching the width of the pouch.
Finished Size & Customization
The finished pencil case is designed around standard pencil case dimensions and can accommodate regular pens, pencils, and erasers. The exact measurements are not specified in the supplied instructions.
You can adjust the design in two main ways:
- Change the Length: Adjust the starting foundation chain to make the pouch longer or shorter. Keep your preferred stitch count consistent with the shape you want.
- Change the Character: Replace the Spider-Man applique with another cartoon motif, initials, or a child’s favorite character.
Crochet Abbreviations
- Ch: Chain
- Sl St: Slip Stitch
- St(s): Stitch(es)
- SC: Single Crochet
- DC: Double Crochet
- Inc: Increase (work 2 stitches in the same space or stitch)
- BLO: Back Loop Only
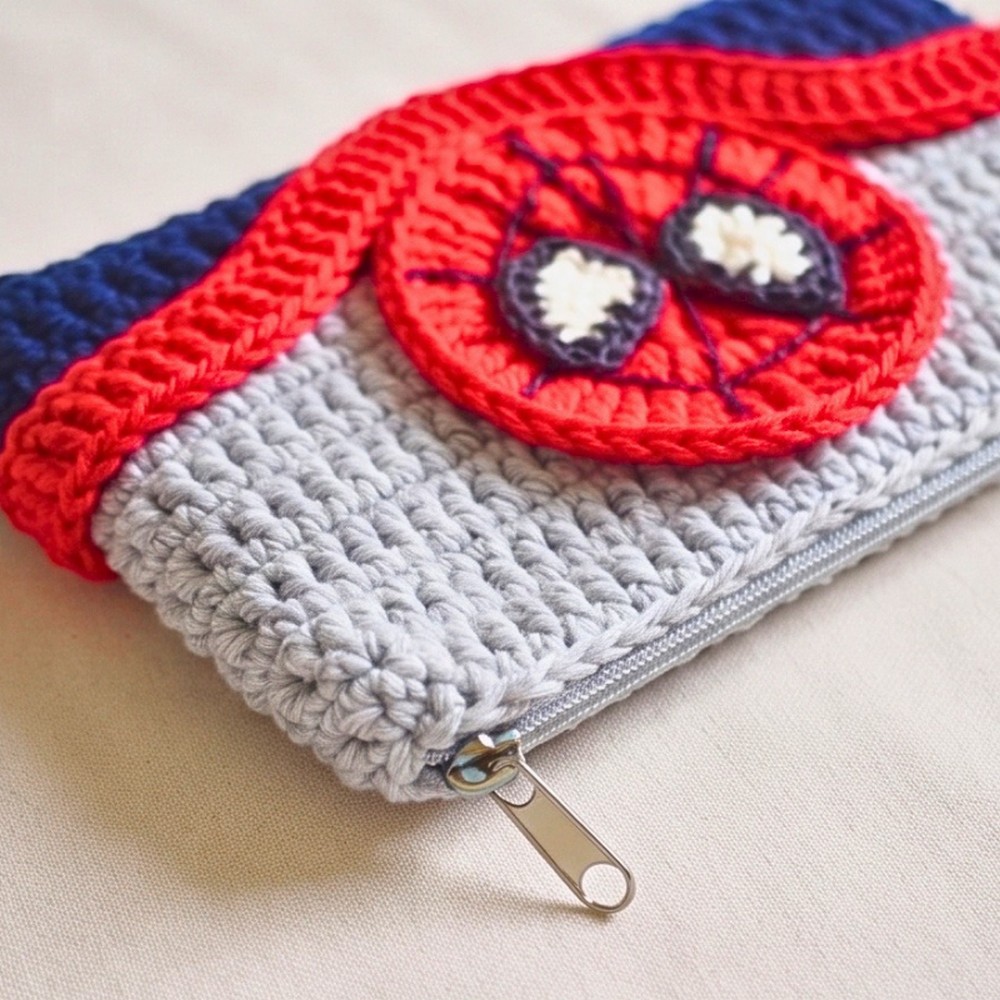
Part 1: Crochet the Pencil Case Base and Body
The pouch begins with a foundation chain of 30 stitches. The first round is worked around both sides of this chain to create an oval-shaped base. After that, alternating single crochet and double crochet rounds build the sides of the pencil case.
Foundation Chain
- Make a slip knot and place it on your crochet hook.
- Chain 30 stitches.
- Keep the chain relaxed and check that it is not twisted before beginning the first round.
Round 1: Form the Oval Base
- Skip the first 3 chains from the hook.
- Insert your hook into the 4th chain and work 4 DCs into the same space. These stitches create the rounded end of the base.
- Work 1 DC into each of the next 5 chain spaces, following the supplied instructions.
- In the very last chain stitch at the end, work 5 DCs into the same hole to form the opposite rounded end.
- Continue working down the opposite side of the foundation chain with 25 DCs.
- Join with a slip stitch to the 3rd starting chain.
The supplied pattern gives a total stitch count of 60 DCs for this round.
Round 2: Single Crochet in BLO
- Chain 1.
- Insert your hook into the back loop only (BLO) of the first stitch.
- Work 1 SC in each stitch around, continuing through the back loops only.
- Join with a slip stitch to the first SC.
Working into the back loops creates a visible ridge between the base and the sides of the pouch.
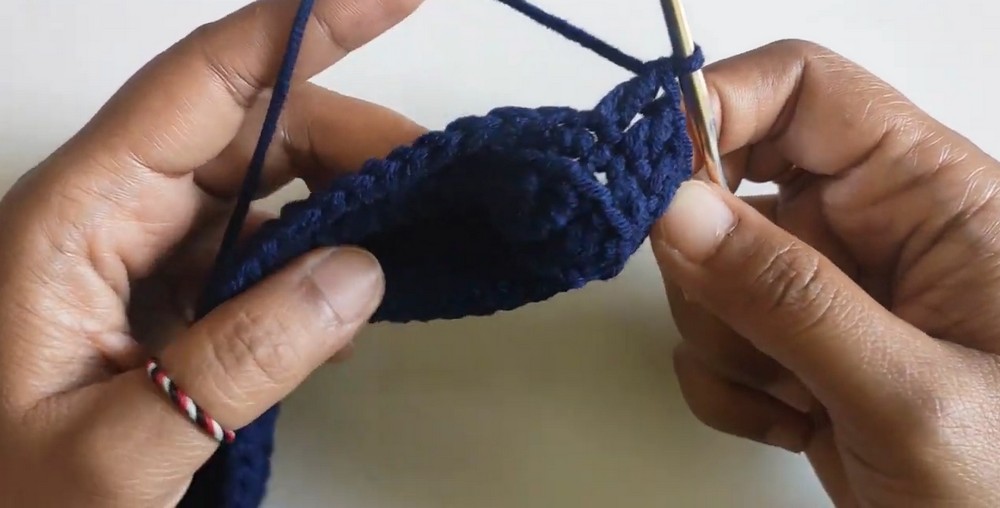
Round 3: Double Crochet Body Round
- Chain 2. This starting chain does not count as a stitch.
- Work 1 DC into the very same stitch as the starting chain.
- Continue working 1 DC into each stitch around.
- You should have 60 DCs in total.
- Join with a slip stitch to the first DC.
Round 4: Single Crochet Round
- Chain 1.
- Work 1 SC into each stitch around.
- Join with a slip stitch.
Rounds 5 and 6: Continue the Texture
Repeat the established alternating stitch pattern:
- Round 5: Work a DC round following the same method as Round 3.
- Round 6: Work an SC round following the same method as Round 4.
After completing Round 6, fasten off the primary color yarn.
Part 2: Add the Accent Color
Switch to the secondary color, such as grey, to create a contrasting section on the pencil case. The stitch pattern continues alternating between double crochet and single crochet rounds.
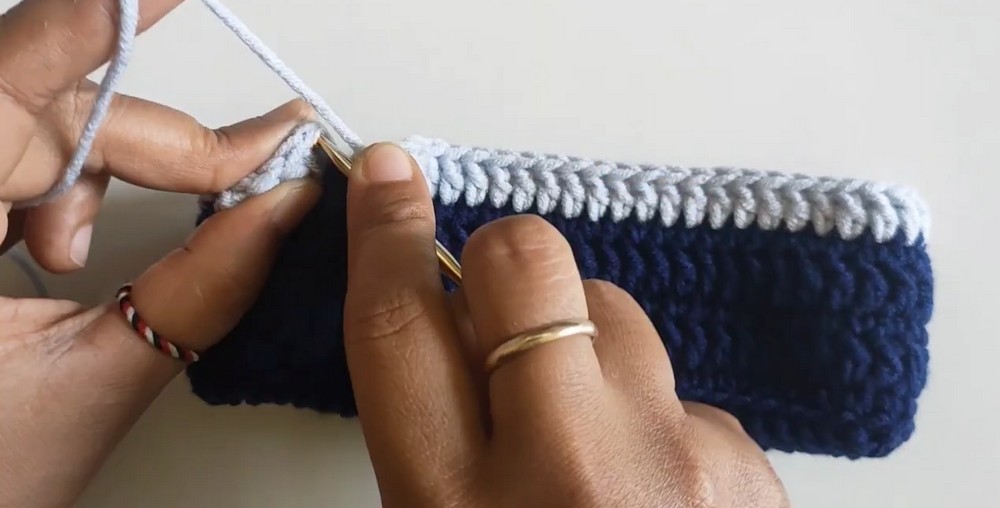
Round 7: Begin the Grey Section
- Join the secondary grey yarn with a slip knot.
- Chain 2.
- Work 1 DC into every stitch around.
- Maintain the supplied count of 60 DCs.
- Join with a slip stitch to the first DC.
Round 8: Single Crochet Round
- Chain 1.
- Work 1 SC into every stitch around.
- Join with a slip stitch.
Rounds 9-14: Complete the Pouch Body
Continue alternating the two established round types:
- Work 1 DC round.
- Follow it with 1 SC round.
- Repeat this sequence until you complete Round 14.
Fasten off the yarn and weave in any loose ends with your tapestry needle.
The pouch body is now ready for the zipper and decorative character pieces.
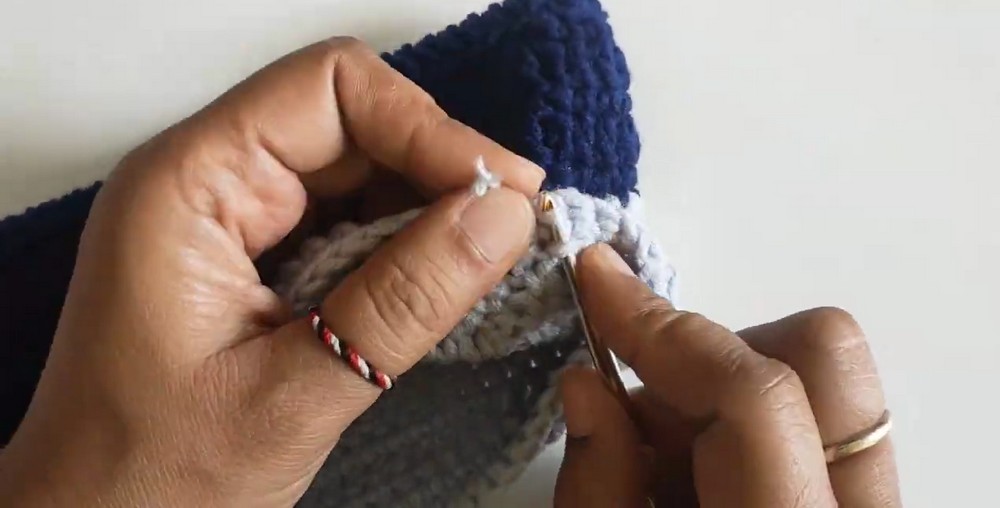
Part 3: Attach the Zipper
A zipper along the top opening keeps the stationery securely inside the pencil case. Take your time positioning it before sewing so that both sides sit evenly.
Position the Zipper
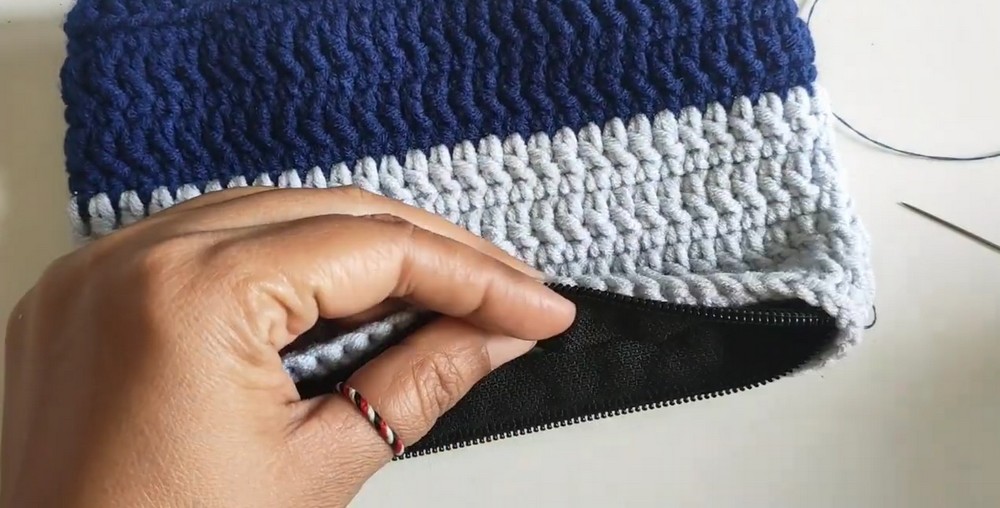
- Open the zipper and align it neatly along the inside top opening of the completed crochet pouch.
- Make sure the zipper is positioned evenly along the upper edge.
- Use pins or clips to hold it in place so it does not shift while sewing.
Sew the Zipper
- Thread a sewing needle with matching thread.
- Begin stitching the zipper to the upper edge of the crochet fabric.
- Sew carefully along the edge, keeping the zipper aligned with the pouch opening.
- Continue until the zipper is securely attached.
Before finishing, open and close the zipper to check that it moves smoothly and that the crochet fabric does not catch in its teeth.
Part 4: Make the Spider-Man Applique
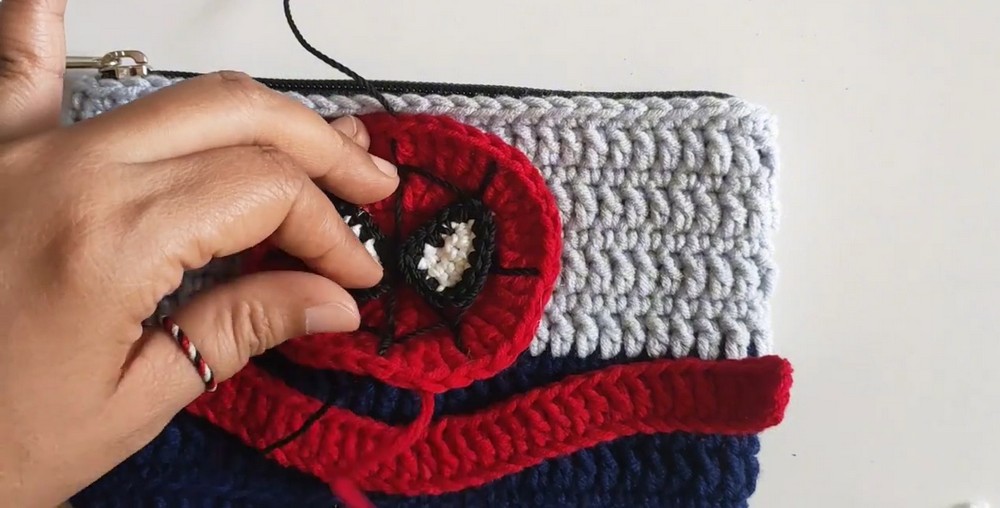
The Spider-Man decoration consists of three separate elements: a circular head, two eyes, and a bottom accent strap. Make each piece individually before arranging them on the front of the pencil case.
Component A: Crochet the Spider-Man Head
Use the supplied black and red/white character colors as appropriate for the design shown in your reference. The head instructions below retain the stitch sequence provided.
Round 1: Make the Magic Ring
- Form a magic ring.
- Chain 3.
- Work 11 DCs inside the ring.
- Pull the yarn tail tightly to close the center.
- Join with a slip stitch to the 3rd starting chain.
The supplied stitch count for this round is 12 DCs, including the starting chain.
Round 2: Increase Around
- Chain 3.
- Work 1 DC into the same space as the starting chain. This makes an increase.
- Continue working double crochet increases around, placing 2 DCs into each stitch.
- Join with a slip stitch.
You should have 24 DCs at the end of the round.
Round 3: Shape the Head
Follow the supplied sequence carefully:
- Chain 3.
- Work 1 DC increase in the next stitch.
- Repeat (1 DC, DC increase) three more times.
- In the next stitch, work 3 DCs into the same stitch.
- Repeat (1 DC, DC increase) three more times.
- Work 3 DCs into the next stitch.
- Repeat (1 DC, DC increase) four times.
- Join with a slip stitch.
- Leave a long yarn tail for sewing and fasten off.
Keep the long tail available because you will use it to attach the head to the front of the pencil case.
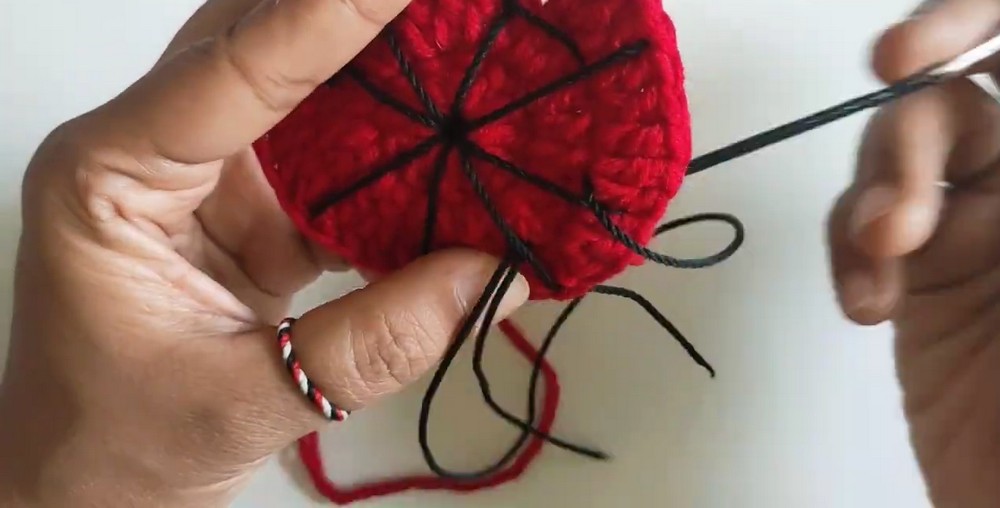
Component B: Crochet the Eyes
Make the eye pieces separately.
Round 1: Small Starting Ring
- Form a magic ring.
- Chain 1.
- Work 4 SCs into the ring.
- Pull the yarn tail tight to close the center.
Round 2: Begin Shaping
- Chain 1 and turn your work.
- Work 2 SCs into each of the next 2 stitches.
- Work 1 SC into the final stitch.
Round 3: Continue the Eye Shape
- Chain 1 and turn.
- Skip the immediate hole.
- Work 1 SC into each of the next 2 stitches.
- Work 2 SCs into each of the next 2 stitches.
- Chain 1 and fasten off.
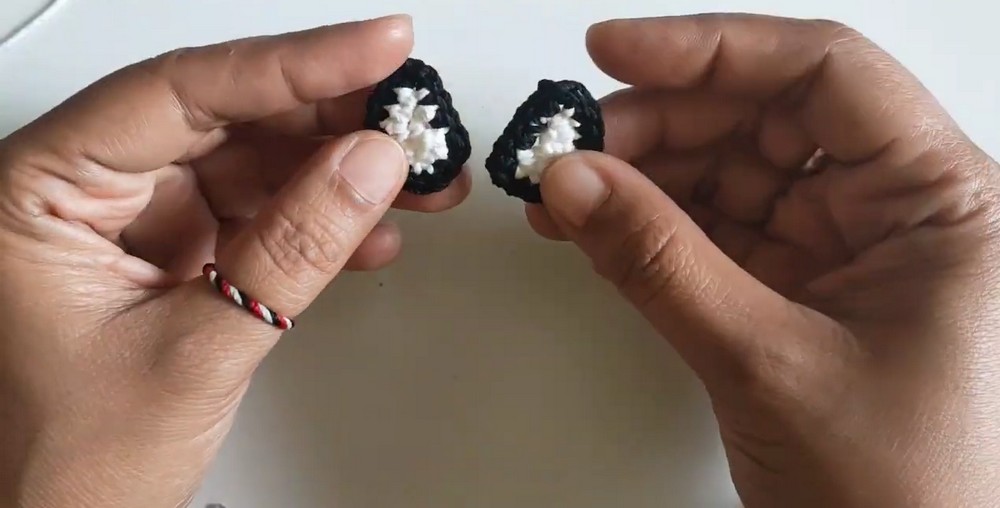
Add the Black Outline
- Attach black yarn to the eye piece.
- Work single crochet stitches around its outer perimeter to outline the shape.
- At the corner or tip turns, work 3 SCs into the same stitch to help maintain the pointed eye contours.
- Fasten off.
Make the second eye using the same instructions.
Component C: Crochet the Bottom Accent Strap
- Make a slip knot.
- Chain 40.
- Skip 3 chains from the hook.
- Work 1 DC into each chain across to the end.
- Fasten off.
This narrow strip forms the bottom accent detail beneath the Spider-Man face.
Part 5: Arrange and Attach the Appliques
With the head, eyes, and accent strap complete, arrange them on the front of the pencil case before sewing. This gives you an opportunity to check the spacing and overall character placement.
Position the Spider-Man Face
- Place the head on the front face of the pouch.
- Arrange the two eyes on the head.
- Position the bottom accent strap beneath the head.
- Adjust the pieces until the character looks balanced.
- If needed, use a small amount of fabric glue to hold the pieces temporarily in place.
Sew the Pieces Securely
- Thread your tapestry needle with a matching yarn tail.
- Sew the head onto the pouch.
- Attach both eyes in their chosen positions.
- Sew the bottom accent strap securely beneath the head.
- Weave in any remaining loose yarn ends.
Check that the appliqués are firmly attached and that no loose yarn tails remain.