How to Crochet a Pumpkin Bucket Hat For Thanksgiving Wear
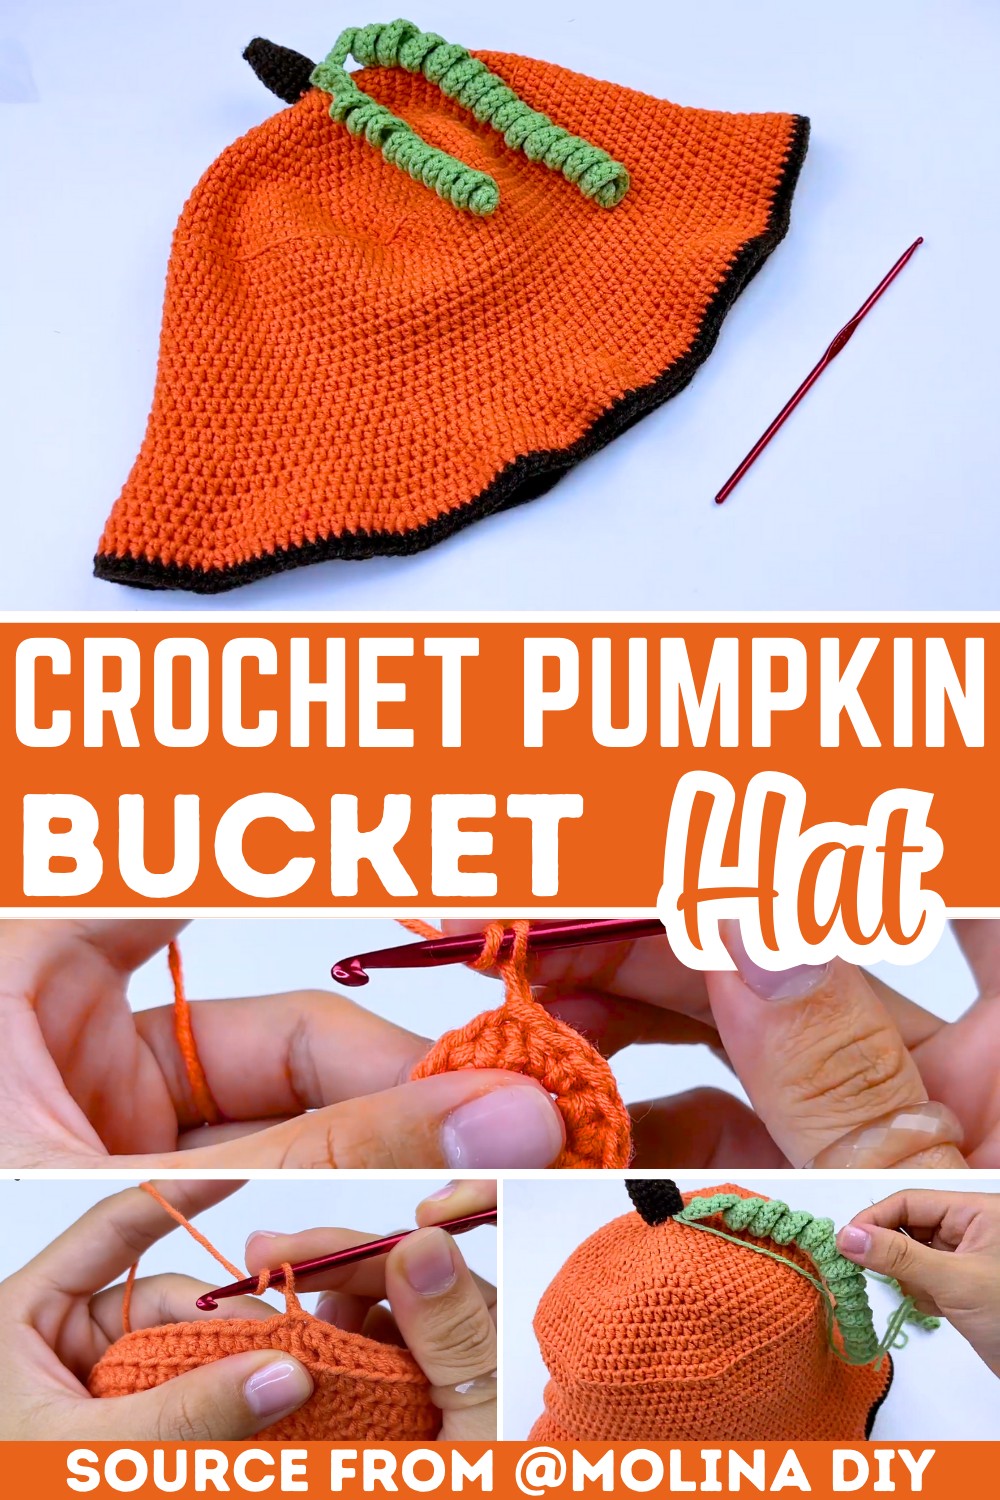
Nothing captures the spirit of Thanksgiving quite like a pumpkin, and this crochet bucket hat turns that autumn favorite into a playful accessory you can actually wear.
The rounded shape, bold pumpkin color, and charming finishing details give it a festive look. That’s perfect for holiday gatherings, fall markets, family photos, or simply enjoying the season in style. It’s a crochet piece that’s both eye-catching and practical, making it just as fun to create as it is to wear.
Crochet a Pumpkin Bucket Hat

If you’d like to make one yourself, this pattern walks you through each stage with easy-to-follow instructions and beginner-friendly techniques. You’ll build the crochet hat step by step, shape the pumpkin-inspired design. And add the finishing touches that bring the whole look together. Keep reading to see how this festive crochet hat comes to life, one stitch at a time.
Credit Molina DIY
Materials & Tools Needed
- Yarn: Milk Cotton Yarn, 125g (5-ply).
- Crochet Hook: 3.5mm crochet hook.
- Other Tools:
- Needle
- Stitch markers
- Scissors
Finished Size & Customization Ideas
- Top Diameter: Approx. 16 cm (6.3 in)
- Body Height: Approx. 8 cm (3.2 in)
- Brim Width: Approx. 6 cm (2.3 in)
Customization Options:
- Use yarn in a pumpkin-like orange shade for a traditional Thanksgiving theme.
- Add green leaves or vine appliqué to the brim for extra detail.
- Experiment with different yarn types to adjust texture or finish.
Pattern Abbreviations & Terminology
- Sts – Stitches
- Ch – Chain
- SC – Single Crochet
- HDC – Half Double Crochet
- DC – Double Crochet
- BLO – Back Loop Only
- Inc – Increase (crochet 2 stitches in the same stitch)
- Sl St – Slip Stitch
- Magic Ring/Loop: Circular foundation technique.
(Note: U.S. Terminology is used in this pattern.)

Step-by-Step Detailed Crochet Instructions
Part 1: Top of the Pumpkin (Hat’s Crown)
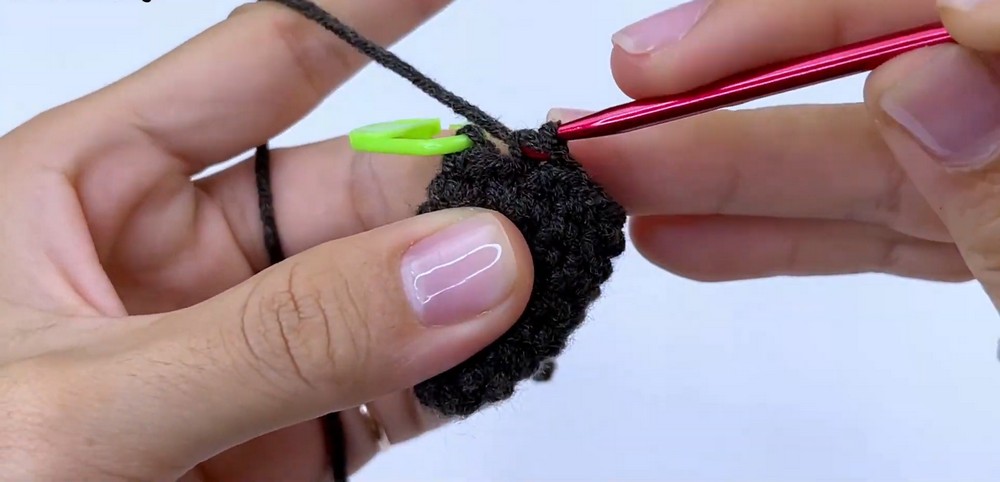
- Round 1:
- Start with a magic ring, chain 1, make 6 SC into the ring.
- Pull the tail to close and Sl St into the first SC. (6 sts)
- Round 2:
- Chain 1, make 1 SC in each stitch around.
- Sl St to join. (6 sts)
- Round 3:
- Chain 1, (SC in the first stitch, increase SC in the next stitch).
- Repeat 3 times.
- Sl St to join. (9 sts)
- Rounds 4–9:
- Chain 1, SC in each stitch around.
- Sl St to join. (9 sts)
Part 2: Pumpkin Texture (Hat Body)
- Foundation Chain for Body:
- Make a slip knot.
- Chain 60.
- Creating Pumpkin Texture:
- Skip 2 chains. In the next chain.
- Make 1 HDC and 1 DC.
- Make 3D DC in each chain across until the last stitch.
- Fasten off.

Part 3: Expanding the Crown
- Round 1:
- Start with a magic ring, chain 1, make 8 HDC into the ring.
- Sl St to join. (8 sts)
- Round 2:
- Chain 1, make Inc HDC in each stitch around.
- Sl St to join. (16 sts)
- Round 3:
- Chain 1, (HDC in the first stitch, Inc HDC in the next).
- Repeat 8 times. Sl St to join. (24 sts)
- Round 4:
- Chain 1, (HDC in the next 2 sts, Inc HDC in the next stitch).
- Repeat 8 times. Sl St to join. (32 sts)
- Round 5:
- Chain 1, (HDC in the next 3 sts, Inc HDC in the next stitch).
- Repeat 8 times. Sl St to join. (40 sts)
(Continue increasing in this pattern to enlarge the crown if needed.)

Part 4: Body of the Hat
- Round 1:
- Chain 1, HDC in each stitch BLO to create a textured edge.
- Sl St to join. (104 sts)
- Rounds 2–13:
- Chain 1, HDC in each stitch around.
- Sl St to join. (104 sts)
(Adjust the number of rounds for a taller or shorter hat body.)
Part 5: Brim of the Hat
- Round 1:
- Chain 1, (HDC in the next 11 sts, Inc HDC in the next stitch).
- Repeat 8 times. Sl St to join. (113 sts)
- Round 2:
- Chain 1, (HDC in the next 12 sts, Inc HDC in the next stitch).
- Repeat 8 times. Sl St to join. (122 sts)
(Adjust the brim’s width by adding more rounds if desired.)

Finishing Details
- Weave in all loose ends using a needle.
- Shape the hat properly. Stretch and smooth the brim for stability.
- Optionally, add embellishments like leaves, vines, or a stalk at the top.
Final Thoughts
Your adorable pumpkin bucket hat is now ready to wear! Perfect for Thanksgiving gatherings, fall outings, or as part of a festive ensemble. Follow the tutorial closely for visual instructions and feel free to customize as you like.