Crochet Character Drawstring Bag Pattern with Wings and Hat
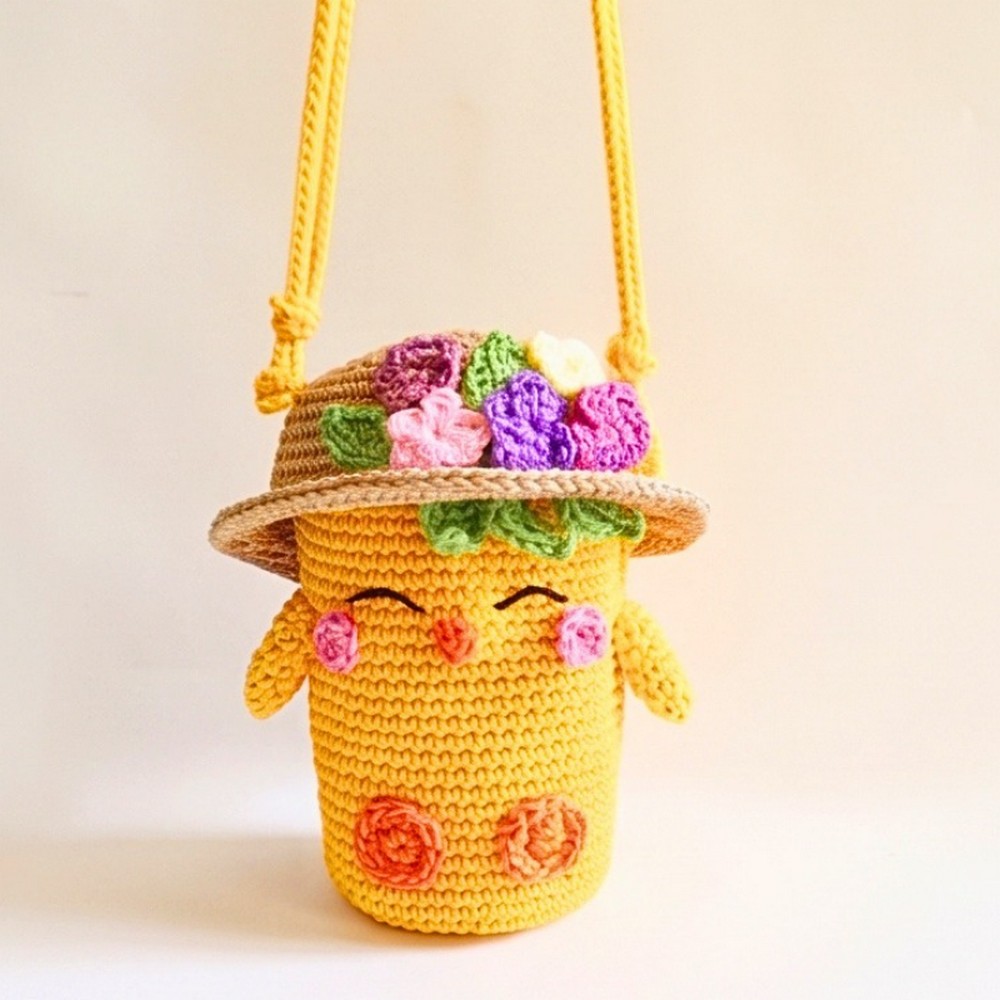
Crochet a cute character bag with a round yellow base, mesh drawstring top, decorative wings, little feet, and a matching hat.
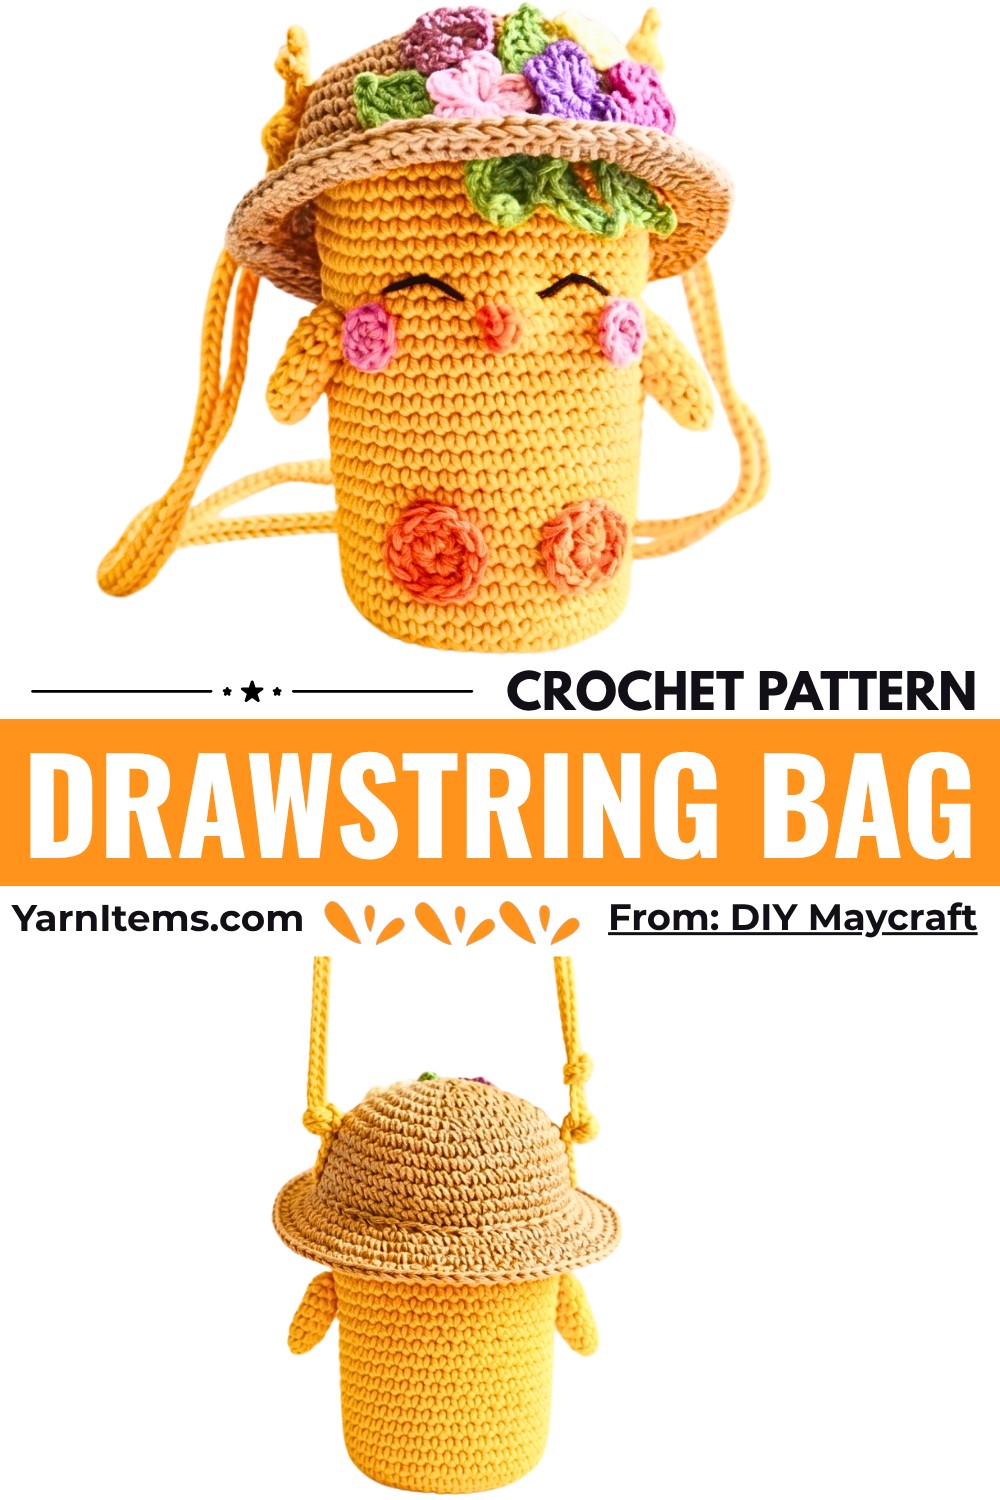
A small round crochet bag becomes more playful with character details and a coordinating hat. This crochet design starts with a flat circular base, then grows upward into a simple bag body with a mesh section at the top. Its approximately 9 cm base diameter makes it a compact accessory for carrying small essentials.
The decorative details are made separately or added to specific rounds after the main bag is complete. You’ll crochet the base in continuous single crochet rounds, build the body to your preferred height, and create the mesh opening for the drawstrings. The wings, feet, leaves, and little hat complete the look, while the adjustable strap chains let you customize how you carry the bag.
Credit DIY Maycraft
Materials & Tools Needed
- Yarn: D30 milk cotton yarn or similar sport/DK-weight yarn.
- Yellow for the main bag body.
- Additional accent colors for the hat, leaves, wings, feet, and other character features.
- Crochet Hook: 6/0 Tulip crochet hook, approximately 3.5–4.0 mm.
- Notions:
- Stitch markers.
- Yarn needle.
- Scissors.
- Lighter, only if appropriate for safely sealing compatible synthetic yarn ends.
Finished Size & Customization
- Base Diameter: Approximately 9 cm (3.5 inches).
- Main Body: The supplied instructions use 35 rounds before starting the mesh section.
You can adjust the bag’s height by adding or removing rounds before the mesh section. For a taller bag, work additional rounds; for a shorter version, stop earlier.
The standard strap length begins with 80 chains. Adjust this starting chain count to make the straps shorter or longer, depending on how you want to carry the bag.
Crochet Abbreviations
- ch: Chain
- sc: Single crochet
- inc: Single crochet increase (work 2 sc in the same stitch)
- hdc: Half double crochet
- dc: Double crochet
- dc inc: Double crochet increase (work 2 dc in the same stitch)
- st(s): Stitch(es)
- sl st: Slip stitch
- BLO: Back loop only
- Rnd: Round
Part 1: Crochet the Circular Bag Base
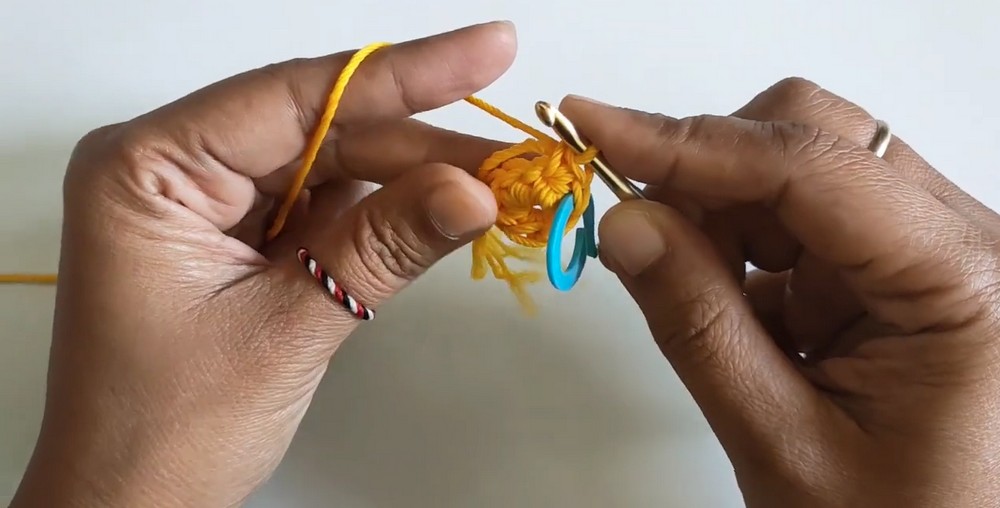
The bag starts with a flat circle worked in continuous spiral rounds. Place a stitch marker in the first stitch of every round so you can easily identify where each new round begins.
Round 1: Start with a Magic Ring
- Make a magic ring.
- Chain 1.
- Work 6 sc into the magic ring.
- Pull the yarn tail tightly to close the center.
- Continue directly into the first sc to begin the next round.
Stitch count: 6 sts.
Because this section is worked in a continuous spiral, do not join the end of every round with a slip stitch. Keep your marker in the first stitch and move it up as you work.
Round 2: Increase Around
- Work 2 sc into the first stitch.
- Work 2 sc into each of the next 5 stitches.
- Move your stitch marker to the first stitch of the new round.
You are increasing in every stitch, doubling the original stitch count.
Stitch count: 12 sts.
Round 3: Increase Every Second Stitch
Work the following sequence around:
- 1 inc
- 1 sc
Repeat this sequence 6 times.
Stitch count: 18 sts.
Round 4: Increase Every Third Stitch
Work:
- 1 inc
- 2 sc
Repeat the sequence 6 times around.
Stitch count: 24 sts.
Round 5: Increase Every Fourth Stitch
Work:
- 1 inc
- 3 sc
Repeat 6 times around.
Stitch count: 30 sts.

Round 6: Increase Every Fifth Stitch
Work:
- 1 inc
- 4 sc
Repeat 6 times around.
Stitch count: 36 sts.
Round 7: Increase Every Sixth Stitch
Work:
- 1 inc
- 5 sc
Repeat 6 times around.
Stitch count: 42 sts.
Round 8: Complete the Circular Base
Work:
- 1 inc
- 6 sc
Repeat the sequence around the circle.
The supplied instructions also mention working 1 additional inc followed by 1 sc at the end of this round.
Stitch count stated in the supplied pattern: 48 sts.
Check the base diameter when you finish. It should measure approximately 9 cm (3.5 inches).
Part 2: Build the Bag Body
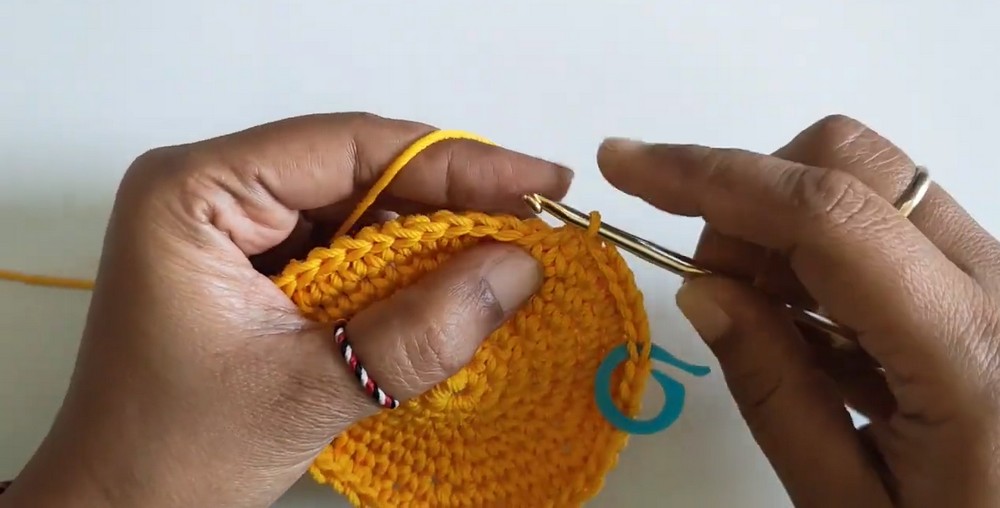
Once the circular base is complete, the next rounds create the sides of the bag. Unlike the base, these rounds do not include increases, so the fabric grows upward rather than continuing to spread outward.
Rounds 9-35: Work in Continuous Single Crochet
- Work 1 sc into every stitch around.
- Continue without joining the rounds with slip stitches.
- Move the stitch marker upward as you complete each round.
- Maintain 48 sc in every round.
Repeat until you have completed Round 35.
At the end of Round 35, join with 1 sl st.
The supplied pattern uses 35 rounds for the main body. If you want to change the bag height, adjust the number of single crochet rounds before moving on to the mesh section.
Part 3: Crochet the Mesh Drawstring Opening
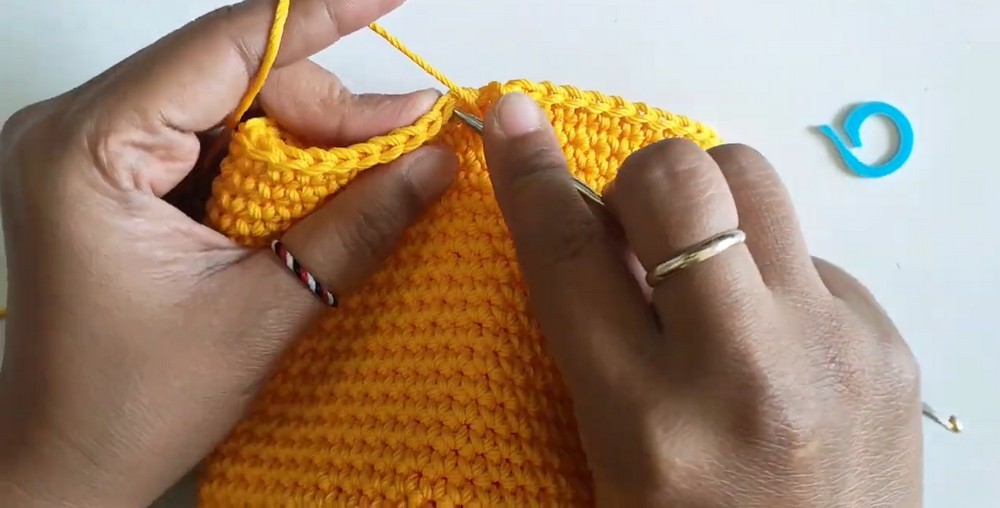
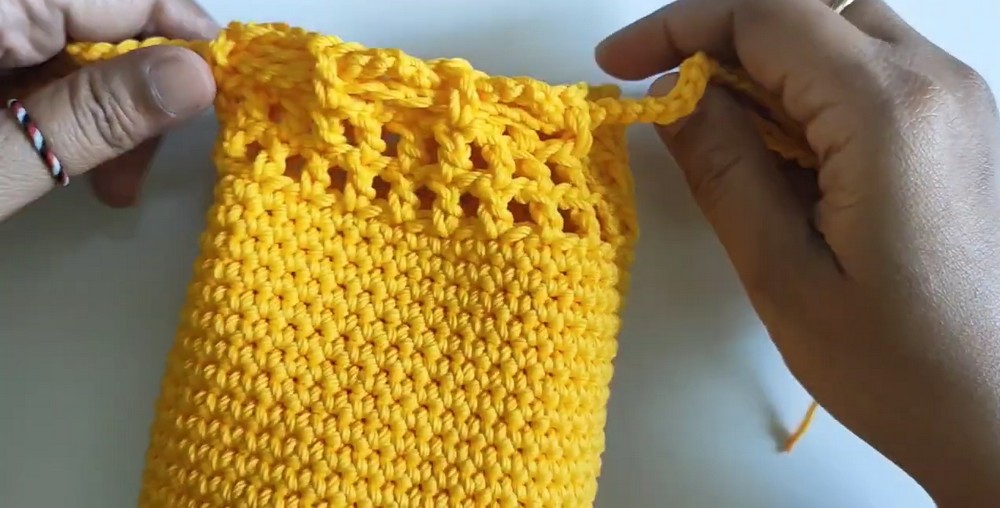
The mesh section creates open spaces around the top of the bag. These spaces allow the drawstrings to pass through and gather the opening.
Round 36: First Mesh Round
- Chain 4. This counts as 1 dc and 1 ch.
- Skip 1 stitch below.
- Work 1 dc into the next stitch.
- Chain 1 and skip the next stitch.
- Repeat the sequence of 1 dc in the next stitch, ch 1, skip 1 stitch around the bag.
- Join with a slip stitch into the 3rd chain of the starting ch-4.
Round 37: Continue the Mesh
- Chain 1.
- Skip the chain space below.
- Work 1 dc into the next dc.
- Chain 1.
- Continue repeating the mesh sequence around: work 1 dc into the next dc, then ch 1.
- Join with a slip stitch.
Round 38: Complete the Mesh Section
Repeat the mesh pattern for one more round:
- Chain 4.
- Skip 1 chain space.
- Work 1 dc.
- Chain 1.
- Continue the same sequence around the opening.
- Join with a slip stitch.
Cut the yarn and weave in the remaining ends.
The supplied instructions mention using a lighter to seal synthetic yarn ends. Only use heat on a yarn fiber specifically confirmed as suitable for heat sealing, away from the crocheted fabric and any flammable materials. Do not use a lighter on cotton or milk cotton yarn; secure those ends with a yarn needle instead.
Part 4: Make the Decorative Wings
Make 2 wings using the accent yarn color. Each wing begins with a small circular base and continues with three rounds of single crochet.
Rounds 1-2: Form the Small Circle
- Make a magic ring.
- Work 6 sc into the ring.
- Pull the tail to close the center.
- In the next round, work an increase in every stitch by placing 2 sc into each stitch.
Stitch count after Round 2: 12 sts.
Rounds 3-5: Work the Straight Rounds
- Work 1 sc into every stitch around.
- Continue without increases.
- Repeat for 3 rounds, maintaining 12 sc in each round.
Fasten off, leaving a long yarn tail for sewing the wing onto the bag.
Make a second wing in the same way.

Part 5: Make the Feet
Make 2 feet for the character decoration.
The supplied instructions refer to the opening rounds of the foot-shaping tutorial sequence but do not include the actual stitch instructions or stitch counts.
Follow the original foot-shaping sequence for both pieces, then fasten off each one with a long tail for sewing.
Pattern note: The exact foot-shaping instructions are needed to reproduce these pieces accurately. They have not been added here because the supplied information does not specify their stitches, rounds, or final shape.
Part 6: Crochet the Leaf Accents
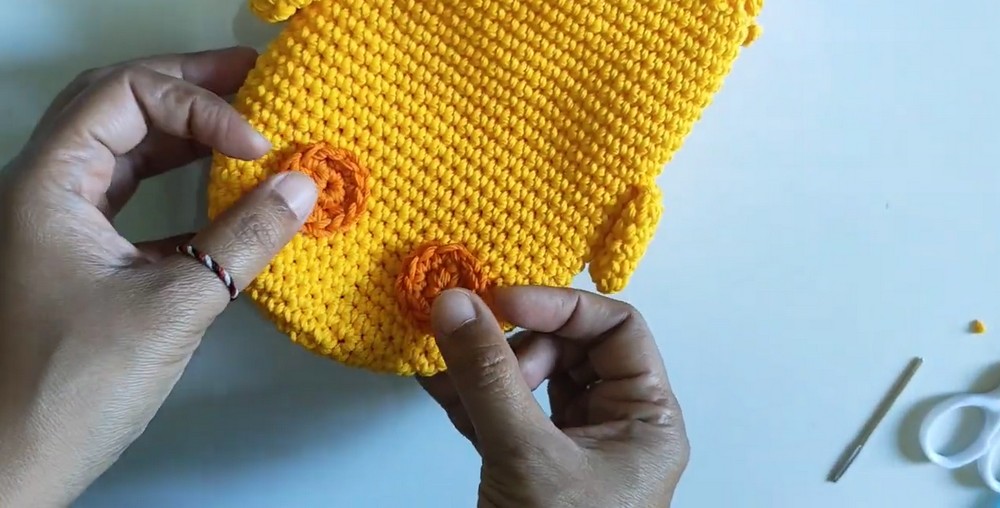
The leaves are worked directly onto the specified spaces around the bag. Each leaf begins with a chain and is shaped by working different stitches along both sides.
Attach the Yarn
- Attach the accent yarn with a slip knot into the specified space near Round 35.
- Chain 7 to create the foundation for the leaf.
Shape the First Side
Work back down the chain in this order:
- Work 1 sc.
- Work 1 hdc.
- Work 2 dc.
- Work 1 hdc.
- Work 3 sc into the very last tip stitch.
The 3 sc at the tip help form the rounded end of the leaf.
Work Along the Opposite Side
Pivot your work and continue down the opposite side of the chain:
- Work 1 hdc.
- Work 2 dc.
- Work 1 hdc.
- Work 1 sc.
Finish the Leaf
- Join with 1 sl st.
- Chain 3.
- Secure the chain with a slip stitch in the middle space.
- Repeat the same leaf pattern at the specified locations.
- Fasten off and weave in the loose ends.

Part 7: Crochet the Little Hat or Lid
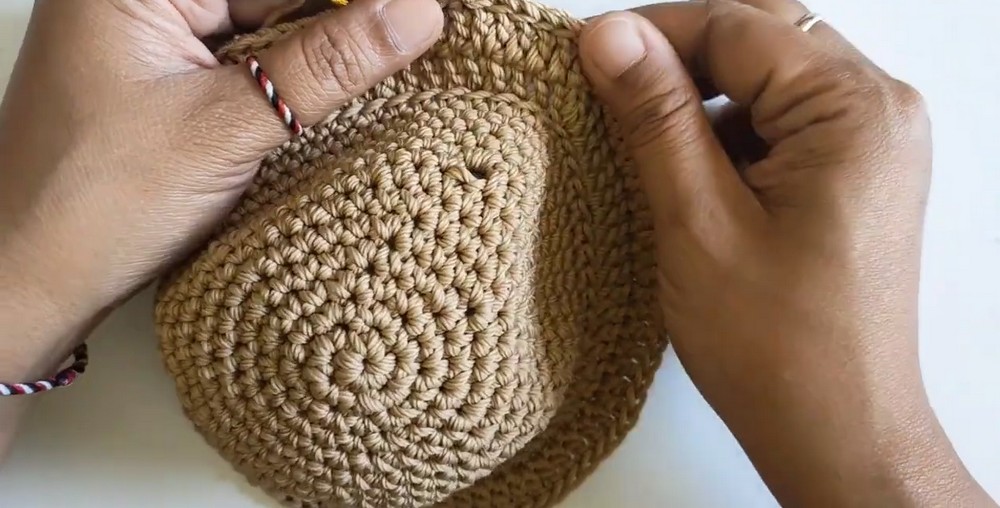
The hat/lid begins with the same circular base as the bag. After the first eight rounds, additional stitches and shaping create the wider decorative section.
Rounds 1-8: Make the Circular Base
Repeat the exact same circular increase pattern used for the main bag base:
- Round 1: Magic ring, ch 1, 6 sc.
- Round 2: Increase in every stitch (12 sts).
- Round 3: (1 inc, 1 sc) around (18 sts).
- Round 4: (1 inc, 2 sc) around (24 sts).
- Round 5: (1 inc, 3 sc) around (30 sts).
- Round 6: (1 inc, 4 sc) around (36 sts).
- Round 7: (1 inc, 5 sc) around (42 sts).
- Round 8: (1 inc, 6 sc) around (48 sts), following the supplied Round 8 instructions.
Round 9: Begin the Hat Shaping
- Chain 2.
- Skip 1 stitch below.
- Work 7 sc.
- Place a stitch marker.
- Work the sequence (1 inc, 7 sc) twice.
- Continue the sequence as supplied to form the structured openings for the hat.
The supplied instructions do not give a complete repeat count or a final stitch count for this round, so check the original tutorial for the exact placement of each opening.
Round 10: Work into the Chain Spaces
- Work 1 sc into every stitch around.
- Work 2 sc into each 2-chain space.
- Continue around the entire piece.
Stitch count stated in the supplied pattern: 54 sts.
Rounds 11-14: Build the Hat Body
Work 1 sc into every stitch around for four rounds.
Maintain 54 sc in each round.
Round 15: Double Crochet Border in BLO
- Work in the back loop only.
- Chain 3.
- Repeat the following sequence around:
- 3 dc
- 1 dc inc
Continue around the full round.
Round 16: Final Increase Round
- Chain 1.
- Repeat (1 dc, 1 dc inc) around the full circle.
- Join with a slip stitch.
- Cut the yarn and secure the loose ends.
The hat/lid is now ready to be positioned with the bag and drawstrings.
Part 8: Make and Thread the Drawstring Straps
The straps are made from long foundation chains and threaded through the mesh openings at the top of the bag.
Crochet the Straps
- Make a slip knot.
- Chain 80 for the first strap.
- Fasten off.
- Make a second strap using the same 80-chain length.
You will need 2 strap pieces in total.
Thread Through the Mesh
- Take the first chain strap.
- Thread it evenly in and out through the mesh gaps of Round 38.
- Repeat with the second strap, following the arrangement shown in the original tutorial.
- Tie adjustable knots to secure the straps.
You can shorten or lengthen the straps by changing the initial chain count.
Part 9: Assemble the Character Bag
Once the bag body, decorative pieces, hat, and straps are complete, bring them together to finish the design.
Attach the Hat and Bag
- Position the hat/lid with the main bag body.
- Pull the straps through the designated openings in the hat component.
- Adjust the placement so the straps can move as intended.
Attach the Wings and Feet
- Arrange the two wings on the main bag body.
- Position the two feet where they belong in the character design.
- Use the long yarn tails and a yarn needle to sew each piece securely in place.
Add the Leaf Accents
- Check the leaf placement around the specified bag spaces.
- Secure the leaf ends and weave in any remaining yarn tails.
- Check that all decorative pieces are firmly attached.
Finish by weaving in loose ends and checking that the drawstrings move through the mesh openings without catching.
Your Crochet Character Bag Is Complete!
The finished bag combines a round single crochet base, a simple body, and a mesh drawstring opening with playful decorative details. The matching hat, wings, feet, and leaves give it a distinctive character-inspired appearance. Adjust the body height and strap length to make a version that suits your preferred size.