
A lightweight and versatile crochet scarf featuring the playful “drunken granny stitch,” with its whimsical, staggered texture—perfect to brighten up your wardrobe year-round.

The Drunken Granny Stitch Scarf is a cozy and stylish accessory perfect for adding a special touch to any outfit. Made with soft cotton-blend yarn, this scarf combines texture and warmth, making it ideal for chilly days or as a thoughtful handmade gift. Its unique “drunken granny” stitch creates a beautiful, eye-catching pattern that ensures your scarf stands out.
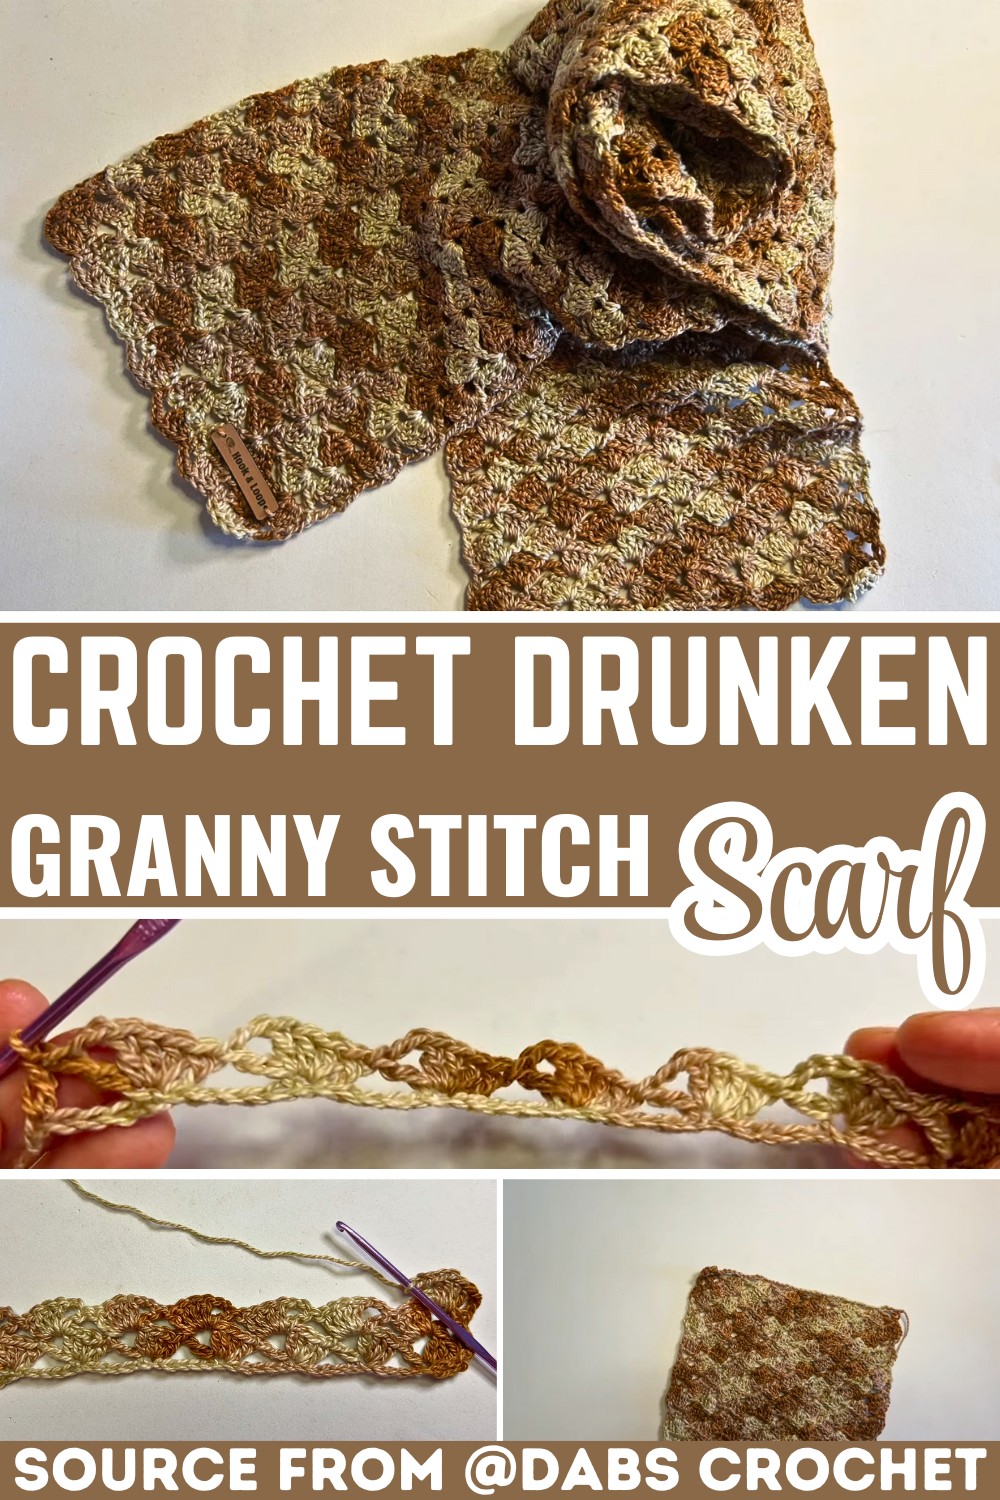
Crochet a Drunken Granny Stitch Scarf
This scarf is not just a delight to wear but also an enjoyable crochet design for those looking to try something new. The stitch pattern repeats evenly, making it beginner-friendly and easy to extend to your preferred length. Once complete, you can add a simple border to finish the edges or keep it classic and clean. You can even consider adding fringes for a playful look. While it’s practical for everyday wear, the decorative detail makes it elegant enough for special occasions too.
Credit Hook & Loop Crochet Tutorials
Key Features and Construction Highlights
- Materials: Brown cotton-blend yarn, 3 mm crochet hook, tapestry needle, and scissors.
- Stitch Pattern: Uses the “drunken granny stitch,” combining clusters of double crochets for a flowing, staggered design.
- Foundation Chain: Worked in multiples of 6 + 4 for flexibility in size.
- Main Construction: Crocheted in rows, building repeating blocks of clustered stitches.
- Borders: Finished off with distinct upper and bottom borders for a polished look.
- Optional Decorations: Fringes or a label can be added for personalization.
The foundation chain sets the stage for the scarf’s playful texture, requiring chains in multiples of 6 + 4. For the example scarf, 42 chains were used, creating a piece approximately 19 cm wide. The first row introduces the drunken granny stitch pattern, with clusters of four double crochets and chain spaces spaced evenly across the work. Each “block” is crocheted by creating 4 double crochets in a single stitch, chaining 2, and adding one more double crochet to anchor the cluster. This clever design forms the staggered and whimsical appearance of the drunken granny stitch.

Subsequent rows are built on top of the first row by turning the work and repeating the stitch pattern. The clusters are worked into the chain spaces from the previous row, ensuring a consistent layout that maintains the scarf’s playful texture. It’s important to place the first double crochet close to the last one in the sequence to avoid loose stitches, keeping the scarf neat and sturdy. The work grows row by row until reaching the desired length—this example measures an impressive 175 cm (68.9 inches), making it cozy yet lightweight.

Once the main body is complete, the scarf is finished off with upper and bottom borders to create clean edges and enhance the overall look. The upper border introduces chains and single crochets alternated across the edge, followed by three double crochets worked into chain spaces for added flair. The bottom border replicates this concept, working slip stitches, chain spaces, and double crochets into the edge for symmetry. The result is a polished finish that looks professional and cohesive.

If you’re feeling adventurous, fringes can be added to the edges for a boho touch, but this scarf is equally stunning without them. If gifting or selling the scarf, a decorative label can be sewn in for a thoughtful, personalized touch.

Video Tutorial
Step-by-Step Pattern
Materials
To make this scarf, you’ll need the following materials:
- Yarn: 100% cotton blended yarn (brown)
- Crochet Hook: 3 mm
- Optional Tools:
- Tapestry needle (for weaving in ends)
- Scissors

Pattern Instructions
Foundation
- Start with a Foundation Chain: Create a chain in multiples of 6 + 4 to begin your scarf. In this tutorial, we’ll use a total of 42 chains to achieve a scarf width of approximately 19 cm (7.5 inches).
Main Body Pattern
Row 1
- Chain 4.
- Double crochet into the 5th stitch from the hook.
- Work 3 additional double crochets into the same stitch (4 total).
- Chain 2, then complete the block by creating 1 double crochet in the same stitch as the previous block.
- Skip 5 stitches, then repeat the pattern:
- 4 double crochets into the 6th stitch,
- Chain 2,
- 1 double crochet in the same stitch.
- Continue this pattern across the row. For the last five chain stitches, work 1 double crochet into the final stitch.
Row 2
- Chain 3, turn your work.
- In the first space between blocks, create 1 new block by working the following:
- 4 double crochets,
- Chain 2,
- 1 double crochet.
- Work another block in the next space.
- Repeat the pattern across the row, ensuring the stitches are closely spaced for consistency.
Helpful Tip: Ensure your first double crochet is positioned closer to the previous row’s last stitch, preventing loose or uneven gaps.
Row 3 and Beyond
- Chain 3 and turn your work.
- Continue repeating Row 2’s block-building pattern until you reach your desired length. For this tutorial, the scarf measures 175 cm (68.9 inches), but feel free to adjust according to your preferences.
Adding Decorative Borders
Once the main body of the scarf is complete, we’ll add borders to both the upper and bottom sides for a polished look.
Upper Border
Row 1:
- Chain 3 and turn your work.
- Single crochet into the space, then chain 2.
- Skip one stitch, single crochet into the next stitch.
- Chain 1, single crochet into the space between the blocks.
- Continue with this pattern:
- Chain 2, skip one stitch,
- Single crochet into the next stitch,
- Chain 1, single crochet into the space between blocks.
- At the end, single crochet into the top chain of the last block and turn your work.
Row 2:
- Chain 1 and turn your work.
- Single crochet into the space, chain 3.
- Work 3 double crochets into the chain 2 space, then single crochet into the next space.
- Continue the pattern:
- Chain 3, work 3 double crochets into the next space.
- Single crochet on top of the chains.
- Slip stitch under the last space, then chain 1 and cut the yarn. Make sure both sides match.
Bottom Border
- Start by slip stitching into the top of the chains.
- Chain 3, work 3 double crochets into the space.
- Single crochet into the space underneath.
- Chain 3, work another 3 double crochets into the next space.
- Repeat this pattern across the row.
- At the end, slip stitch into the last space.
Optionally, you can add fringes to the edge for more decoration, but this tutorial opts to leave the scarf plain for a clean finish.
Finishing Touches
- Weave in any loose ends at both sides using a tapestry needle.
- If you’re gifting or selling this scarf, consider attaching a stylish label for personalization.
Troubleshooting and Suggestions
Common Issues:
- Loose Stitches: Make sure to work the starting double crochet in each cluster close to the previous double crochet to maintain tension and visual consistency.
- Clean Edges: Ensure stitches into the last chain of each row are secure to avoid gaps or uneven edges.
- Matching Borders: Pay careful attention when replicating the border on both sides to ensure symmetry.
Creative Modifications:
- Colors: Experiment with variegated or self-striping yarns to highlight the texture of the drunken granny stitch. Bold or contrasting colors can make this design pop!
- Fringes: Add decorative fringes on both ends for a playful vibe. Alternatively, beads or tassels can increase the scarf’s appeal.
- Adaptations: Turn this pattern into other accessories like table runners or shawls by adjusting the width of the foundation chain and the length of the piece.


