Crochet Origami Large Tote Bag Pattern Free
An Origami Large Tote Crochet Bag begins with one flat rectangle, but it doesn’t stay flat for long. A few folds completely change the shape, revealing a roomy tote with clean lines and a balanced structure.
This tutorial follows each stage in order, so every fold makes the finished crochet design. Easier to understand and more satisfying to watch take shape.

Raffia yarn gives the bag a crisp form while keeping it light enough for everyday use. The crochet pattern shows when to fold, where to join the edges.
And how the handles complete the crochet design without unnecessary steps. As each section comes together, the final shape feels clearer, yet the last transformation is still rewarding to see.
Credit Felicia Andronic
Materials & Tools Needed:
- Raffia Paper Yarn:
- Approximately 2 skeins of white/beige raffia paper yarn (nearly fully used)
- Approximately 1 skein of blue raffia paper yarn (slightly more than half used)
- Crochet Hook: Use the size recommended for your yarn (preferably a medium hook for raffia yarn).
- Stitch Markers: Optional, for keeping precise folds in place before joining.
- Scissors: For cutting yarn when needed.
Finished Size & Customization Ideas:
- The finished tote bag size depends on the rectangular base. Ensure the rectangle’s length is three times its width. Use this proportion to customize your bag.
- To check the correct rectangle size: Stretch out the rectangle to measure properly, as blocking/stretching affects the final shape. Fold corners to check if they align with the origami design.
Customization Ideas:
- Adjust the base rectangle size for larger or smaller bags.
- Use contrasting colors or yarn types for handles and edges for more flair.
- Add embellishments like tassels, appliques, or lining for added utility and style.
Pattern Abbreviations & Terminology:
- ch: Chain
- dc: Double crochet
- sc: Single crochet
- sl st: Slip stitch
- back loop only: Working into the back loop of a stitch
- turn: Turn your work
All stitches are described in US crochet terminology.
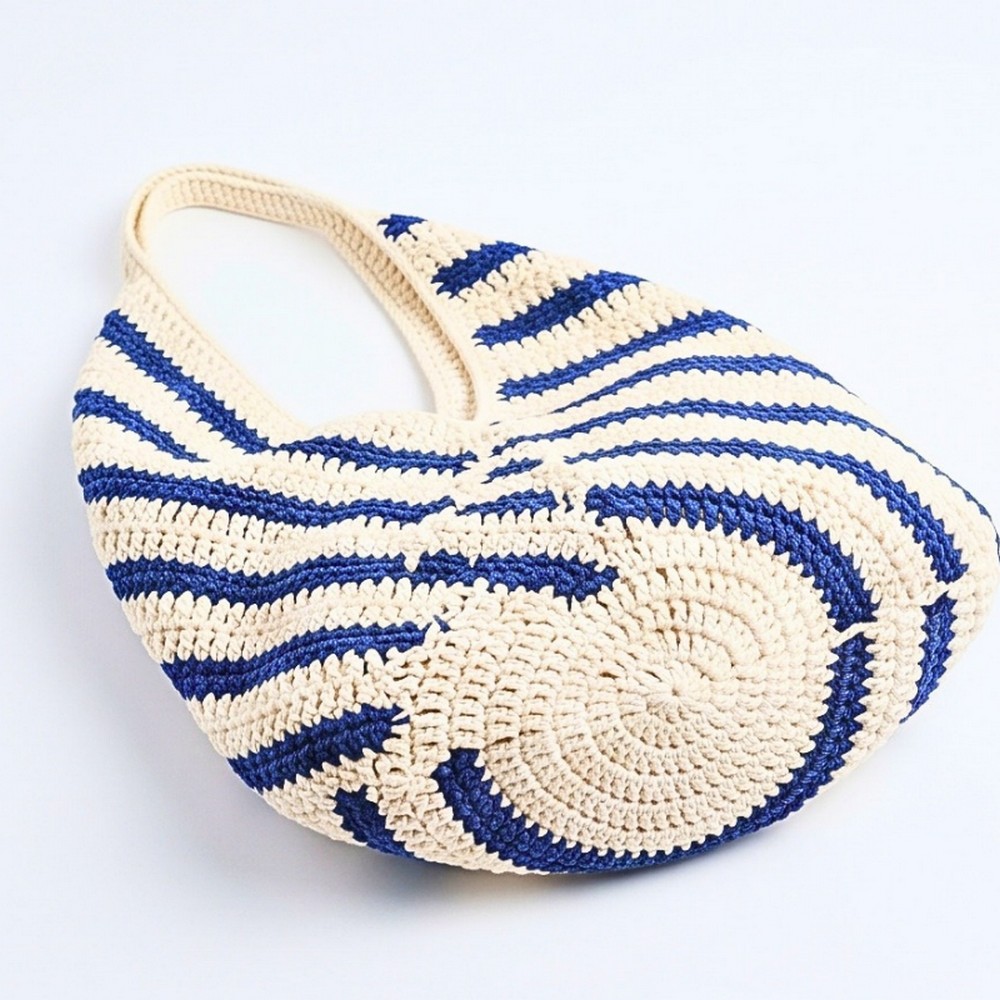
Step-by-Step Crochet Instructions
Base Rectangle
- Start: Begin with a slip knot, then chain 42.
- Row 1: Skip the first two chains (turning chain; does not count as a stitch). Start crocheting 1 double crochet (dc) in the third chain from the hook.
- Work 1 dc in each chain across the row (40 dc total).
- Chain 2, turn your work.

- Row 2: Continue crocheting 1 dc in each stitch across the row (40 dc total).
- At the last stitch, change the color to blue yarn.
- Chain 1, turn your work.
- Row 3: Start crocheting single crochets (sc) in the back loop only across the entire row.
- Chain 1, turn your work.
- Row 4: Repeat Row 3: Crochet sc in the back loop only across the row.
- At the end of this row, cut the blue yarn but do not cut the white yarn.
- Row 5: Return to white yarn at the last stitch of Row 4. Chain 2, turn your work. Crochet dc in the back loop only across the row.
- Row 6: Chain 2 (counts as turning chain), turn your work. Work dc in both loops across the row.
- Repeat Rows 3–6 until the length of the rectangle is three times its width (ensure you stretch it properly when measuring).

Folding the Rectangle
- Fold the rectangle into the origami shape:
- Take one corner of the rectangle and fold diagonally.
- Fold the opposite corner similarly.
- Match the folds to ensure that both corners align well; adjust by adding or frogging rows if necessary.
- Use stitch markers or tie yarn scraps to secure the folds before joining pieces together.
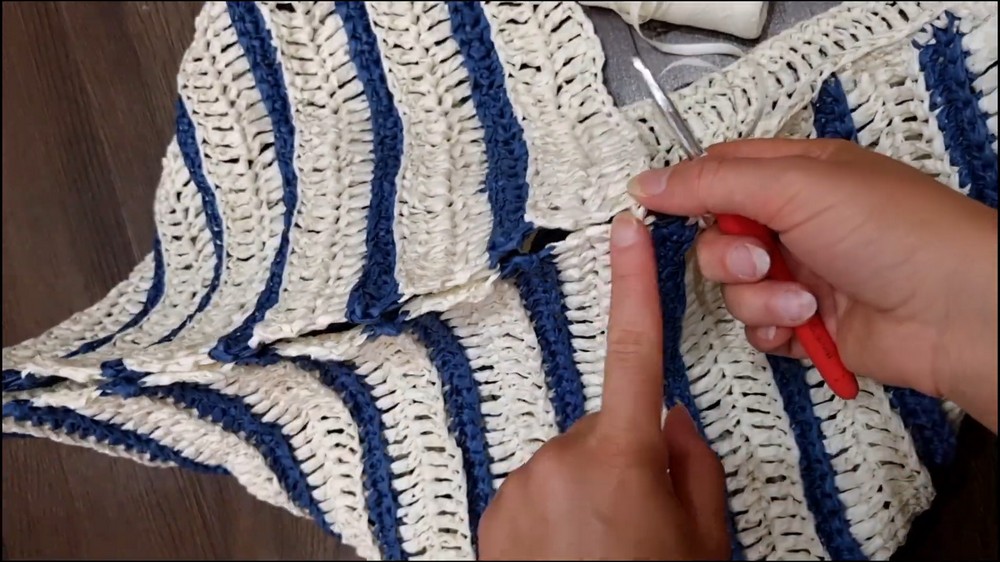
Joining the Bag
- Bottom Seam:
- Attach the yarn at the bottom of the folded bag.
- Work single crochets going upward along the folded edges, joining the pieces.
- Continue with sc along the side edges until reaching the top of the bag’s second folded edge.
- Final Side Seam:
- Attach yarn to the remaining open side seam.
- Crochet sc along the seam, working upward to join both pieces entirely.
Handles:
- Attach Handles:
- Attach yarn at the designated corner of the folded bag where the handle will be placed.
- Crochet 20 chains to create the handle length.
- Connect the chain to the opposite corner with a slip stitch.
- Reinforce Handles:
- Work single crochets (sc) along the chains to strengthen the handle.
- Return via sl st through the existing sc row for added durability.
- Repeat one more row of sc as needed, turning after every row, to provide extra strength to the handle.
- Finish with a final slip stitch, cut the yarn, and weave in the ends.

Finishing Touches:
- Stretch and Block:
- Stretch out the bag and block if necessary for a more polished shape.
- Secure Loose Ends:
- Weave in all the remaining loose ends using a yarn needle.
- Optional Additions:
- Lining, pockets, or decorative elements can be sewn in to suit your preferences.