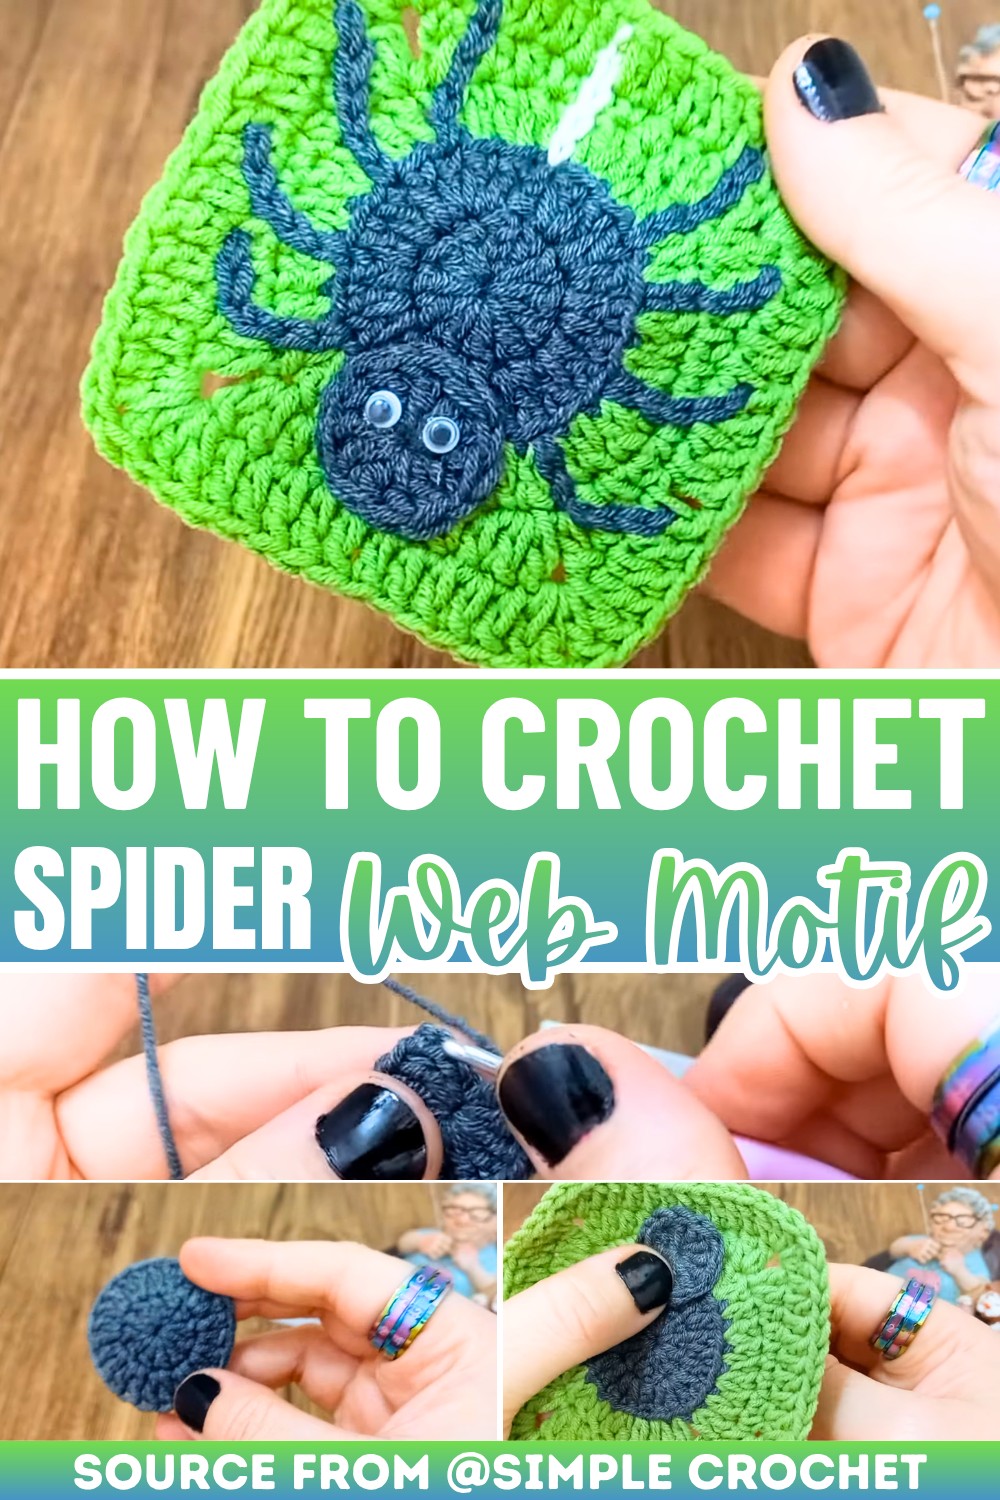
Crochet Spooky Spider Web Motif for Halloween Decor
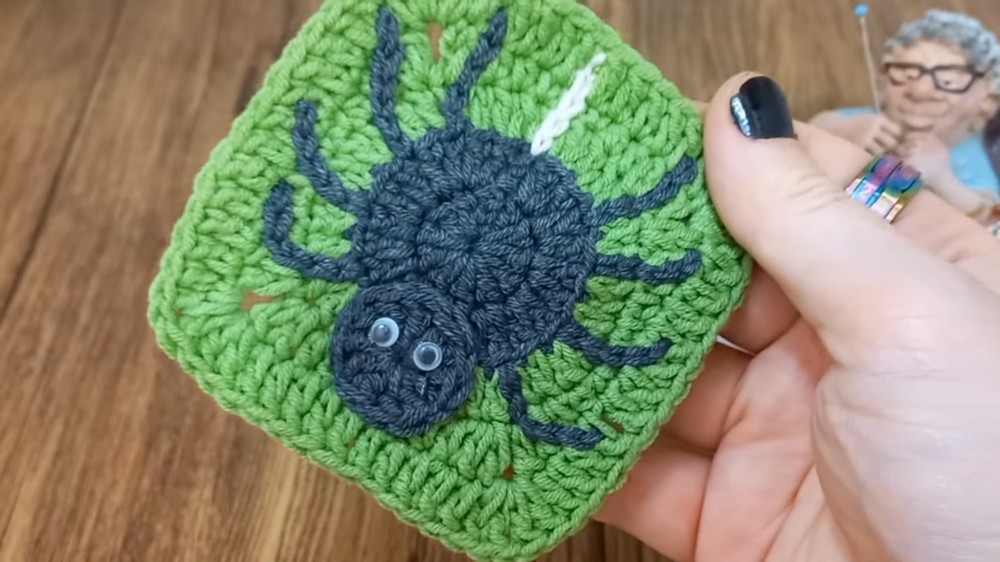
This crochet spider web pattern is perfect for Halloween decorations. It combines a spooky spider granny square and detailed web designs that are fun to make. The motif stands out with adjustable size and versatility, letting you use it for bags, decor, or even costumes. It’s simple, stylish, and adds a touch of Halloween charm to your crochet creations.
Crochet a Spooky Spider Web Motif
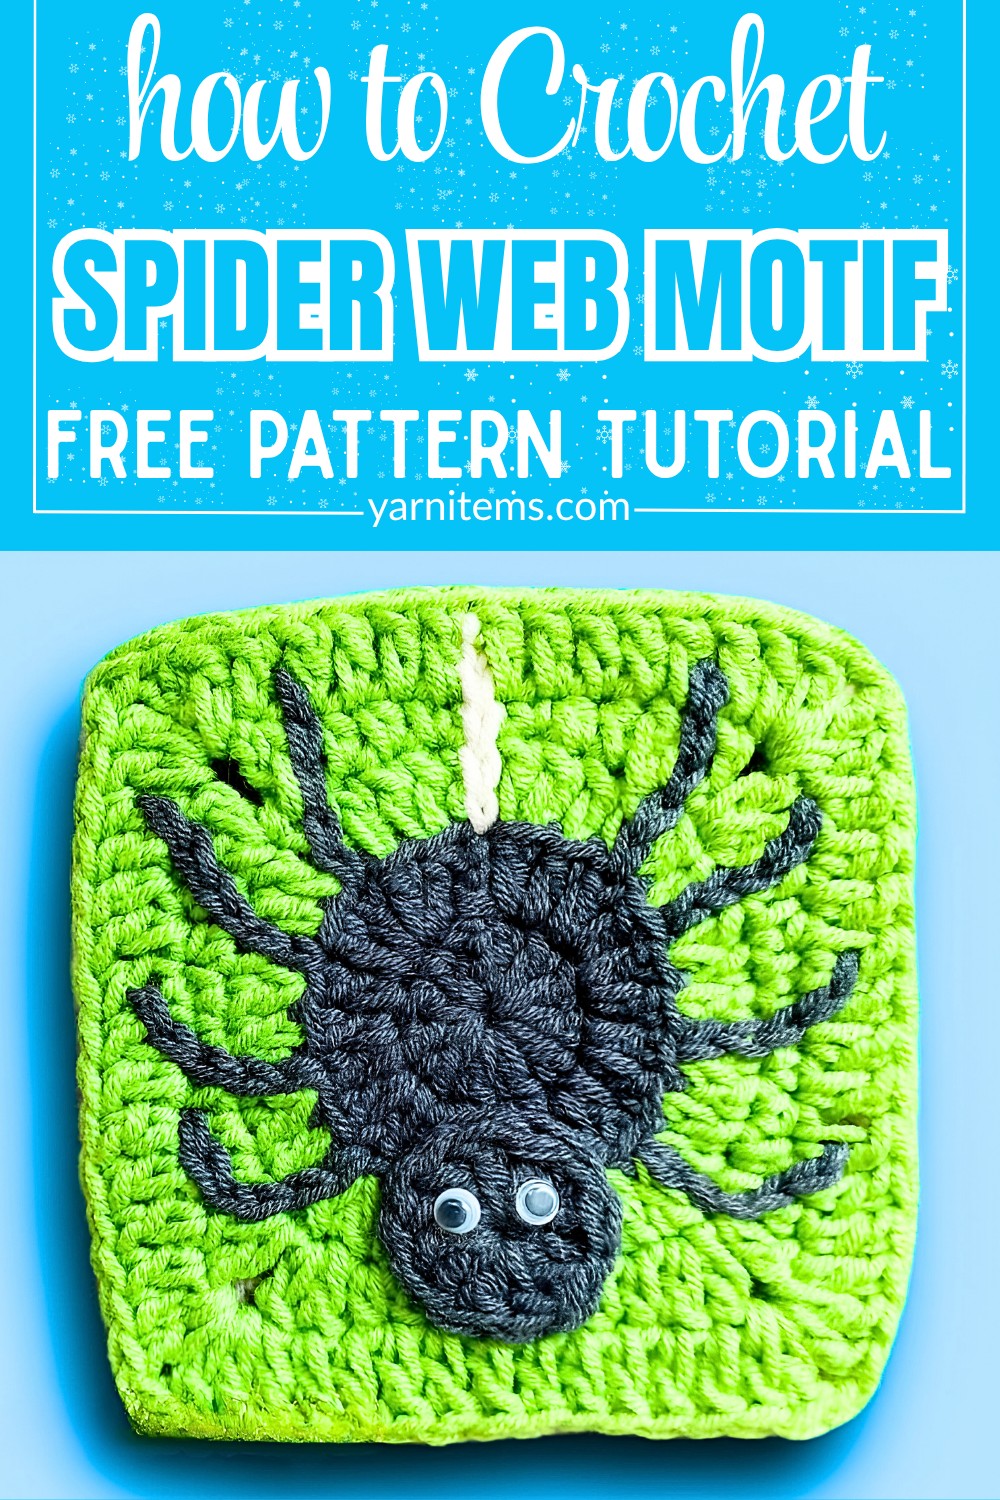
You can customize the colors to suit your theme—choose classic black and green for an eerie vibe or something playful like purple and orange. Each round involves simple stitches like magic rings, double crochet, and slip stitches, making it easier for beginners. Add doll eyes, adjust leg styles, or change sizes to fit your preferences and occasions.
For added detail, the spider’s head, legs, and web lines are creatively crocheted, and lightweight yarn adds practicality. You can try new stitching techniques like slip stitches for unique designs. Bring your crochet spider to life by attaching playful eyes with glue or thread, making it both fun and simple for kids to help with.
Credi Simple Crochet
Materials & Tools Needed
-
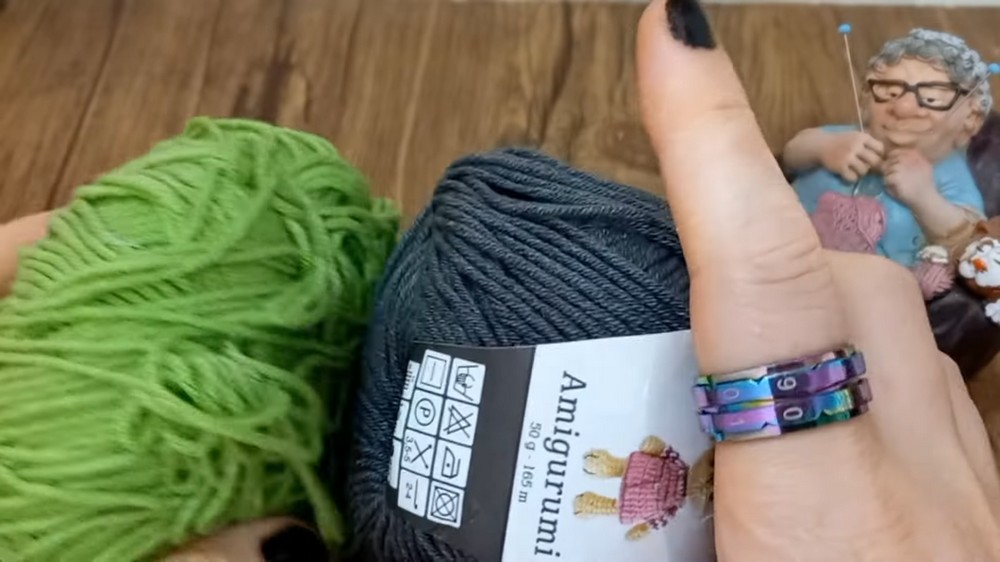
Yarn: Cotton yarn in two contrasting colors. The tutorial uses classic Black for the spider and a vibrant Green for the square background.
-
Crochet Hook: A 2.5 mm hook (or a size that matches your chosen cotton yarn to keep your stitches nice and tight).
-
Notions: A tapestry needle for weaving in ends, a pair of sharp scissors, and hot glue.
-
Embellishments: A pair of small plastic doll eyes (or safety eyes/buttons).
Key Pattern Features & Construction
-
Starts in the Round: The project kicks off as a flat circle using a magic ring to form the dense, solid body of the spider.
-
Special Stitch Placement: To create a distinct border between the spider’s body and the background, Round 3 is worked strictly into the back loop and third loop of the stitches.
-
Squaring the Circle: You will gracefully transform the round circle into a sharp four-cornered granny square by varying stitch heights—using a mix of single crochets, half double crochets, and double crochet corner clusters.
-
Surface Crochet Details: Instead of crocheting separate pieces for the legs and web, you will use surface slip stitches directly onto the finished square to build the spider’s eight legs and a hanging web line.
Step-by-Step Pattern
Part 1: The Spider Body (In the Round)
-
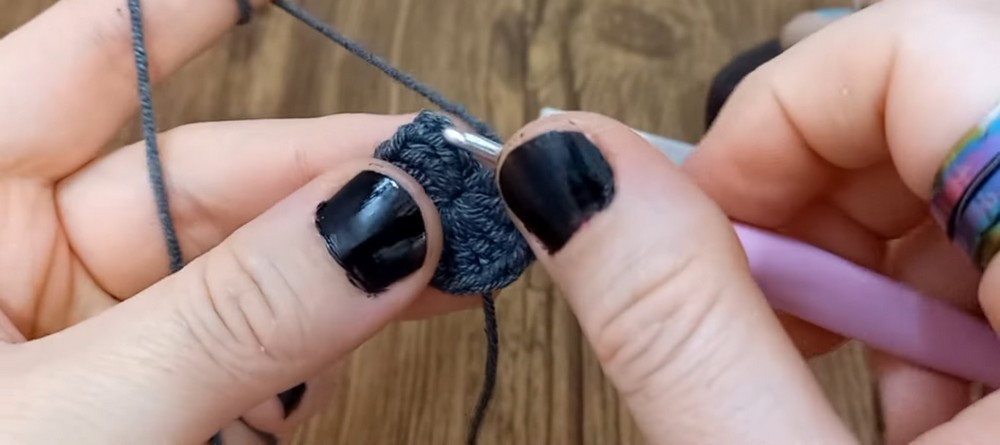
Round 1 (Black): Start by creating a magic ring. Chain 3 (counts as your first double crochet), then work 11 more double crochets into the ring. Pull the ring tight to close the center hole and join with a slip stitch to the top of the beginning chain-3. (12 double crochets)
-
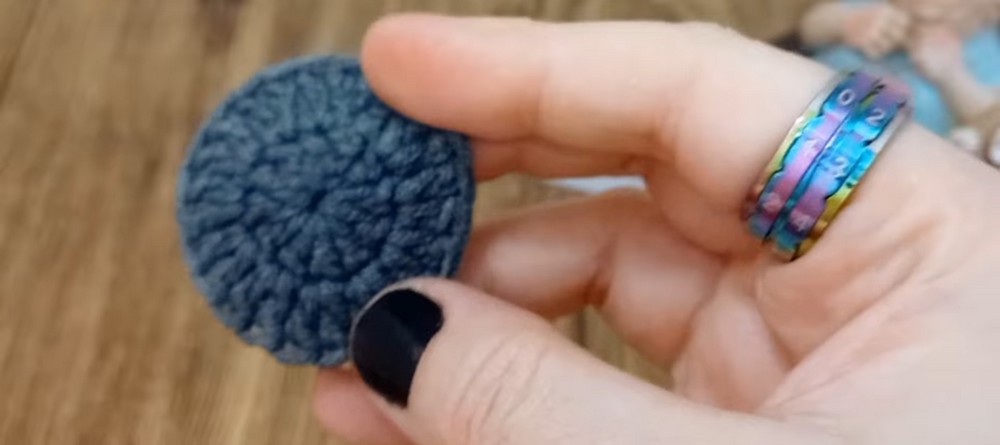
Round 2 (Black): Chain 3. Work a second double crochet directly into that same starting space. Proceed to work 2 double crochets into every single stitch around to double your stitch count. Join with a slip stitch to the beginning chain-3, fasten off, and weave in your ends neatly with a tapestry needle. (24 double crochets)
Part 2: Squaring the Background
-
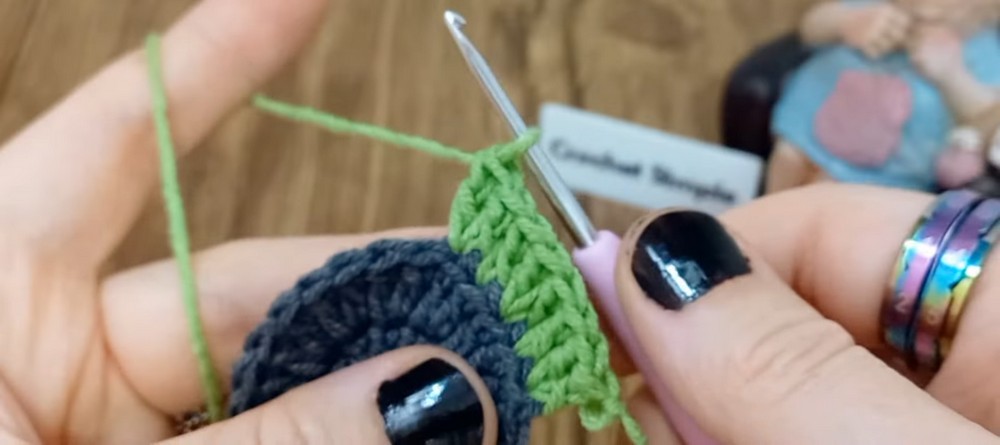
Round 3 (Green): Join your green yarn with a slip knot on your hook. To create a crisp border around the spider body, work this entire round only into the back loop and the third loop (the loop hidden just behind the back loop) of Round 2. Join in any stitch, chain 3 (or make a standing double crochet), and work another double crochet in that same stitch. Continue around the circle following a pattern of
[1 double crochet in the next stitch, 2 double crochets in the following stitch]. Join with a slip stitch to finish. (36 double crochets)
-
Round 4 (Green): Now we shape the square using the full loops of the stitches. Chain 3, then chain 1 more for a corner space. In the next stitch, work 2 double crochets. This forms your first corner structure! Moving along the first side: work 1 half double crochet into each of the next 2 stitches, followed by 1 single crochet into each of the next 3 stitches, and 1 half double crochet into each of the next 2 stitches. For the next corner: work 2 double crochets in the next stitch, chain 1, and 2 double crochets in the following stitch. Repeat this side-and-corner sequence all the way around. Join with a slip stitch.
-
Round 5 (Green): Slip stitch into the first corner chain-1 space. Chain 4 (counts as a double crochet plus a chain-1 space), and work 2 double crochets into that same corner space. Work 1 double crochet into every stitch across the flat side. When you reach a corner chain-space, work
[2 double crochets, chain 1, 2 double crochets]. Repeat around, completing the final corner on your way back, and join with a slip stitch. Note: You can repeat this round as many times as you like to make the granny square larger!
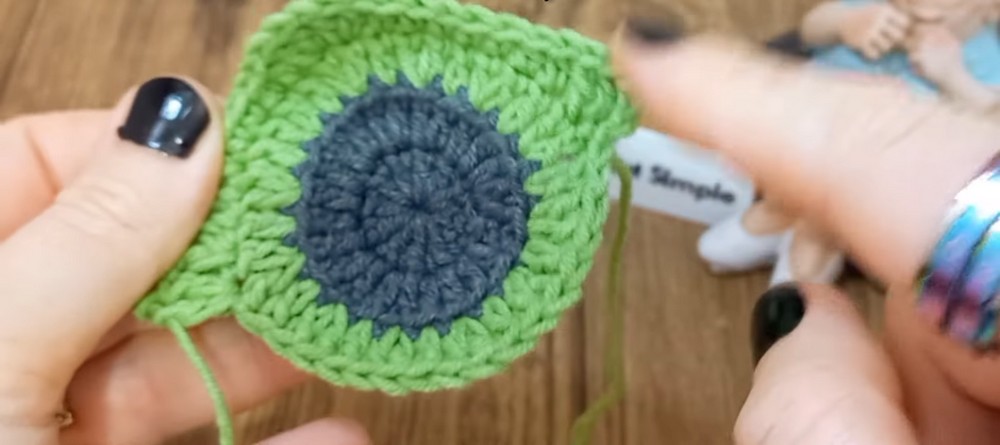
Part 3: The Spider Head & Finishing Touches
-
The Head (Black): In a separate magic ring, chain 3 and work 11 double crochets. Pull tight and join to create a small, flat 12-stitch circle. Fasten off, leaving a tail for sewing. Use your tapestry needle to sew this headpiece securely onto the top edge of the main black body circle.
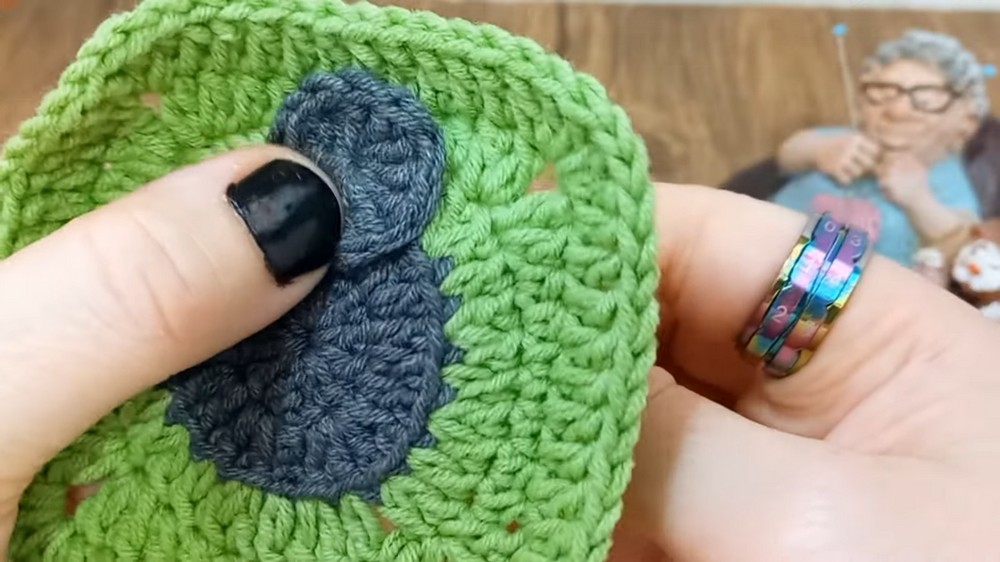
-
The Legs & Web Line: Attach your black yarn with a slip knot onto your hook from the back of the square. Following an imaginary line (or a temporary fabric marker line), pull a loop up to the surface and work a line of surface slip stitches radiating outwards from the body to create a bent spider leg. Repeat this to give your spider 4 legs on each side. Use the same surface slip stitch technique starting at the bottom of the spider to create a straight vertical “web thread” hanging down.
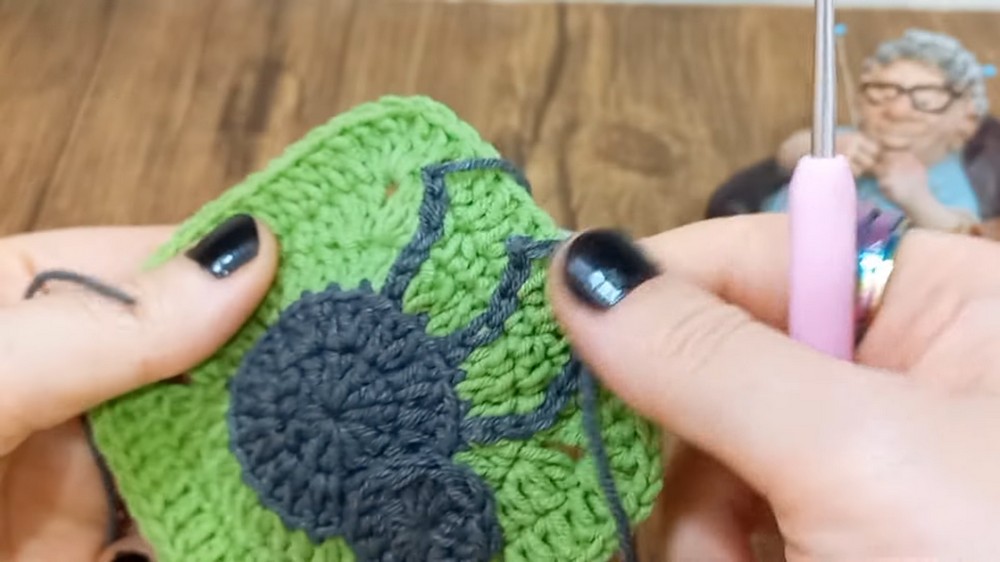
-
The Face: Finish your spooky little friend by using hot glue to secure two tiny doll eyes onto the spider’s head!
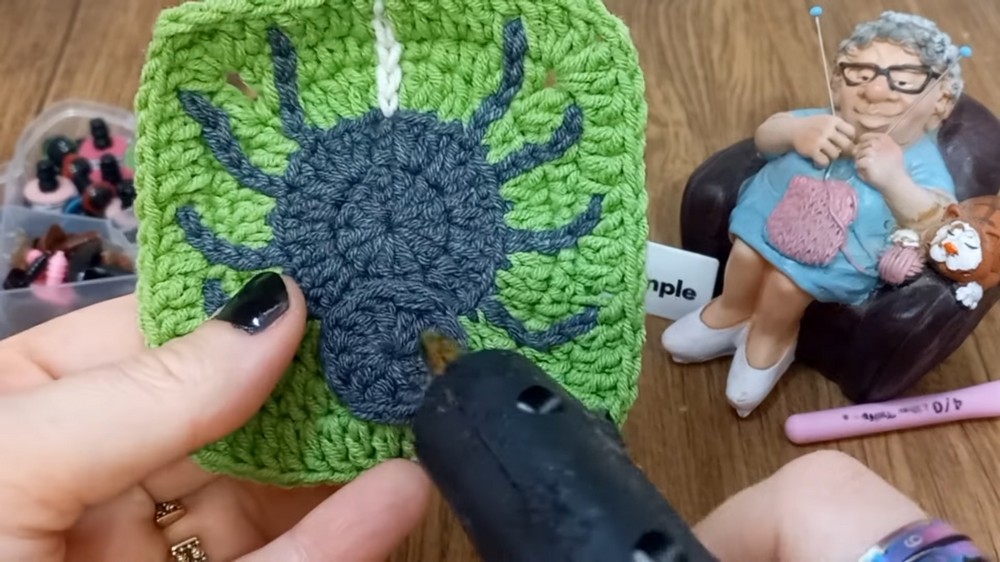
Troubleshooting & Suggestions
-
Struggling with the Surface Slip Stitches? Surface crochet can feel tight or warp your square if your tension is too high. Keep your tension loose and casual as you glide across the front of the piece. If you find it too fiddly, you can alternatively use a tapestry needle and a length of black yarn to simply embroider the legs and web line onto the square using a basic backstitch!
-
Clean Transitions: When working Round 3 into the back loop and third loop, make sure you are catching both of those back loops. Leaving the front loop entirely unworked creates the beautiful, clean circular ridge that perfectly outlines the spider’s body against the green background.
-
Creative Customizations:
-
Color Play: While black and lime green give off the ultimate classic Halloween vibe, try experimenting with a bright purple, a vibrant orange, or a spooky glow-in-the-dark white background yarn.
-
Embellishments: If you don’t have plastic doll eyes on hand, you can easily stitch small white and black felt circles onto the face, use tiny white buttons, or embroider two little white French knots for eyes.
-
Functional Adapting: These motifs make incredible individual coasters for a Halloween party! Alternatively, you can stitch multiple squares together to create a festive table runner, a spooky throw blanket, or a trick-or-treat tote bag.
-