How to Crochet a 3D Flower in a Granny Square
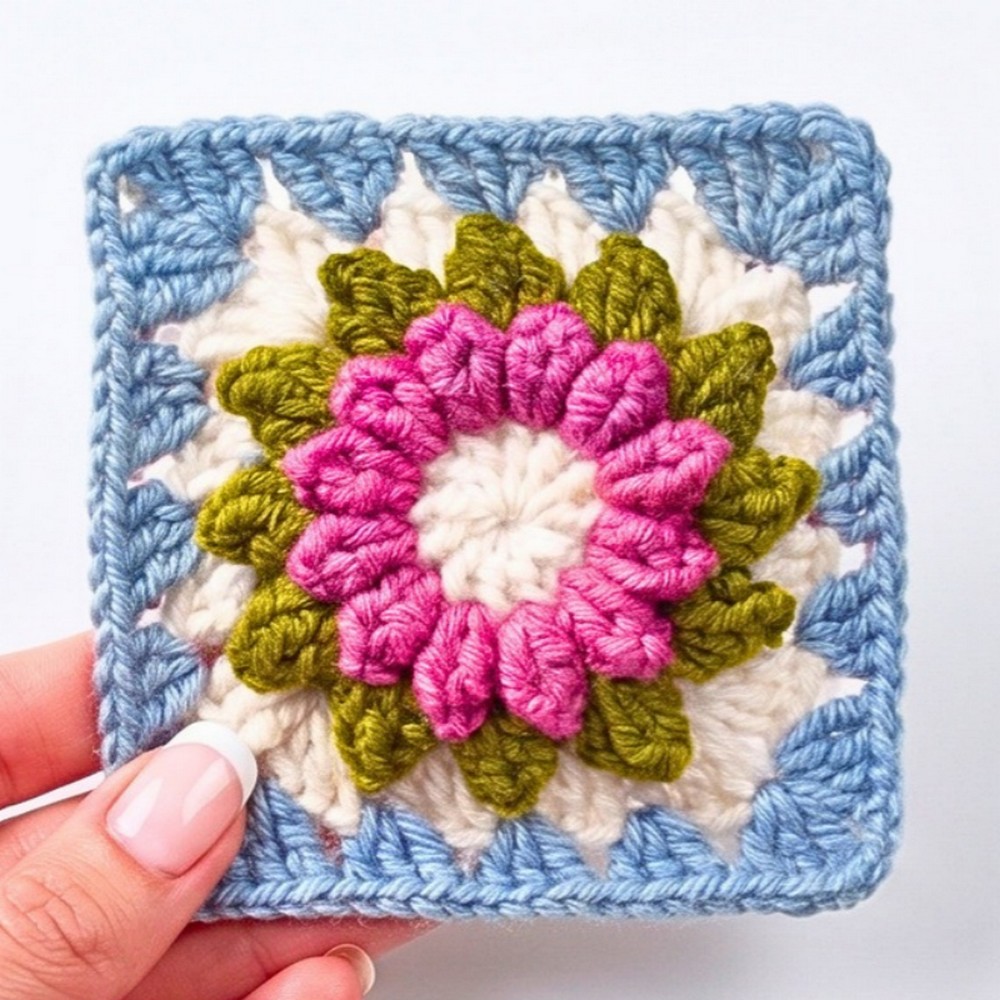
A single raised flower can completely change the look of an ordinary granny square. This beautiful crochet piece combines soft 3D petals with a classic square border, creating a design that feels fresh and full of texture.
Bright color combinations make every stitch stand out while adding warmth and personality to your handmade collection. It is a lovely piece for anyone who enjoys creating eye-catching crochet items with timeless appeal.

The beauty of this crochet granny square shines through its endless possibilities. It works wonderfully for blankets, cushion covers, bags, and other decorative pieces that deserve a floral touch.
You can easily switch the colors to match every season, room, or special occasion without changing the overall style. Each finished crochet piece offers a charming blend of elegance, texture, and creativity that makes every stitch feel worthwhile.
Credit dreampls
Materials & Tools Needed
- Yarn:
- Base color for the center (e.g., yellow or white).
- Contrasting colors for petals (e.g., blue, dusty rose).
- Additional colors for the granny square border (e.g., white, green).
- Crochet Hook: Recommended size for the yarn (e.g., 4mm or 5mm hook).
- Scissors.
- Tapestry needle (for weaving in ends).
Finished Size & Customization Ideas
- Finished Size: The size of the granny square depends on the hook size and the yarn thickness. Typically, it will be around 6″ x 6″ when using a medium-weight yarn and a 4mm hook.
- Customization Ideas:
- Add more rows to the granny square for a larger piece.
- Use different colors for each row to create a colorful effect.
- Combine multiple squares to create blankets, cushion covers, or unique garments.
Pattern Notes
- This pattern creates a 3D flower centerpiece with petals that pop out, surrounded by a granny square.
- Work stitches into the specific spaces indicated for accurate results.
- For a seamless color change, use the slip knot method described below.
- Always check stitch counts as you complete each round for symmetry.
Pattern Abbreviations & Terminology
- ch: chain
- sl st: slip stitch
- dc: double crochet
- yo: yarn over
- st(s): stitch(es)
- sp: space
- RS: Right Side (front side of the piece).
Note: This pattern uses US Terminology.
Tips Before You Start
- Practice the Magic Ring Technique: The flower’s center begins with a magic ring, which is key for a tight and neat centerpiece.
- Color Changes: Use the slip knot method for smooth transitions between colors.
- Keep Consistent Tension: Ensure all stitches are worked at an even tension to maintain shape and size.
- Have all your materials prepped and organized before starting to avoid interruptions.
Step 1: Center Circle (Yellow Yarn)
-
Make a magic ring: wrap yarn around your fingers, insert hook, grab yarn, twist, and make 1 chain.
-
Make 12 double crochets (dc) into the ring.
-
Pull the short tail to close the ring, make 1 slip stitch into the very first double crochet, chain 1 to secure, and cut the yarn.

Step 2: Inner Petals (Blue Yarn)
-
Make a slip knot and join into the slip stitch from the previous row.
-
Chain 2.
-
In that same stitch, make 4 double crochets.
-
Form a petal: Remove your hook, count back 4 stitches (to the first dc), insert your hook into the top of that first dc, grab the working loop, and pull it through.
-
Chain 2.
-
Move to the next stitch and repeat (4 double crochets →\rightarrow pull loop through first stitch →\rightarrow chain 2) all the way around for a total of 12 petals.
-
After the last petal, chain 2, make a slip stitch into the center of the very first petal, chain 1, and cut the yarn.

Step 3: Outer Petals (Dusty Rose Yarn)
-
Make a slip knot and join into the space between the petals. Chain 2.
-
Work into the spaces under the chain-2 spaces from the previous row:
-
Make 5 double crochets into the space.
-
Form a petal: Remove hook, count back 5 stitches, insert hook into the top of the first dc, grab the working loop, and pull it through.
-
Chain 3.
-
-
Repeat this in each chain space around for a total of 12 petals (each made of 5 double crochets with 3 chain stitches between them).
-
Finish with 3 chain stitches, slip stitch into the top of the first petal, chain 1, and cut the yarn.

Step 4: Shaping the Granny Square (White Yarn)
-
Make a slip knot and join into the space between the petals. Chain 2.
-
In the same space, make 3 double crochets.
-
Sides: Chain 1, then make 3 double crochets in the next chain space. Repeat for the next space.
-
Corners: In the corner chain space, work 3 double crochets, chain 2, 3 double crochets all in the same space.
-
Continue working sides (chain 1, 3 dc) and corners (3 dc, chain 2, 3 dc) around the square.
-
Complete the initial starting corner with the remaining 3 double crochets and chain 2, then join with a slip stitch to the first double crochet. Chain 1 and cut the yarn.
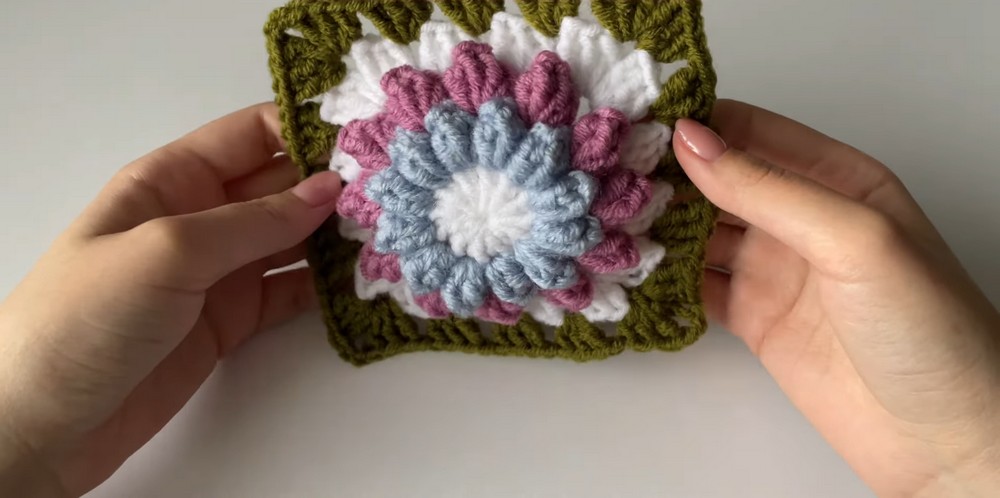
Step 5: Final Border (Green Yarn)
-
Make a slip knot and join into the center of any corner space. Chain 2.
-
In the same corner space, make 3 double crochets.
-
Continue working around the square:
-
Sides: Chain 1, then place 3 double crochets into each chain space.
-
Corners: Make 3 double crochets, chain 2, 3 double crochets into each corner space.
-
When reaching the last corner, complete it with 3 double crochets and chain 2, then join with a slip stitch into the very first double crochet. Chain 1, pull tight, and cut the yarn.