Crochet Mini Tulip Bouquet Pattern – Easy Wired Tulip
Want a tiny crochet tulip with a real flower-like shape? This mini bouquet combines layered petals, a wired leaf, and a wrapped stem to create a charming handmade flower.

Mini floral pieces bring handmade charm to desks, gifts, and small displays without requiring much space. This crochet tulip uses layered petals and simple shaping, while crochet techniques help create delicate flower details even for beginners.
Inside this crochet tutorial, you’ll learn how to form small and large petals, build a wired leaf, assemble layered flower sections, secure everything onto stem wire, and finish the bouquet with wrapping paper and ribbon. Let’s begin.
Credit Xuxu Crochet
Materials & Tools
- Yarn: Milk Cotton yarn (50g) in two main colors, such as blue for petals and green for stem and leaves
- Crochet Hook: 2.5 mm
- Floral Wire: 0.4 mm floral wire for the leaf and structural support, plus thicker wire for the stem
- Adhesive: Hot glue gun
- Packaging Materials: Decorative ribbon and flower wrapping paper in white and colored sheets
Finished Size & Customization
This pattern creates a miniature tulip bouquet suitable for a desk ornament, keyring accessory, or small handmade gift.
For different flowers, use classic tulip shades such as pink, yellow, red, or purple for petals while keeping the stem and leaf green.
You can also scale up the arrangement by grouping three or more individual tulips together instead of making one mini stem.
Pattern Abbreviations & Terminology
- ch: Chain
- st / sts: Stitch / Stitches
- sl st: Slip stitch
- sc: Single crochet
- hdc: Half double crochet
- Rnd / Row: Round or working row
- […]: Repeat instructions for the specified count

Step-by-Step Crochet Pattern
Step 1: Crochet the Three Small Inner Petals
These smaller petals form the enclosed center of the tulip. Make 3 petals using your chosen flower color.
For each petal, begin with a chain 7.
Round 1:
- Skip the first chain from the hook.
- Work 1 sc into the 2nd chain and place a stitch marker in this first working stitch.
- Work 1 sc in the 3rd chain.
- Work 1 hdc in the 4th chain.
- Work 1 hdc in the 5th chain.
- Work 1 sc in the 6th chain.
- Work 2 sl st into the 7th, final chain.
- Continue along the opposite side of the foundation chain while trapping the starting yarn tail underneath the stitches.
- Work 1 sc, 1 hdc, 1 hdc, 1 sc, then 2 sc into the final chain.
Working both sides of the chain creates a symmetrical petal outline.
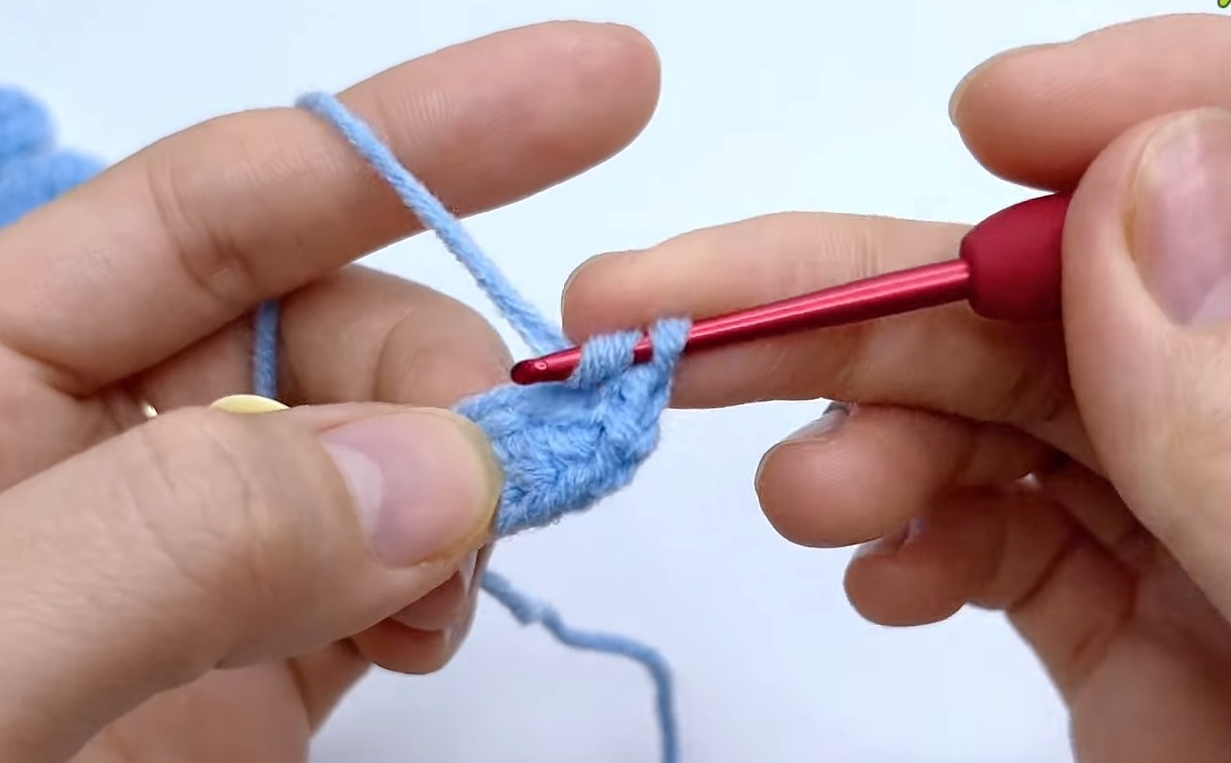
Round 2:
- Remove the stitch marker.
- Work 1 sl st into the very first stitch to join.
- Chain 1.
- Work 1 sc into the same space as the chain 1.
- Continue with 1 sc in each stitch around the entire petal edge.
- Join with 1 sl st to the first stitch.
- Fasten off and pull the working tail through to the back.
- Turn the petal right side out.
Repeat until you have 3 small petals.
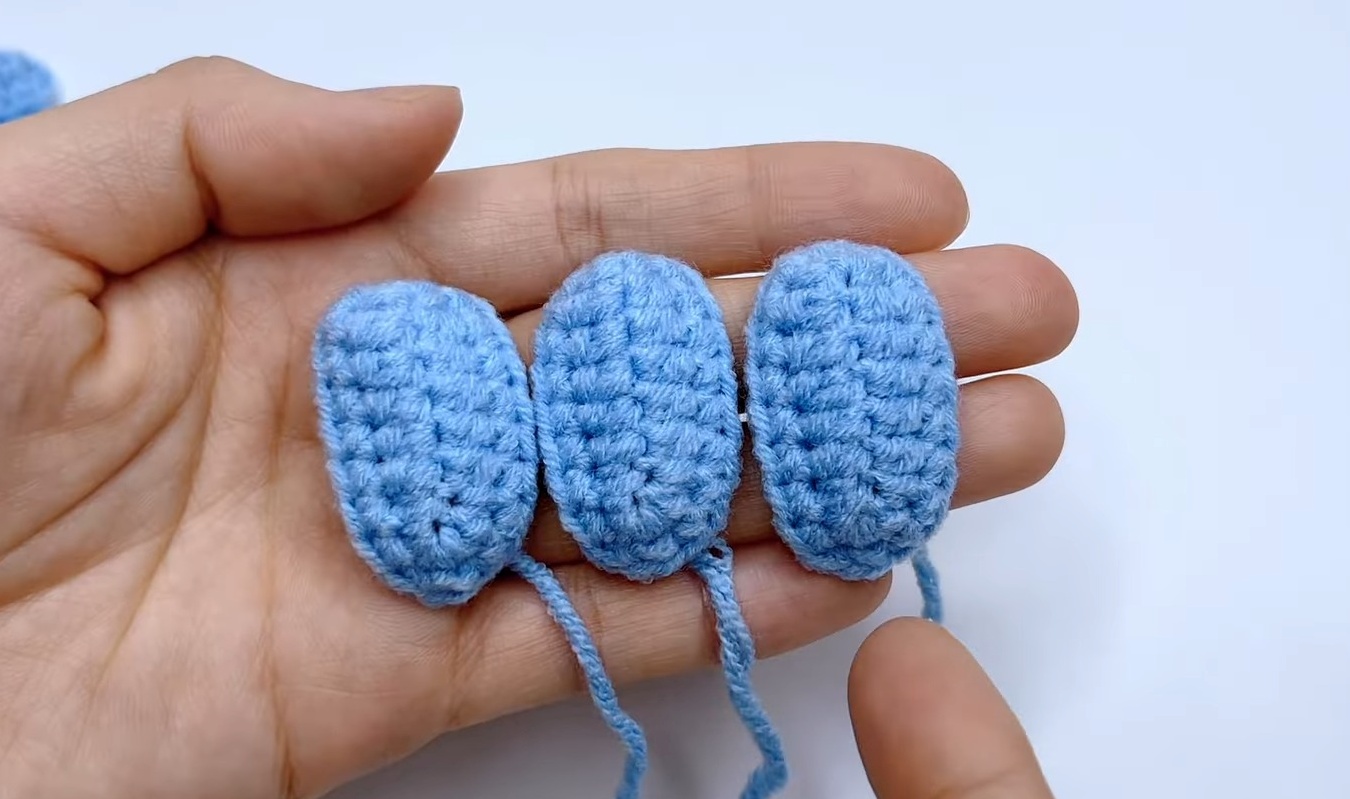
Step 2: Make Three Larger Outer Petals
Larger petals create the full outer shape of the tulip and sit around the smaller inner layer.
Make 3 large petals in the same main flower color.
Begin each one with chain 10.
Round 1:
- Skip the first chain.
- Work 1 sc in the 2nd chain and place a stitch marker there.
- Work 1 sc in the 3rd chain.
- Work 1 hdc in each of the next 5 chains.
- Work 1 sc in the next chain.
- Work 2 sl st into the 10th, final chain.
- Work back down the opposite side while concealing the starting yarn tail.
- Work 1 sc, followed by 1 hdc in each of the next 5 stitches.
- Work 1 sc, then 2 sc in the final stitch.
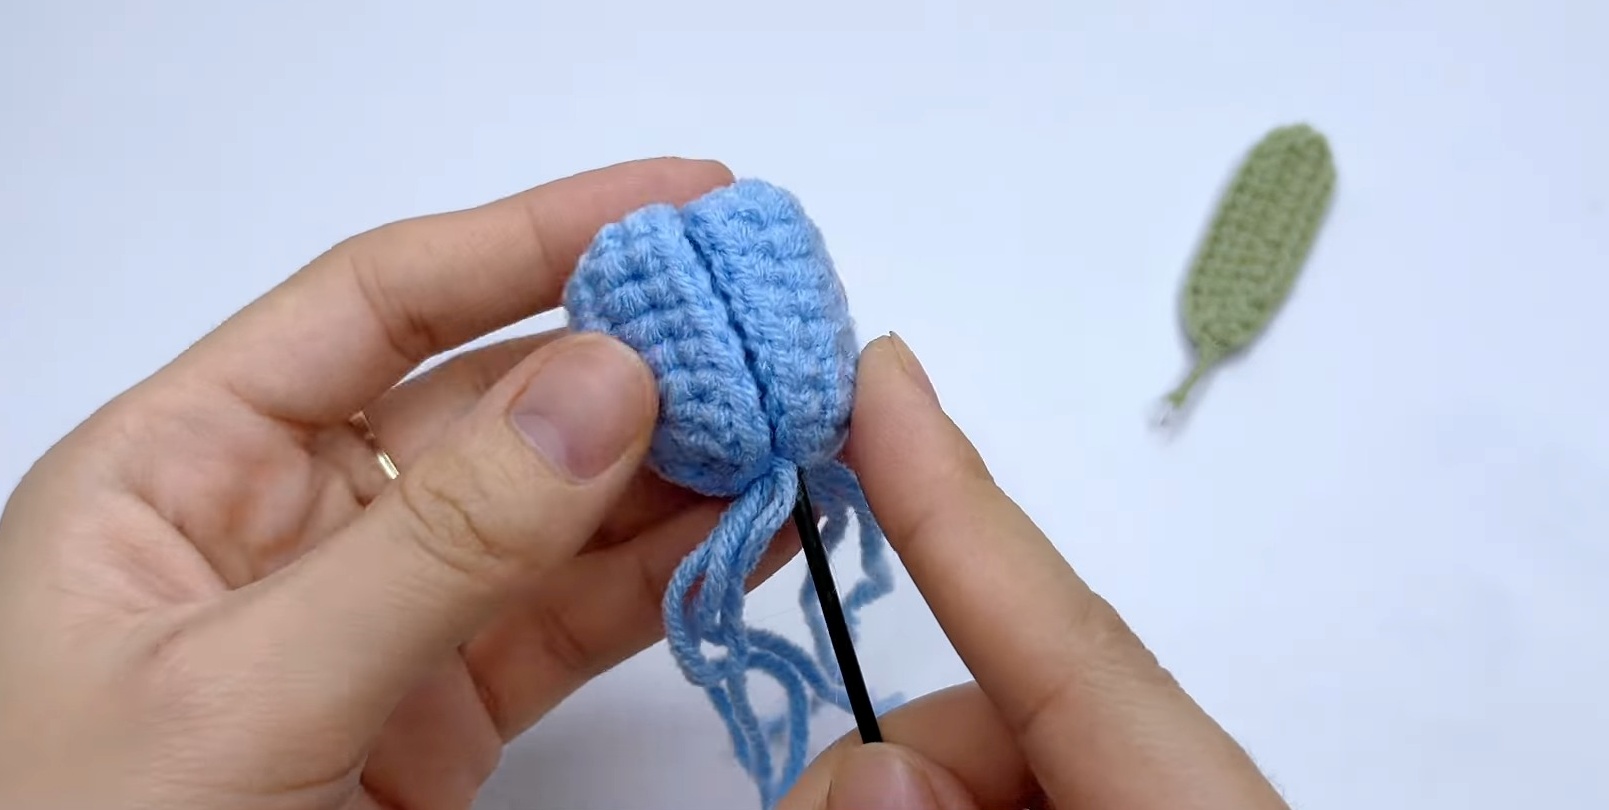
Round 2:
- Join with 1 sl st to the first stitch.
- Chain 1.
- Work 1 sc into the same space.
- Continue with 1 sc in each stitch around the entire perimeter.
- Join with 1 sl st to the first stitch.
- Fasten off and pull the tail to the back.
- Turn the petal right side out.
Set all three larger petals aside for assembly.
Step 3: Crochet the Wired Green Leaf
The leaf uses green yarn together with 0.4 mm floral wire, allowing it to be shaped after crocheting.
Begin with chain 13, enclosing the floral wire as you work.
Round 1:
- Skip the first chain.
- Work 1 sc into the 2nd chain while enclosing the wire inside the stitches. Place a stitch marker.
- Work 1 sc in the next chain.
- Work 1 hdc in each of the next 8 chains.
- Work 1 sc in the next chain.
- Work 2 sc in the final chain.
- Continue along the opposite side while working over the wire.
- Work 1 sc, then 1 hdc in each of the next 8 stitches.
- Work 1 sc, followed by 1 sc in the final stitch.
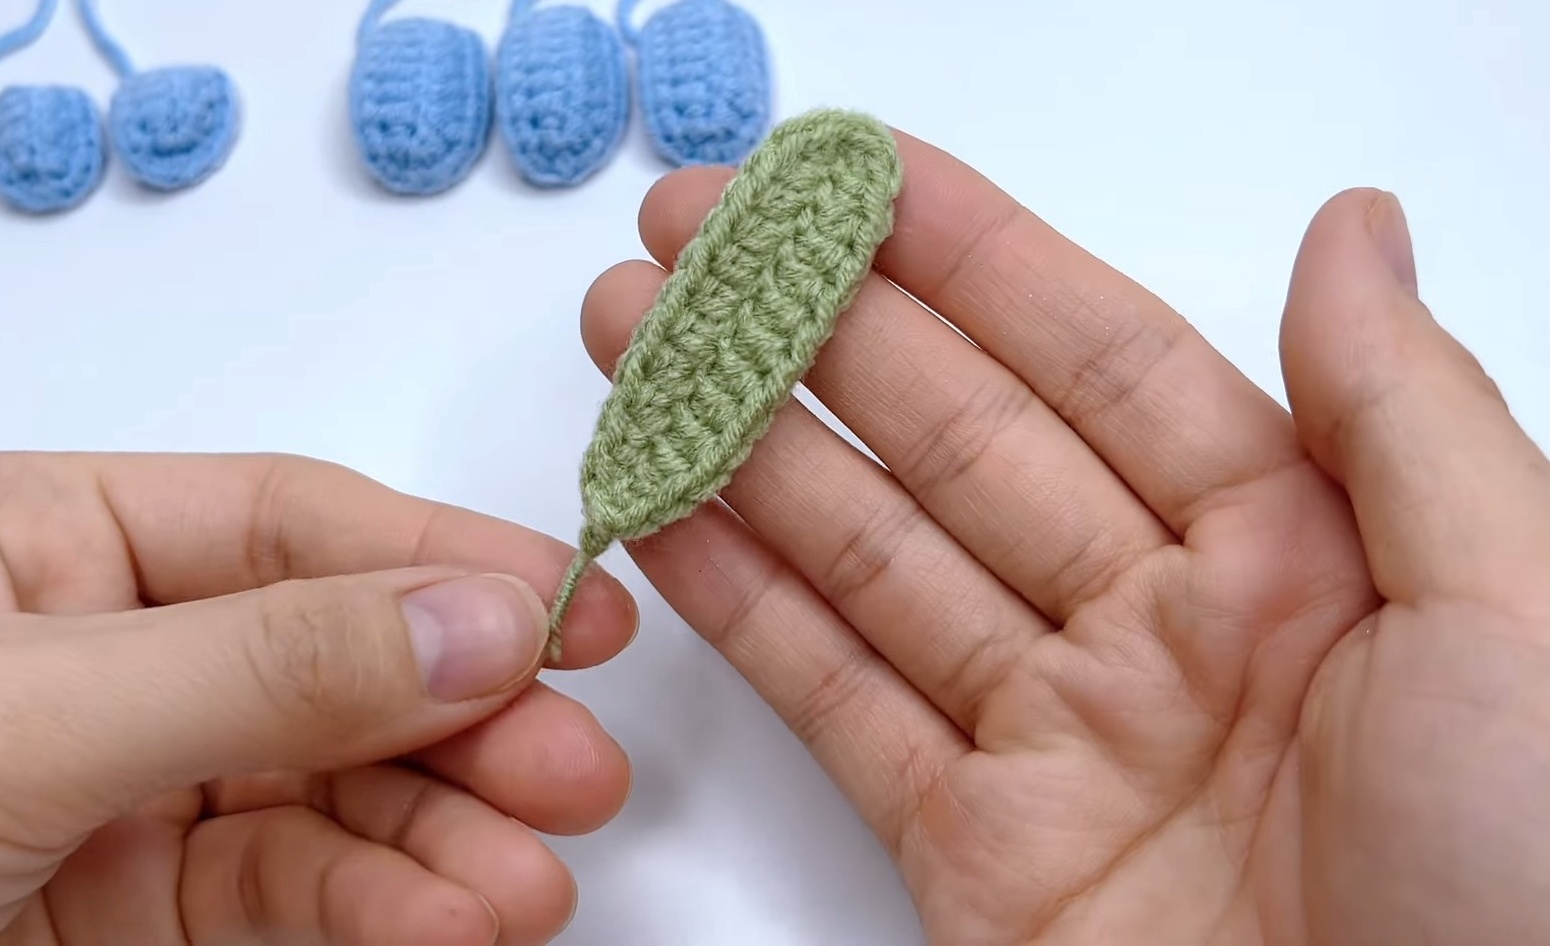
For finishing:
- Remove the stitch marker.
- Pass the working yarn between the two wire ends.
- Make 1 sl st to join.
- Chain 1 to lock the stitch and cut the yarn.
- Wrap the yarn tail tightly around the base wire structure.
- Tuck the end between the wire strands.
- Trim excess wire.
The covered wire lets you position the finished leaf naturally along the stem.
Assemble the Mini Tulip
Step 4: Form the Closed Inner Bud
Take the 3 small petals and overlap them sequentially in a circular arrangement.
Each petal should cover the outer single-crochet border of the petal before it. Once the three pieces overlap into a closed center, use hot glue to secure their lower halves.
This creates the compact inner bud that will support the remaining flower layers.
Step 5: Secure the Stem Inside the Bud
Take the thicker stem wire and bend its top tip over to create a small anchor.
Insert this bent end upward through the center base of the assembled small-petal bud. The bent tip helps keep stem wire securely positioned inside flower.
Step 6: Add the Three Large Outer Petals
Apply hot glue directly over the seams between the small petals.
Attach the 3 large petals evenly around outside of the bud. Position them uniformly so they fill out the tulip blossom.
Once outer petals are arranged, add a small amount of glue at the base junction to secure flower firmly to stem wire.
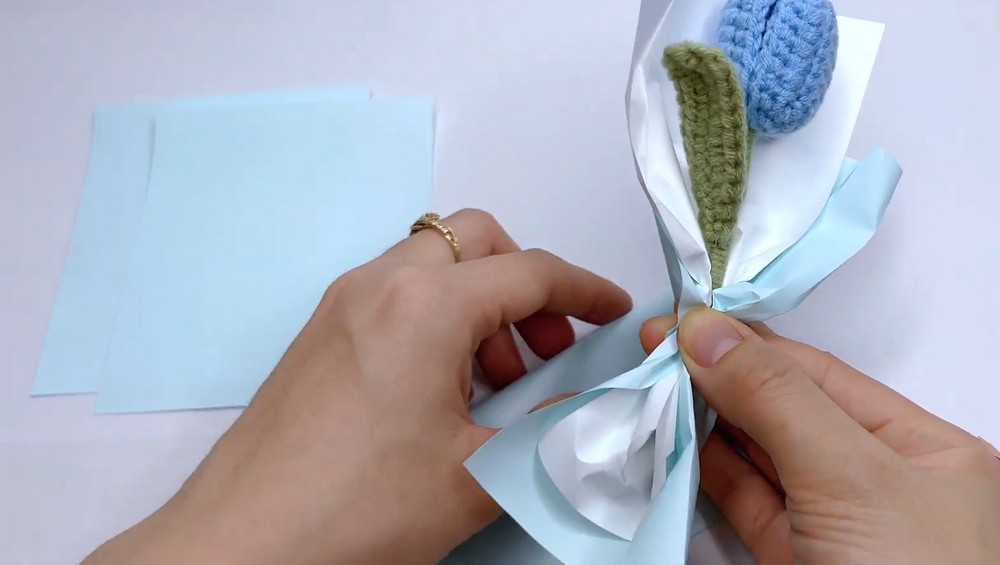
Step 7: Wrap the Stem and Attach the Leaf
Wrap green yarn downward around stem wire, covering loose yarn tails as you go.
Position finished leaf approximately two-thirds of the way up the stem.
Wrap green yarn over its base tail to hold leaf permanently in place. Add a drop of glue at the bottom end of the wrapped stem to finish the covering securely.
Step 8: Wrap the Finished Tulip as a Mini Bouquet
Cut stem wire to your desired length.
For a decorative bouquet finish:
- Layer white and colored wrapping paper diagonally around the tulip.
- Pinch and fold the paper texture around the base.
- Arrange the wrapped layers neatly around flower and stem.
- Tie a decorative bow around stem using ribbon.
Your layered petals, wired leaf, and wrapped stem now come together as a finished miniature tulip bouquet.

Customizing Your Tulip Bouquet
Changing petal color is the easiest way to create different versions of this design. Try pink, yellow, red, or purple petals while keeping green stem and leaf for a classic floral appearance.
For a larger arrangement, make several individual tulips and group three or more stems together before wrapping them. This creates a fuller bouquet while keeping the same petal construction for each flower.
Your crochet mini tulip bouquet is now complete, ready to display, gift, or turn into a tiny handmade floral accessory.