Crochet Cat Earphone Case Pattern – Step-by-Step
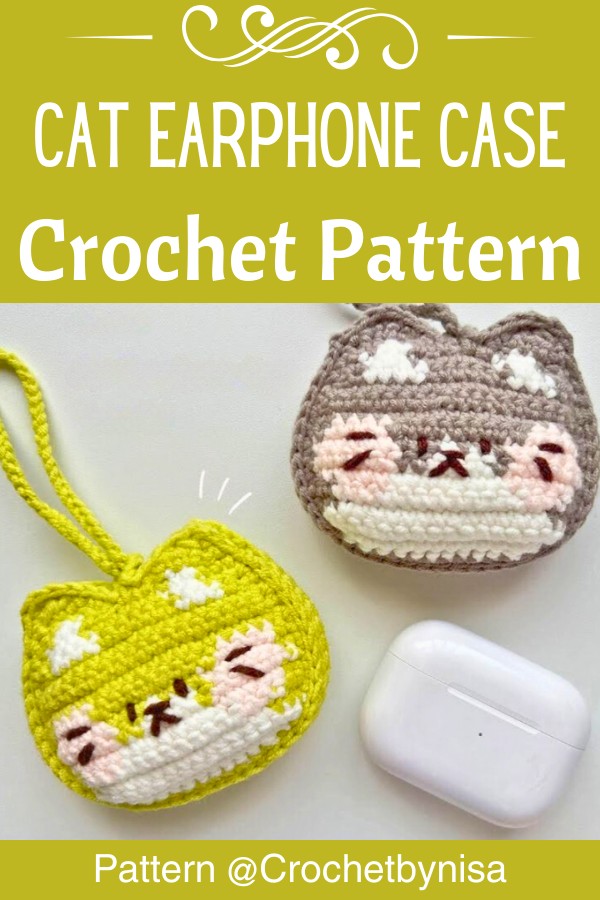
Looking for a cute way to protect your earphone case? This crochet cat cover combines colorwork, pointed ears, and a hanging loop in one compact handmade accessory.
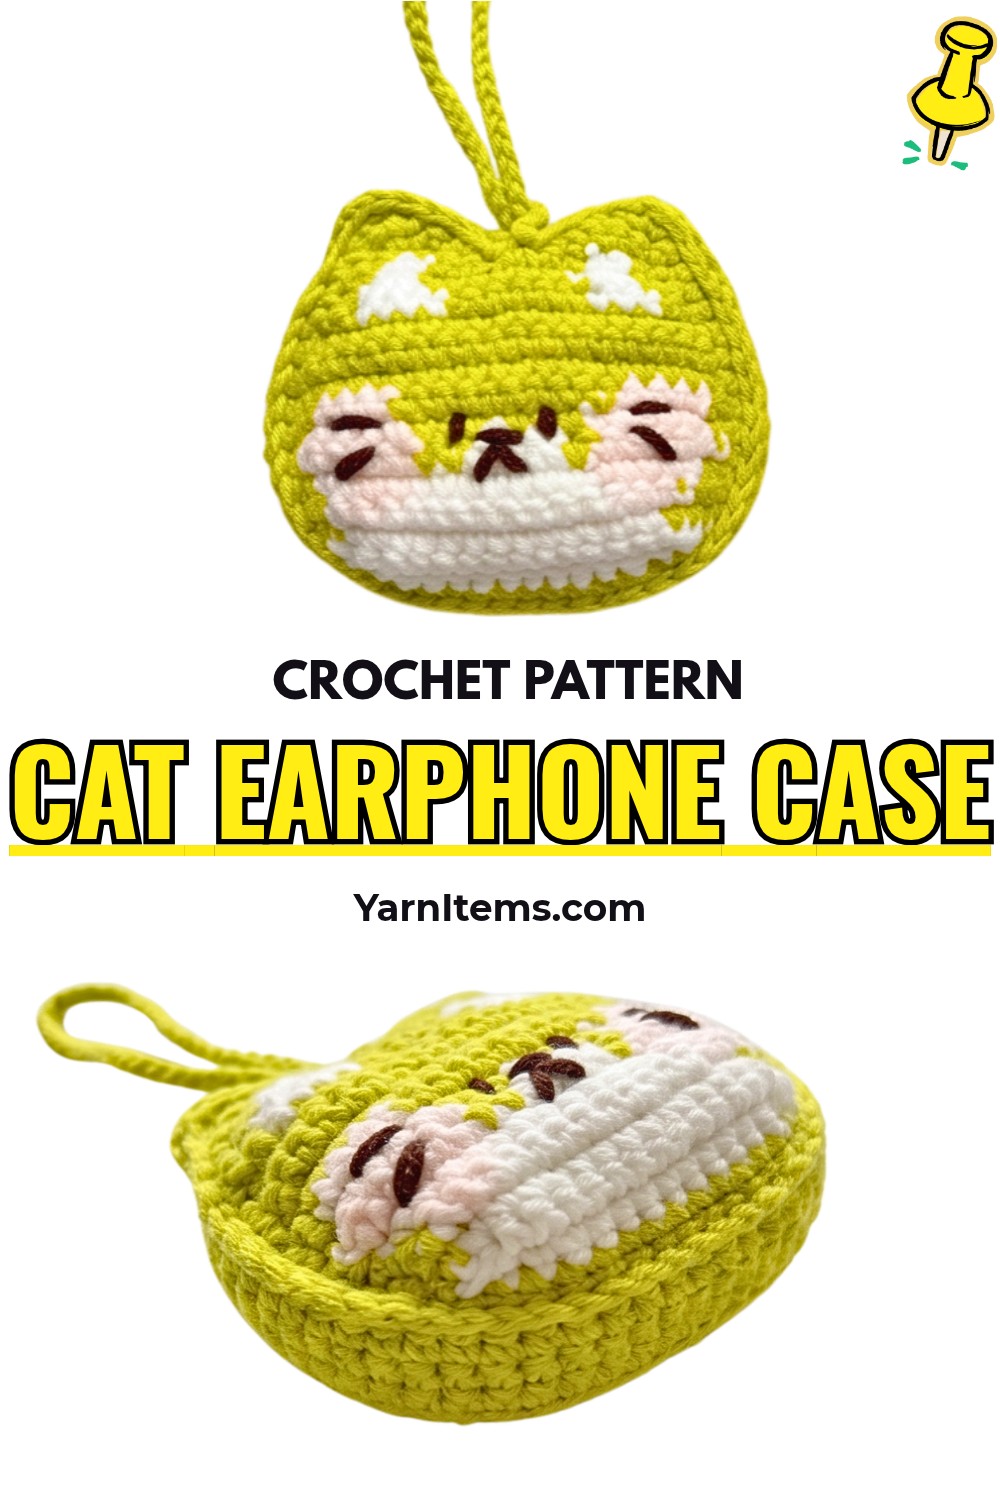
Small earphone cases are easy to misplace, but this crochet cat cover gives yours a recognizable shape while adding a soft handmade layer. Flat-row crochet keeps construction straightforward, while green, white, and pink sections create the cat face.
This tutorial covers yarn and hook requirements, row-by-row colorwork, ear shaping, the back panel, facial embroidery, and final seaming. You will also find simple ways to adjust the loop and personalize the cat expression.
Credit Crochetbynisa
Materials & Tools
Prepare all yarn colors and basic tools before beginning the panels.
- 5-ply milk cotton or similar yarn:
- Bud Green: Main color
- White: Muzzle and facial colorwork
- Light Pink: Cheeks
- Chestnut/Brown: Facial embroidery
- 3 mm crochet hook
- Tapestry needle: For weaving ends and embroidering the face
- Scissors
- Optional small button or snap fastener: If you want additional closure
Finished Size & Customization
This case is designed to fit standard wired or wireless earphone charging cases measuring approximately 6–7 cm wide.
You can personalize the finished case without changing its basic construction:
- Replace Bud Green with pastel blue, lavender, or yellow.
- Adjust the hanging loop length to create a keychain charm, wristlet, or bag accessory.
- Change the embroidered face to sleeping eyes, winking eyes, or different cheek colors.
Pattern Abbreviations
- ch: Chain
- sc: Single crochet
- inc: Increase – 2 sc worked into the same stitch
- dec / sc2tog: Single crochet decrease – work 2 sc together
- hdc2tog: Half double crochet decrease
- sl st: Slip stitch
- st(s): Stitch(es)
- [#]: Total stitch count at end of row

Pattern Note
This case is worked flat in rows, back and forth, rather than in the round. Unless otherwise specified, chain 1 and turn at the end of every row.
Step-by-Step Crochet Cat Earphone Case Instructions
Part A: Crochet the Front Panel
The front panel creates the visible cat face, including the white muzzle, pink cheeks, green head, and pointed ear shaping. Follow each color section carefully because these rows build the facial design directly into the fabric.
Step 1: Build the Foundation
Begin with White yarn.
Chain 12.
This foundation establishes the width of the facial panel. Keep your chain tension even because later rows depend on this starting width.
Step 2: Work Row 1
Start building the white base from the foundation chain.
Work: 1 sc in 2nd ch from hook, then 1 sc in each of the remaining 10 ch. [11 sts]
Check your count before moving forward. You should have 11 stitches across the row.
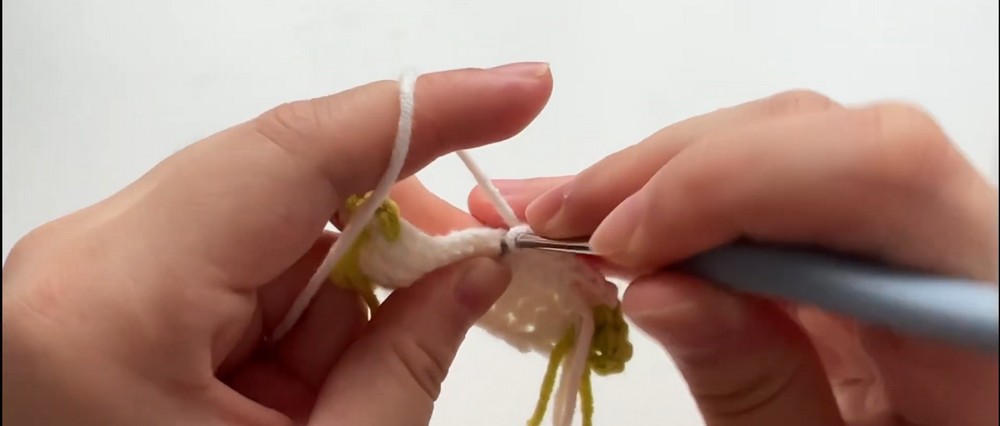
Step 3: Widen Row 2
Begin increasing both ends to create the gradual rounded shape of the face.
Ch 1, turn.
Work: 3 sc in first st, 9 sc, 3 sc in last st. [15 sts]
The extra stitches at both ends expand the panel while the center remains straight.
Step 4: Complete Row 3 and Change Color
Continue widening the facial shape.
Ch 1, turn.
Work: 3 sc in first st, 13 sc, 3 sc in last st. [19 sts]
For the color change, drop White and join Bud Green on the final pull-through of the last stitch.
Do not cut White immediately if you plan to carry it. Otherwise, fasten it off and reattach it when needed.
Step 5: Establish Green Edges and White Center
Begin the main cat colorwork.
Ch 1, turn.
Work: 3 sc Green, 13 sc White, 3 sc Green. [19 sts]
Keep the white center aligned because it forms the main facial area.
Step 6: Add Pink Cheeks
The next rows begin developing the colored facial details.
Ch 1, turn.
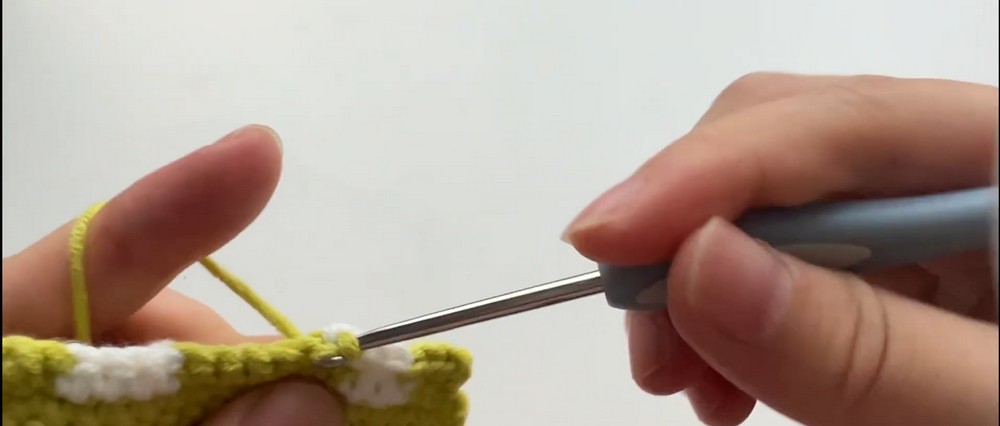
Work: inc Green, 1 sc Green, 3 sc Pink, 9 sc White, 3 sc Pink, 1 sc Green, inc Green. [21 sts]
Both pink sections should sit symmetrically around the white center.
Step 7: Continue Facial Colorwork
Keep the same 21-stitch width while changing colors across the face.
Ch 1, turn.
Work: 2 sc Green, 5 sc Pink, 7 sc White, 6 sc Pink, 1 sc Green. [21 sts]
Watch the transition points carefully so pink sections remain positioned on both sides of the white area.
Step 8: Refine the Cheek and Muzzle Shape
Continue the color arrangement.
Ch 1, turn.
Work: 1 sc Green, 6 sc Pink, 2 sc Green, 4 sc White, 1 sc Green, 6 sc Pink, 1 sc Green. [21 sts]
The smaller white section begins narrowing the visible muzzle area.
Step 9: Continue the Color Sections
Work the next row without changing the overall width.
Ch 1, turn.
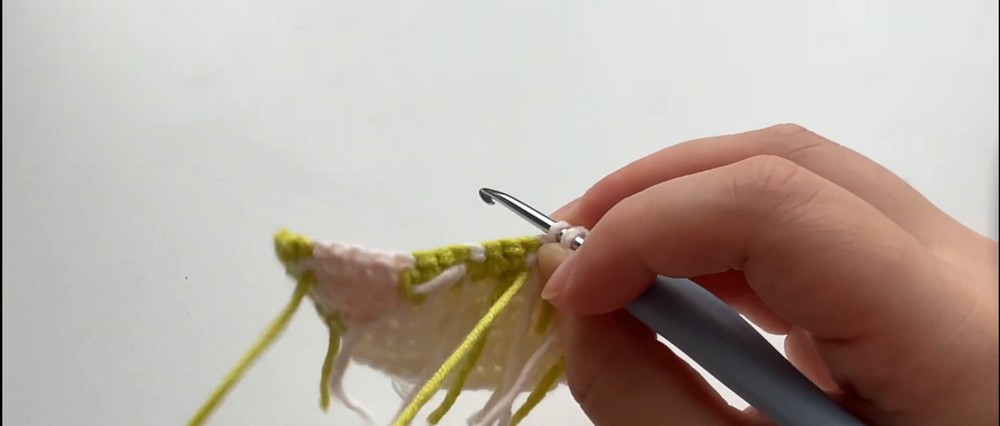
Work: 2 sc Green, 5 sc Pink, 3 sc Green, 1 sc White, 3 sc Green, 6 sc Pink, 1 sc Green. [21 sts]
Keep each color section in its specified position rather than carrying color changes loosely across the front.
Step 10: Return to Solid Green
Complete the facial colorwork and prepare for ear shaping.
Ch 1, turn.
Work: 21 sc in solid Bud Green. [21 sts]
At this point, the colorful face section is complete and the upper head can begin taking shape.
Step 11: Begin Left Ear Shaping
Reduce the width to start forming the pointed ear sections.
Ch 1, turn.
Work: 1 sc2tog, 17 sc, 1 sc2tog. [19 sts]
The decreases at both outer edges bring the row inward evenly.
Step 12: Work Solid Green
Continue upward with the reduced width.
Ch 1, turn.
Work: 19 sc Green. [19 sts]
Keep the row straight before introducing the next color details.

Step 13: Add White Inner-Ear Sections
Introduce white sections while continuing to taper the shape.
Ch 1, turn.
Work: 1 sc2tog, 1 sc Green, 4 sc White, 6 sc Green, 3 sc White, 1 sc Green, 1 sc2tog. [17 sts]
Check that both white sections are positioned toward their respective ear areas.
Step 14: Continue Inner-Ear Colorwork
Maintain the pointed-ear design while keeping the color placement visible.
Ch 1, turn.
Work: 3 sc Green, 3 sc White, 6 sc Green, 3 sc White, 2 sc Green. [17 sts]
The white sections now sit inside the developing ear shapes.
Step 15: Shape the Ear Peaks
Begin the final taper of both ears.
Ch 1, turn.
Work the decreases and color sections needed to shape the left and right ear peaks: 1 sc2tog, work the inner-ear color transitions according to the tutorial, then finish with the matching decrease at the opposite edge.
Keep both sides balanced so the ear points develop evenly.
Step 16: Finish the Ear Points
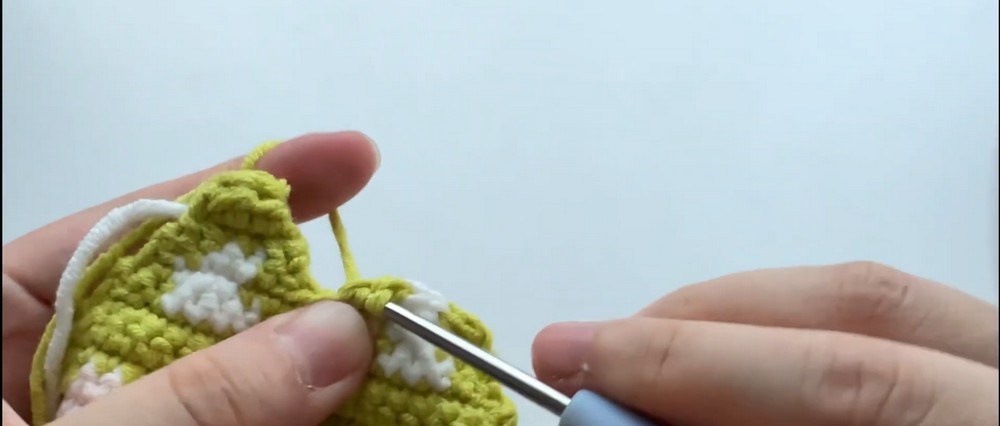
Continue working decreases along the outer slopes of the cat ears through Rows 16–17.
The goal is cleanly tapered ear points rather than blunt corners.
Fasten off and weave in the ends once both ear peaks are complete.
Part B: Crochet the Back Panel
Step 17: Repeat the Panel in Solid Green
The back panel uses the same basic construction as the front but removes the facial colorwork.
Repeat Rows 1 through 17 using solid Bud Green yarn throughout.
Do not add the white muzzle or pink cheek sections to this panel.
Keeping the row structure consistent with the front panel ensures both pieces will align during assembly.
Step 18: Add the Hanging Loop
Create the loop after reaching the top center peak between the ears.
Chain approximately 50 ch.
Bring the chain back down and anchor it with a sl st to form the hanging or closure loop.
Fasten off securely.
The loop can later hold a keyring or clip, or simply provide a convenient way to hang the case.
Part C: Embroider the Cat Face
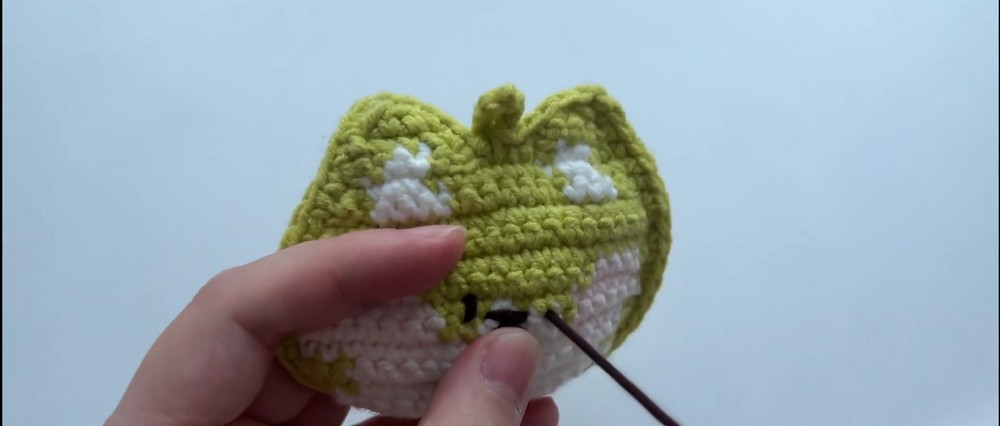
Step 19: Add Eyes, Nose, and Whiskers
Use Chestnut/Brown yarn and your tapestry needle for the facial details.
Embroider:
- Two simple closed eyes or curved sleeping lashes above the pink cheeks
- A small inverted triangle or dot for the nose
- Short whiskers extending outward from the nose area
Keep both eyes positioned at similar heights for a balanced expression.
For another personality, replace closed eyes with a wink or adjust the cheek colors.
Part D: Assemble the Earphone Case
Step 20: Align Front and Back Panels
Place the completed front and back panels directly on top of each other with wrong sides facing inward.
This means the clean front stitches should face outward on both sides.
Before seaming, align the bottom corners, side edges, and pointed ears.
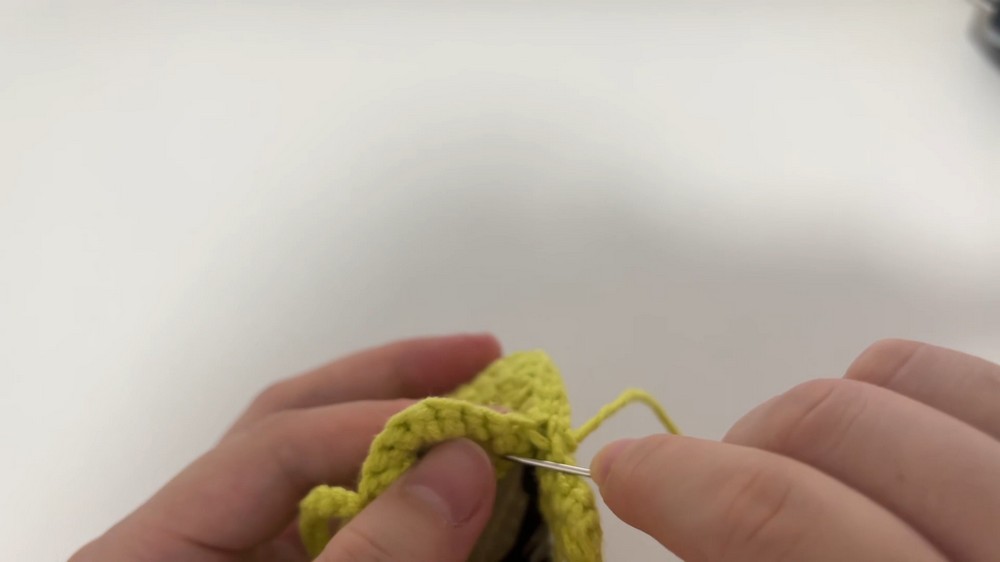
Step 21: Seam Around the Case
Attach Bud Green yarn at the bottom corner.
Work either single crochet or slip stitches evenly around the outer edge through both thicknesses.
Continue upward along both sides and around the cat ears.
Work evenly around the curves and ear points so the finished border does not pull the panels out of alignment.
Step 22: Keep the Top Opening Clear
Do not close the top center section between the ears.
This opening allows the earphone charging case to slide in and out easily.
Once the side and lower edges are securely joined, fasten off and hide loose yarn tails inside the case.
Ways to Customize Your Cat Case
Once the basic case is complete, small changes can give it a completely different look.
For different colors: Replace Bud Green with pastel blue, lavender, or yellow.
For different uses: Lengthen or shorten the approximately 50-chain loop to suit a keychain, wristlet, or bag attachment.
For different expressions: Use sleeping eyes, winking eyes, alternate cheek colors, or different embroidered nose shapes.