Crochet Hello Kitty Candy Amigurumi Keychain Pattern
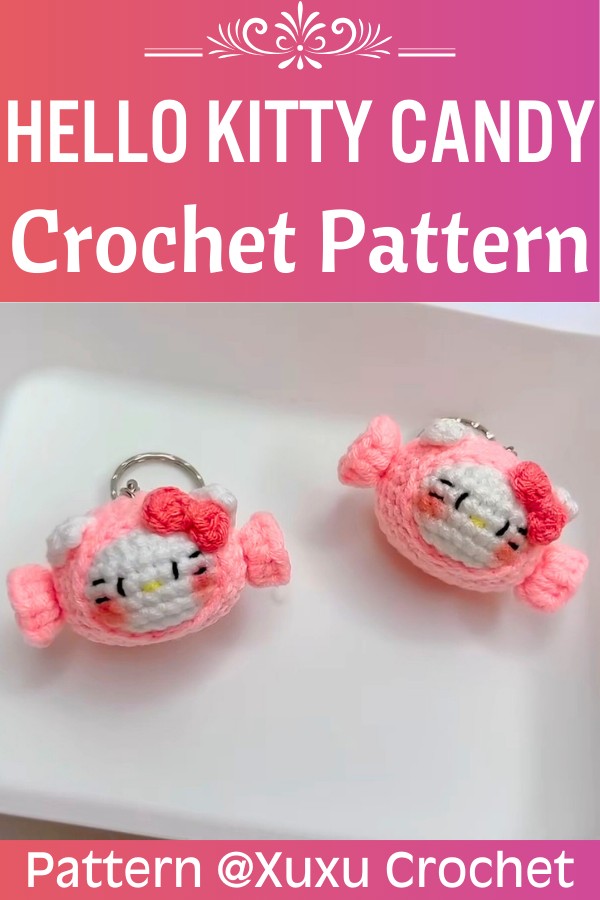
Here’s a sweet Hello Kitty candy keychain crochet pattern that combines simple amigurumi shaping with tiny ears, frilled wrapper ends, and a cute pink bow.
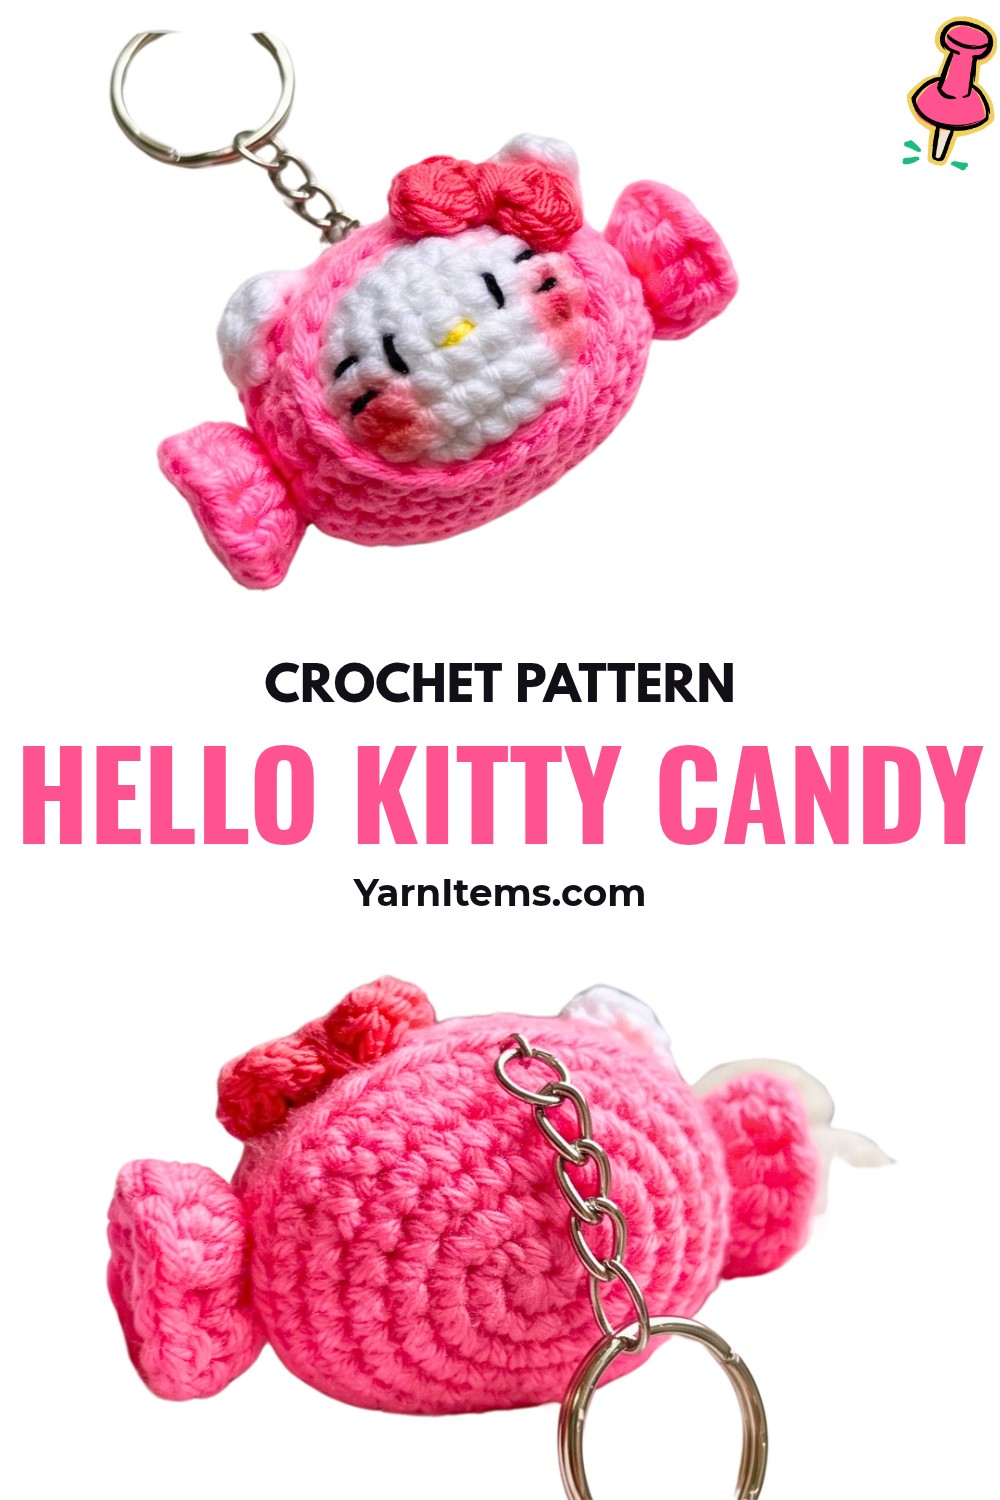
Miniature crochet designs can be especially satisfying when every small detail contributes to the finished character. This crochet candy turns a simple rounded center into a playful Hello Kitty-inspired charm that works beautifully on bags, keys, or as a small handmade gift.
You’ll crochet the white candy core first, cover it with its light pink wrapper, then add frills, ears, bow, and embroidered facial details. This crochet pattern also explains how to position each feature and finish the piece neatly, so you can follow its construction from beginning to end.
Credit Xuxu Crochet
Materials & Tools
- Yarn: Milk Cotton yarn (50g) in White, Light Pink, Dark Pink, Black, and Yellow
- Crochet Hook: 2.5 mm
- Notions: Stitch marker, yarn needle, polyester fiberfill stuffing, hot glue gun, blush for cheeks, and a keychain ring
Finished Size & Customization
Finished candy measures approximately 6–7 cm long, making it a practical size for a keychain or bag charm.
For different versions, replace the light pink wrapper with pastel blue, yellow, or mint green to create a colorful candy collection. Changing ribbon color can also coordinate each charm with seasonal themes or different outfits.
Pattern Abbreviations & Terminology
- ch: Chain
- sl st: Slip stitch
- sc: Single crochet
- hdc: Half double crochet
- dc: Double crochet
- inc: Increase – 2 sc in the same stitch
- dec: Decrease – 2 sc worked together using the front loops only
- (…): Repeat instructions between parentheses for the specified number of times or to the end of the round

Step-by-Step Crochet Pattern
Step 1: Build the White Candy Core
Begin with white yarn and work in a continuous spiral without joining rounds. Increasing gradually creates the rounded candy shape, while the later decreases bring the opening inward for stuffing and closure.
- Round 1: Make a magic ring and work 6 sc into the ring. Pull tight to close. (6 sts)
- Round 2: Work 1 inc in each stitch around. (12 sts)
- Round 3: Work (1 sc, 1 inc) around. (18 sts)
- Round 4: Work (1 sc, 1 inc, 1 sc) around. (24 sts)
- Round 5: Work (3 sc, 1 inc) around. (30 sts)
- Rounds 6-9: Work 1 sc in each stitch around. (30 sts each round)
- Round 10: Work (3 sc, 1 dec) around. (24 sts)
- Round 11: Work (1 sc, 1 dec, 1 sc) around. (18 sts)
Before closing the core, firmly fill it with polyester fiberfill so it holds its rounded shape.
- Round 12: Work (1 sc, 1 dec) around. (12 sts)
Cut yarn, leaving a tail. Thread the tail onto a yarn needle and weave through the front loops of all 12 remaining stitches. Pull tightly until the opening closes completely.
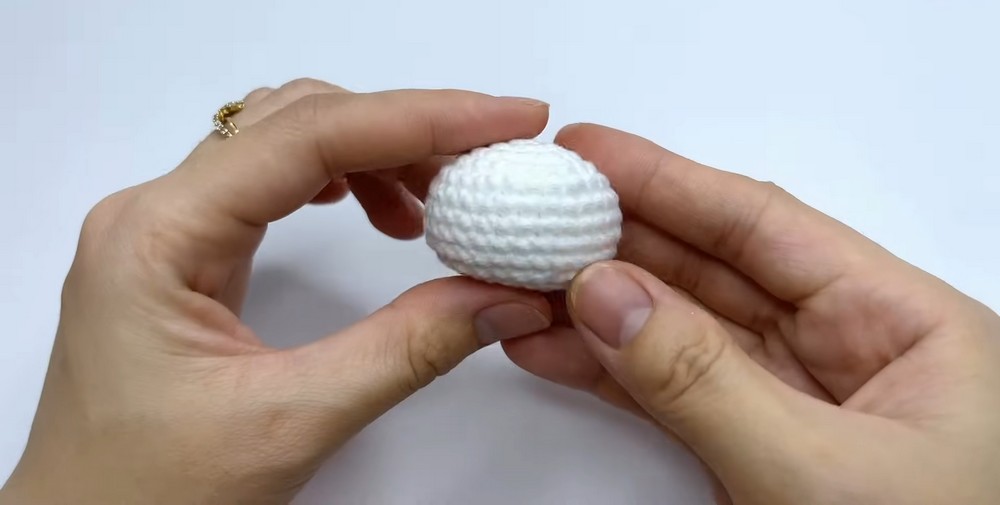
Step 2: Cover the Core with the Pink Wrapper
Switch to light pink yarn for wrapper. Work in continuous spiral rounds, following the same increase sequence used for candy core.
- Round 1: Make magic ring and work 6 sc. (6 sts)
- Round 2: Work 1 inc in every stitch. (12 sts)
- Round 3: Work (1 sc, 1 inc) around. (18 sts)
- Round 4: Work (1 sc, 1 inc, 1 sc) around. (24 sts)
- Round 5: Work (3 sc, 1 inc) around. (30 sts)
- Rounds 6–11: Work 1 sc in each stitch around. (30 sts each round)
Now place stuffed white candy core inside pink wrapper. Align back seams and center white core carefully before beginning decreases.
- Round 12: Work (3 sc, 1 dec) around. (24 sts)
- Round 13: Work (1 sc, 1 dec, 1 sc) around. (18 sts)
For finishing, cut yarn. Skip one stitch, insert needle into next stitch, then go back through loop of final stitch. Pull gently to minimize step-down offset and weave remaining tail into wrapper.
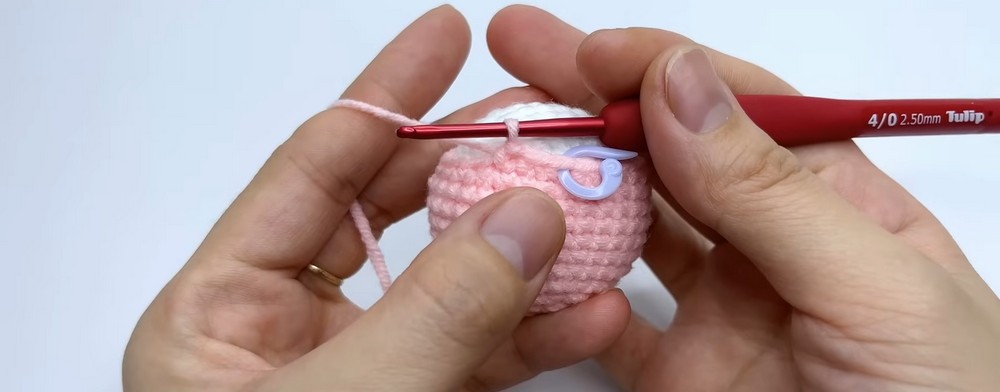
Step 3: Crochet Two Frilled Candy Ends
Create two light pink frilled pieces to give candy its twisted-wrapper appearance.
For each frill:
- Round 1: Make magic ring and work 6 sc. (6 sts)
- Round 2: Join with sl st to first stitch and ch 2.
- In same stitch, work 1 hdc and 1 dc together as a cluster.
- Repeat (1 hdc, 1 dc) cluster into each of remaining 5 stitches, creating 6 frill clusters total.
- Sl st to first stitch, fasten off, and leave long tail for gluing.
Make 2 frills altogether.
Step 4: Shape Two Tiny Hello Kitty Ears
White yarn forms two small pointed ears.
For each ear:
- Leave starting tail for sewing.
- Chain 3.
- Skip first chain from hook.
- Work 1 sc into second chain.
- Work 1 dc into final chain.
- Chain 1 to secure.
- Cut yarn, leaving long sewing tail.
Make 2 ears.
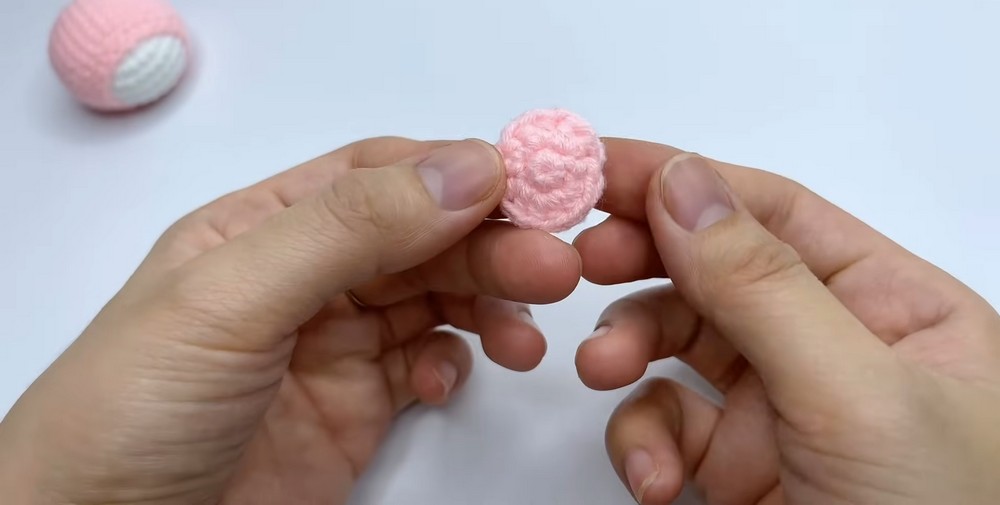
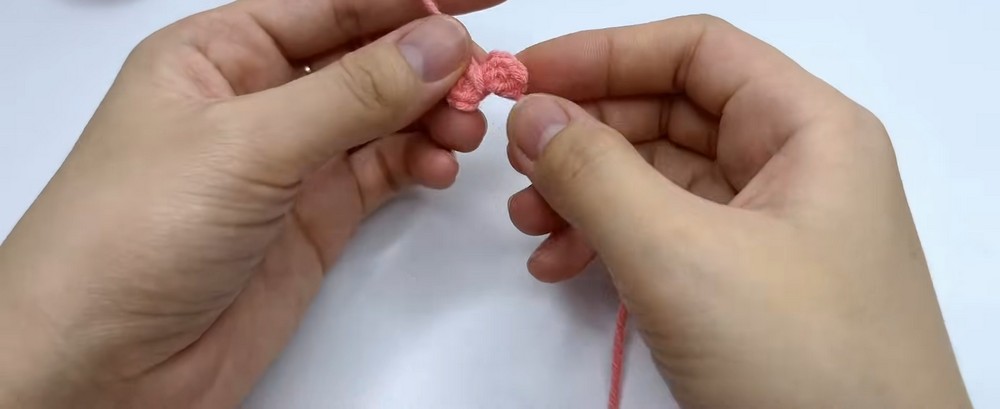
Step 5: Form the Dark Pink Bow
Use dark pink yarn to create small bow beside one ear.
- Make magic ring and ch 2.
- Inside ring, work 1 hdc, ch 2, 1 sl st to complete first loop.
- Ch 2, then work 1 hdc, ch 2, 1 sl st to complete second loop.
- Pull magic ring tight.
- Wrap tail firmly around bow center several times.
- Tie secure knot at back and trim excess ends.
Keep bow center tightly wrapped so both loops retain their shape.
Assembly & Finishing
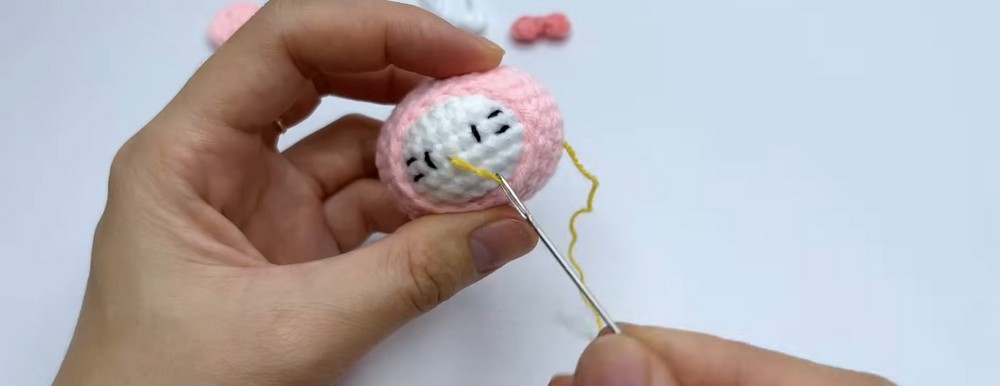
Step 6: Embroider Hello Kitty’s Face
Use black embroidery thread to add two small eyes horizontally across middle rows. Keep them approximately 3 stitches apart.
Add whiskers on both sides of eyes, then place small yellow nose directly between them.
Because candy is only 6–7 cm long, keep embroidery stitches small and compact to maintain balanced facial proportions.
Step 7: Sew on the Ears
Position white ears near top of wrapper across Rows 2-3, with each ear spanning approximately 3 stitches wide.
Sew them down securely using their long tails, then hide remaining yarn ends inside wrapper.
Step 8: Add the Bow
Place dark pink bow diagonally beside one ear. Glue or sew it into position, depending on your preferred finishing method.
Check its angle before securing it so bow sits naturally beside ear rather than directly underneath it.
Step 9: Attach the Candy Frills
Curl both light pink frills inward before attaching them.
Use hot glue to secure one frill to each side of main candy wrapper, beginning around Row 4 and extending outward.
Allow adhesive to set securely while maintaining inward curl of each end.
Step 10: Finish the Face and Add Keychain Hardware
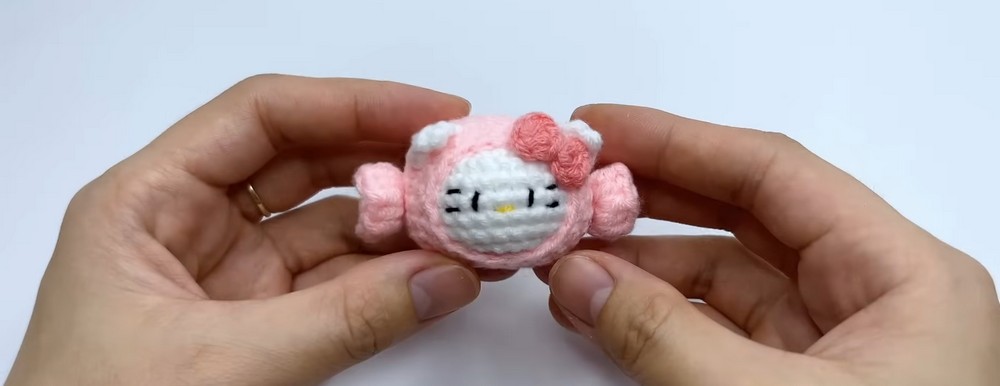
Give cheeks their soft finishing touch by lightly applying pink blush beneath eyes.
Finally, attach metal keychain ring securely to top center of wrapper. Check attachment point carefully before placing candy on keys or bag so ring remains firmly connected.
Finished Hello Kitty Candy Charm
Your Hello Kitty candy amigurumi keychain is now ready to use or gift. Its miniature size makes it especially suitable for decorating bags, keys, pouches, or other everyday accessories, while alternate wrapper and bow colors let you create an entire collection of candy-inspired charms.