Crochet Moon and Stars Trinket Dish Pattern
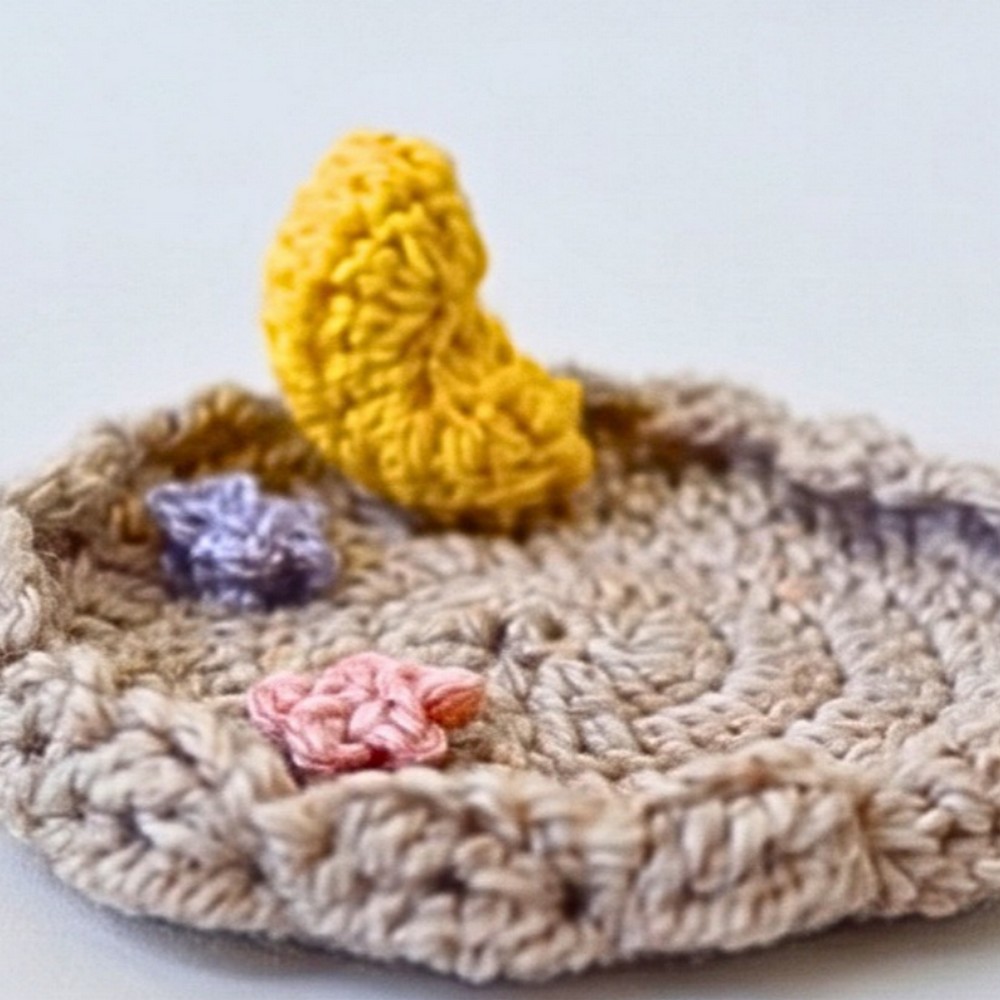
Want a dreamy crochet trinket dish? A round base, puffy cloud border, crescent moon, and tiny stars create a miniature night sky for your jewelry.
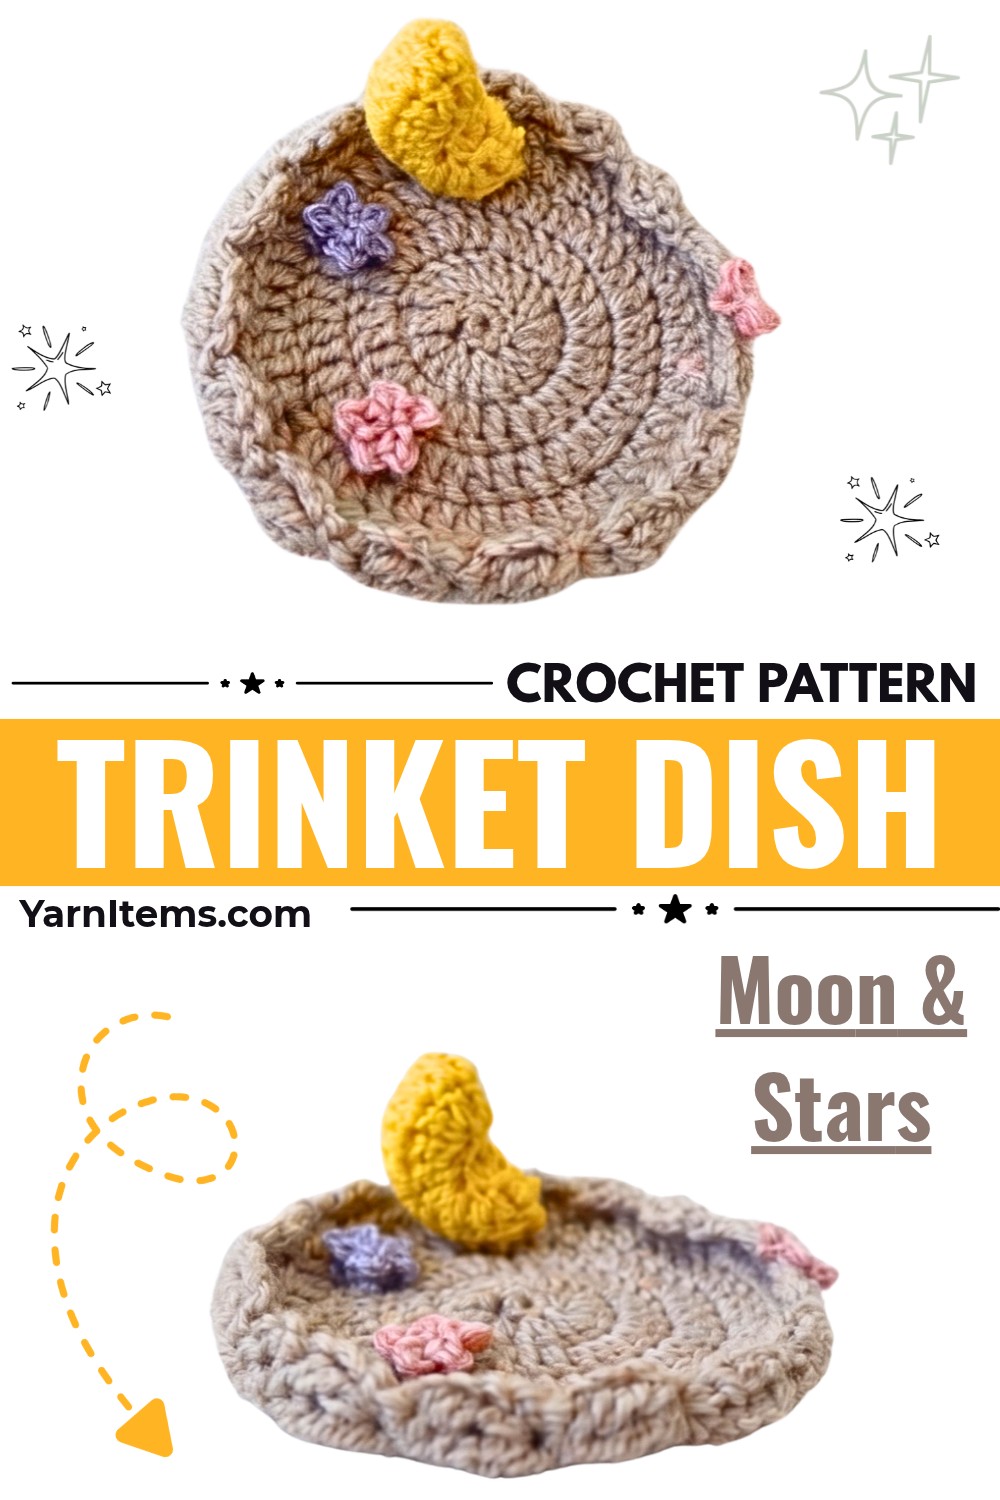
Dreamy details turn this little crochet dish into more than a place to drop your rings and earrings. A round crocheted base becomes the open sky, while a raised cloud border, folded crescent moon, and scattered stars create a playful nighttime scene around the edge.
Starting with the circular base, you’ll add the unusual puff-stitch cloud strand before making the tiny crochet stars and crescent moon. Fold the moon and lightly stuff it with scrap yarn for extra dimension, then sew or attach the border and decorations with hot glue, depending on your preferred finish.
Credit Crochet with ice
Materials & Tools Needed
- Yarn:
- Size 4 medium-weight yarn for the base
- Yellow yarn for the moon
- Scrap yarn for stuffing the moon
- Crochet Hooks:
- 4.0 mm for the base
- 3.5 mm for the moon, stars, and clouds
- Yarn or Sewing Needle
- Scissors
- Hot Glue Gun: Optional; the pieces can also be sewn together
Finished Size & Customization
The finished dish is a small, useful size for holding rings, earrings, and other tiny trinkets.
For a night-sky variation, use a dark navy or similarly deep color for the base. You can also add more stars or rearrange them to create a different sky around the dish.
Pattern Abbreviations
- MR – Magic Ring
- ch – Chain
- sc – Single Crochet
- dc – Double Crochet
- dc inc – Double Crochet Increase
- sl st – Slip Stitch
- st(s) – Stitch(es)
Bubble Stitch / Puff
The Bubble Stitch used for the cloud border is made from 3 unfinished treble crochets in the same space. Wrap the yarn twice around the hook, pull through the stitch, pull through two loops, and pull through two loops again. Repeat this process two more times in the same stitch until 4 loops remain on the hook, then pull through all 4 loops at once.
Crochet the Round Base
Use the 4.0 mm hook and your main yarn color.
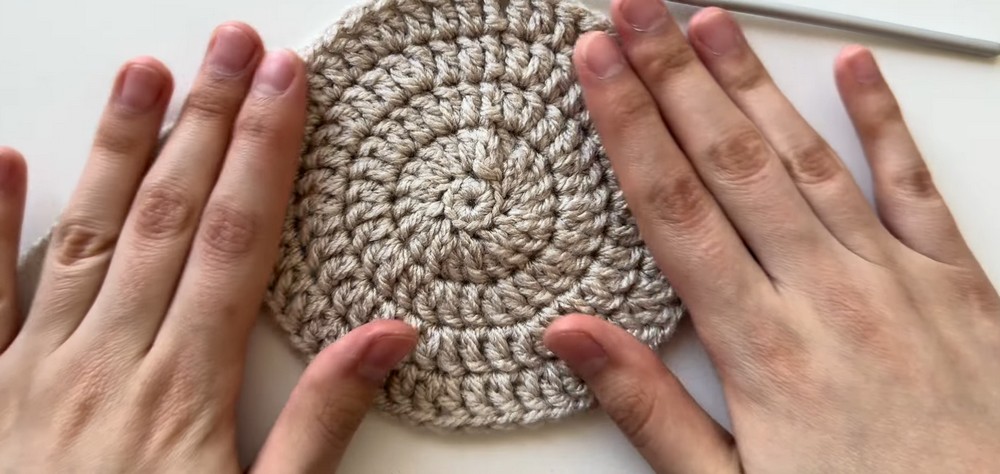
The base grows from 10 single crochet stitches to 50 double crochet stitches. Each round is joined with a slip stitch into the first actual double crochet rather than into the beginning chain.
Round 1: Create a MR, work 10 sc into the MR, pull the yarn tail tightly to close, then sl st into the first sc. (10 sts)
Round 2: Ch 2, work a dc inc in every stitch around, then sl st into the first dc, skipping the beginning ch 2. (20 sts)
Round 3: Ch 2, repeat (1 dc in the next st, dc inc in the following st) around for a total of 10 repeats, then sl st into the first dc. (30 sts)
Round 4: Ch 2, repeat (1 dc in each of the first 2 sts, dc inc in the 3rd st) around for a total of 10 repeats, then sl st into the first dc. (40 sts)
Round 5: Ch 2, repeat (1 dc in each of the first 3 sts, dc inc in the 4th st) around for a total of 10 repeats, then sl st into the first dc. (50 sts)
Fasten off and weave in the ends.
Base check: The finished piece should be a flat circular base. Keep your increases evenly spaced so the circle stays relatively smooth before you add the raised border.
Crochet the Cloud Border
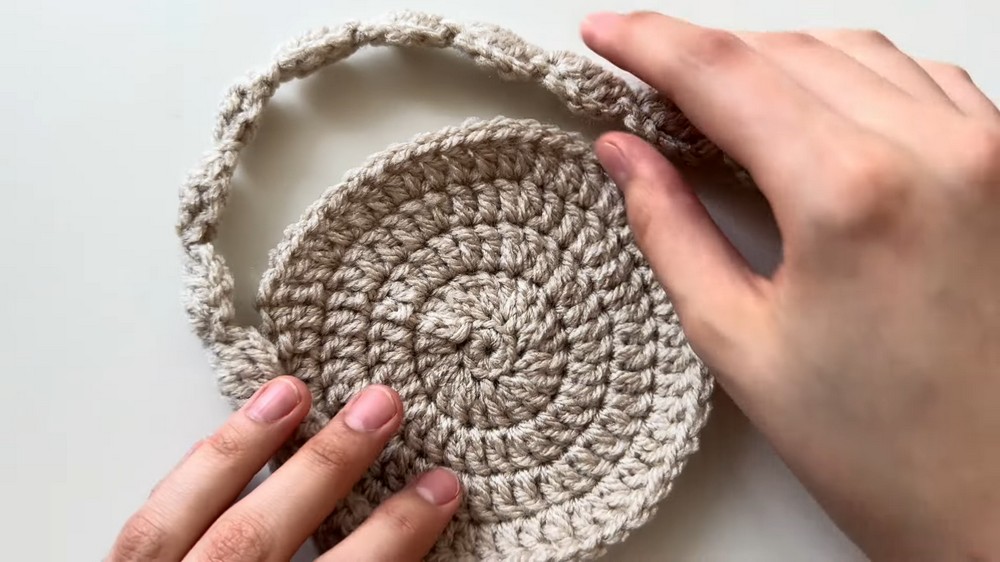
Switch to the 3.5 mm hook. This border is made as one continuous strand of small puffs rather than as separate clouds.
Step 1: Create a slip knot and ch 5; this chain serves as the foundation, including the ch 2 and ch 3 portions used to begin the first puff.
Step 2: Work 1 Bubble Stitch into the 2nd chain from the bottom, which is the 4th chain from the hook.
Step 3: Ch 1, turn your work, and sc into the stitch directly next to the Bubble Stitch.
Step 4: Ch 3, turn your work again, and work another Bubble Stitch directly into the sc just made.
Step 5: Continue repeating (ch 1, turn, sc, ch 3, turn, Bubble Stitch) until you have 15 total puffs.
Fasten off.
The completed 15-puff strand is intended to wrap around the entire circular base.
Puff check: Each puff should remain visibly rounded rather than being pulled flat. If your bubbles look compressed, avoid tightening the surrounding chains too much.
Crochet the Stars – Make 3
Use the 3.5 mm hook.
Each tiny star is formed from five repeated points worked into one Magic Ring.
Step 1: Create a MR.
Step 2: Ch 2, place 1 sc into the first chain made, which is the 2nd chain from the hook, then sl st back into the MR.
Step 3: Repeat the same sequence a total of 5 times to create five points.
Pull the yarn tail tightly to close the center. Fasten off and weave in the ends.
Repeat to make 3 stars, or make additional stars if you want to decorate more of the dish.

Crochet the Crescent Moon
Use the 3.5 mm hook and Yellow yarn.
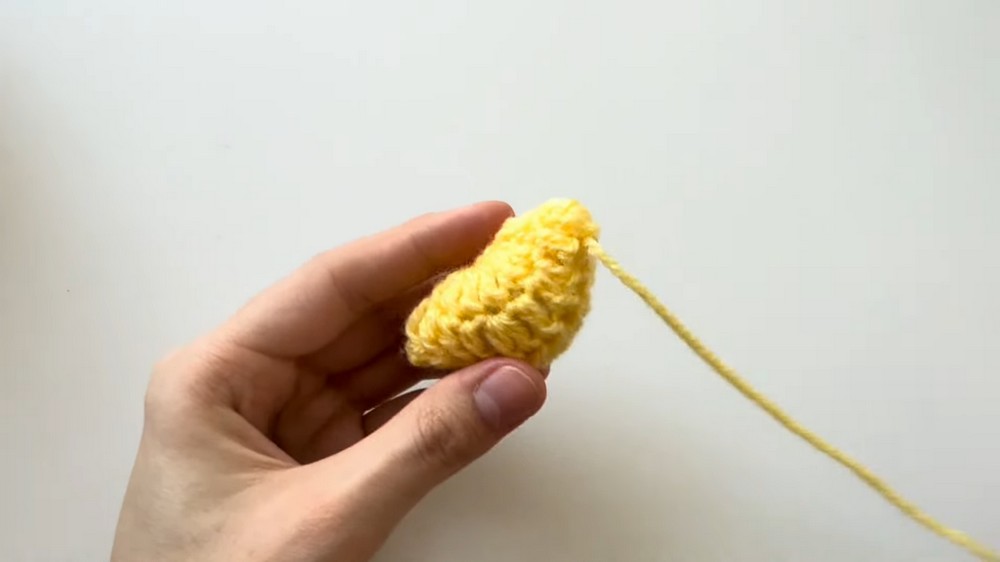
The moon begins as a flat yellow circle. Folding and lightly stuffing that circle creates the final crescent shape.
Round 1: Create a MR, work 8 sc into the MR, pull to close, then sl st into the first sc. (8 sts)
Round 2: Ch 2, work a dc inc in every stitch around, then sl st into the first dc, ignoring the beginning ch 2. (16 sts)
Round 3: Ch 2, repeat (1 dc in the next st, dc inc in the following st) around for a total of 8 repeats, then sl st into the first dc. (24 sts)
Fasten off, leaving a long tail if you plan to sew the moon.
Shape and Stuff the Moon
Fold the flat yellow circle directly in half. The folded piece should now resemble a crescent moon.
Lightly fill the inside with small amounts of scrap yarn. Avoid overstuffing—the goal is simply to give the moon some dimension while allowing it to retain its crescent shape.
Thread the long yarn tail onto your needle and sew along the curved open outer edges to hold the folded moon closed.
Assemble the Trinket Dish
Add the Cloud Border
Lay the circular base flat and wrap the 15-puff cloud strand snugly around its outside perimeter.
Check the fit before attaching it. The strand should follow the circular edge without pulling the base into a noticeably distorted shape.
Position the Moon
Place the folded crescent on the edge of the cloud border, keeping the center of the base open. This leaves the middle area available for rings, earrings, and other small belongings.
Hold the moon in position before securing it so you can check that its crescent shape remains visible from above.
Arrange the Stars
Place the three stars around the base and cloud border in a playful arrangement. You can vary their spacing or make additional stars if you want a fuller night-sky effect.
Secure the Decorations
Once you are happy with the arrangement, permanently attach the cloud border, crescent moon, and stars to the base.
You can use a hot glue gun for quick attachment or sew the pieces in place with a yarn needle for a softer, fully crocheted finish.
Placement check: Before securing the final piece, look at the dish from above. The moon and stars should decorate the outer area without taking away too much of the open center where your jewelry will sit.
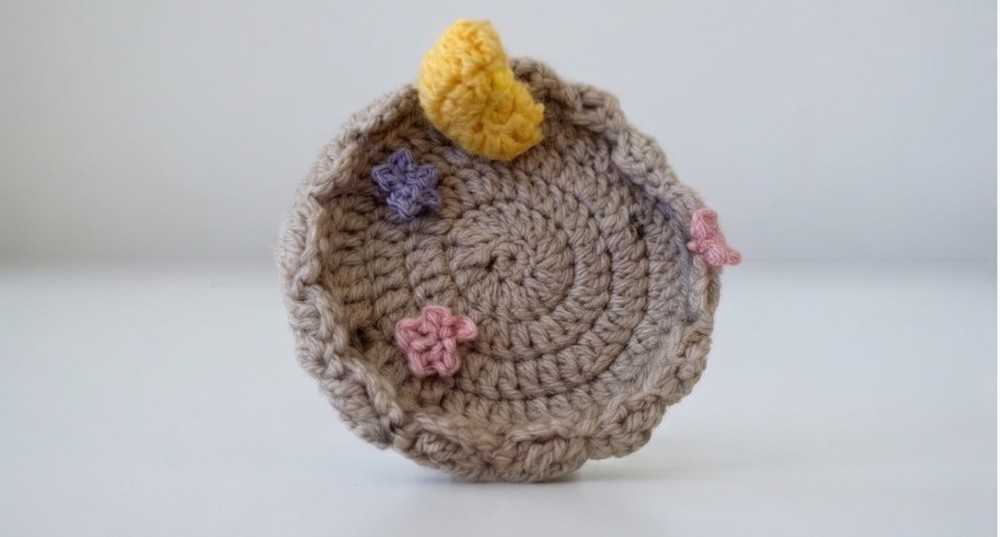
Finished Dish Check
Place a few small items inside the center to make sure the dish remains comfortably open and the raised cloud border keeps them contained.
The completed piece should have a flat usable center surrounded by puffy clouds, with the yellow crescent and little stars creating the miniature night-sky theme around the edge.