Crochet Sunflower Cardigan with Hexagon Panels & Granny Squares
Learn how to crochet a sunflower cardigan with folded hexagons and colorful granny squares, with simple sizing adjustments to help you get the fit you want.
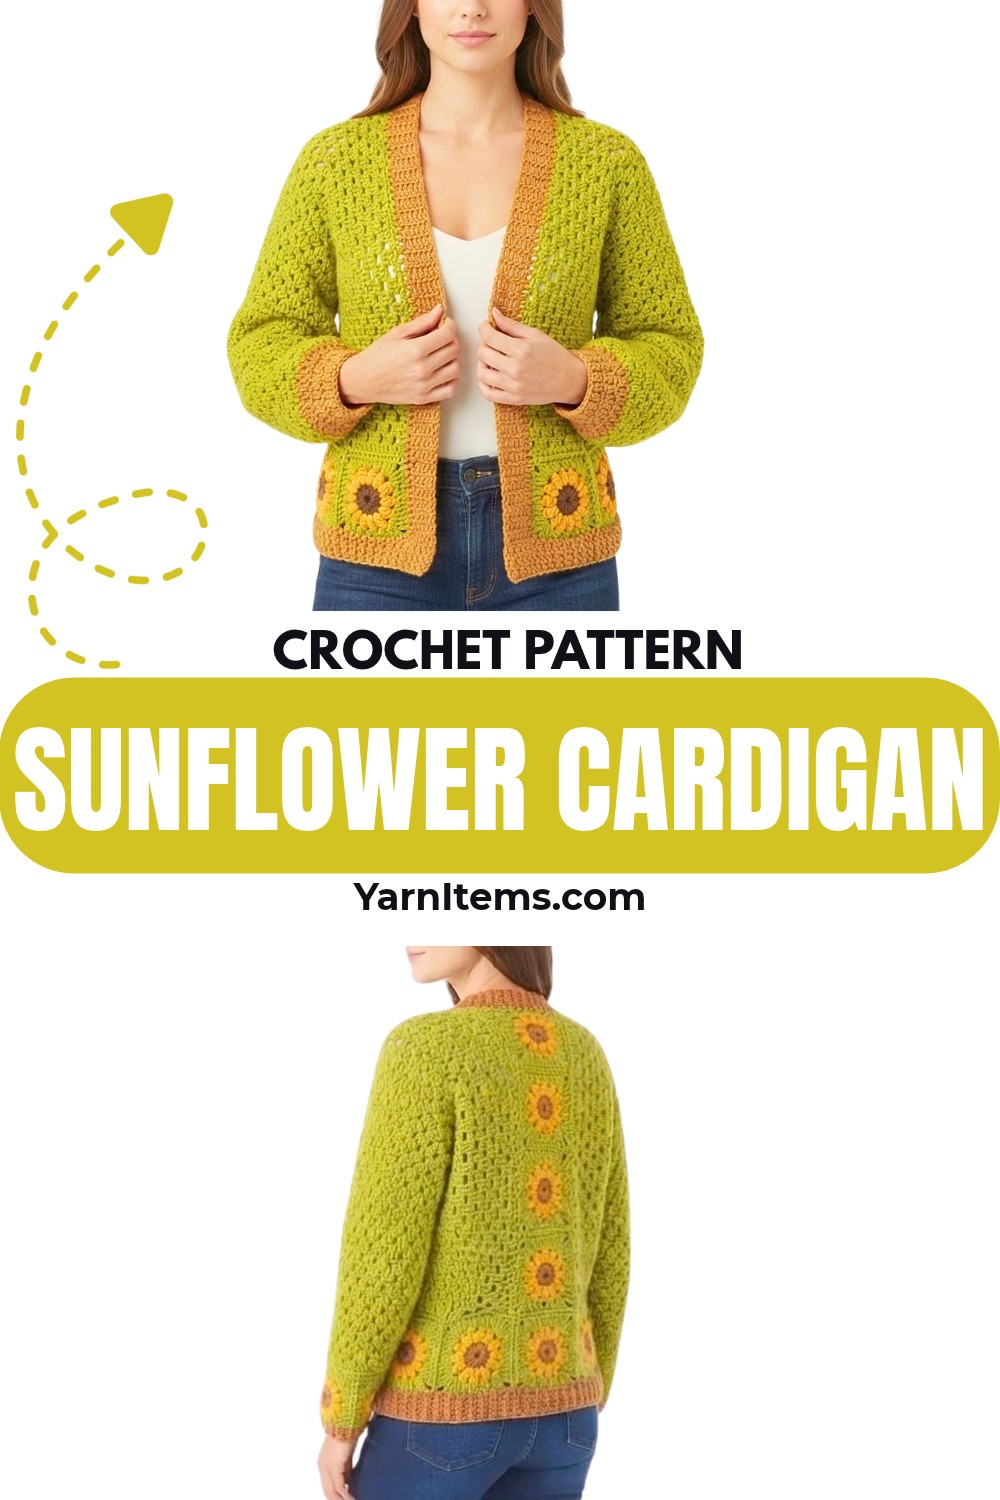
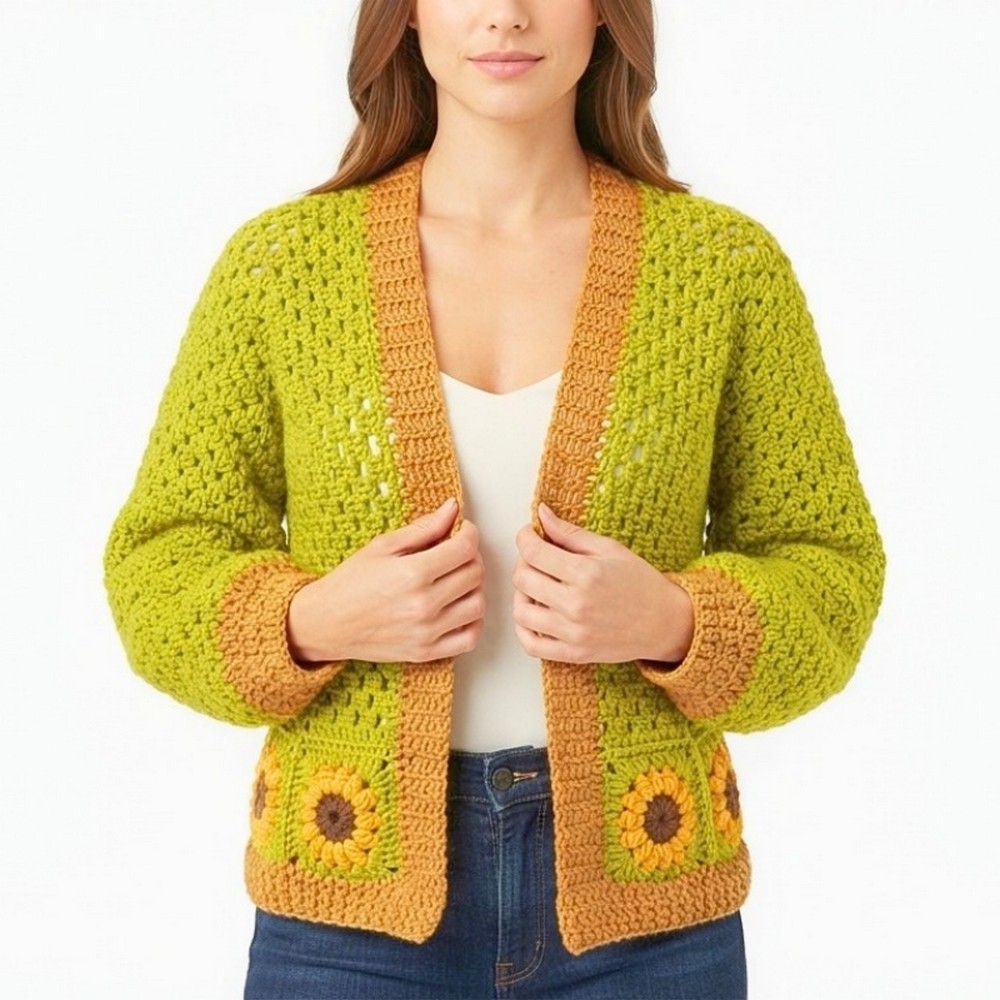
Sunflower-inspired details give this crochet cardigan its character, combining large green hexagon panels with warm brown centers, yellow petals, and square motifs along the back, hem, and sleeves. The folded hexagons create the main body and arm shape, while the granny squares add color and texture exactly where the crochet cardigan needs its decorative sections.
Getting the proportions right is the key to making the crochet pieces fit together neatly. You’ll first size the hexagons by measuring the folded sleeve section, then make the 10 x 10 cm sunflower squares and adjust their number or size when needed. From there, the sleeve extensions, seams, edging, and ribbed cuffs follow in a clear order so the crochet cardigan gradually takes its finished shape.
Credit Tejidos Joss Ropa
Materials and Tools
- Main Color (Green): Revés Derecho, Línea Tren King, 100% premium acrylic, 100g / 170m. The tutorial uses Pistachio Green and requires 6 skeins, approximately 600g for size S/M.
- Secondary Color (Yellow): Approximately 70g.
- Tertiary Color (Brown/Coffee): 1 skein.
- Crochet Hook: 5.0 mm.
- Other Tools: Measuring tape, tapestry/yarn needle, stitch markers, and scissors.
Finished Size and Adjustments
The tutorial demonstrates a Small/Medium cardigan.
For the folded hexagon, measure across the arm section after folding it into the L-shape:
- Small: 20 cm
- Medium: 21 cm
- Large: 22 cm
Increase the measurement by approximately 1 cm for each size.
The sunflower granny squares measure 10 x 10 cm. If you need to change the overall cardigan size, adjust the square dimensions as well so they fit evenly across the back and bottom edge. For example, squares measuring 10.5 cm or 11 cm can be used when those measurements better match the required width.
The demonstrated sleeve measures approximately 45 cm total: 30 cm from the hexagon and green extension, 10 cm from the granny-square section, and 5 cm from the ribbed cuff. Adjust the green extension to change the finished sleeve length.
Abbreviations
- ch: Chain
- sl st: Slip stitch
- st(s): Stitch(es)
- sp(s): Space(s)
- dc: Double crochet
- fpdc: Front post double crochet
- bpdc: Back post double crochet
Step-by-Step Sunflower Crochet Cardigan Instructions
Crochet the Hexagon Panels
Make 2 hexagons in green.
Foundation: Start with a slip knot. Ch 4 and sl st into the first ch to form a ring, or use a magic ring.
Round 1: Ch 3 (counts as 1 dc), work 2 dc into the ring, ch 1; work 3 dc into the ring, ch 1. Repeat from * to * 4 more times. Sl st to the 3rd ch of the starting ch-3. Stitch count: 6 clusters of 3 dc separated by ch-1 spaces.
Round 2: Sl st into the first ch-1 sp. Ch 3, 2 dc, ch 1, 3 dc all in the same space to form the first corner; in the next ch-1 sp, work (3 dc, ch 1, 3 dc). Repeat around. Sl st to the top of the starting ch-3. There are 6 corners.
Round 3: Sl st into the first corner ch-1 sp. Ch 3, 2 dc, ch 1, 3 dc in the same corner sp; work 3 dc in the next space between the corners, then work (3 dc, ch 1, 3 dc) in the next corner space. Repeat this sequence around. Sl st to the top of the starting ch-3.
Round 4 and onward: Sl st to the first corner sp. Work (3 dc, ch 1, 3 dc) in every corner space and 3 dc in every space along the flat sides. Continue increasing in this manner.
Check the Hexagon Size
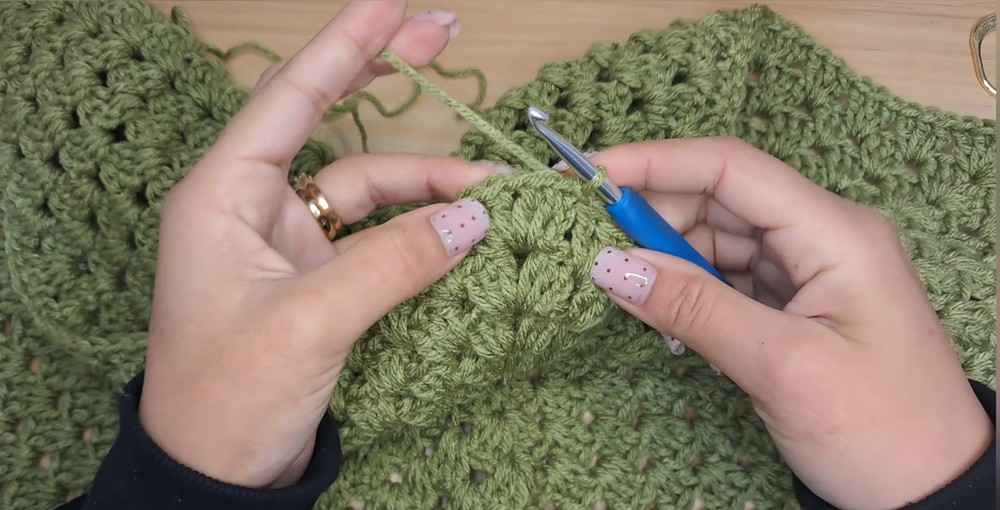
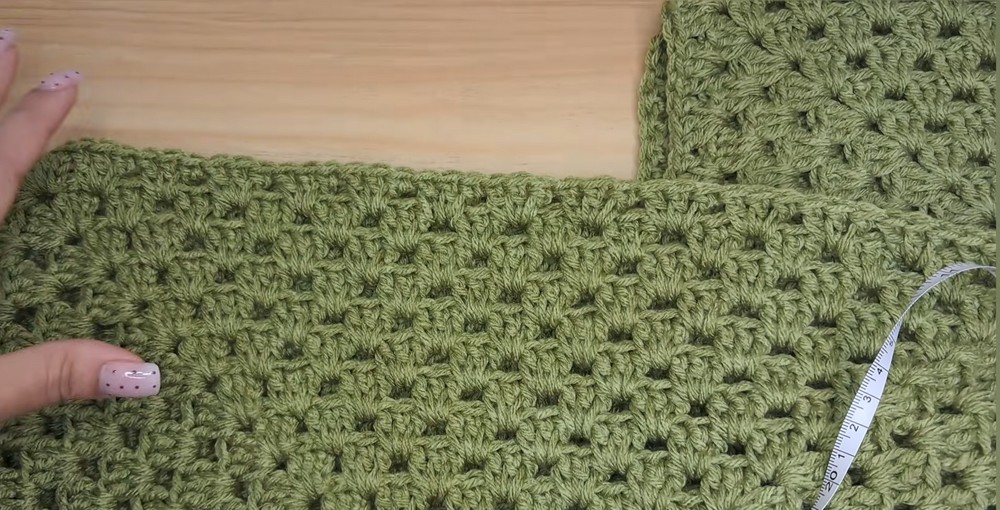
The sides may wave as the hexagon grows, and this is normal at this stage. Fold the hexagon so one corner meets the opposite side, creating the L-shape that forms the sleeve and body. Measure across the folded sleeve section and stop increasing when it reaches your desired size: 20 cm for Small, 21 cm for Medium, or 22 cm for Large. Leave a long tail on the final round for sewing.
Make the Sunflower Granny Squares
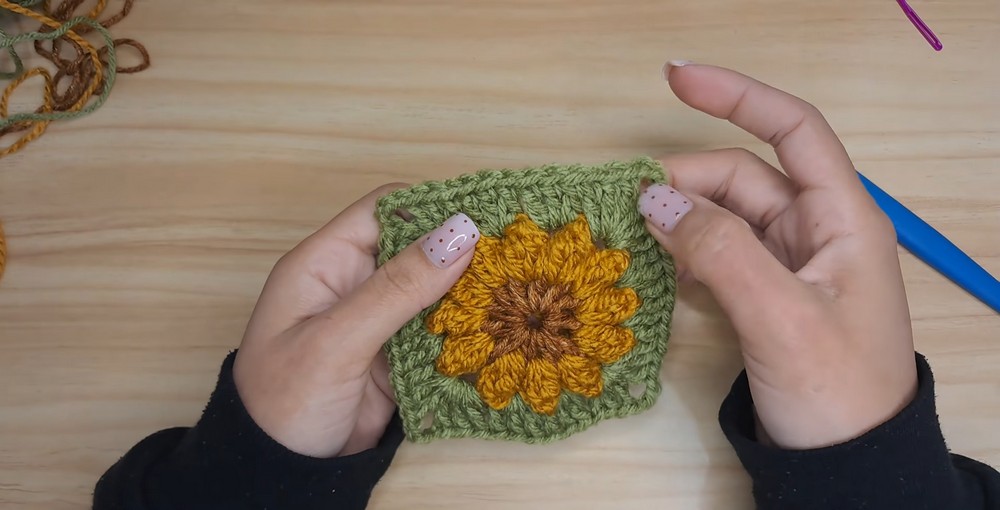
Make 16–19 squares depending on the cardigan size. The demonstrated arrangement uses 4 squares for the back, 9 along the bottom hem, and 6 for the sleeves.
Round 1 – Brown Center: Make a slip knot, ch 4, and sl st to the first ch to form a ring. Ch 3 (counts as 1 dc), work 11 dc into the ring, then sl st to the 3rd ch of the starting ch-3. Fasten off the brown yarn. Stitch count: 12 dc.
Round 2 – Yellow Petals. Attach yellow yarn in the space between any two dc posts. Ch 3, work 3 dc in the same space, remove the hook, insert it into the top of the ch-3, and pull the dropped loop through to form the popcorn stitch. Ch 1 to close the stitch, then ch 1 for spacing.
Continue the Petals
In the next space between the dc posts, work 4 dc. Remove the hook, insert it into the first dc of the group, and pull the loop through. Ch 1 to close the stitch, then ch 1 for spacing. Repeat around all the spaces. Fasten off the yellow yarn. Stitch count: 12 petals.
Round 3 – Green Squaring. Attach green yarn in any ch-1 space between the petals. Ch 3, 2 dc, ch 3, 3 dc in the same space to form the first corner.
Continue Squaring
Work 3 dc in the next space, work 3 dc in the following space, then work (3 dc, ch 3, 3 dc) in the next space to form the corner. Repeat around.
Invisible Finish
Cut the yarn, leaving a short tail. Thread the tapestry needle, skip the starting ch-3, pass the needle under both loops of the next dc, and bring it back down through the center of the final dc made. Weave in the ends.
Add the Green Sleeve Extensions
The green extension brings the sleeve section to approximately 30 cm before the granny-square cuff section is added.
Round 1: Attach green yarn to the bottom edge of the sleeve on the folded hexagon. Ch 3, 2 dc in the same space, then work 3 dc in each space around the sleeve.
Shoulder Seam Modification
When you reach the shoulder seam, work 1 dc in the corner sp, 1 dc directly into the seam, and 1 dc in the next corner sp to form a 3-dc cluster. Sl st to the top of the starting ch-3 to join.
Round 2: Ch 3, jump immediately to the next space and work 3 dc. Continue working 3 dc in each space around. At the end, work 2 dc in the very first space where the ch-3 began to complete the initial cluster. Sl st to join.
Continue the Extension
Alternate the two starting methods for each round until the sleeve measures 30 cm from the shoulder, or approximately 15 cm shorter than your desired total arm length.
Teaching Guide: Keep the Pieces in Proportion
The most important measurement happens before the hexagons are finished. Because the folded hexagon creates both the body and sleeve shape, measuring only the flat, unfolded piece can give you the wrong result.
Fold each hexagon into its L-shape and measure the sleeve section in that folded position. Stop increasing when it reaches the size you need. The same idea applies to the sunflower squares: their final dimensions need to work with the back and hem measurements rather than simply being made in a fixed quantity.
When changing size, adjust the square dimensions together with the cardigan measurements. This keeps the pieces easier to tile across the back and lower edge instead of leaving an awkward difference between the green panels and the decorative strips.
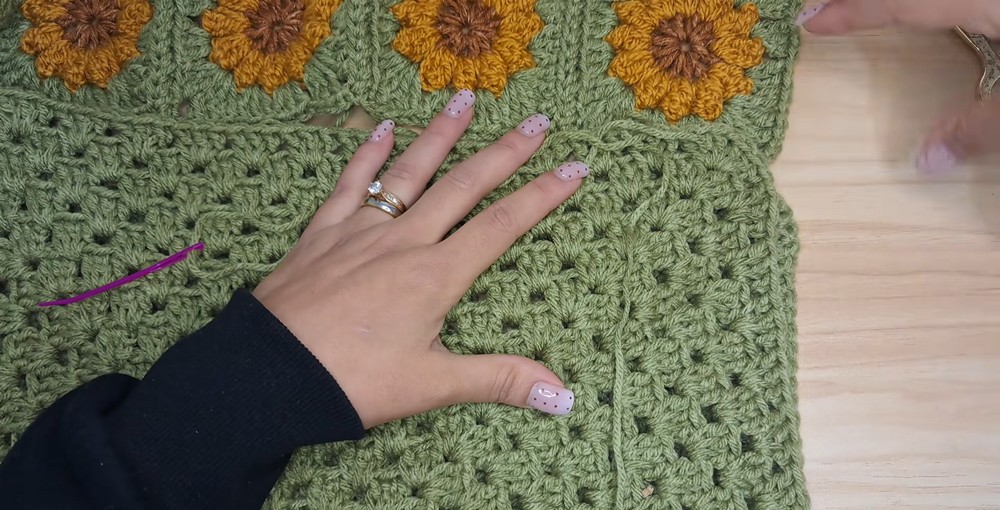
Assembly: Join the Main Pieces
Shoulder Seams
Fold the two hexagons into their L-shapes. Using the long green tail and tapestry needle, whipstitch the top shoulder/arm seam together by passing the needle through the back loops only of both sides.
Back Panel
Take 4 sunflower squares, or enough to match the required back length. The tutorial uses a total back length of approximately 40 cm. Whipstitch the squares vertically into a strip, matching the back loops only.
Place the strip between the two folded hexagon body pieces and sew the edges together using the same back-loop technique. Keep the seam on the wrong side so the right side remains clean.
Bottom Hem
Sew 9 sunflower squares together into a long strip: 2 for each front panel and 5 wrapping around the back. Sew this strip to the entire bottom edge of the green cardigan body.
Sleeve Squares
Sew 3 sunflower squares together into a ring. Attach the ring to the bottom edge of the green sleeve extension. Repeat for the second sleeve.
Ribbed Front Opening and Neckline
Row 1
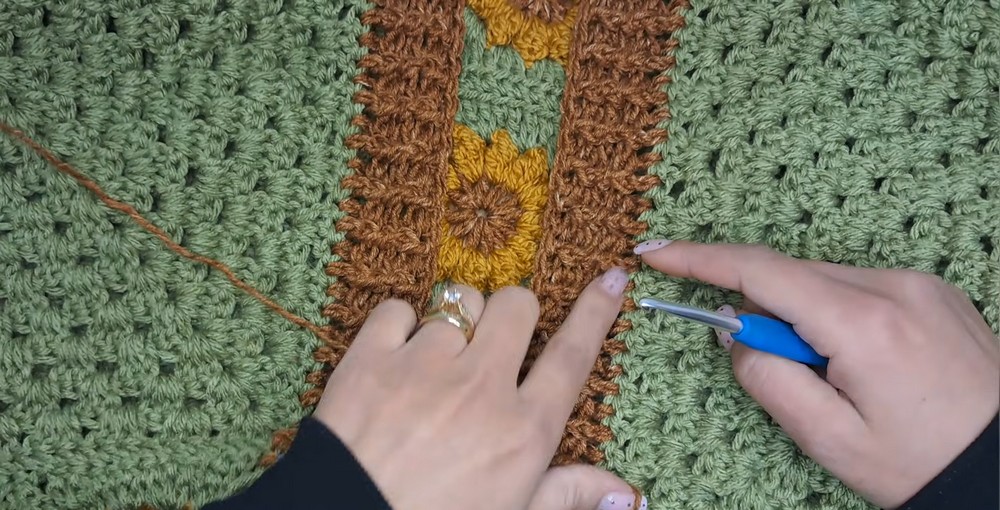
Attach brown yarn at the bottom front corner. Ch 3 (counts as dc), then work dc evenly around the entire front and neck opening, using 2 dc per row edge along the green hexagon sides, 1 dc in each stitch of the granny squares, and 1 dc in all seams and corners. Turn.
Row 2
Ch 3. Work 1 fpdc around the next st, work 1 bpdc around the following st. Repeat from * around the entire opening. Turn.
Rows 3–4
Ch 3. Work the stitches as they present, placing fpdc into fpdc and bpdc into bpdc, until the border reaches approximately 5 cm wide. Fasten off.
Ribbed Bottom Hem
Attach brown yarn to the bottom edge of the lower granny squares.
Row 1
Ch 3 (counts as dc), then work dc evenly around the hem.
Rows 2–4
Follow the same ribbing sequence used for the front opening: alternate fpdc and bpdc, then continue working each stitch as it presents until the border reaches approximately 5 cm. Fasten off.
Sleeve Cuffs
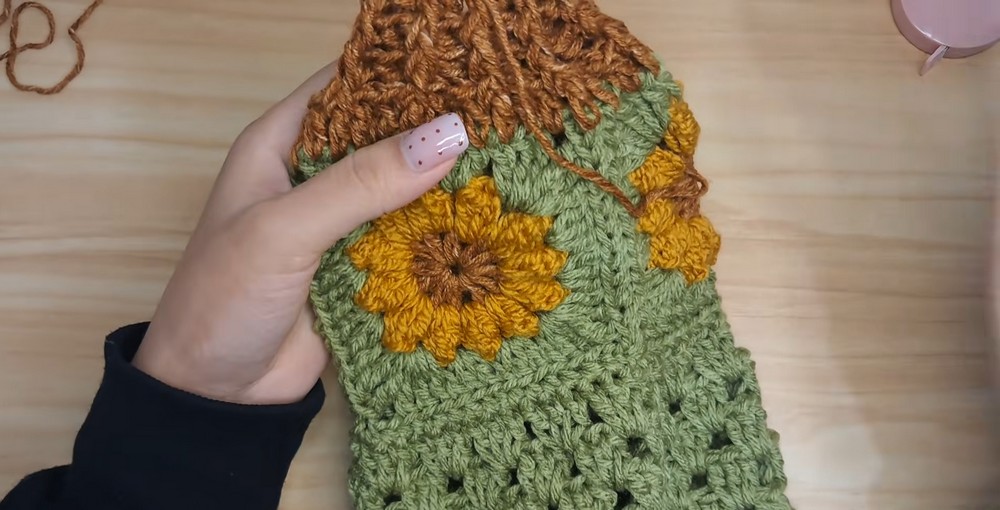
The cuffs are pulled in before the ribbing is continued, giving the sleeve opening a narrower finish.
Round 1
Attach brown yarn to the bottom edge of the sleeve granny squares. Ch 3, work 1 dc in each stitch around, including seams and corners. Sl st to join.
Round 2
Ch 3. Skip 1 st, fpdc around the next st. Skip 1 st, bpdc around the next st. Repeat from * around to pull the cuff in tightly. Sl st to join.
Rounds 3–4
Ch 3. Work the stitches as they present, placing fpdc into fpdc and bpdc into bpdc, without further decreases. Continue until the cuff measures approximately 5 cm. Fasten off.
Sizing Check Before the Final Weave-In
Before securing every remaining yarn tail, check the cardigan while it is assembled. Confirm that the back strip sits evenly between the two green body sections, the bottom granny-square strip reaches across the intended hem, and both sleeve sections have the same extension length.
For the sleeves, remember that the demonstrated 45 cm total comes from three sections: 30 cm of hexagon and green extension, 10 cm of granny squares, and 5 cm of ribbed cuff. If you need more or less length, the green extension is the section to adjust before adding the square ring and cuff.
Final Finishing
Turn the cardigan inside out and use the tapestry needle to securely weave in all remaining loose yarn tails. Check the seams and joined areas as you finish, then turn the cardigan right side out to reveal the sunflower details, green hexagon body, and ribbed edging.