Crochet Poncho Gardenia with Turtleneck & Optional Sleeves
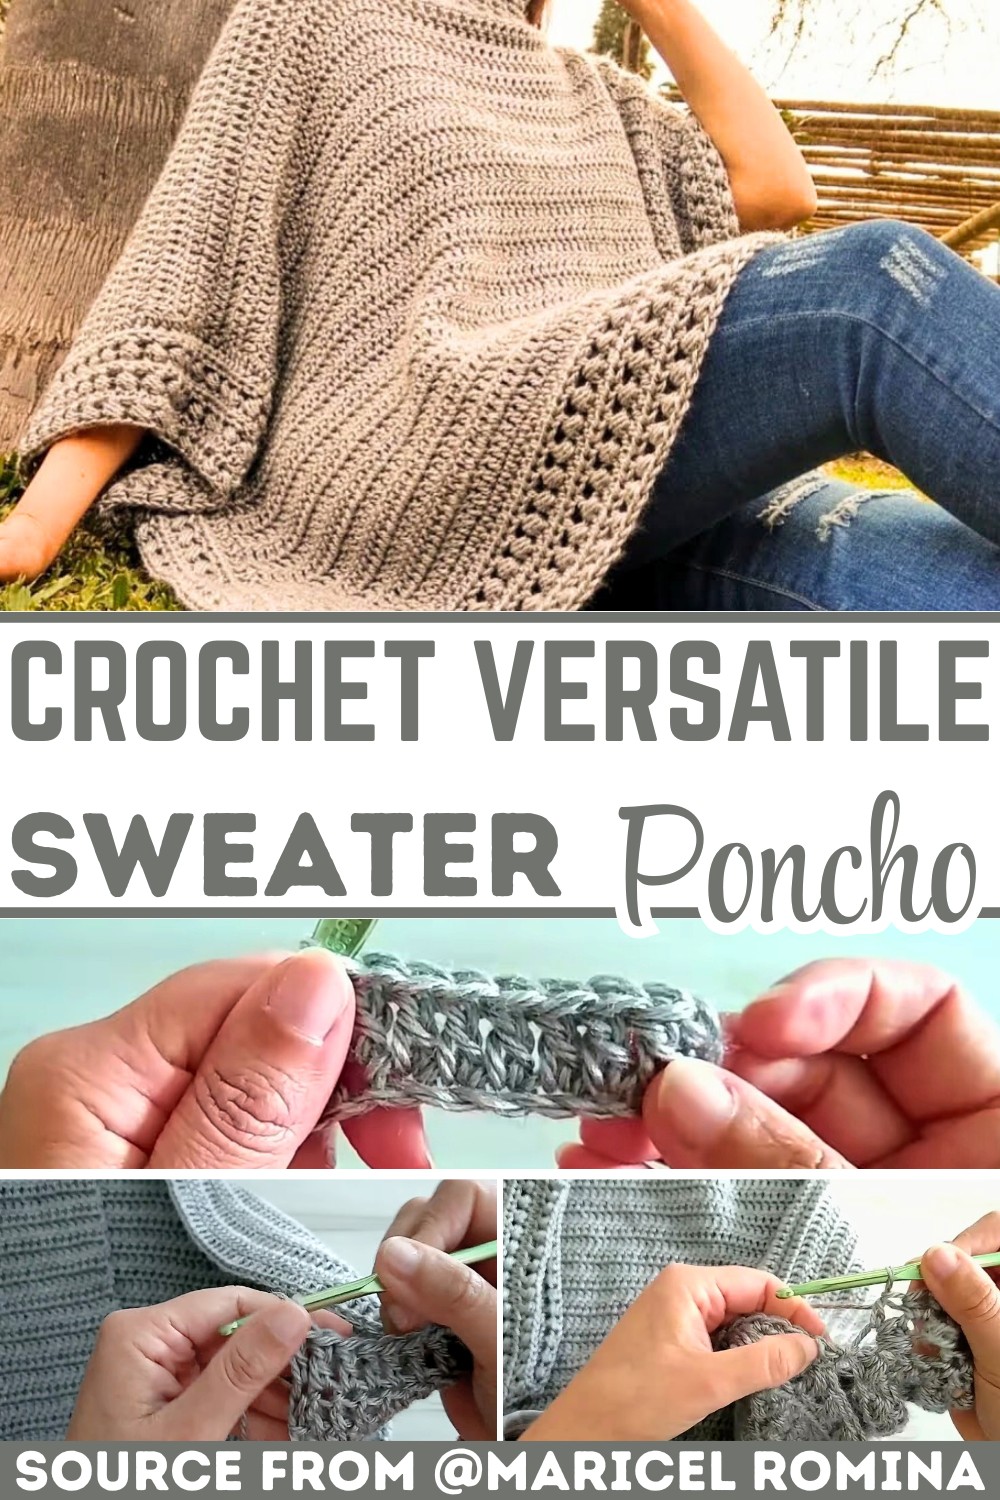
Here’s the crochet sweater Poncho Gardenia, with oversized drape, chunky ribbing, and raised bead-stitch borders, plus simple length and neckline choices for different looks.
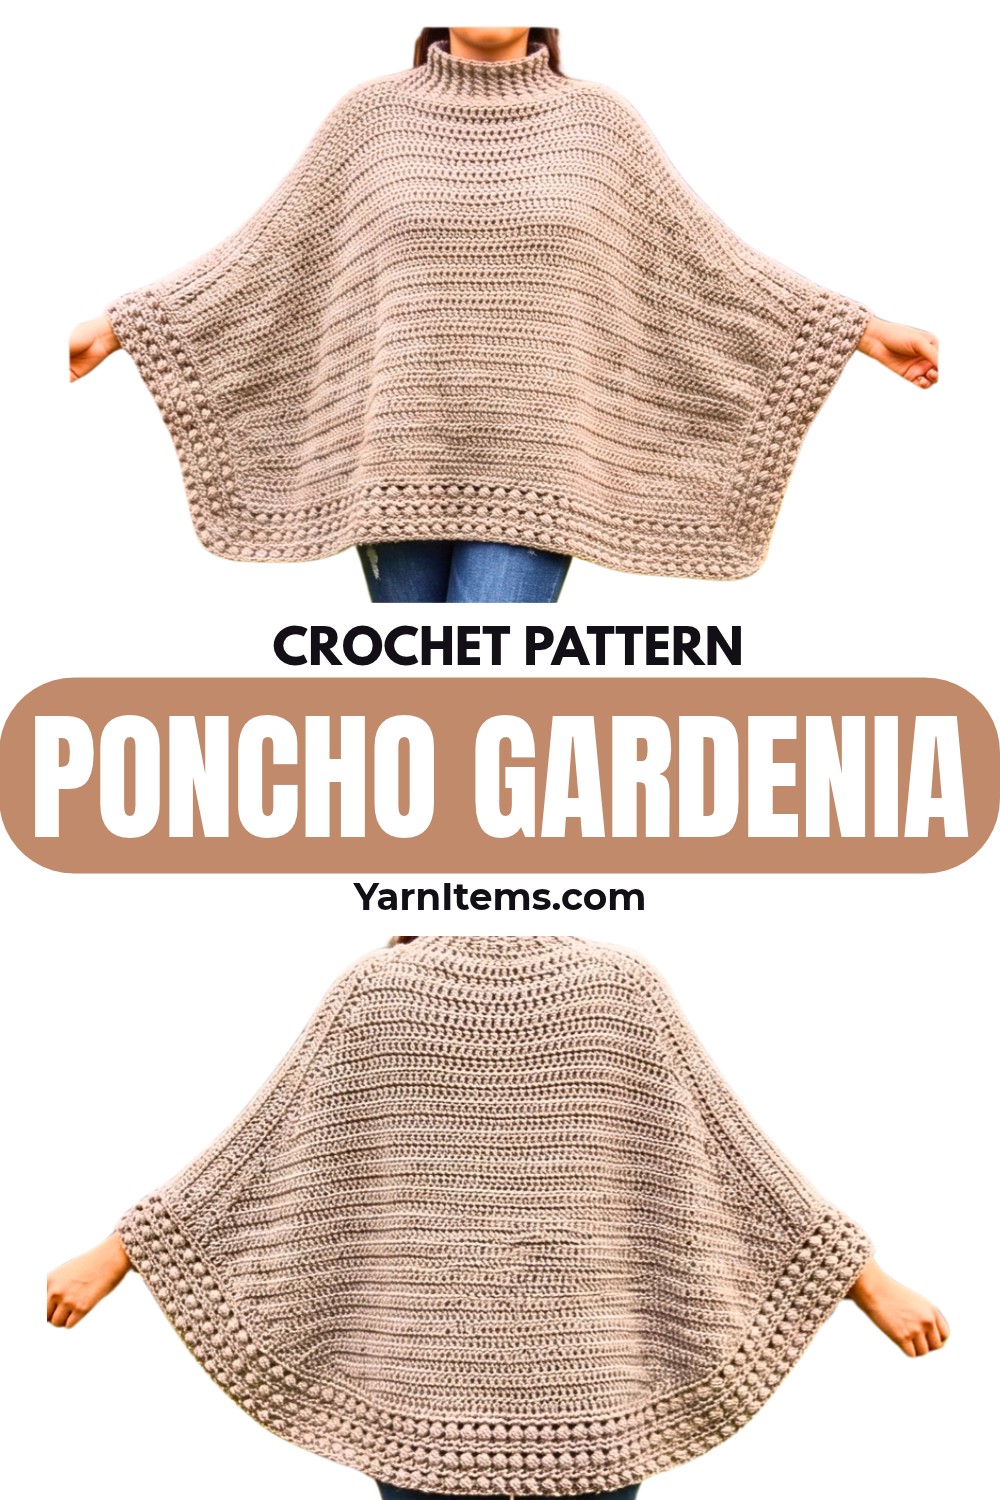
Soft acrylic yarn and simple rectangular panels give crochet Poncho Gardenia its relaxed, oversized shape, while raised bead stitches bring texture along its lower edges. Ribbed neck detail adds warmth, and optional sleeves can turn loose crochet poncho styling into more coverage.
Sizing starts with chain count, so you can choose between S/M, M/L, and L/XL before crocheting panels. Length, neckline, yarn type, and sleeve coverage can also be changed later, making this pattern useful for cozy winter wear or lighter seasonal styling.
Credit Maricel Romina
Materials & Tools
- Yarn: Any soft acrylic yarn; creator uses 2 mm thick “cast 1011” yarn
- Hook: 6.0 mm crochet hook
- Stitch markers
- Yarn needle
- Scissors
Choose Your Size
Starting chain count determines panel width:
- S/M: 80 chains per rectangle
- M/L: 90 chains per rectangle
- L/XL: 100 chains per rectangle; this is size featured in video
For additional length, add more double crochet rows to body panels. Creator worked 28 rows and suggests 30 rows for extra length.
Neckline can also change final style:
- Follow full pattern for chunky high turtleneck
- Work only 2 collar rounds for a simple collar
- Leave collar completely unworked for wide boat neck
For beach cover-up or mid-season wear, substitute semi-thick cotton yarn and skip turtleneck collar.
Pattern Abbreviations – US Terms
- ch: Chain
- sl st: Slip stitch
- hdc: Half double crochet
- dc: Double crochet
- fpdc: Front post double crochet, worked around front of post from stitch below
- bpdc: Back post double crochet, worked around back of post from stitch below
- Bead Stitch: Work 1 dc; yarn over, insert hook behind post of newly made dc, yarn over and pull up loop; repeat this process 2 more times for 3 total repeats; yarn over and pull through all loops on hook.

Begin Main Body Panels
Make 2 matching rectangles. Loose foundation chain tension matters here because tight chains can pull the lower edge inward and affect panel width.
Foundation Chain: Ch 100 very loosely. Loose tension helps prevent curling or tightness along the lower edge.
Row 1: Ch 4, counting as first dc and turning chain; work 1 dc into 5th ch from hook; work dc into every ch across entire row.
Row 2: Ch 2 or ch 3 according to preference; turn; skip base stitch of chain and work 1 dc into next stitch; continue dc across entire row.
Rows 3–28: Repeat Row 2 until 28 total rows are complete. For extra length, work until 30 total rows.
Keep both rectangles equal in row count and width. Matching panels will make shoulder markers line up correctly during joining.
First Panel: Cut yarn and fasten off.
Second Panel: Do not cut yarn after completing the final row.
Mark Shoulder Sections
Lay both rectangles flat before joining. Marking both panels in matching positions creates a neck opening between shoulders.
Front Panel: Count 38 stitches inward from left edge and place stitch marker; count 38 stitches inward from right edge and place second stitch marker. Approx. 24 middle stitches remain unworked for neck opening.
Back Panel: Repeat same marking process on back panel so shoulder sections align perfectly with front panel.
Check both markers before joining. Uneven marker placement can shift neck opening toward one side.
Join Shoulders
Place front and back pieces together with right sides facing outward. Shoulder seams should remain loose so finished poncho can drape naturally instead of pulling upward around neck.
Shoulder Joining: Using sl st, pick up only inner loops, or back loops, of corresponding stitches from both panels; keep tension very loose while joining to create reinforced yet flat shoulder seams.
Seam 1: Sl st across first 38 stitches until reaching first stitch marker; fasten off and knot yarn.
Seam 2: Reattach yarn at opposite outer shoulder edge; sl st across other 38 stitches until reaching second stitch marker; fasten off.
Middle unworked section now forms neck opening.
Shape Chunky Turtleneck
Turn poncho right side out. Collar is worked directly around neck opening, beginning from shoulder seam.
Base Round: Attach yarn at shoulder seam of neck opening; ch 2; work dc evenly around entire neck opening; join with sl st to first stitch.
Even spacing matters here. Keep dc stitches distributed around neckline without pulling edge inward, since uneven spacing can create puckering.
Round 1 – Ribbing: Ch 2; work 1 fpdc around next stitch, then 1 bpdc around following stitch; alternate fpdc and bpdc around entire neckline; join with sl st.
Rounds 2-5: Ch 2; work fpdc into previous fpdc stitches and bpdc into previous bpdc stitches, maintaining ribbing alignment; continue until desired collar height is reached.
Creator completed 6 total collar rounds for chunky turtleneck. Fasten off.
For shorter collar, work only 2 rounds. For wide boat neckline, leave collar completely unworked.
Add Raised Bottom Border
Bottom border is worked separately along front and back bottom edges. Each panel receives the same border treatment, creating matching textured hems.
Front Panel Border
Row 1 – Base: Attach yarn at bottom right corner of front panel; ch 2; work hdc evenly across entire bottom edge; keep spacing balanced so stitches are neither bunched together nor spread too far apart.
Row 2 – Bead Stitches: Ch 3, turn; skip 1 space; work 1 dc into next stitch; work 1 Bead Stitch around post of dc just made; skip 1 space; work 1 dc into next stitch and work 1 Bead Stitch around it; repeat across row; finish with standard dc in last stitch.
Raised bead stitches should sit visibly along front of hem. If spacing becomes uneven, check skipped spaces before continuing because they control rhythm of texture.
Row 3: Ch 2, turn; work 1 hdc into each space or stitch across row.
Row 4+: Repeat Row 2 and Row 3 until desired border width is reached. Creator suggests 2–3 rows of bead stitches.
Back Panel Border
Turn poncho over and repeat exact border process along bottom hem of back panel.
Keep front and back border widths equal for balanced finished drape.
Optional Sleeves and Side Seams
Sleeves are optional, so poncho can remain open-sided for loose coverage or receive short or extended sleeves for additional warmth.
Mark Armholes
Align front and back panels. Starting from bottom hem, count 10 bead stitches upward along side of both panels.
At the 10th bead stitch, insert hook through both front and back panels to mark underarm position.
Secure Side
Attach yarn through both panels at marked position to secure side of poncho.
Round 1: Ch 2; work hdc evenly in circle around armhole opening; join with sl st.
Round 2: Ch 2; work Bead Stitch pattern around armhole by working dc, Bead Stitch around dc, then skipping 1; repeat around; join with sl st.
At this stage, sleeve can remain short and decorative, or additional rounds can be added for more coverage.
Additional Sleeve Rounds: Continue alternating hdc rounds and Bead Stitch rounds until desired sleeve length is reached; fasten off when satisfied.
Repeat complete sleeve process on opposite armhole.
Choosing Final Length and Collar Style
Poncho Gardenia can look noticeably different depending on finishing choices.
For longer body coverage, increase panel length by working 30 or more rows instead of 28.
For warm winter styling, keep full 6-round turtleneck and continue sleeves farther down arm.
For lighter styling, use semi-thick cotton yarn and omit turtleneck.
For relaxed neckline, leave collar unworked and allow neck opening to form wide boat-neck shape.
Final Finishing Check
Weave in all loose yarn ends with a yarn needle.
Before wearing, check shoulder seams for even tension, confirm both panels hang evenly, and inspect bead-stitch rows for consistent spacing. Loose shoulder joins should allow fabric to fall naturally across upper body.
Finished Poncho Gardenia has oversized drape, raised textured hems, and flexible styling options. Turtleneck adds chunky warmth, while optional sleeves can extend coverage without changing basic panel shape.