Crochet Flower Coaster Pattern – Step-by-Step
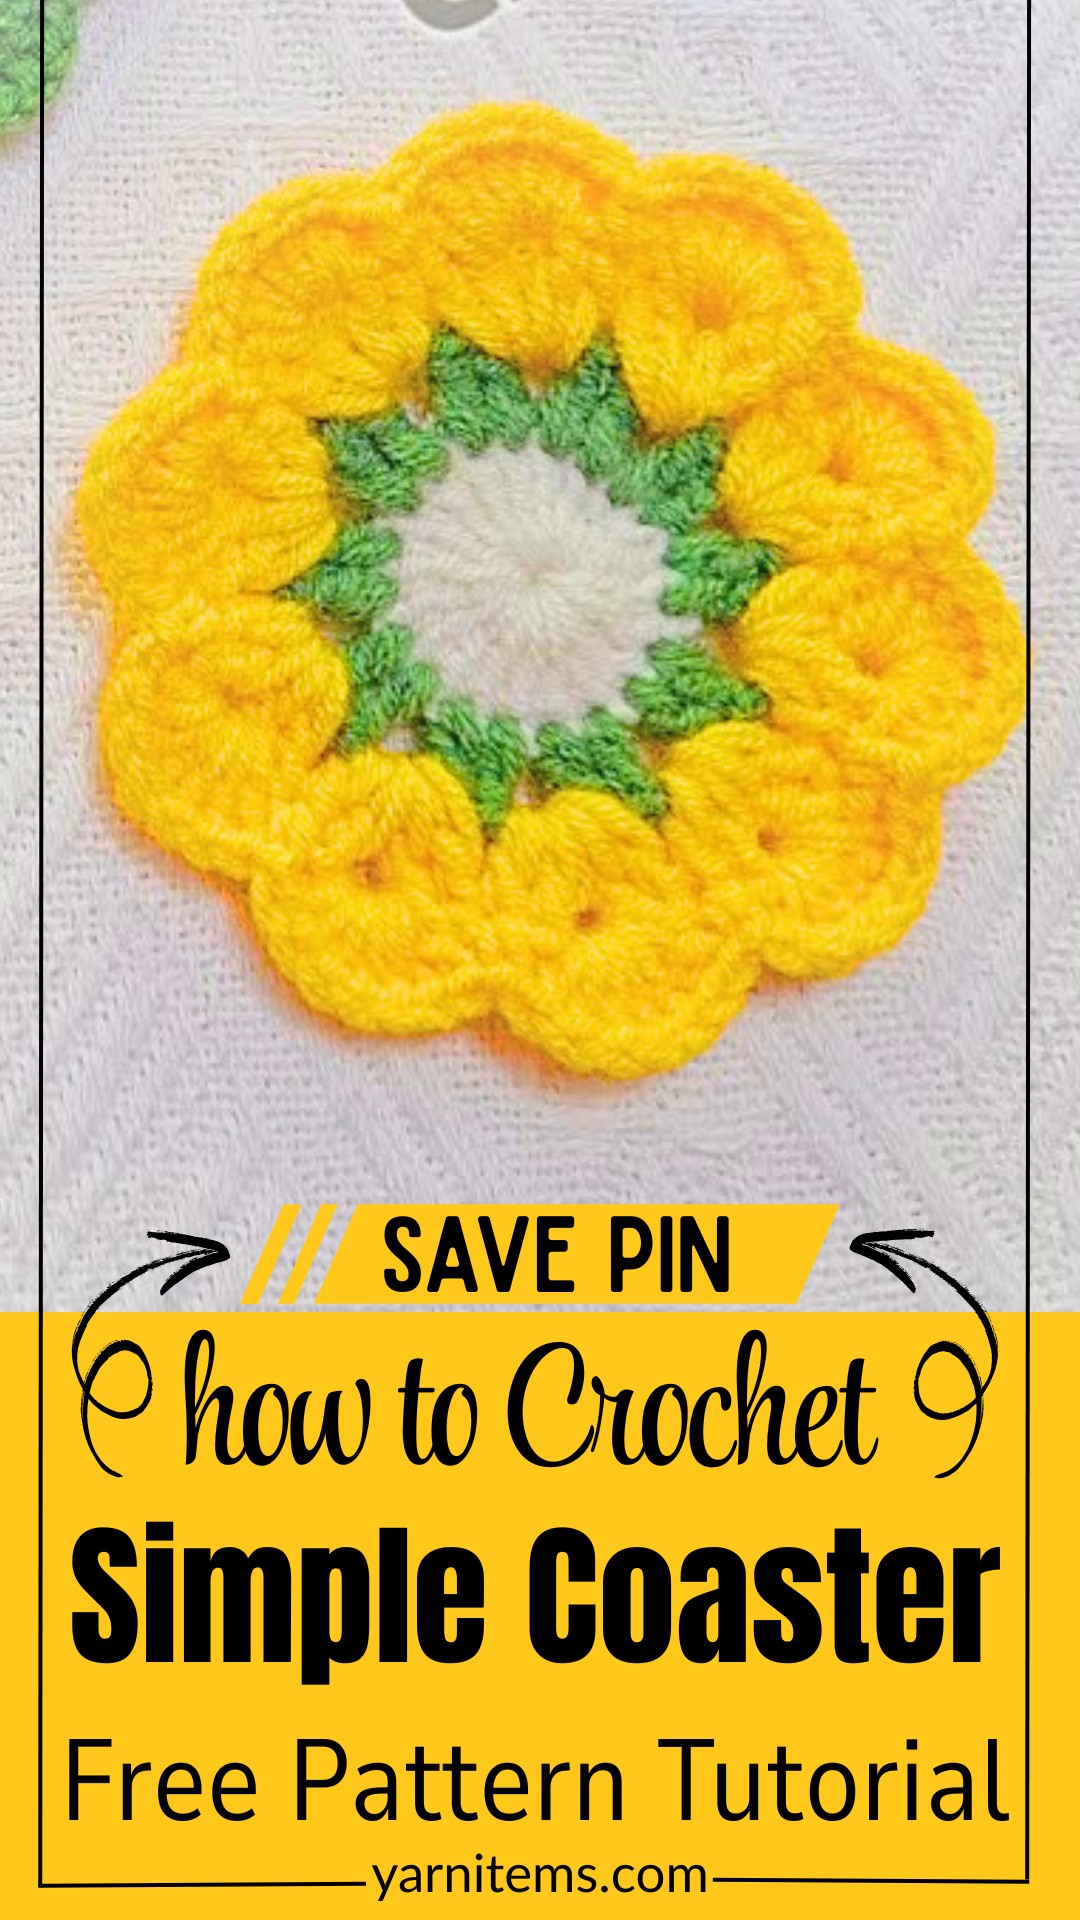
Looking for a pretty way to protect your table? This crochet flower coaster combines three yarn colors, layered petals, and a scalloped edge in a beginner-friendly pattern.
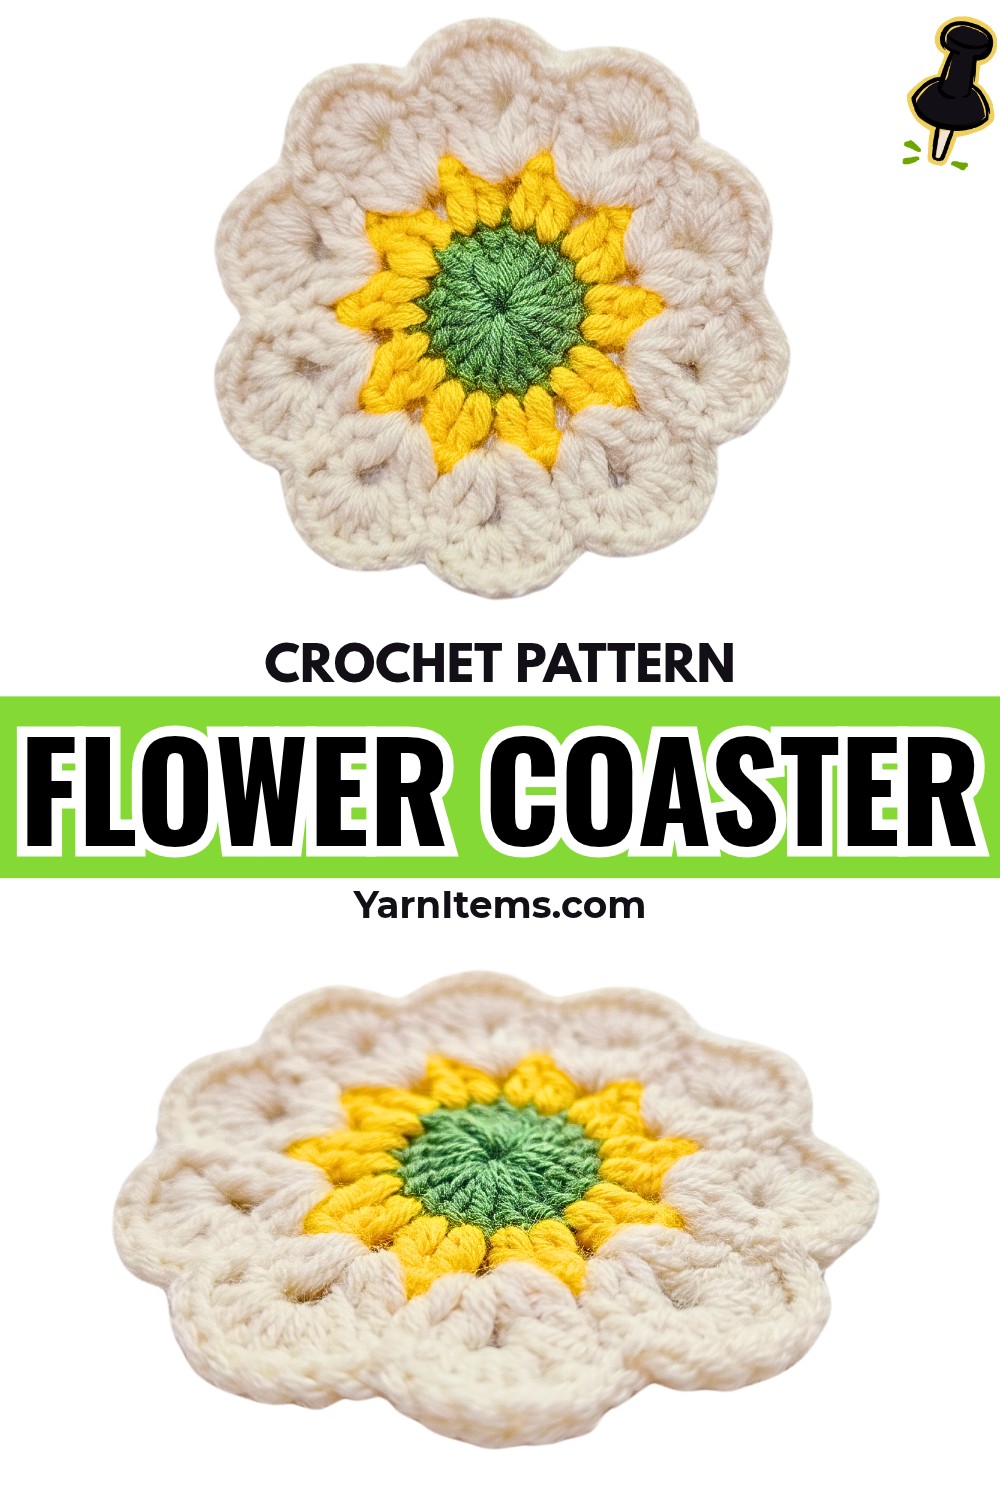
Small handmade details can bring color to an everyday coffee table, and crochet flower coasters are a lovely way to add that touch. If shaping petals feels tricky at first, working in separate rounds makes the design easier to follow.
This crochet tutorial guides you through the green center, yellow petal base, cream shell stitches, and scalloped border. You’ll also find stitch abbreviations, finishing advice, and color ideas to personalize your crochet coaster. Let’s get started.
Credit Eny’s crochet
Materials & Tools
-
Yarn: 4-ply or DK-weight cotton yarn in three contrasting colors:
-
Green for the center disc
-
Yellow for the inner petal base
-
Cream or white for the petals and scalloped border
-
-
Crochet hook: 2.0 mm
-
Notions: Scissors, yarn needle, and stitch markers
Cotton yarn is a practical choice for a coaster because it creates a firm fabric suitable for holding mugs and glasses.
Finished Size & Customization
-
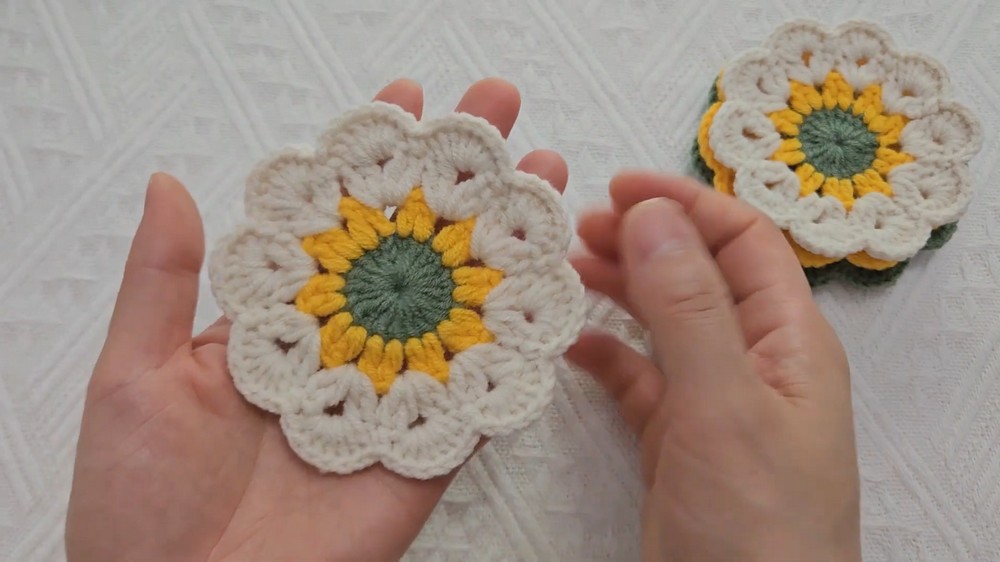
Finished diameter: Approximately 4 inches (10 cm).
-
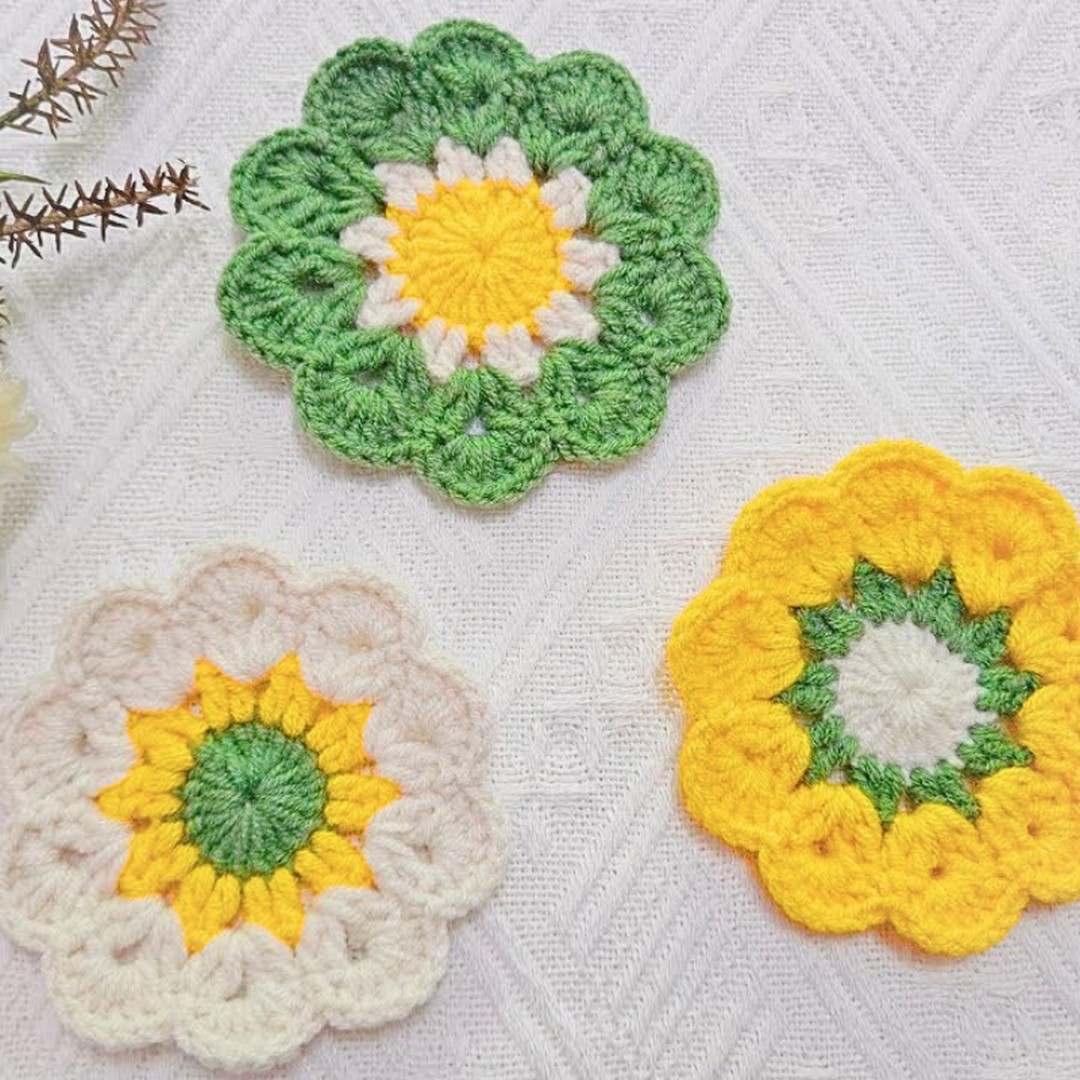
Color variations: Try gold and brown for a sunflower-inspired design or festive shades for seasonal table decorations.
-
Larger versions: Use thicker cotton yarn and a larger hook, such as 3.5 mm or 4.0 mm, to create a bigger floral mat. If using it as a pot holder, choose suitable heat-resistant materials and construction rather than assuming every yarn version is safe for hot cookware.
Pattern Abbreviations
-
ch: Chain
-
dc: Double crochet
-
sc: Single crochet
-
sl st: Slip stitch
-
st(s): Stitch(es)
-
rep: Repeat
-
R: Round
Before starting: Work in joined rounds, changing yarn colors as indicated. The starting chain-3 counts as one double crochet wherever specified. Keep track of stitch spaces so each petal stays evenly spaced.
Step-by-Step Crochet Flower Coaster Tutorial
Round 1: Crochet the Green Center
Begin with green yarn to form the circular center. This base supports all the petal layers, so aim for a neat, flat circle.
Step 1: Form a magic ring.
Make a magic ring with green yarn, leaving enough yarn at the tail to tighten the center later. Keep the adjustable loop loose enough to work stitches into it comfortably.
Step 2: Start with chain 3.
Chain 3. These chains count as your first double crochet. If you find it helpful, place a stitch marker in the top chain to identify the beginning of the round.
Step 3: Work 19 double crochets.
Make 19 double crochets directly into the magic ring. Work each stitch around the loop rather than into another stitch.
You should have 20 stitches in total, counting the starting chain-3 as one double crochet.
Step 4: Close the center.
Pull the yarn tail firmly enough to close the hole in the middle. Fasten off green yarn, leaving a short tail for weaving in later.
Check your work: The center should form a compact, circular disc without a large hole. If the stitches are crowded, avoid pulling them excessively tight.
Round 2: Build the Yellow Petal Base
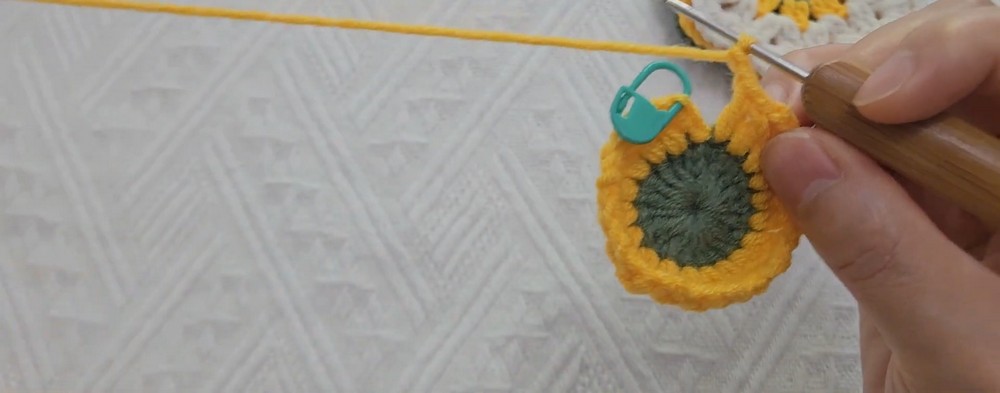
Yellow yarn creates the first layer of petal spaces. Chain-2 gaps around this round provide the spaces needed to shape the outer petals.
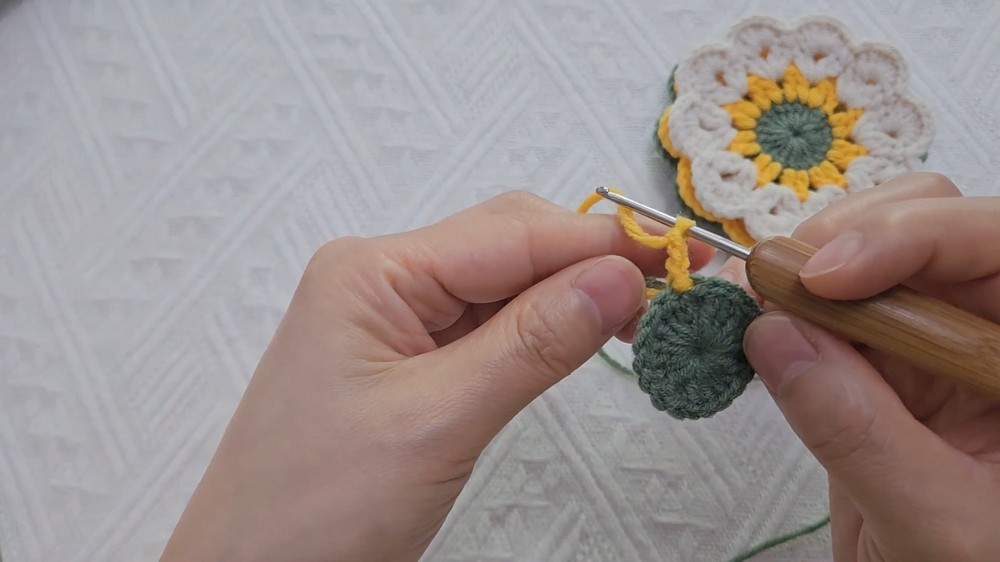
Step 1: Attach yellow yarn.
Join yellow yarn to any stitch from Round 1. Choose a position where you can work comfortably and keep the join secure.
Step 2: Create the first pair of double crochets.
Chain 3, counting these chains as your first double crochet. Work one additional double crochet into the same stitch.
You now have two double crochets sharing one stitch from the green center.
Step 3: Form the first petal gap.
Chain 2, then work two double crochets into the next stitch. The chain-2 section creates an open space between pairs of stitches.
Step 4: Repeat around the circle.
Repeat the sequence below nine more times:
-
Chain 2.
-
Work 2 double crochets into the next stitch.
Keep following the same sequence around the remaining stitches. Try to maintain similar tension in each pair so the petal bases remain evenly distributed.
Step 5: Join the round.
Finish with chain 2, then join with a slip stitch as indicated in the pattern. Fasten off yellow yarn.
You should now have 10 chain-2 petal spaces around the circle.
Round 3: Shape the Cream Petal Foundations
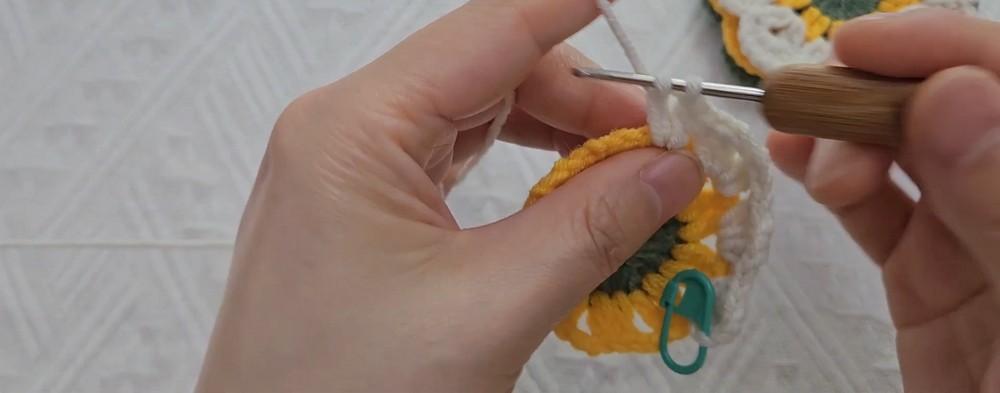
This round turns the yellow base into distinct petal sections. Each chain-2 space receives a shell-like group of stitches that will support the scalloped edging.
Step 1: Position the work and attach cream yarn.
Keep the front side of the coaster facing you. Attach cream or white yarn into any chain-2 space from Round 2.
Working on the front helps keep the decorative side consistent throughout the flower.
Step 2: Form the first shell cluster.
Into the same chain-2 space, work the following sequence:
-
Chain 3, counting it as one double crochet.
-
Work 1 double crochet.
-
Chain 2.
-
Work 2 double crochets.
All these stitches go into the same chain-2 space. The group forms the first shell, with a small opening at its center.
Step 3: Complete the remaining shells.
Work the following sequence into each of the remaining nine chain-2 spaces:
2 dc, ch 2, 2 dc
Place every group inside its designated space rather than working into individual stitches from the previous round.
Step 4: Join without fastening off.
Slip stitch into the top of the starting chain to close the round.
Important: Do not cut the cream yarn here. Round 4 continues directly with the same yarn to create the scalloped border.
Round 4: Crochet the Scalloped Outer Border
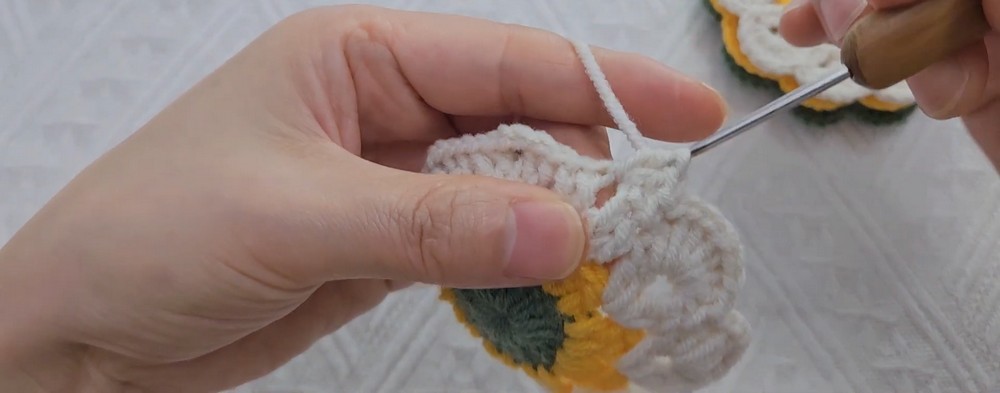
The final round gives each flower petal a rounded, decorative edge. Alternating single crochet and groups of double crochet creates the scalloped outline.
Step 1: Begin with single crochet.
Work one single crochet into the chain-2 space at the top of the previous round, as specified in the pattern.
This shorter stitch provides a dip between the fuller scallops.
Step 2: Build the first scallop.
Work seven double crochets into the next petal gap or space. Place all seven stitches in the same space to create a fuller, curved section.
Avoid spreading these stitches across several spaces, as this changes the scalloped effect.
Step 3: Repeat around the coaster.
Continue alternating the following sequence around the entire coaster:
-
Work 1 single crochet in the designated chain-2 space.
-
Work 7 double crochets in the next petal gap.
Repeat the sequence for each petal section, keeping the stitches evenly spaced.
Step 4: Close the border.
Join with a slip stitch to the first single crochet. Fasten off cream yarn, leaving a longer tail for finishing.
Check your work: The outer edge should have clearly defined rounded scallops. If the border curls or looks uneven, check your stitch placement and tension before blocking.
Finishing Your Crochet Flower Coaster
Weave in the Yarn Ends
Thread the remaining yarn tails through your yarn needle. On the back of the coaster, weave each tail through several nearby stitches, changing direction where practical to help secure it.
Trim excess yarn only after checking that each end is secure. Avoid cutting so close that the tail slips free.
Block the Coaster if Needed
Lay the coaster flat and gently arrange its petals into shape. If the border does not lie flat, use a suitable blocking method for your yarn.
Cotton can tolerate careful handling, but high heat may damage fibers or affect the finished piece. Follow the yarn manufacturer’s care instructions, and avoid direct steam contact unless the fiber and equipment instructions permit it.
Allow the coaster to dry completely before placing it under a mug or glass.
Ways to Customize Your Flower Coaster
-
Sunflower colors: Replace green, yellow, and cream with brown, golden yellow, and a lighter accent shade.
-
Holiday palette: Use red, green, white, or other festive color combinations.
-
Larger floral mats: Try thicker cotton yarn and a larger hook, adjusting tension as needed. The finished diameter will vary.
- Matching sets: Make several coasters in complementary colors for coordinated table settings or handmade gifts.