Functional Crochet Pumpkin Coasters with Orange Body
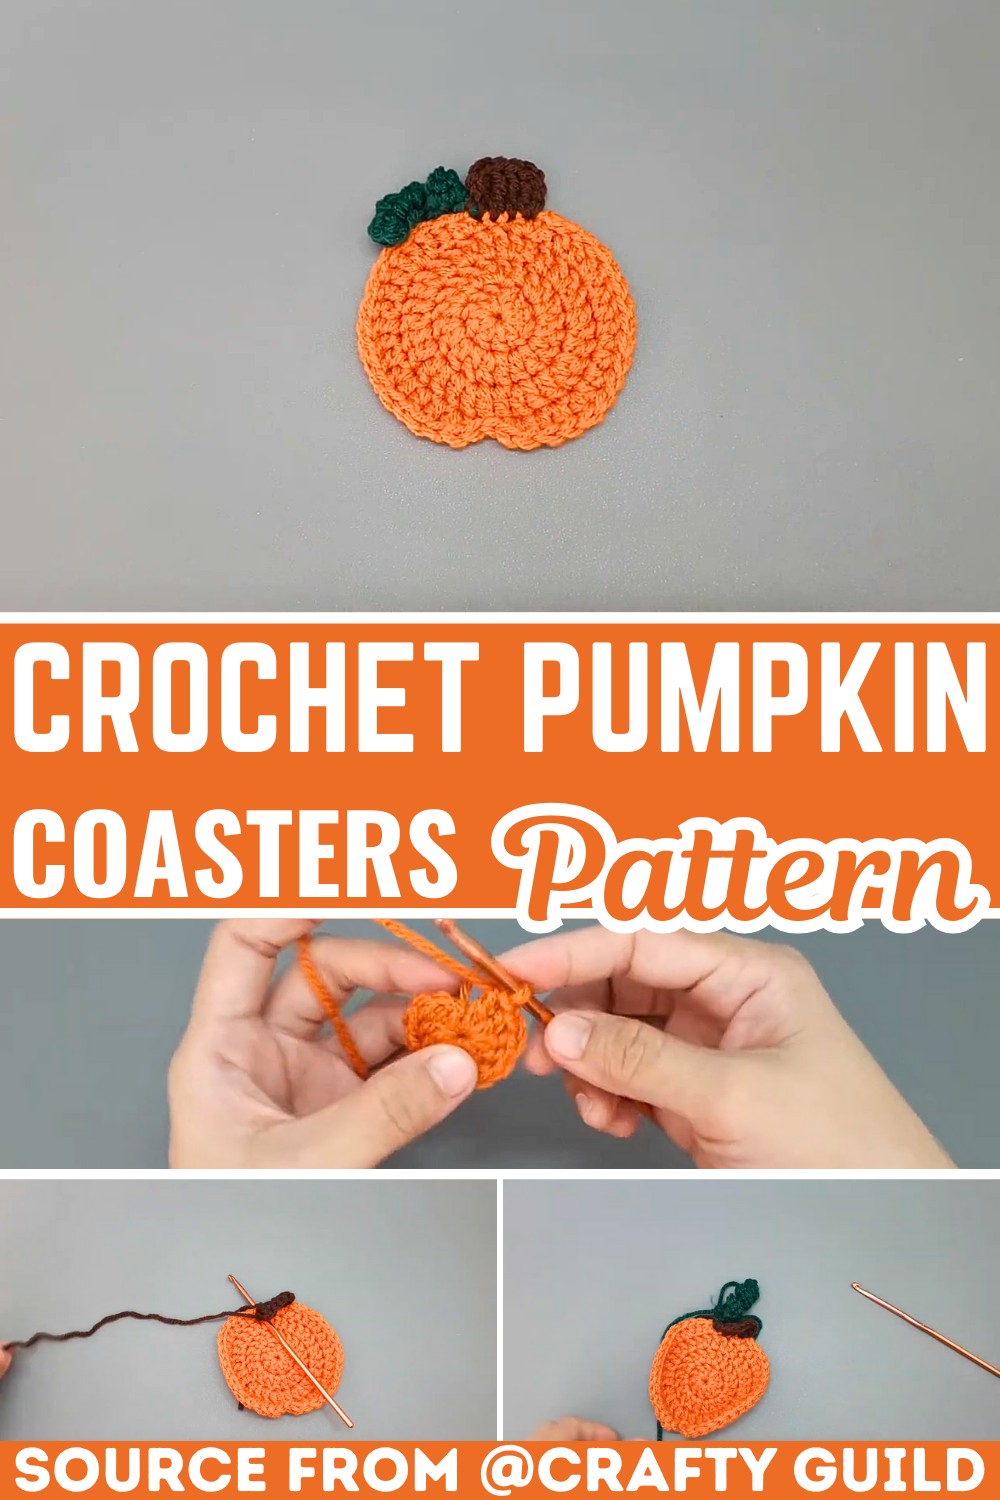
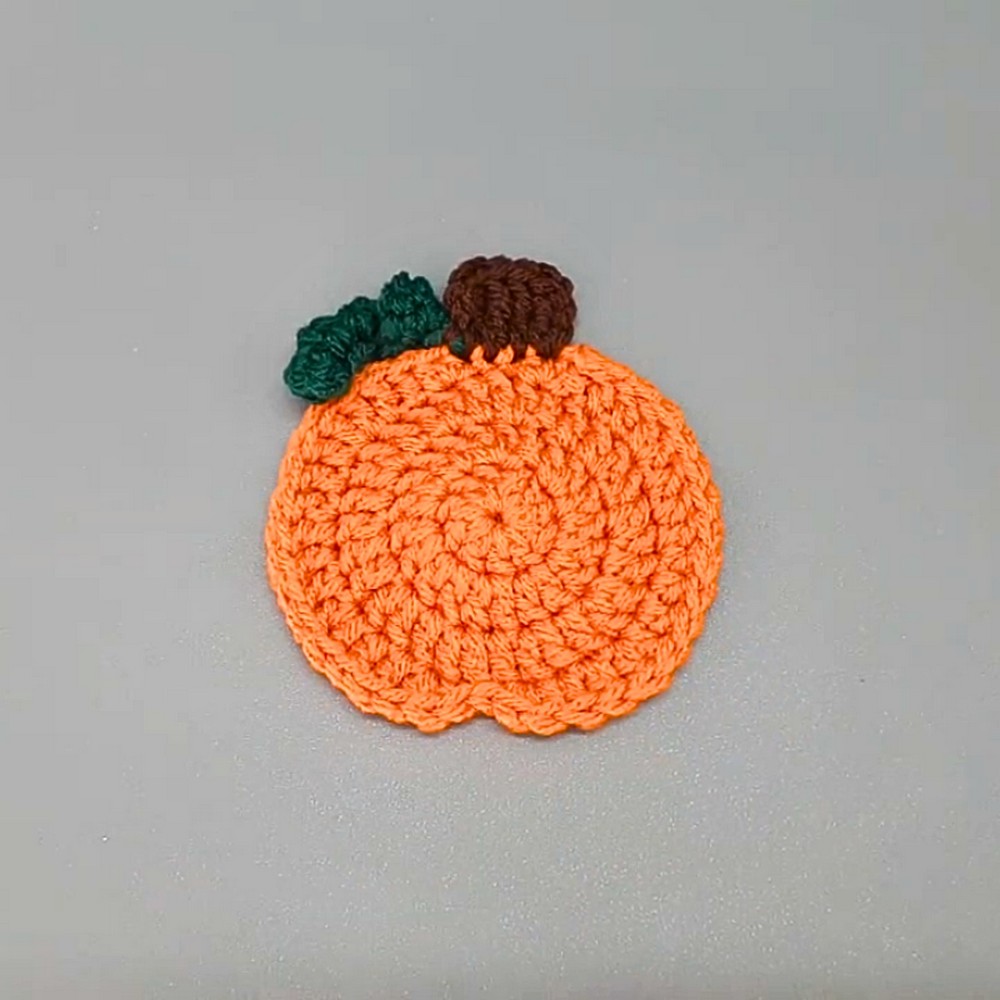
A simple pumpkin-shaped coaster can instantly make an ordinary table feel warm and welcoming. With its bright orange body, sturdy brown stem, and playful green curl, this crochet coaster captures the charm of the fall season practically.
The textured design is easy to recognize while remaining simple enough for patient beginners to enjoy. It’s a delightful crochet item that combines everyday function with handmade seasonal style.
Crochet Pumpkin Coasters
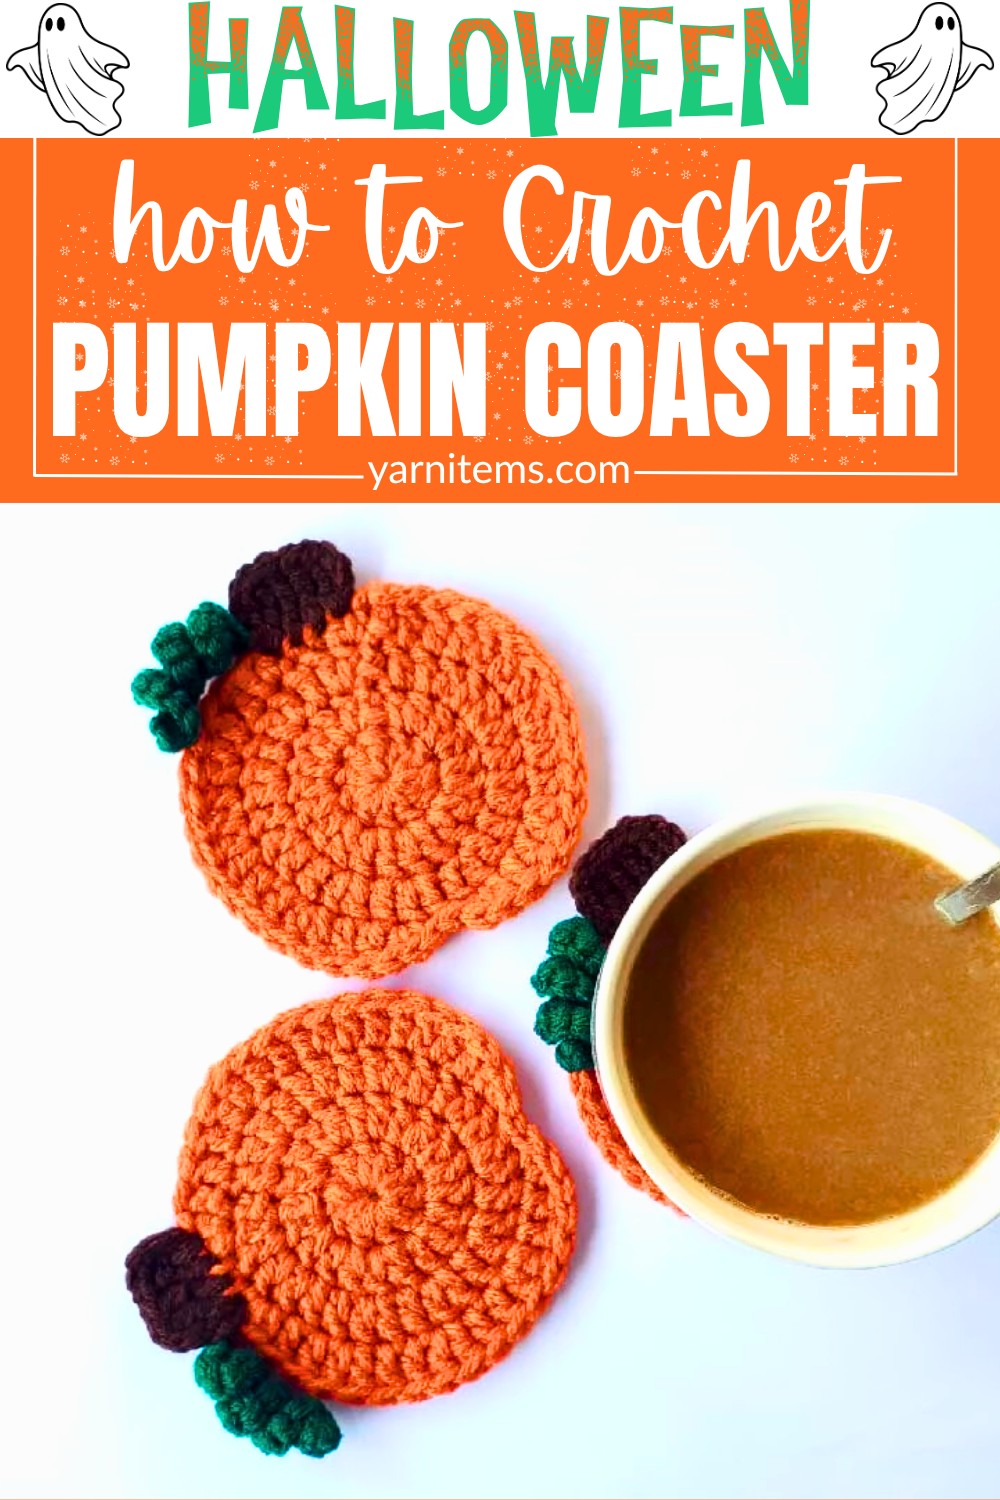
Every stitch works together to create a crochet coaster that protects your surfaces while adding a cheerful decorative accent. The guide below includes the materials, stitch abbreviations, pattern notes, finished size, customization ideas, and detailed instructions needed to complete each piece with confidence. Whether you make a single coaster or a matching set, this charming crochet design is perfect for mugs, glasses, candles, and cozy autumn table settings. Its compact size also makes it a thoughtful handmade addition to seasonal gifts and home décor.
Credit Crafty Guild
Perfect for Fall Decorating
- Versatility: Use the coaster to enhance coffee tables or dining tables.
- Styling Tips:
- Add candles and small pumpkins for a warm autumn vibe.
- Pair it with seasonal table runners for a cohesive look.
- Create a cozy centerpiece perfect for the season.
- Creative Options: Mix and match with other crochet pieces featuring fall themes.
These Tools Will Save You Time
To create one crochet pumpkin coaster, you will need:
- Yarn: Worsted weight yarn in orange (main body), brown (stem), and green (vine).
- Crochet hook: 4.25 mm (G/6).
- Other tools: A pair of scissors and a yarn needle for finishing.
Pattern Secrets Experts Don’t Tell You
- Starting Point:
- Begin the project by crocheting into a magic ring.
- Joining Rounds:
- Use slip stitches to join the end of each round back to the first stitch.
- Key Tips:
- Pay close attention to both repetition and stitch counts for each round.
- This is important to ensure the pumpkin shape remains circular and stable.
- Customization:
- To make the coaster larger or smaller, add or subtract rounds as needed.
- Adjust your stitch increases appropriately to maintain the circular shape.
Which Finish Size Is Best?
2. Creative Ways to Use Your Pumpkin Coaster
- Under mugs, cups, and glasses – Protect your surfaces while adding a cozy, seasonal touch.
- As a candle mat – Place under candles to create a warm autumnal ambiance while protecting your furniture.
- Under small flower pots – Elevate succulents or tiny indoor plants with a festive base.
- Table decorations for Thanksgiving – Use them as charming accents at each place setting.
- Handmade gift sets – Combine sets of coasters with other goodies for a thoughtful, handcrafted present.
- Fall party table settings – Scatter them creatively across the dining table for a cohesive seasonal theme.
Why it works: Utilizing pumpkin coasters in these ways enhances the functionality and aesthetic appeal of the item, increasing its perceived value and making it a versatile addition to your home or gifting repertoire.
- Approximately 4–5 inches in diameter (size may vary depending on yarn type and tension).
Customization Made Easy with This Simple Key
- Natural Pumpkin Look: Use variegated orange yarn to create a realistic, organic pumpkin effect.
- Adjust Size:
- Add an extra round to make the coaster larger.
- Omit one round to make the coaster smaller.
- Halloween Theme: Embroider a small face on the pumpkin to turn it into a festive Halloween decoration.
Essential Terminologies Explained Simply
This pattern follows US crochet terminology:
- Ch: Chain
- Sl St: Slip Stitch
- Dc: Double Crochet
- Hdc: Half Double Crochet
- Tr: Treble (Triple) Crochet
- Sc: Single Crochet
- Magic Ring: A way to start crocheting in the round.
Learn Every Step Without Confusion
Pumpkin Body (Orange Yarn)
Round 1:
- Make a magic ring.
- Ch 2 (counts as the first dc) and work 10 dc into the magic ring. (Total: 10 dc)
- Pull the yarn tail to tighten the magic ring.
- Sl St to the top of the first dc to close the round.
Round 2:
- Ch 2 (counts as the first dc).
- In the same stitch, make 2 dc.
- Work 2 dc in each stitch around. (Total: 20 dc)
- Sl St to the top of the first dc to close the round.
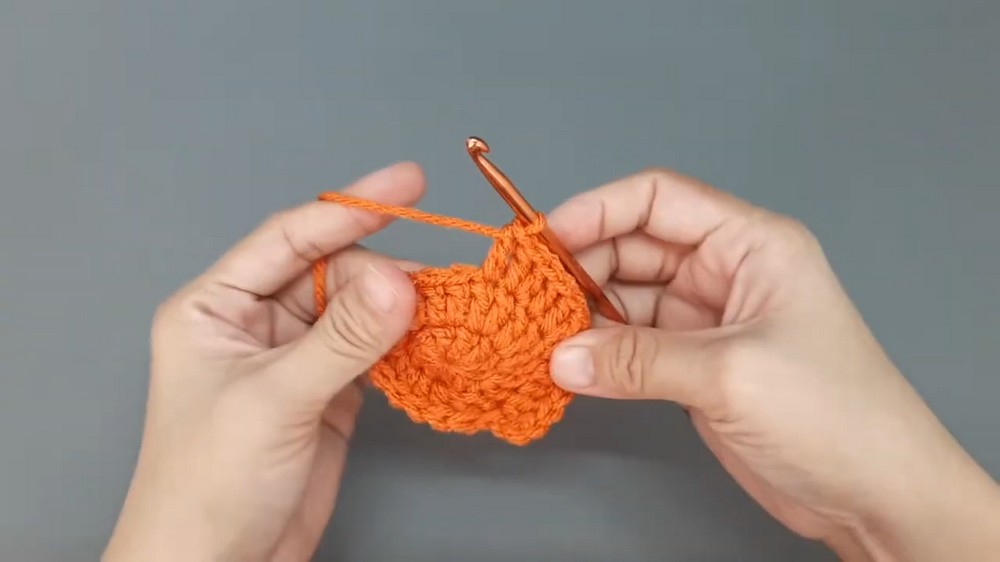
Round 3:
- Ch 2 (counts as the first dc).
- In the same stitch, work 2 dc.
- In the next stitch, work 1 dc.
- Repeat the pattern: 2 dc in one stitch, 1 dc in the next stitch.
- Continue this pattern until the round is complete. (Total: 30 dc)
- Sl St to the top of the first dc to close the round.
Round 4:
- Ch 2 (counts as the first hdc).
- In the same stitch, work 2 hdc.
- In the next 2 stitches, make Sl St.
- In the next stitch, work 2 hdc.
- In the next 2 stitches, work 1 dc in each.
- In the next stitch, work 2 dc in the same stitch.
- Repeat the following pattern: 2 dc in one stitch, 1 dc in the next two stitches around to the end of the round.
- Continue until the entire pumpkin shape is formed (wider on the sides, tapered at the top/bottom).
- Sl St to the first hdc of the round, then fasten off and weave the ends.
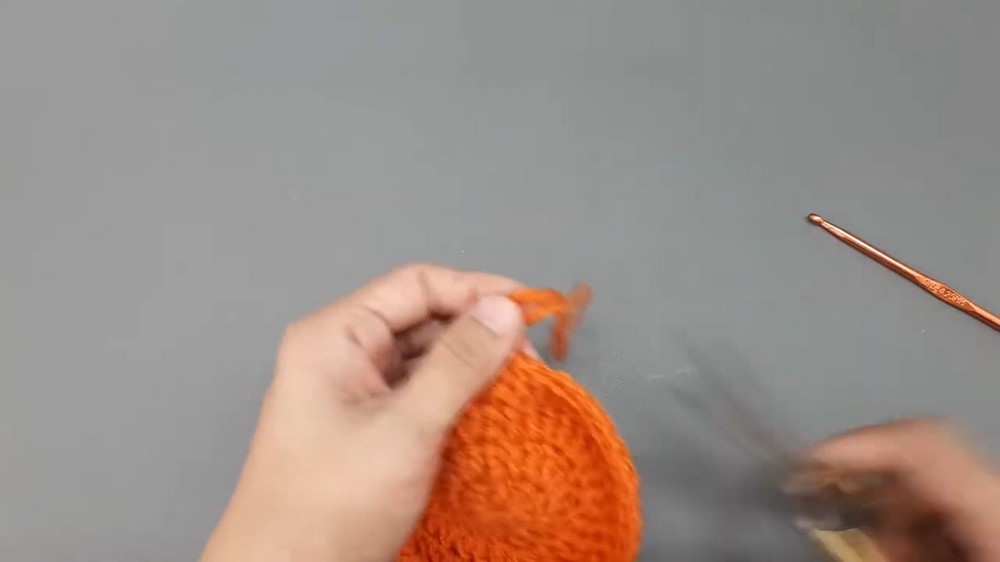
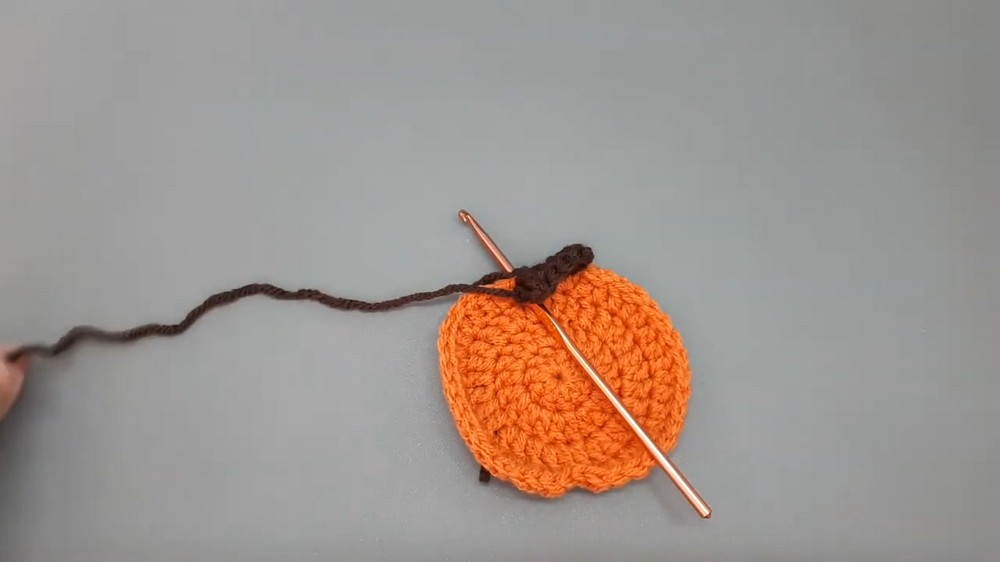
Pumpkin Stem (Brown Yarn)
- Insert your hook into the second hdc of the previous round.
- Attach the brown yarn and Ch 3.
- In the same stitch, work 1 tr.
- Work 1 tr in the next 3 stitches.
- Ch 3 and Sl St into the same stitch.
- Fasten off and weave in the ends.
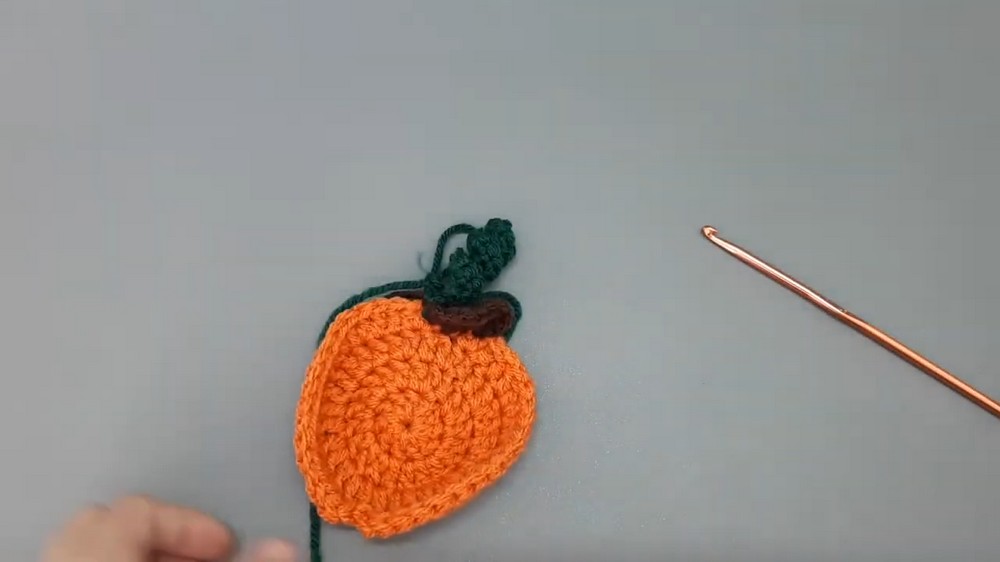
Pumpkin Vine (Green Yarn)
- Join the green yarn with a Sl St into one of the stitches near the stem.
- Ch 13.
- Skip the first chain and work 2 sc into each chain down the length of the chain.
- Fasten off and weave in the ends.
Last-Minute Touches That Wow Everyone
- After completing the rounds, vine, and stem, use a yarn needle to securely weave in all ends.
- Block the coaster lightly (if needed) to smooth the shape and edges.
Creative Ways to Use Your Pumpkin Coaster
- Under mugs, cups, and glasses – Protect your surfaces while adding a cozy, seasonal touch.
- As a candle mat – Place under candles to create a warm autumnal ambiance while protecting your furniture.
- Under small flower pots – Elevate succulents or tiny indoor plants with a festive base.
- Table decorations for Thanksgiving – Use them as charming accents at each place setting.
- Handmade gift sets – Combine sets of coasters with other goodies for a thoughtful, handcrafted present.
- Fall party table settings – Scatter them creatively across the dining table for a cohesive seasonal theme.
Why it works: Utilizing pumpkin coasters in these ways enhances the functionality and aesthetic appeal of the item, increasing its perceived value and making it a versatile addition to your home or gifting repertoire.