Crochet Puff Stitch Bookmark Pattern with Tassel
Crochet bookmarks are practical and pretty accessories for book lovers. This bookmark, featuring a puff stitch pattern and a tassel, stands out with its intricate yet simple design, giving a touch of elegance to your favorite books. It’s a perfect handmade project for adding personality to your reading routine.

Crochet Puff Stitch Bookmark
This Pattern is inspired by the joy of reading and the beauty of handmade crafts. It’s a charming addition during back-to-school season or a thoughtful gift idea for World Book Day. Its lightweight design makes it easy to carry and use in books, journals, or planners, making reading even more enjoyable.
Credit Anutha – The Crochet World
Features & Benefits
- Skill Level & Time Commitment:
- Beginner-friendly with easy-to-follow steps like puff stitches and double crochets.
- Quick to complete, even if you’re new to crochet.
- Versatility:
- Perfect project for using leftover yarn scraps.
- Customizable with different colors, yarn types, and tassel lengths.
- Gifting & Personal Use:
- Perfect as a gift for book lovers, teachers, or students.
- Adds a handmade touch to personal journals or planners.
Materials & Tools Needed
- Yarn:
- Use 100% cotton yarn for durability (colors are customizable).
- Recommended yarn weight: Light (e.g., sport or DK).
- Hook:
- 2.5 mm crochet hook for a delicate and neat stitch design.
- Additional Tools:
- Scissors for trimming yarn and tassels.
- Darning needle for weaving the ends.
- Optional:
- 4 fingers for creating the tassel base (or use a tassel maker).
Finished Size & Customization Ideas
- Approximate Finished Size:
The bookmark length can range depending on how many repeats of the pattern you create (about 6–8 inches or longer based on preference). Width is approximately 1 inch. - Customization Ideas:
- Adjusting Yarn Weight:
- Use fingering weight yarn for a thinner bookmark.
- Use worsted weight yarn for a bulkier design.
- Length:
- Repeat the designated pattern until you reach your desired length.
- Colors:
- Use multicolor yarn for a gradient effect or alternate solid colors between rows.
- Tassels:
- Add tassels in matching or contrasting colors at the base for extra flair.
- Adjusting Yarn Weight:
Pattern Abbreviations & Terminology
- Ch: Chain
- Yarn Over: Wrapping the yarn around your hook.
- Puff Stitch: A cluster of yarn overs pulled together to form a raised stitch.
- Double Crochet: Standard stitch worked in parts (here, doubled half-finished stitches are pulled together).
- Magic Circle: A starting loop that creates a closed ring for your first round.
(Pattern uses US crochet terminology.)

Step-by-Step Detailed Crochet Instructions
1. Starting the Pattern
- Create a magic circle:
- Wrap the yarn around your fingers to form a loop.
- Insert the hook, grab the yarn, and twist to create a secured working loop.
- Work Chain 3 (Ch 3) into the magic circle.
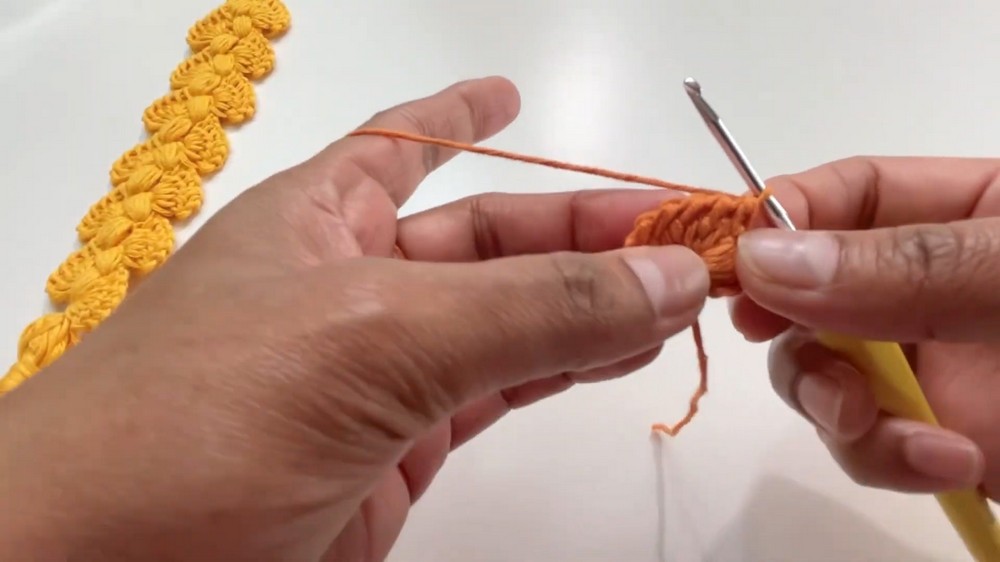
2. Create the Puff Stitch
- Yarn Over 6 Times into the magic circle:
- Yarn over, insert hook into the circle, pull through yarn. Repeat 6 times (you’ll have 13 loops on the hook).
- Finish Puff Stitch:
- Yarn over, pull through all loops on the hook.
- Chain 1.
3. Create Half-Double Crochets
- Form Double Crochet Clusters (6 stitches halfway done):
- Yarn Over, insert hook into the magic circle, pull through yarn.
- Pull through only 2 loops every time and leave the stitch half-completed.
- Repeat this process 6 times until you have 7 loops on your hook.
- Finish Double Crochets:
- Yarn over, pull through 1 loop initially.
- Then pull through 2 loops at a time until all loops are cleared.

4. Repeat for Desired Length
- Chain 3 and Turn Your Work:
- Locate the space between the puff stitch and chains from the previous row.
- Create Puff Stitch in the Space:
- Yarn over 6 times, insert hook, and pull through all loops for a puff stitch.
- Work Double Crochets After Puff Stitch:
- Locate space between the puff stitch and the chain 3 stitches.
- Repeat the process of 6 half-done double crochets.
- Pull all loops together to complete the cluster of double crochet stitches.
- Repeat Steps 7–9 until the bookmark reaches your desired length.
5. Ending and Finishing
- Final Row:
- Add an extra Chain 1 at the end and cut the yarn.
- Pull through the last stitch and secure.
- Weave Ends:
- Use the darning needle to weave the top tail into the stitches.
- Add Bottom Tassel:
- Wrap yarn around 4 fingers about 20 times.
- Tie at the top, secure tightly with a knot, and attach to the bottom loop of the bookmark.
- Trim tassel ends to even out.
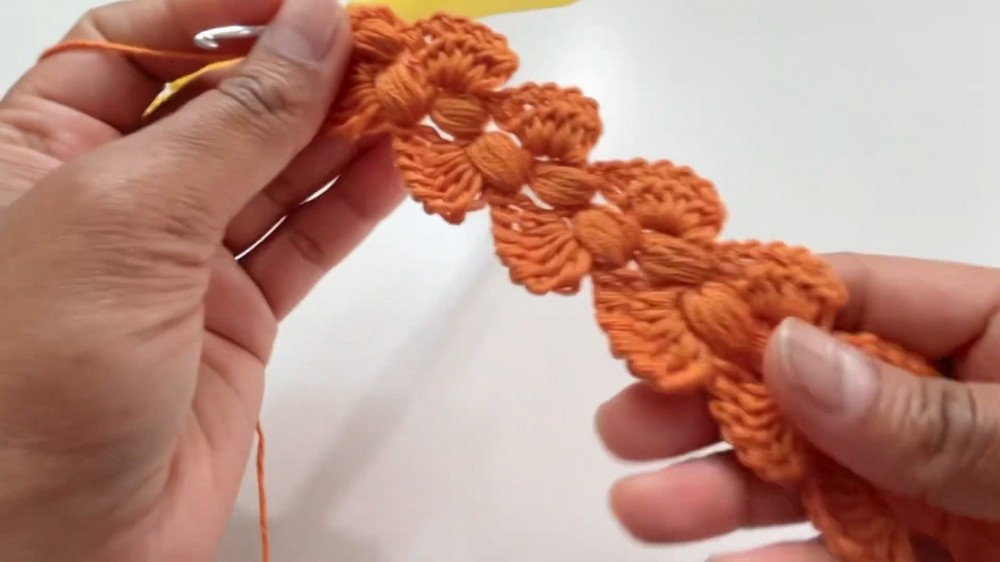
Key Notes
- Ensure your stitches are tightened evenly, especially the puff stitches.
- For beginners, work slowly with the puff stitch to avoid snagging loops.
- Experiment with different color or yarn styles to personalize bookmarks for gifting.
And that’s your Crochet Bookmark! Enjoy creating your unique pieces and adding personal touches. 😊
Extra Tips, Variations & Use Cases
- Color Scheme Ideas:
Choose neutral tones for a classic look, vibrant shades for a playful vibe, or seasonal hues (e.g., reds and greens for the holidays). - Gifting Ideas:
Pair the bookmark with a book or a journal for a meaningful gift. You can also use it as a party favor or a giveaway for book clubs. - Alternative Uses:
Use the same pattern to create other items like keychains or decorative accents for bags. - Encourage Personalization:
Add beads or charms to the tassel for extra flair. You can also play with the length or make themed bookmarks for occasions.