Free Crochet Christmas Star Pattern For Festive Decor
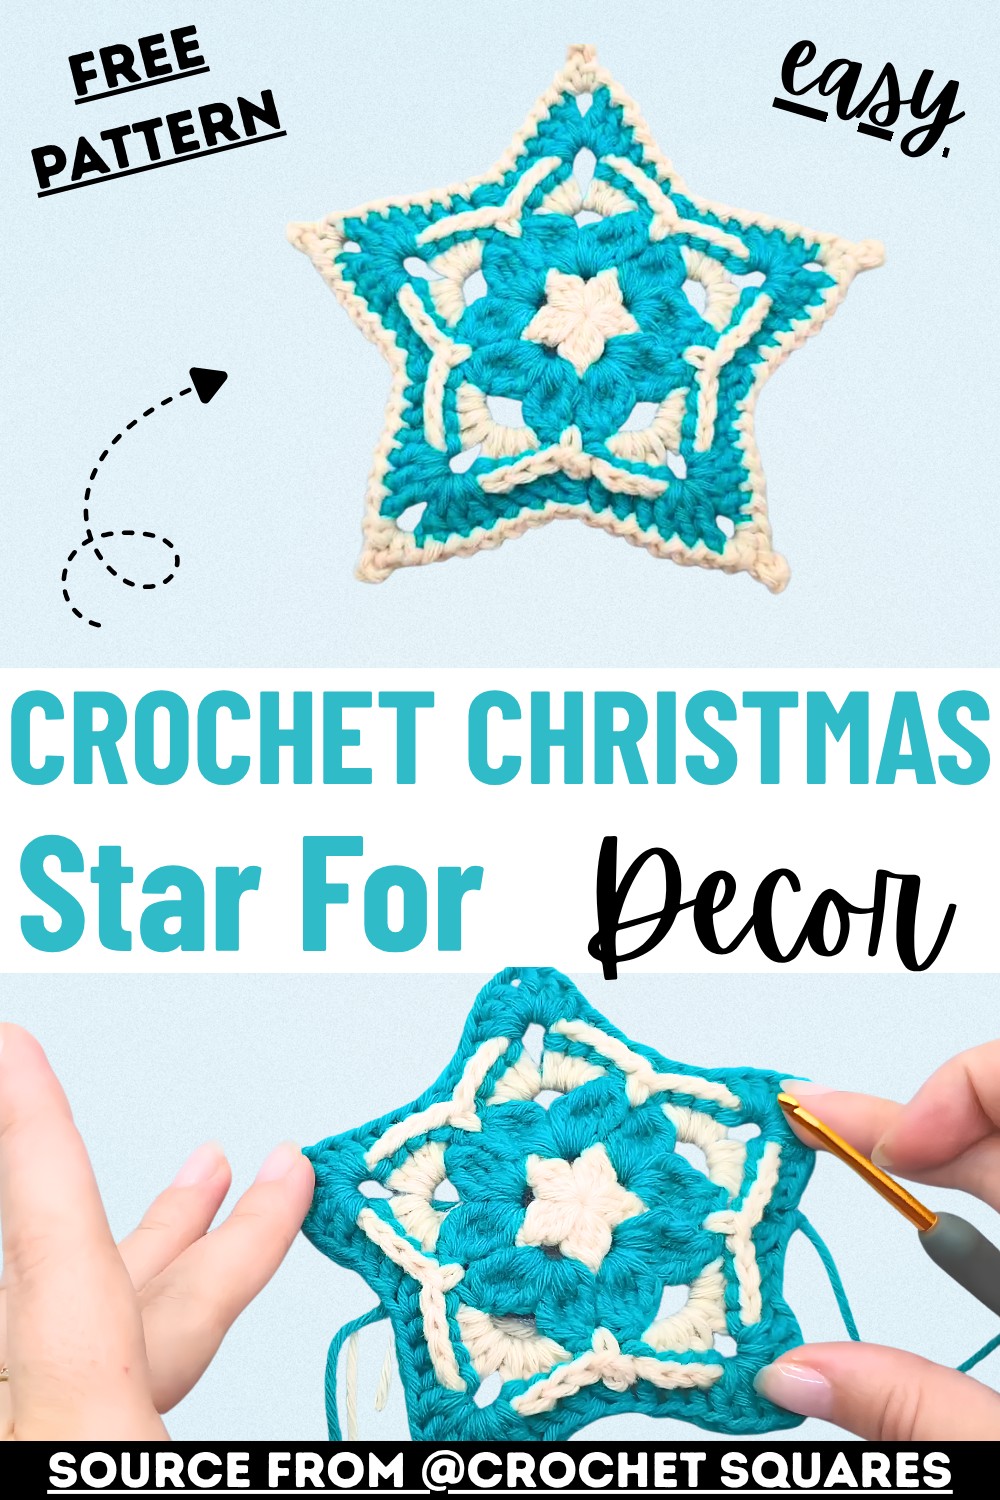
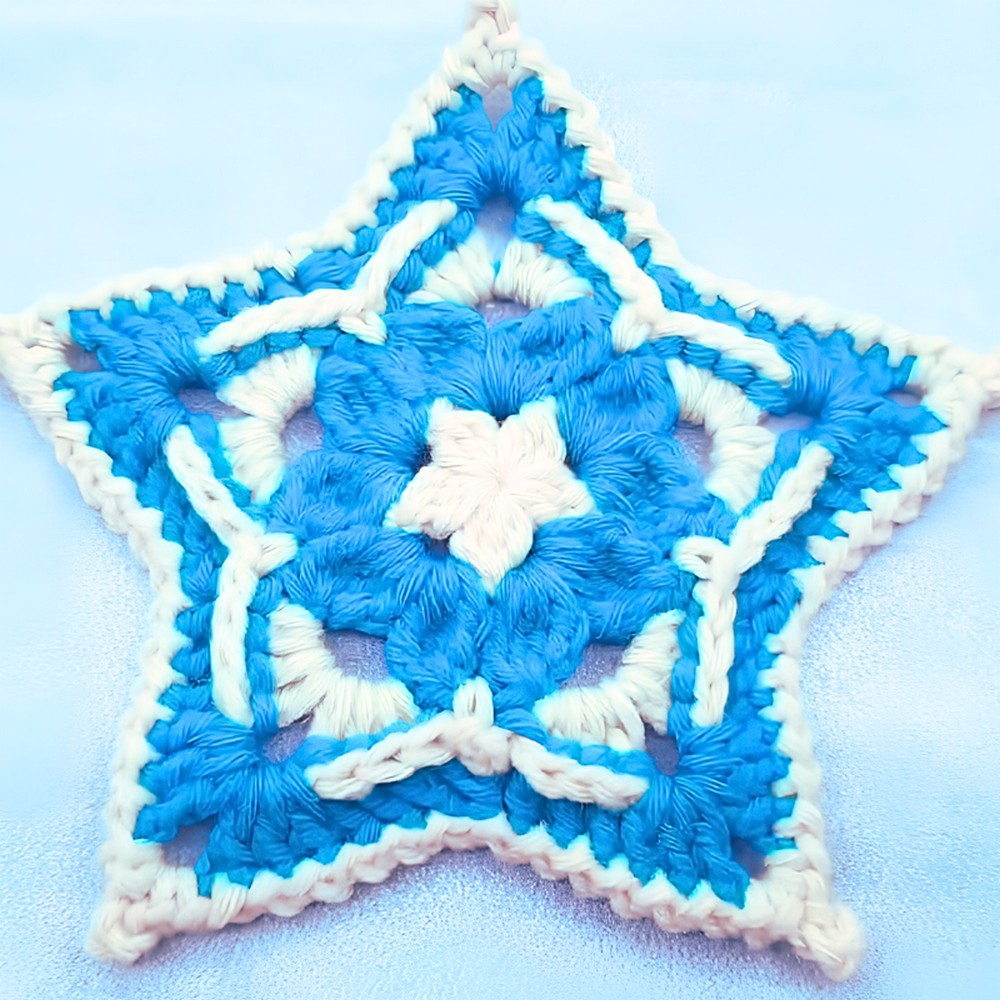
A crochet Christmas star is one of those decorations that instantly makes holiday decorating feel more personal. Hang it on the tree, display it in a festive garland, decorate gift packages, or add it to a holiday wreath for a handmade touch. Its classic shape never goes out of style, making it a crochet piece you’ll want to use year after year.
Crochet Christmas Star Pattern
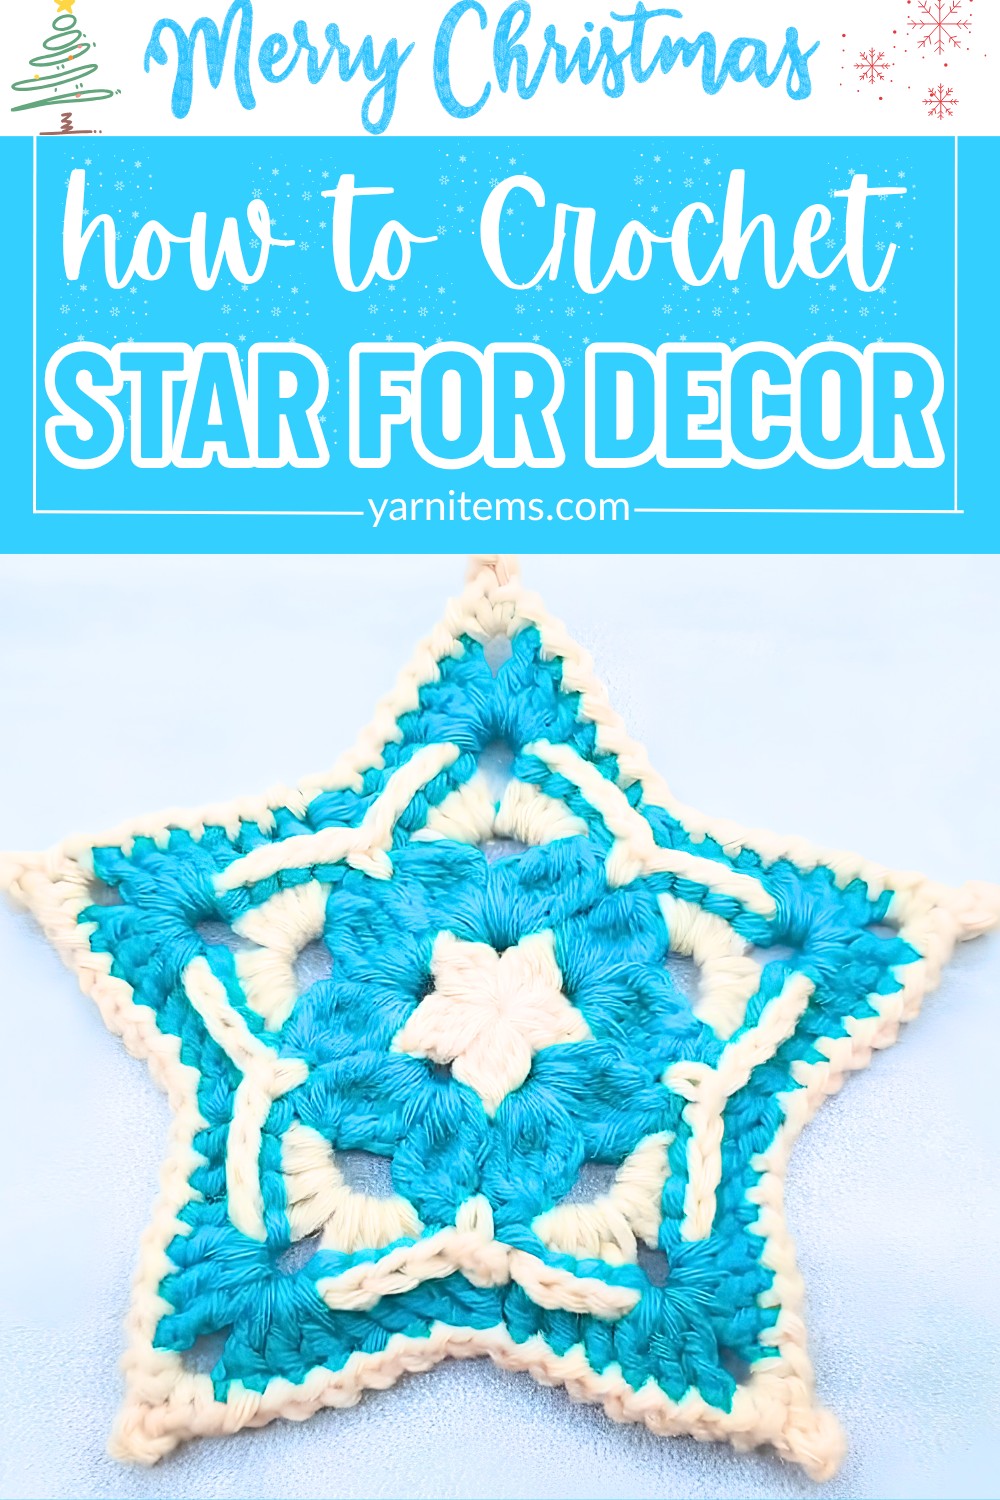
This crochet pattern breaks the star into simple, easy-to-follow sections. So you can build each point with confidence without feeling overwhelmed. Whether you’re creating your first Christmas ornament or adding another design to your holiday collection, the process stays enjoyable from beginning to end. Keep scrolling to see how a few basic crochet stitches come together to create a festive star that’s ready to brighten any celebration.
Credit Crochet Squares
Materials & Tools Needed
- Yarn: DK weight acrylic yarn in two coordinating holiday colors (e.g., beige/cream and emerald green). Optional: Metallic silver yarn for the final border.
- Crochet Hook: 3.00 mm (Size 5/0)
- Other Supplies: Scissors, Yarn Needle/Tapestry Needle, Measuring Tape
Finished Size & Customization Ideas
- Size Variations:
- Star 1 (Smaller Option): Approx. 4.5 inches (11.5 cm) across.
- Star 2 (Larger Option): Approx. 5.7 inches (14.5 cm) across.
- Customization Options:
- Add a metallic yarn border for sparkle.
- Use as a festive blanket motif, table runner, or connect stars into a garland.
Pattern Abbreviations & Terminology
- ch: Chain
- sc: Single crochet
- dc: Double crochet
- tr: Treble crochet
- sl st: Slip stitch
- ch-sp: Chain space
- dc3tog: Double crochet 3 stitches together (cluster stitch)
- tr4tog: Treble crochet 4 stitches together (petal/cluster stitch)
- bpsc: Back post single crochet
- bpdc: Back post double crochet
- bpdt / bpdc dec: Back post double crochet decrease (stitches worked together around posts)
- picot: Chain 4, slip stitch into the first chain (forms a loop/point).
Step-by-Step Instructions
Round 1 (Color A – Beige/Cream)
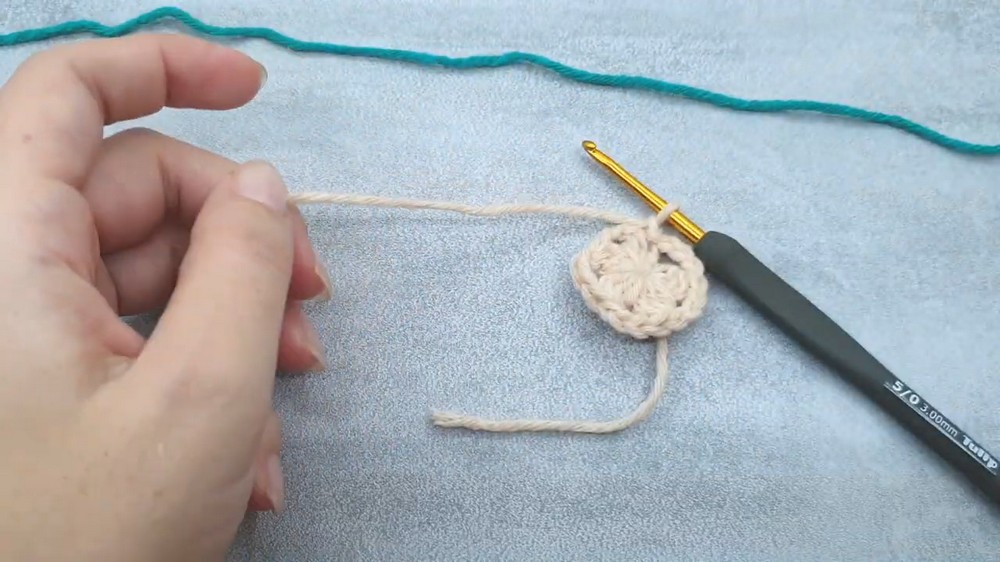
- Make a magic circle, ch 1 to secure.
- Work 1 sc into the circle.
- Crochet 2 unfinished dc into the circle, yarn over.
- Pull through all loops on the hook (dc3tog cluster). Ch 3.
- Repeat (dc3tog, ch 3) 4 more times into the circle.
- Pull the tail of the circle tightly to close.
- Join with sl st to the first cluster, ch 1, fasten off.
Tip: You’ll now have a 5-pointed star core/flower shape.
Round 2 (Color B – Green)
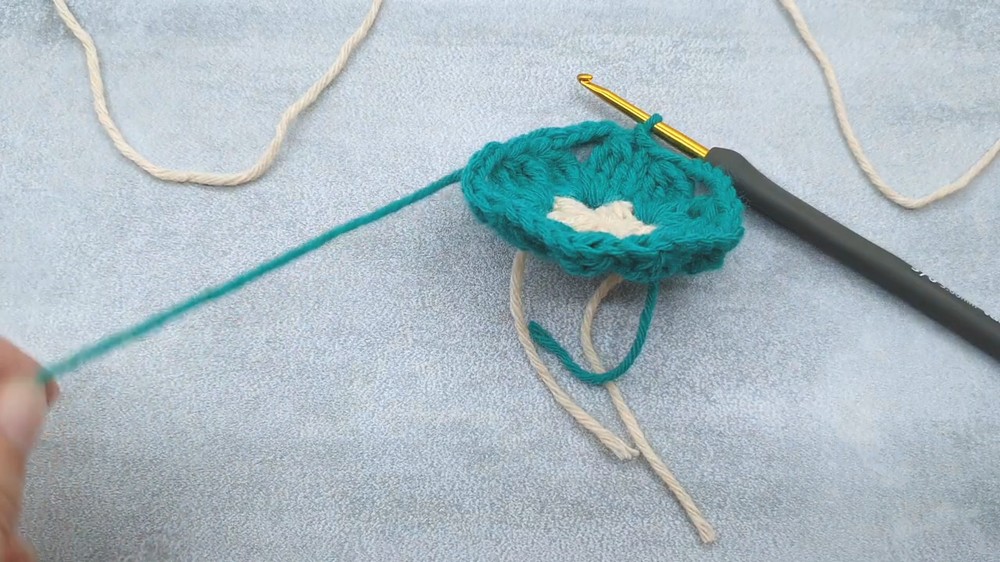
- Attach Color B to any ch-3 space from Round 1 using a slip knot/slip stitch.
- In the same ch-3 space, work: 1 sc, ch 2, 3 unfinished tr.
- Yarn over, pull through all loops to complete tr4tog petal cluster. Ch 5.
- In the same ch-3 space, work another tr4tog cluster, followed by ch 1.
- Move to the next ch-3 space and repeat: (tr4tog, ch 5, tr4tog, ch 1) for all spaces.
- Finish the round with sl st, ch 1, fasten off.
Round 3 (Color A – Beige/Cream)
- Attach Color A to any ch-5 space from Round 2.
- In the ch-5 space, work: 1 sc, ch 1, 3 dc, ch 3, 4 dc.
- In the next ch-1 space (between clusters), work 1 sc.
- Repeat the sequence around: (In ch-5 space: 4 dc, ch 3, 4 dc. In ch-1 space: 1 sc) for all points.
- Join with sl st, ch 1, fasten off.
Note: If making smaller Star 1, skip ahead to Round 5 for the final border.
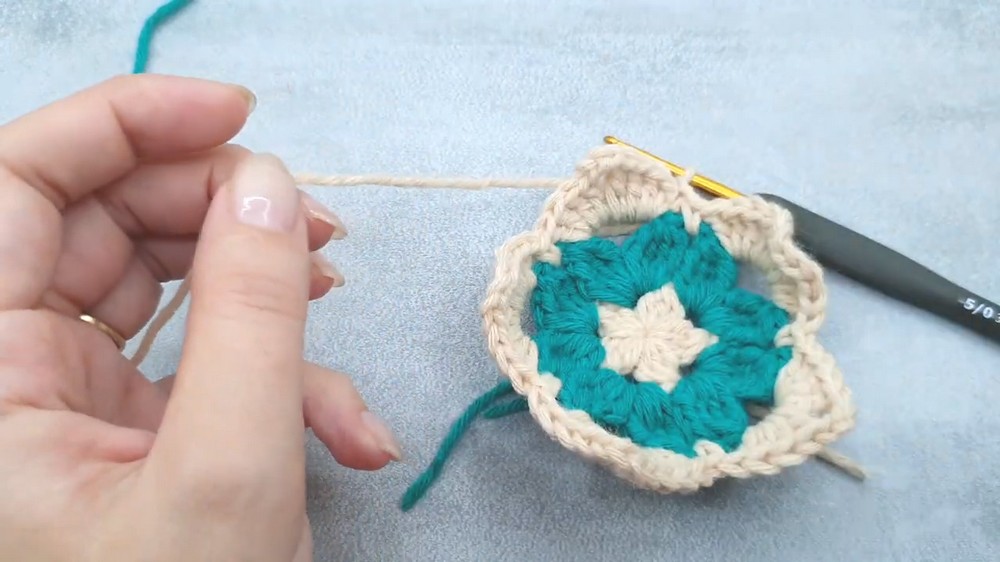
Round 4 (Color B – Green)
- Attach Color B to the back post of the first sc in Round 3.
- Work 1 bpsc, ch 1.
- Work 2 bpdc over the next two stitches.
- At the ch-3 peak space, create the point as follows:
- 1 sl st, ch 1, 1 sl st.
- Ch 4 picot: Chain 4, sl st into the first chain.
- 1 sl st, ch 1, 1 sl st.
- Work 4 bpdc down the other side of the peak.
- Skip the next stitch (sc from previous row).
- Repeat for all star points: 4 bpdc up, peak pattern at ch-3, 4 bpdc down.
- Join with sl st, ch 1, fasten off.
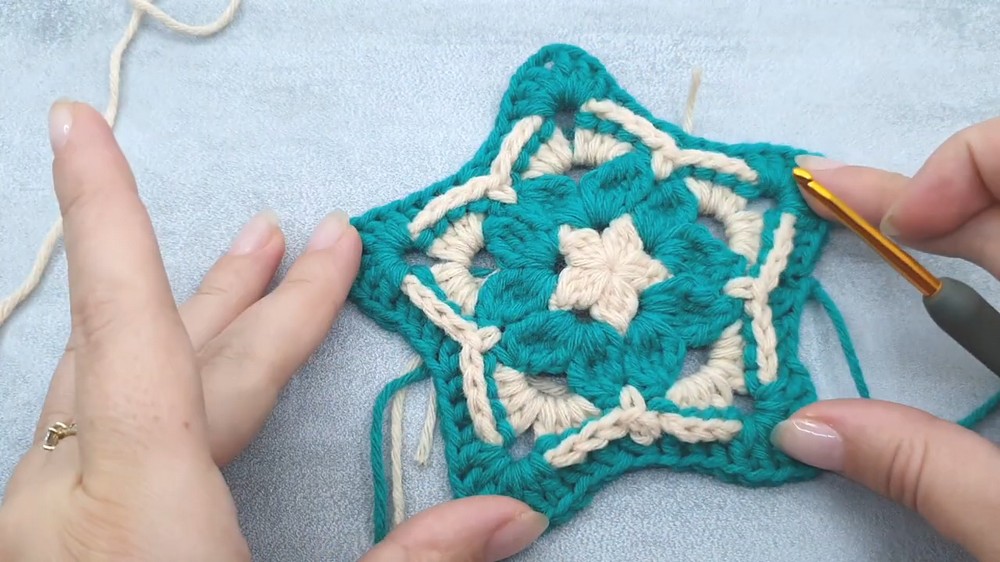
Round 5 (Textured Final Layer – Color A or Metallic Yarn)
- Attach finishing yarn to the back loop of a peak point.
- Work 1 bpsc, ch 1, and 2 bpdc down the edge.
- In the valley section: work 3 bpdc, followed by 2 bpdc decrease.
- Continue up the side with 3 bpdc.
- In the ch-3 peak space, work: (3 dc, ch 3, 3 dc).
- Mirror the pattern downward: 3 bpdc, 2 bpdc dec, 3 bpdc.
- Join with final sl st, cut yarn, pull tight, and weave in ends using a tapestry needle.
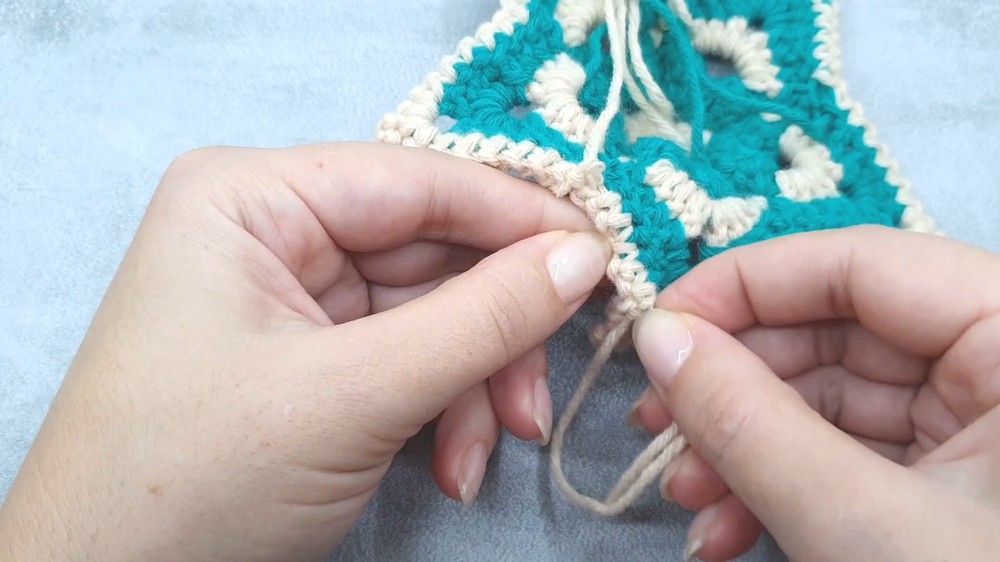
Finishing Touch:
Weave in all loose ends securely, trim excess yarn, and block your star to achieve the desired shape. Your crochet Christmas star is now ready to shine.