Festive Pumpkin Pie Crochet Coasters for Thanksgiving
A slice of pumpkin pie usually belongs on the dessert table, but these crochet coasters let you enjoy that cozy Thanksgiving favorite all season long. Their playful pie-slice design adds a warm autumn touch to every mug. They also protect your table from hot cups and everyday spills. If you’re looking for handmade décor that’s both charming and useful, this crochet pattern is a fun place to start.
Crochet Pumpkin Pie Coasters Pattern
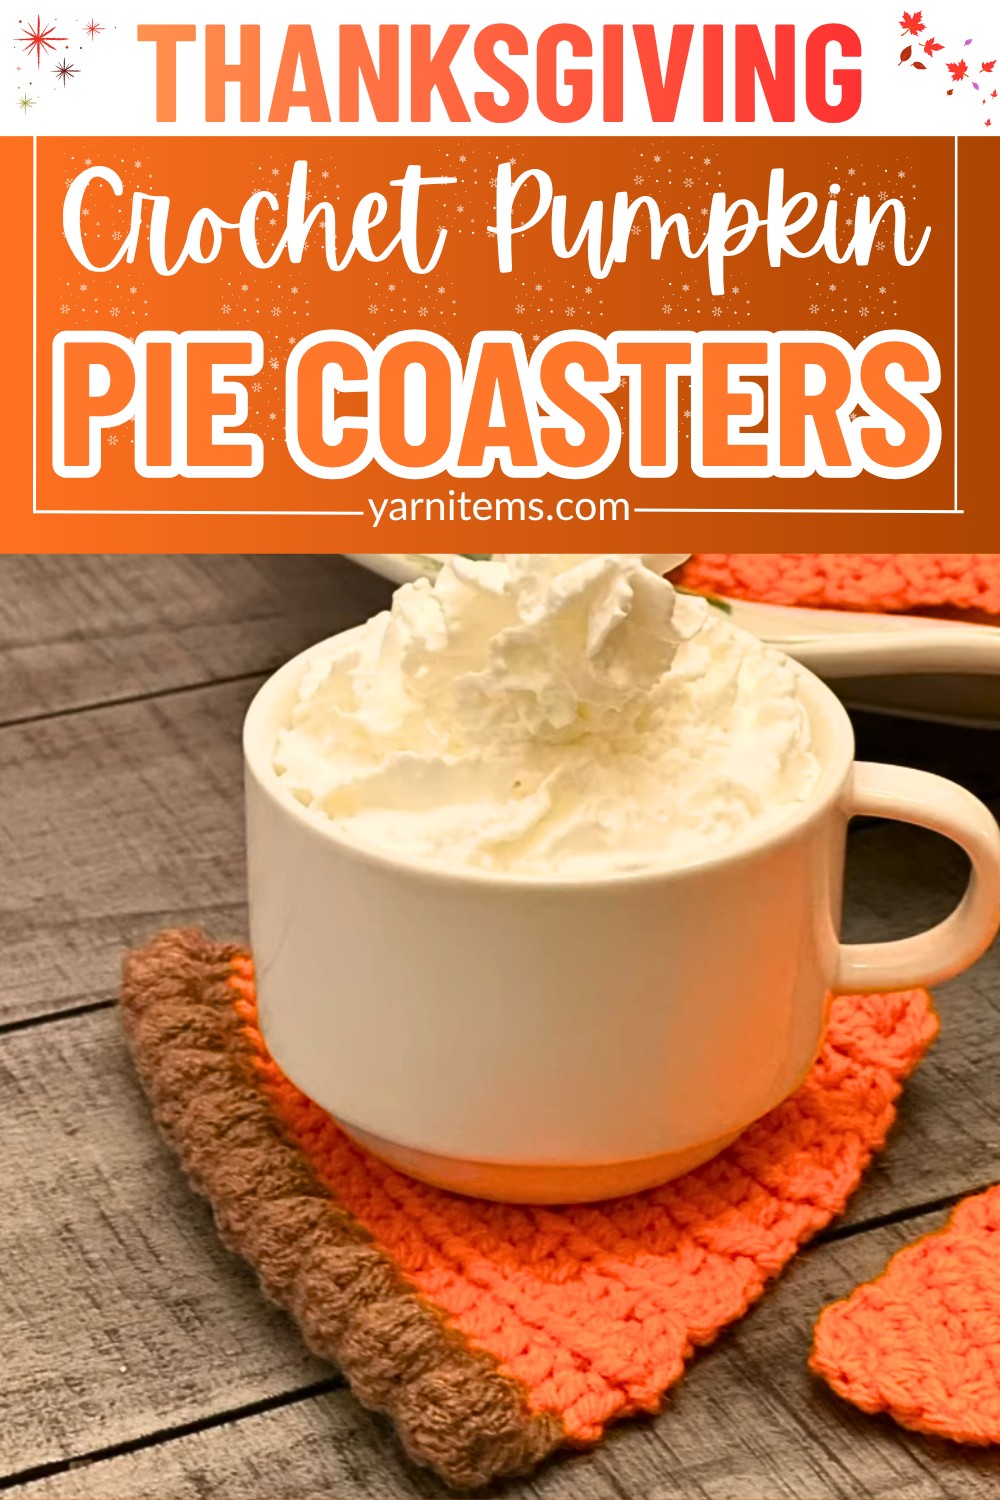
The step-by-step instructions make each coaster easy to build, from the pie filling to the whipped cream topping and crust. They’re quick enough to make for your own table and thoughtful enough to bundle as handmade holiday gifts. Keep scrolling to see how these festive crochet pie slices come together, one stitch at a time.
Credit Loveforyarn123
Materials & Tools Needed
- 3.5mm crochet hook
- Orange yarn (for the pumpkin pie filling)
- Brown yarn (for the crust)
- Scissors
- Tapestry needle (for weaving in ends)
Finished Size & Customization Ideas
- Finished Size: The coaster has a circular design approximately 4–5 inches in diameter (depending on your tension).
- Customization Ideas:
- Adjust the size: Use larger/smaller hooks or alter stitch counts.
- Experiment with colors: Add whipped cream and sprinkles using white or multicolor yarn.
- Block the coasters to maintain shape.
Pattern Abbreviations & Terminology
- MR: Magic ring
- ch: Chain
- hdc: Half double crochet
- sc: Single crochet
- inc: Increase (2 stitches worked into 1 stitch)
- st: Stitch
- bobble stitch: A cluster stitch made by partially completing multiple stitches in the same stitch before closing them together.
Note: US crochet terminology is used for this pattern.

Step-by-Step Detailed Crochet Instructions
Base of the Pumpkin Pie Filling (Orange Yarn):
- Magic Ring with HDCs:
- Make a magic ring.
- Work 2 HDCs into the ring; close the ring. (2 stitches total)
- Round 2:
- Ch 1, turn your work.
- Work 2 hdcs into each stitch (2 increases). (4 stitches total)
- Round 3:
- Start with an increase in the first stitch (2 hdcs in the stitch).
- Work 1 hdc in the next two stitches.
- Increase in the last stitch (2 hdcs). (6 stitches total)
- Round 4:
- Increase in the first stitch.
- Work 1 hdc in the next four stitches.
- End with an increase. (8 stitches total)
- Round 5:
- Increase in the first stitch.
- Work 1 hdc in the next six stitches.
- Finish with an increase. (10 stitches total)
- Round 6:
- Increase in the first stitch.
- Work 1 hdc in the next eight stitches.
- End with an increase. (12 stitches total)
- Round 7 (No increases):
- Work 1 hdc in each stitch around. (12 stitches total)
- Round 8:
- Increase in the first st.
- Work 1 hdc in the next 10 stitches.
- End with an increase. (14 stitches total)
- Round 9:
- Increase in the first st.
- Work 1 hdc in the next 12 stitches.
- End with an increase. (16 stitches total)
- Round 10 (No increases):
- Work 1 hdc in each stitch around. (16 stitches total)
- Round 11:
- Increase in the first stitch.
- Work 1 hdc in the next 14 stitches.
- End with an increase. (18 stitches total)
- Round 12:
- Increase in the first stitch.
- Work 1 hdc in the next 16 stitches.
- End with an increase. (20 stitches total)
- Round 13 (Final round of orange yarn, no increases):
- Work 1 hdc in each stitch around. (20 stitches total)
- Fasten off the orange yarn after completing Round 13.

Crust of the Pumpkin Pie (Brown Yarn):
- Attach Brown Yarn:
- Insert your hook into the first stitch of the previous round.
- Pull the brown yarn through.
- Ch 1 to secure.
- Single Crochet Round:
- Work 1 sc into each stitch around. (20 stitches total)
- Tip: Hide the yarn tail as you work this round to reduce weaving ends later.

Bobble Stitch Decorative Edge:
- Bobble Stitch Round:
- Ch 1, turn your work.
- Begin the bobble stitch in the first stitch:
- Yarn over, insert hook into the stitch, pull through.
- Yarn over, pull through 2 loops.
- Repeat 4 more times in the same stitch until 5 loops are on the hook.
- Yarn over, pull through all 5 loops.
- Close the bobble stitch with an sc in the next stitch.
- Repeat this process around the circle:
- Complete 10 bobble stitches total (alternated with 10 single crochets).

Finishing Techniques:
- Weave in all ends:
- Use the tapestry needle to weave the tails of both yarn colors securely into the back of the coaster.
- Pull the yarn through one row in the opposite direction to secure it.
- Block your coaster:
- Lightly dampen and pin the coaster to preserve its circular shape.
Additional Tips
- These coasters make wonderful gifts for Thanksgiving or fall-themed events.
- They can also be used as decorative pieces for markets or craft fairs.