Crochet Santa Keychain Pattern For Festive Decor
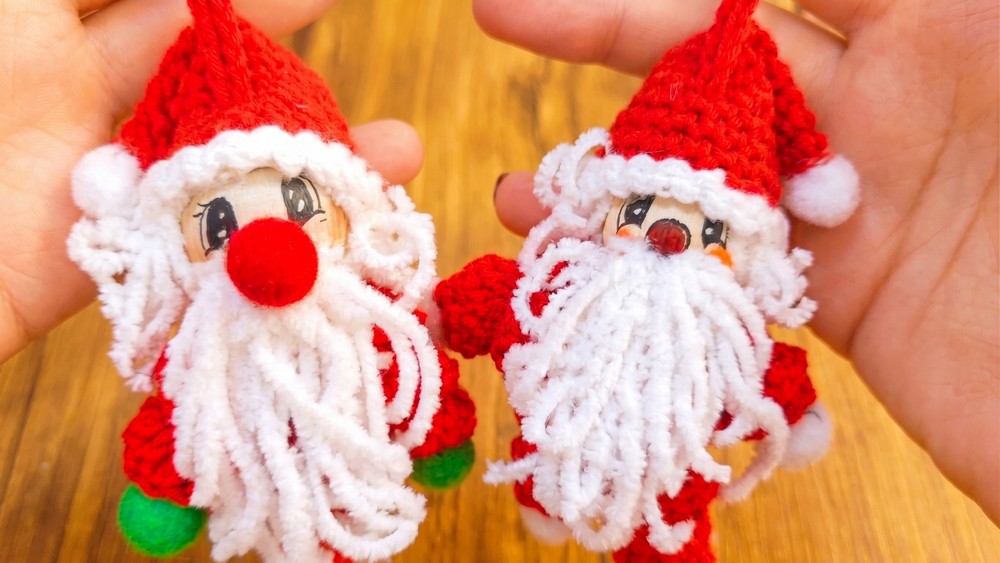
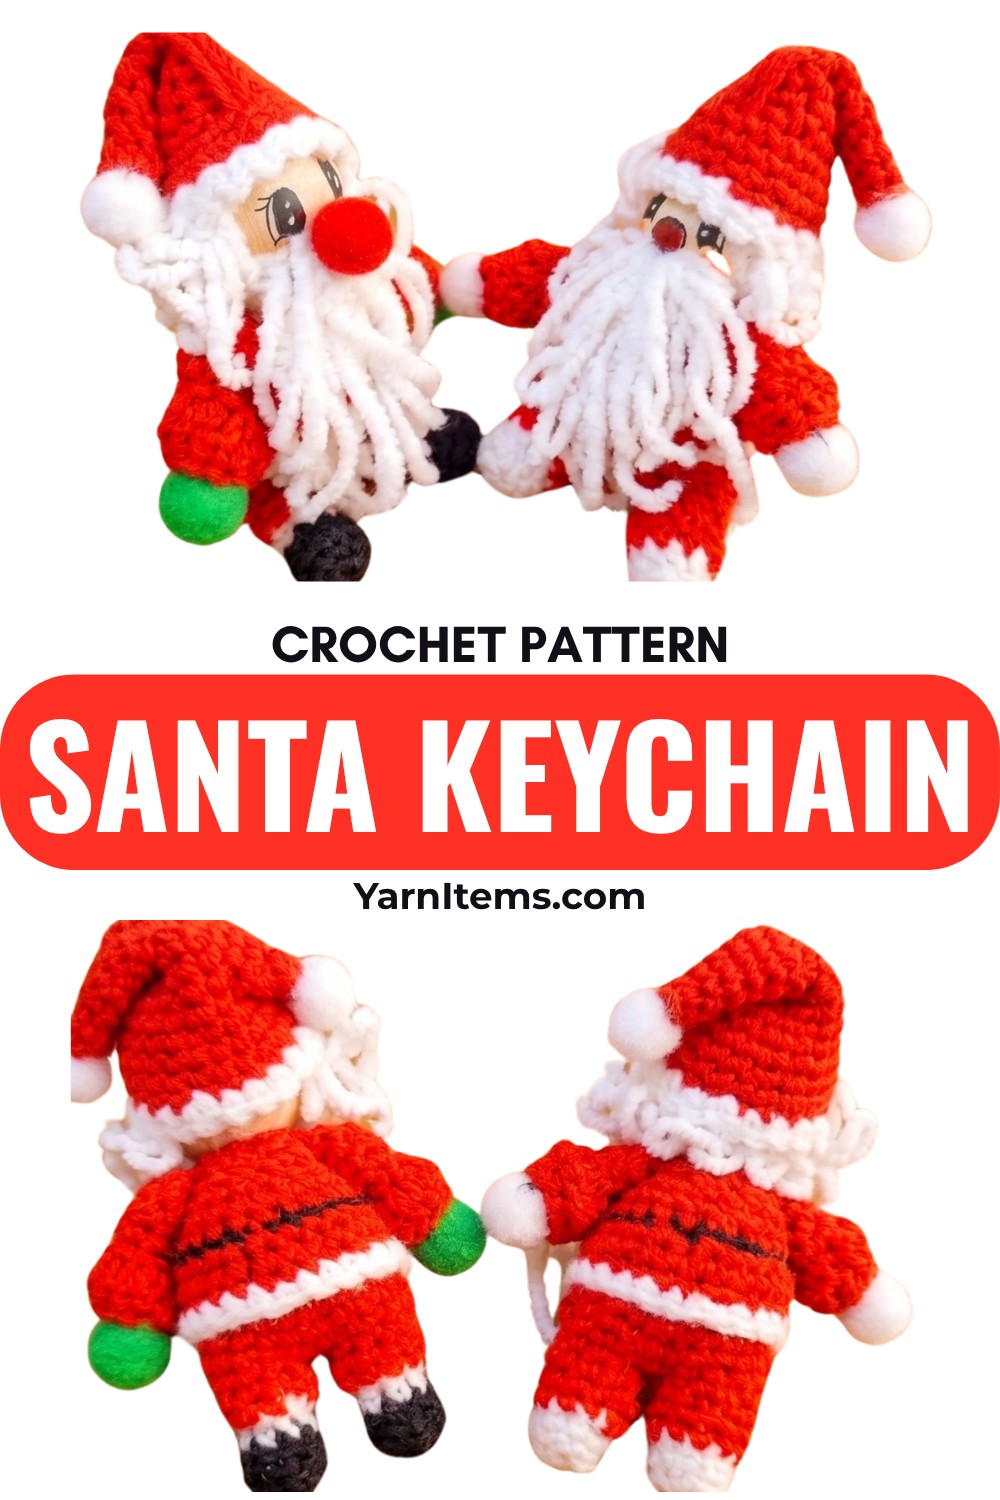
Turn a few small yarn scraps into a cheerful crochet Santa keychain with curly limbs, a fluffy beard, and a tiny hat made for the holiday season.
Crochet Santa Keychain Pattern
Small crochet pieces are a great way to use leftover yarn, and this Santa keychain takes that idea a step further by combining simple crocheted pieces with a wooden bead and a few easy embellishments. The finished Santa is light enough for a keyring or bag charm, but he can also become a small Christmas tree decoration or a handmade gift.
The design is straightforward, but the assembly is where the little details come together. The twisted arms and legs need to be positioned naturally, while the beard, face, hat, and hanging loop all need to be secured firmly enough for a piece that may be handled often. Once those parts are prepared, the crochet piece comes together surprisingly quickly.
Credit Simple Crochet
Materials & Tools Needed
- Yarn:
- Red yarn for the hat and body details
- White, fluffy, or velvet yarn for the beard, hair, and hat trim
- Crochet Hook: Choose a hook suitable for your yarn
- Wooden Bead: Approximately 2.5–3 cm for Santa’s head
- Colorful Felt Balls: For hands and feet
- Red Pom-Pom: For the nose and hat tip
- Pencil, Marker, and Eraser: For drawing Santa’s face
- Hot Glue Gun and Glue Sticks
- Keychain Hook or Ring
- Yarn Needle
- Scissors

Finished Size & Customization
The finished size will vary according to the yarn and hook you use, but the piece is designed to remain small enough for a keychain or hanging ornament.
You can personalize your Santa by:
- Using different shades of red and white
- Choosing pastel colors for a softer holiday look
- Adding tiny buttons or decorative stars
- Changing the pom-pom colors
- Drawing a different facial expression on the wooden bead
Because this is a small piece, it is also a useful way to use up leftover yarn from a larger crochet piece.
Pattern Abbreviations
This pattern uses US crochet terminology.
- ch: Chain
- sl st: Slip stitch
- sc: Single crochet
- dc: Double crochet
- dec: Decrease
- st(s): Stitch(es)
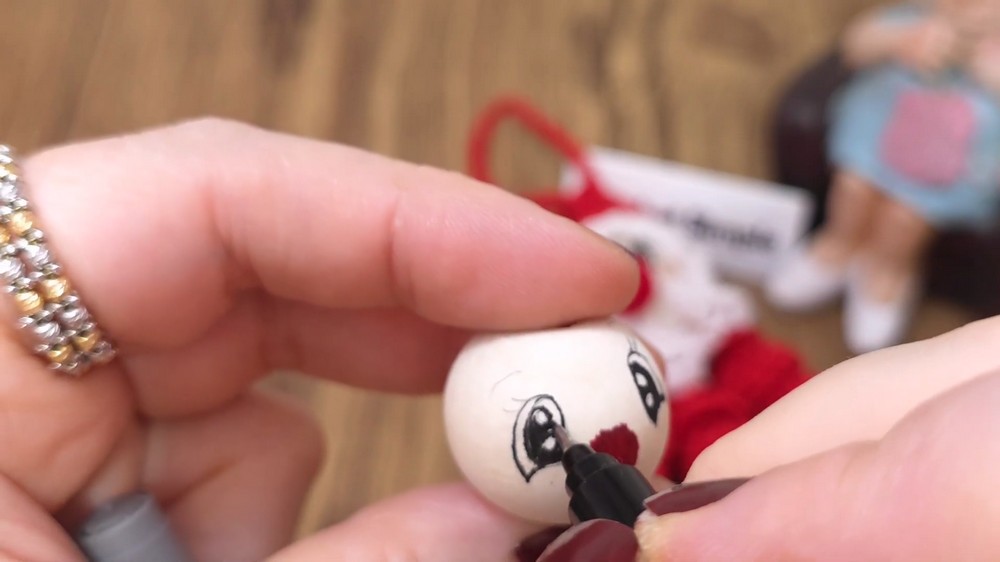
Prepare Santa’s Wooden Head
The wooden bead becomes Santa’s face, so preparing it before attaching the crochet pieces makes the later assembly easier.
- Use a pencil to lightly sketch Santa’s facial features.
- Add two eyes with small highlights.
- Add rosy cheeks with a peach or blush-colored marker.
- Draw a small red smile.
- If you are using a red pom-pom for the nose, attach it with hot glue.
Allow any marker or paint to dry completely before continuing.
Crochet the Legs
The legs are made as long, curled chains of double crochet. The unusual part is that several double crochets are worked into each chain, which naturally creates the twisted shape.
First Leg
- Make a slip knot.
- Chain 20.
- Starting in the 3rd chain from the hook, work 3 dc in the same chain.
- Continue working 3 dc in each remaining chain until you reach the final chain.
- In the last chain, work:
- 2 dc
- ch 3
- sl st into the same chain
- Gently twist and roll the crocheted section so it forms the curled leg.
Second Leg
Without cutting the yarn:
- Chain another 20.
- Repeat the same stitch sequence used for the first leg.
- Shape the second leg in the same way.
Keeping both legs together in one continuous piece helps maintain their connection before they are attached to Santa.
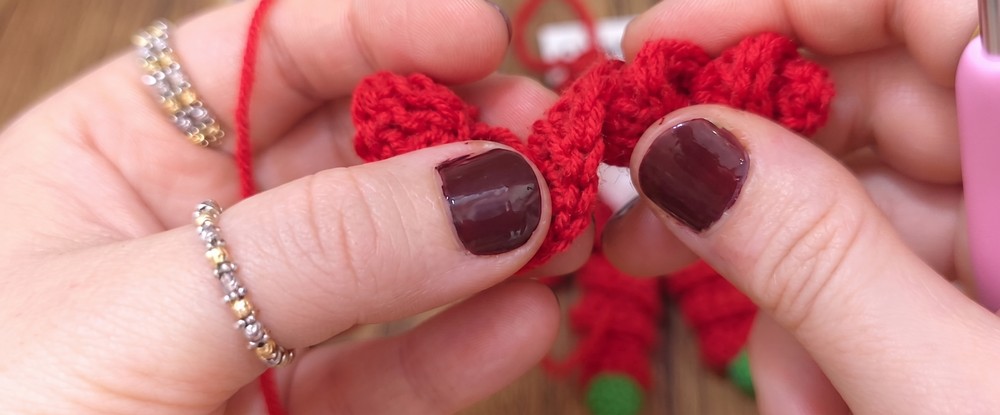
Crochet the Arms
The arms use the same idea as the legs but begin with a shorter chain.
First Arm
- Chain 12.
- Starting in the 3rd chain from the hook, work 3 dc in the same chain.
- Continue with 3 dc in each following chain.
- In the final chain, work:
- 2 dc
- ch 3
- sl st into the same chain
- Twist the stitches gently to form the curled arm.
Second Arm
Without cutting the yarn:
- Chain another 12.
- Repeat the same sequence.
- Shape the second arm to match the first.
Once both arms are finished, make a slip stitch into the first stitch of one leg to bring the pieces together. Cut the yarn and leave a longer tail for attaching the crocheted body pieces to the wooden bead.
Attach the Arms and Legs
Before using glue, arrange the limbs around the wooden head and check their position.
The arms should sit naturally on either side of the face, while the legs should hang below it. Because the limbs are curled, small adjustments to the twist can change the way Santa sits or hangs.
Use the long yarn tail to sew the crocheted pieces securely to the wooden bead. Add a small amount of hot glue where needed for extra stability.
Assembly Check
Take a moment to make sure the arms and legs are balanced before permanently fixing them in place. It is much easier to correct their position now than after the beard and hat have been added.
Make the Keychain Loop
The hanging loop needs to be secure because it will carry the weight of the finished Santa.
- Chain 45–50 stitches.
- Join the last chain to the first with a sl st to form a loop.
- Cut the yarn, leaving a long tail.
- Thread the tail onto a yarn needle.
- Attach the loop securely to the top of the wooden bead.
- Knot the yarn tightly twice.
- Add a small amount of hot glue over the knot if desired.
Attach the keychain ring to the loop once the attachment is completely secure.
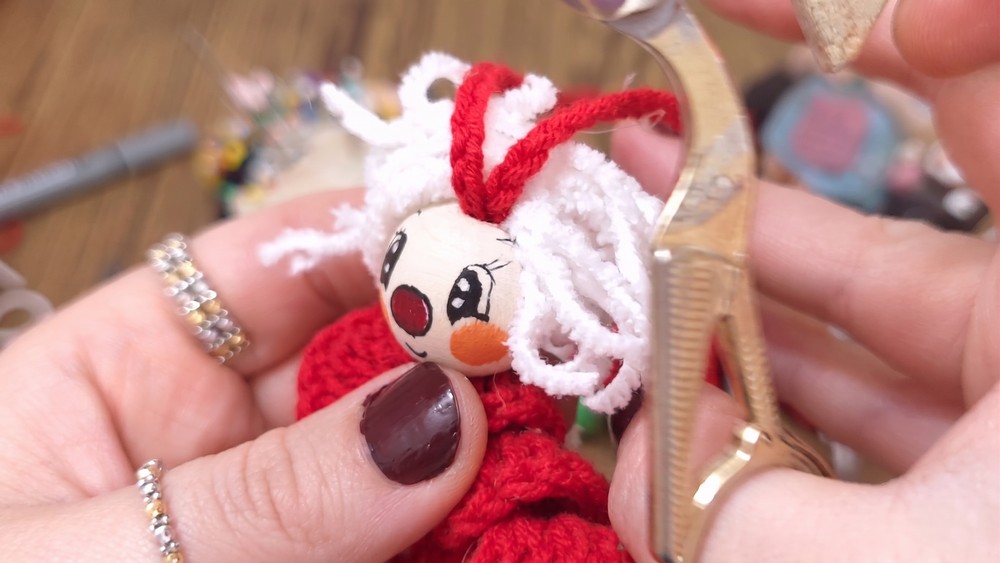
Add Santa’s Hair and Beard
The fluffy yarn creates most of Santa’s recognizable look.
Hair
- Wrap the fluffy yarn around your fingers approximately 10–11 times.
- Cut the yarn.
- Tie the center with a small piece of matching yarn.
- Trim the ends if needed.
- Use hot glue to attach the hair around the top, back, and sides of the wooden bead.
- Shape and trim it until the outline looks even.
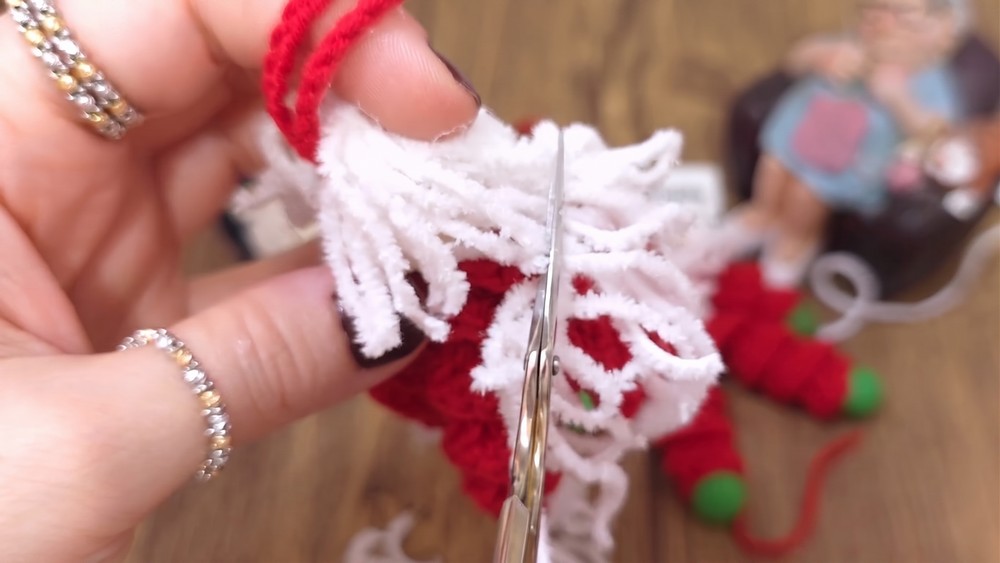
Beard
Repeat the same process for a second bundle of fluffy yarn.
- Create another bundle approximately the same thickness.
- Tie the center securely.
- Attach it beneath Santa’s face.
- Trim the beard into a neat, rounded shape.
Finishing tip: Keep the beard below the mouth and cheeks rather than allowing it to cover the entire face. A little trimming can make Santa’s expression much easier to see.
Crochet the Hat
The hat is worked in two sections: a white trim and the red tapered body.
White Hat Trim
- Make a slip knot.
- Chain 19.
- Join the ends with a sl st to form a loop.
- Chain 1.
- Work sl st, ch 1 around the loop.
- Join with a slip stitch.
- Cut and secure the white yarn.
This creates the soft-looking base trim of Santa’s hat.
Red Hat Body
- Attach red yarn to the back loop of the white trim.
- Work 1 sc in each stitch around.
- Continue for 6 rounds, without increasing or decreasing.
Now begin tapering the hat.
Begin the Decreases
On Round 7, alternate: 1 sc, 1 dec Continue working the decrease pattern through the following rounds as described in the pattern.
As the hat narrows, continue decreasing until the top closes into a point.
Close the Hat
When the hat has narrowed sufficiently:
- Cut the yarn, leaving a tail.
- Thread the tail through a yarn needle.
- Run the needle through the stitches of the final round.
- Pull the yarn to close the opening.
- Secure the yarn firmly.
- Attach a small red pom-pom to the tip.
Attach Santa’s Hat
Place the finished hat over the wooden head.
Thread the keychain loop through the top of the hat so that the loop remains accessible.
Check the hat’s position before securing it. Once it sits correctly, use hot glue and a few stitches where appropriate to keep it firmly attached to Santa’s head.
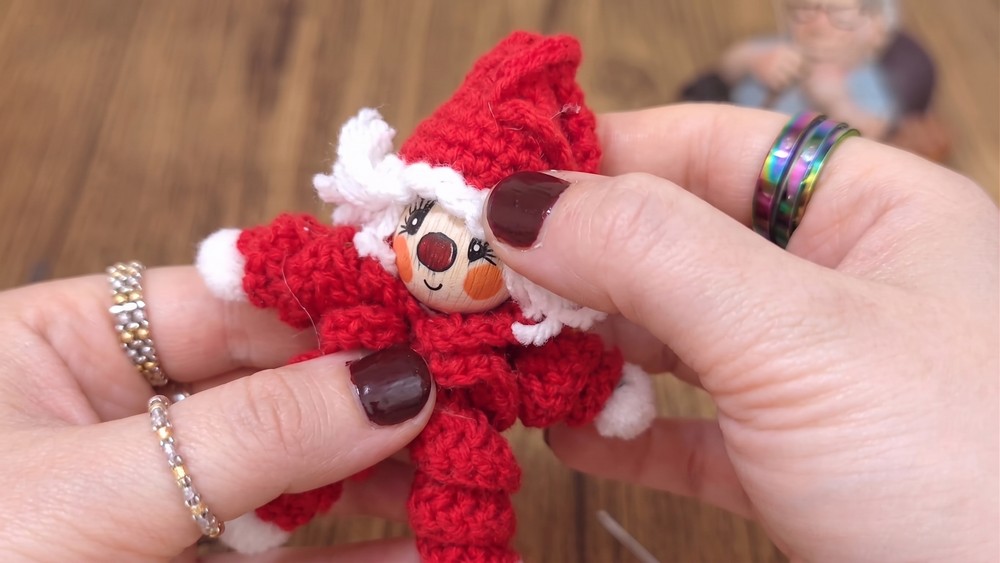
Final Assembly
Now bring all the details together.
- Check that the keychain loop is secure.
- Make sure the arms and legs are firmly attached.
- Position the hair and beard neatly around the face.
- Secure the hat.
- Check the pom-pom details.
- Tuck away any visible yarn ends.
- Trim stray pieces of fluffy yarn for a clean finish.
Because this keychain may be handled frequently, give particular attention to the loop and limb attachments. Those are the areas most likely to experience pulling during everyday use.
A Few Ways to Personalize Santa
Once you have the basic version finished, there are plenty of small changes you can make without changing the construction.
Try a darker red hat, a cream-colored beard, or a contrasting pom-pom. You can also give Santa a different expression or add tiny buttons to his outfit.
For a Christmas-tree version, simply use the finished loop as the hanging loop instead of attaching it to a keychain ring.
Final Thoughts
This Santa keychain is a small piece, but the combination of curled crochet limbs, fluffy yarn, and the wooden face gives it plenty of character. The basic crochet work is manageable for beginners, while the assembly provides an opportunity to practice positioning and neat finishing.
Once the main pieces are ready, focus on securing each part carefully rather than rushing the final steps. A well-attached loop, neatly trimmed beard, and correctly positioned hat will make the finished Santa look polished and ready to hang from a bag, keyring, or Christmas tree.