Free Crochet Christmas Tree Wall Hanging For Decor
Some Christmas decorations last for a season, while others become part of the holiday tradition. A crochet Christmas tree wall hanging brings handmade warmth to empty walls without taking up shelf or floor space.
Its festive shape instantly catches the eye, making it a charming accent for hallways, living rooms, craft corners, or entryways. This crochet pattern shows how to create one from start to finish with simple stitches and easy-to-follow instructions.
Crochet Christmas Tree Wall Hanging Pattern

The design comes together in separate pieces that are joined into one decorative display, making it enjoyable to customize as you crochet. You can switch colors, add tiny embellishments, or keep the look clean and classic to match your holiday style.
Each step gradually transforms yarn into a festive wall decoration that’s light, reusable, and ready to hang year after year. The details ahead make the crochet process easy to follow and rewarding to complete.
Credit Vima’s Crochet
Materials & Tools Needed
- Yarn:
- For the back panel: 4-ply yarn (Yan Ganga Acal Knit Y is used in the tutorial).
- For the Christmas tree: Oswal Enjo Wo yarn (1-ply worsted weight).
- For the trunk: Any 3-ply acrylic yarn.
- For the star: Yellow yarn (can use double strands if thickness is less).
- Hooks:
- 5.5 mm hook (for the back panel, tree, and star).
- 3.5 mm hook (for the trunk).
- Other tools:
- Measuring tape (to ensure accuracy in size).
- Tapestry/yarn needle (for sewing).
- Scissors.

Finished Size
- Approx. 12.5 inches (width) and 12 inches (height).
- Tree size: 7 inches (tall) and 6 inches (wide).
- Adjust the size by altering the chain counts for the tree or panel.
Customization Ideas
- Use multicolored yarn for a more vibrant Christmas tree.
- Decorate the tree with beads, small ornaments, bows, or cut-off yarn for creative garlands.
- Add a wooden dowel or stick along the top back to make the wall hanging steadier, especially if it’s larger.
Pattern Abbreviations & Terminology
- ch: Chain
- sc: Single Crochet
- dc: Double Crochet
- hdc: Half Double Crochet
- sl st: Slip Stitch
- yo: Yarn Over
- st(s): Stitch(es)
- sp(s): Space(s)
US crochet terms are used in this pattern.
Step-by-Step Instructions
1. Crochet the Christmas Tree
Materials: Green yarn (or your desired tree color) and a 5.5 mm hook.
- Begin with a slip knot, then ch 20.
- Add one extra chain for turning (ch 1).
- Work in the back hump of the chain (or grab one loop if preferred) and work:
- Insert your hook in the 2nd chain from the hook and make 1 sc in each st across.
- Ch 2, turn your work.
- In the first stitch, work a bobble (5 dc):
- Yarn over, insert hook in the stitch, pull up a loop (3 loops on hook).
- Yarn over and pull through the first 2 loops.
- Repeat this process 4 more times, leaving the last loop unworked each time
- To create 5 unfinished double crochets.
- Pull through all loops to close the stitch.
- Ch 1 for the space between bubbles.
- Skip 1 st, and make another bobble in the next st.
- Repeat (ch 1, skip 1 st, bobble) to the end of the row.
- In the last st of the row, make 1 dc.
- Turn your work and repeat:
- For rows coming forward (RS), insert the hook in front of the first double crochet when making the bobble.
- For rows worked backward (WS), insert the hook from the back of the first double crochet to make the bobble visible on the RS.
- Continue in rows, decreasing one bobble per row until you have just one bobble at the top, forming a triangle.
Measurements for the Tree: 7 inches tall and 6 inches wide.

2. Make the Background Panel
Materials: White yarn (or color of your choice) and 5.5 mm crochet hook.
- Chain 35 (or enough to ensure the tree fits in the middle with 1 inch space on both sides).
- Row 1: Starting from the 2nd chain from the hook, work 1 sc in each chain across.
- Rows 2–until approx. 12 inches tall: Turn, ch 1, work 1 sc in each st across.
- After 12 inches: Add a border:
- Ch 1, and work reverse single crochets (backward single crochet) around all sides of the rectangle, skipping 1 st between each reverse sc as needed to evenly space the stitches.
- Slip-stitch into the first stitch to join.
- For the hanging loop, ch 50, and slip stitch to the opposite corner of the top edge. Tie off and weave in ends.

3. Make the Tree Trunk
Materials: Brown yarn and 3.5 mm hook.
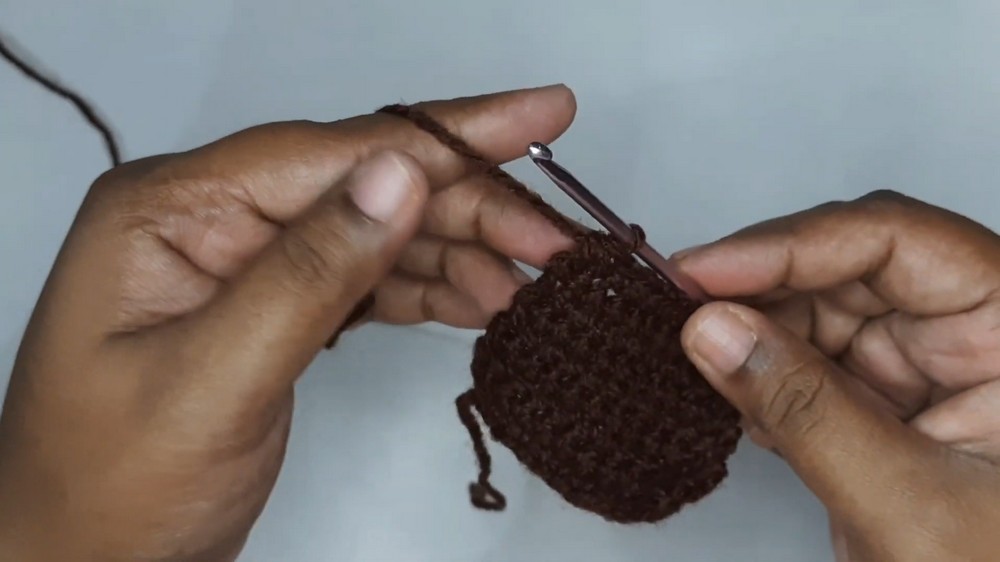
- Chain 12.
- Row 1: Work 1 sc in 2nd ch from hook and across to the end (11 sc).
- Rows 2–8: Turn, ch 1, 1 sc in each st.
- For the last row, decrease at both ends:
- Sc2tog, 1 sc in each st until 2 remain, sc2tog.
- Tie off, leaving a long tail for sewing.
4. Make the Star
Materials: Yellow yarn and 5.5 mm hook.
- Work a magic ring, ch 1, then make 7 sc into the ring.
- Pull the loop tight and join with a sl st to the first sc.
- Round 2: Ch 1, work 2 sc in each st around (14 sc total). Join with sl st.
- Round 3: Create the star spikes:
- Ch 6, work in the back humps of the chain:
- Sc in 2nd ch from hook, 2 hdc in next two chains, 2 dc in last two chains.
- Skip 2 sts, and sl st in the 3rd st.
- Ch 6, work in the back humps of the chain:
- Repeat the star pattern (ch 6, sc, hdc, hdc, dc, dc, sl st in 3rd st) four more times to create 5 points.
- Tie off, leaving a long tail for sewing.

5. Assemble the Wall Hanging
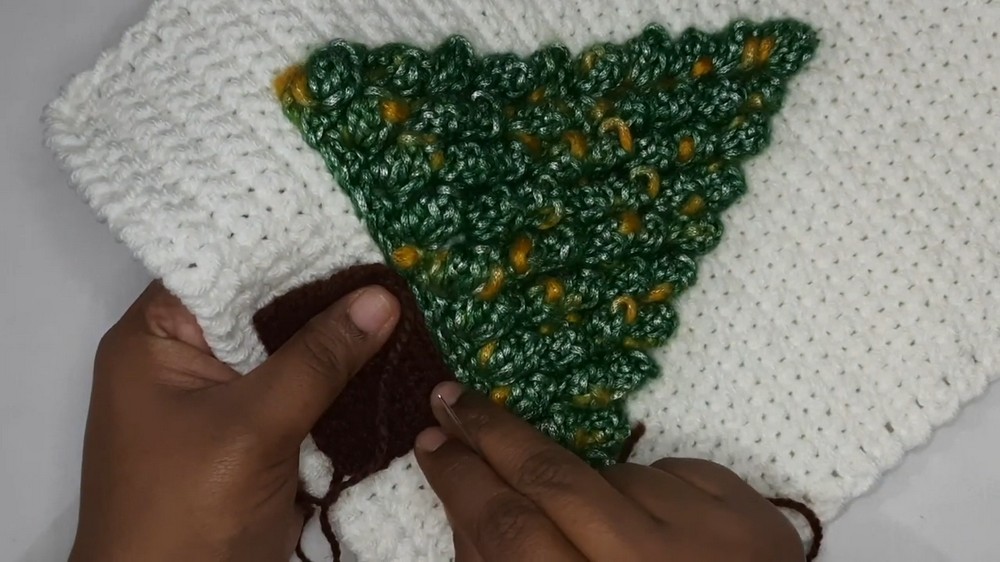
- Center the tree on the background panel, leaving space for the trunk and star.
- Sew the Tree:
- Use the green yarn tail, and whip stitch around the edge of the tree, ensuring it’s well-secured.
- Sew the Trunk:
- Use the brown yarn tail to attach the trunk to the bottom of the tree. Align it centrally along the panel.
- Sew the Star:
- Use the yellow yarn tail to attach the star to the top of the tree.
- Ensure the two bottom points of the star align with the top bubble of the tree.
6. Optional Stabilizer
To prevent larger wall hangings from sagging, create a space for a stabilizing stick:
- Chain 30 and work 4 rows of single crochet to create a panel.
- Sew this short panel only on both sides of the top back of the wall hanging, leaving the middle section open.
- Insert a dowel or stick for support.

Finishing Touches
- Weave in all loose ends.
- Add decorations as desired, such as beads, ornaments, or yarn garlands.
- Hang using the loop at the top for a festive display.