Crochet Hexagon Shirt Pattern – Granny Stitch Top
Two simple granny-stitch hexagons transform into a relaxed, cropped crochet shirt with roomy sleeves and a bold lavender collar.
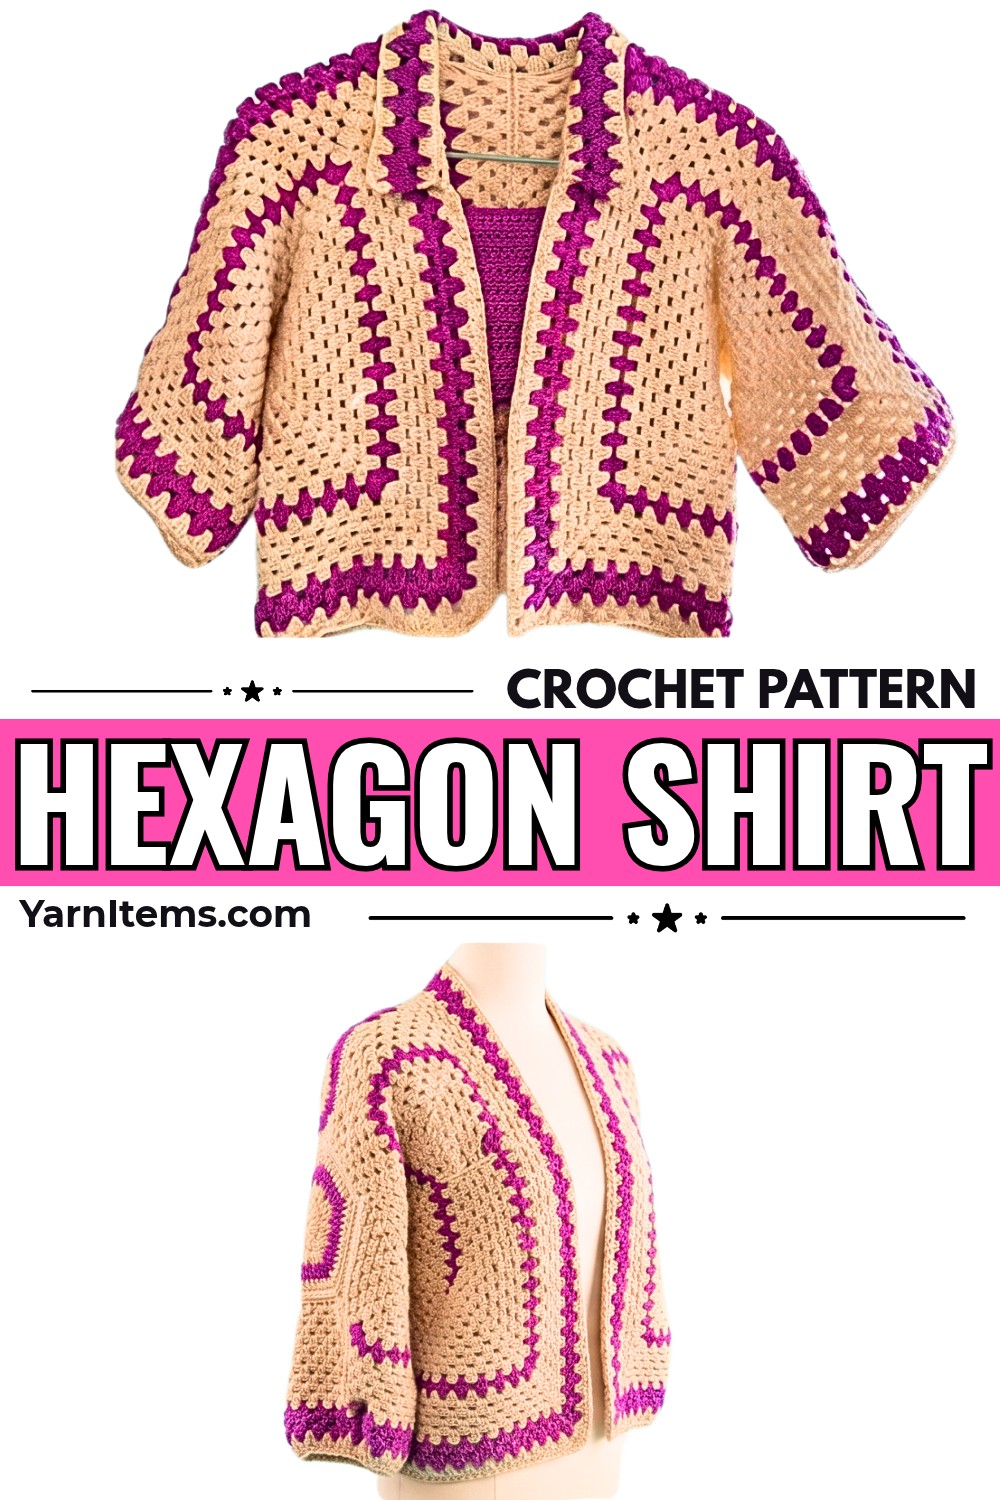
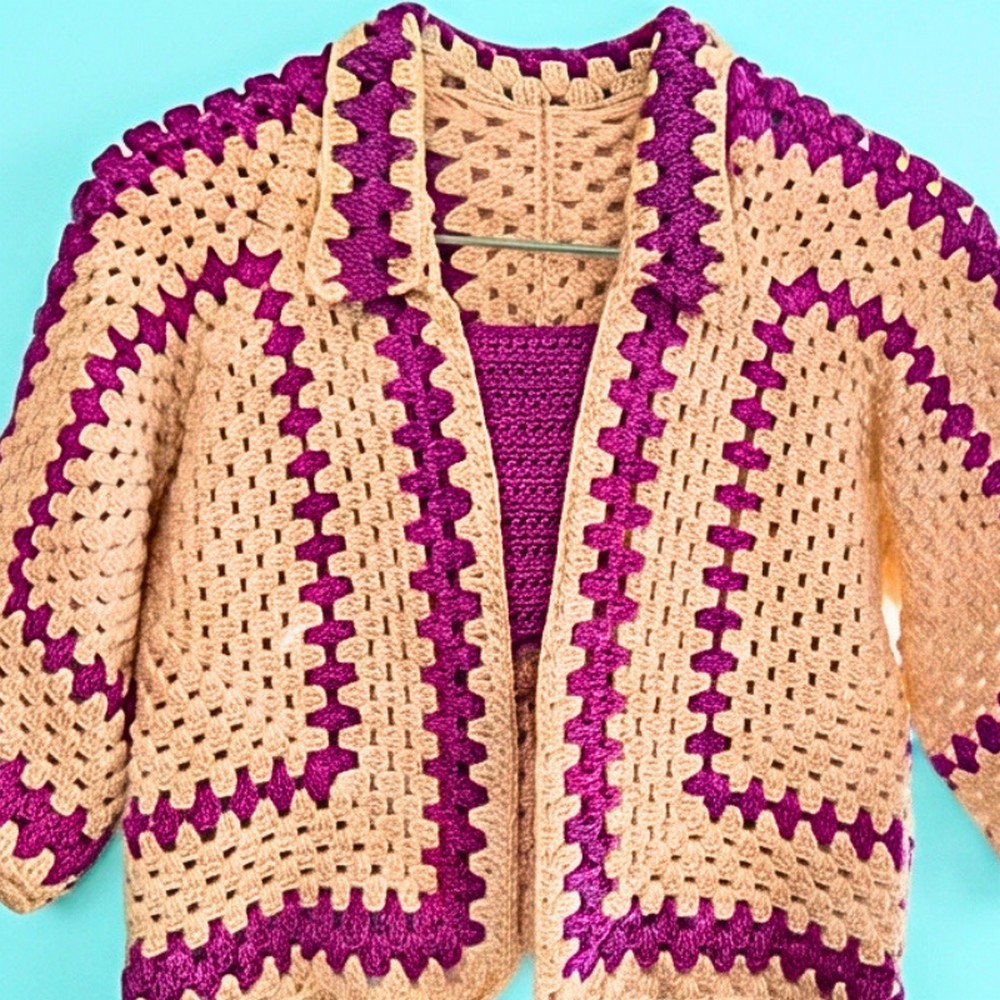
Bold lavender stripes bring a fresh retro feel to this relaxed crochet shirt, while its oversized hexagon panels create sleeves and front sections from just two matching shapes. Cotton yarn gives the crochet granny stitches a breathable texture, and contrasting color makes each round stand out beautifully.
Follow the panel rounds first, then fold and seam each crochet hexagon to shape the sleeves and shoulders. You’ll also learn how to extend the back, join both sides, and build the layered crochet collar around the neckline, with sizing guidance to help adjust the fit.
Credit: CBR crochet
Materials & Tools
Yarn
Vardhman 100% Cotton Yarn in Sport / DK weight, using two contrasting shades:
- Color A – Main Color: Off-white / cream, approximately 400–450g
- Color B – Contrasting Color: Lavender / purple, approximately 100–150g
Crochet Hook
- 4.0 mm hook (US G/6)
Other Supplies
- Tapestry needle or yarn needle for weaving in loose ends
- Scissors
- Stitch markers (optional, useful for counting rounds and marking collar placement)
Finished Size
The sample shown in the video is Women’s Small / Medium, with a relaxed, slightly cropped fit.
Hexagon Dimensions
Measured with each hexagon folded into an L-shape:
- Sleeve length: Approximately 16–17 inches from underarm
- Sleeve circumference: Approximately 15–16 inches
- Front length: Approximately 18–19 inches from shoulder to hem
Customizing the Fit
- Chest / Body Width: Work more or fewer rounds before folding. Each additional hexagon round adds approximately 0.5–0.75 inches to sleeve circumference, front panel width, and total length simultaneously.
- Back Width Adjustments: Back panel rows in Step 2 add cross-back width without making the front neck hole too wide. For extra ease across shoulders and chest, work 4 back extension rows instead of 2.
- Sleeve / Torso Length: If the width fits your bust but you want longer sleeves or a longer bodice, continue working straight granny stripe rows along the bottom hem or sleeve cuff edges only before adding trims.
- Color Palette: Replace the two-color retro stripe sequence with solid monochrome, a full scrap-yarn rainbow, or a three-color palette.
Abbreviations
US crochet terminology is used throughout.
- ch: Chain
- sc: Single crochet
- dc: Double crochet
- sl st: Slip stitch
- sp: Space
- ch-1 sp: Chain-1 space
- Granny cluster: 3 double crochet stitches worked into the same chain space or gap
- MC: Main Color (White / Off-White)
- CC: Contrasting Color (Lavender)
How the Hexagon Panels Work
Make two identical flat six-sided hexagons. Each panel folds along opposite corners to create an L-shape. Once folded, it forms half of the front, half of the back, and one full sleeve.
Use Color A and a 4.0 mm hook for the first 12 rounds. Lavender stripes are introduced in Round 13, followed by alternating cream and lavender sections through Round 22.
Component 1: Make Two Hexagon Panels
Foundation and Initial Rounds
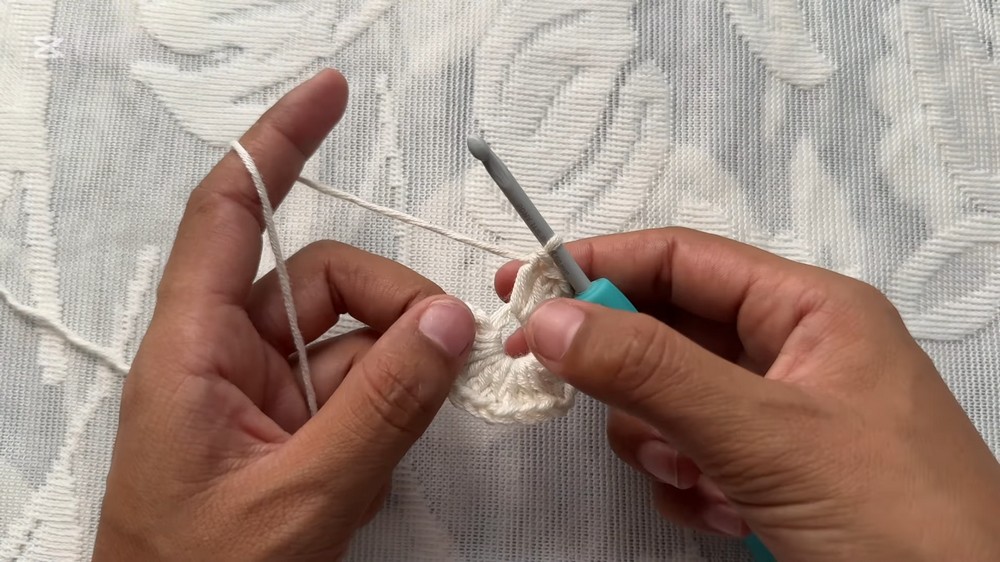
Round 1 (MC):
- Wrap yarn around your fingers to create a Magic Ring.
- Pull up a loop and ch 3. This counts as the first dc.
- Work 2 dc into the ring to complete the first granny cluster.
- Ch 1, then work 3 dc into the ring. Repeat this sequence 4 more times.
- Pull the center tail firmly to close the Magic Ring.
- Join with a sl st into the top of the initial ch-3.
- Slip stitch transit: Sl st into each of the next 2 dc stitches, then sl st directly into the adjacent ch-1 corner space.
Total stitch count: 6 granny clusters, 6 ch-1 corner spaces (18 dc total).
Round 2 (MC):
- In the first corner space, work ch 3, 2 dc, ch 1, 3 dc. This forms the first corner.
- In each of the remaining 5 ch-1 corner spaces, work (3 dc, ch 1, 3 dc).
- Join with a sl st to the top of the starting ch-3.
- Sl st across the next 2 dc and sl st into the corner ch-1 space.
Total stitch count: 12 granny clusters (2 per corner), 6 ch-1 corner spaces (36 dc total, 0 side gaps).
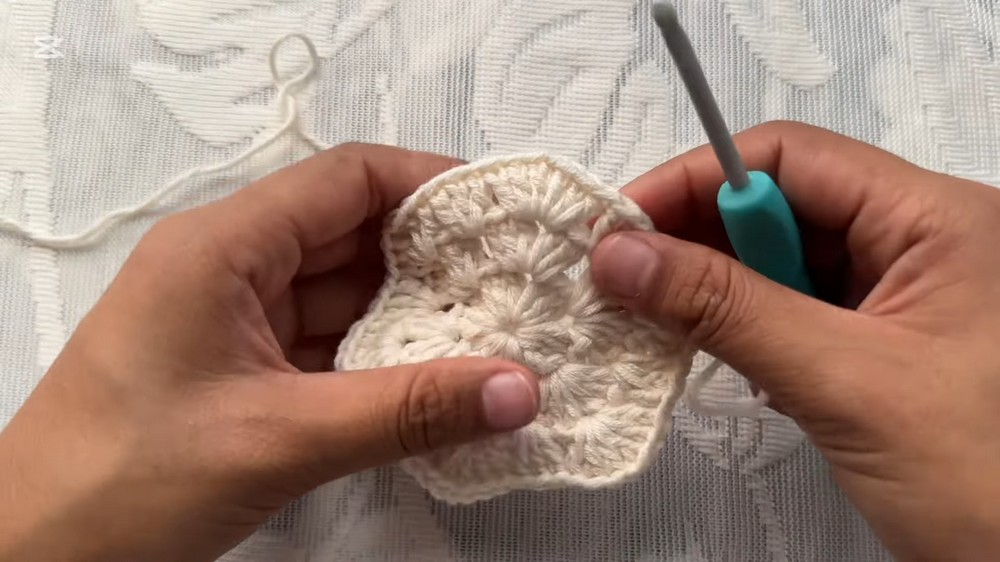
Round 3 (MC):
- In the corner space, work ch 3, 2 dc, ch 1, 3 dc.
- In the side gap between the two clusters of the previous round, work 3 dc. Do not make chains between side clusters.
- In the next corner space, work (3 dc, ch 1, 3 dc). In the next side gap, work 3 dc.
- Repeat this corner-and-side sequence around all 6 sides.
- Join with a sl st to the top of the starting ch-3.
- Sl st across the next 2 dc and sl st into the corner ch-1 space.
Total stitch count: 6 corners (each with two 3-dc clusters separated by ch 1) and 1 side cluster per edge (18 clusters / 54 dc total).
Round 4 (MC):
- In the corner space, work ch 3, 2 dc, ch 1, 3 dc.
- Work 3 dc in each of the 2 side gaps along the edge.
- In the next corner space, work (3 dc, ch 1, 3 dc). Work 3 dc in each of the 2 side gaps along that edge.
- Repeat around.
- Join with a sl st to the top of the starting ch-3, then sl st across to the corner space.
Total stitch count: 6 corners and 2 side clusters per edge (24 clusters / 72 dc total).
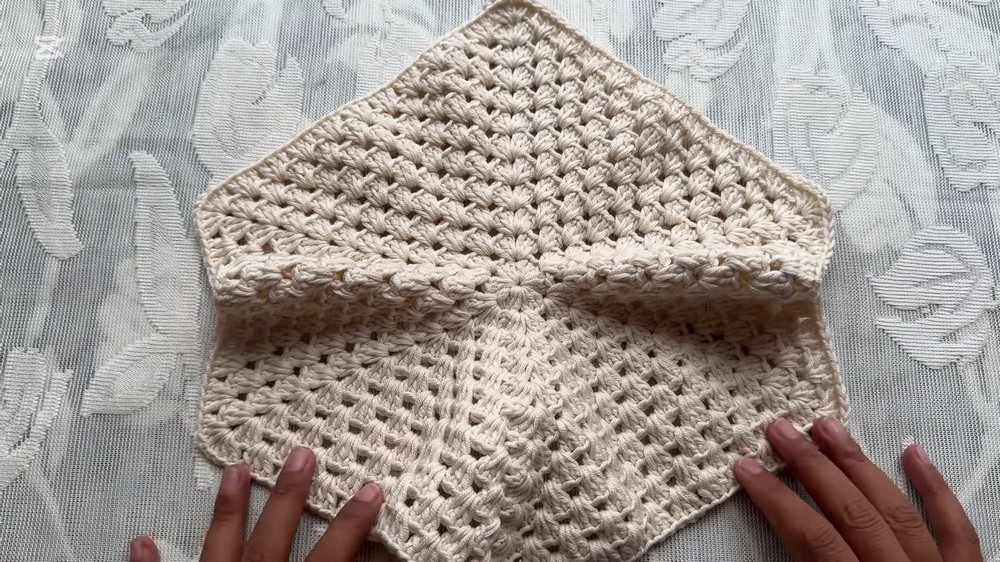
Continue Increasing the Hexagon
Rounds 5–12 (MC):
Continue repeating the established granny hexagon sequence.
- In every corner ch-1 space, work (3 dc, ch 1, 3 dc).
- In every straight side gap between clusters, work 3 dc without adding chains between clusters.
- Increase the number of side gaps by 1 per side on every round.
| Round | Side gaps per edge | Total clusters |
|---|---|---|
| 5 | 3 | 30 |
| 6 | 4 | 36 |
| 7 | 5 | 42 |
| 8 | 6 | 48 |
| 9 | 7 | 54 |
| 10 | 8 | 60 |
| 11 | 9 | 66 |
| 12 | 10 | 72 |
At the end of Round 12, sl st to join, sl st into the next 2 dc, sl st into the corner sp, ch 1, and cut yarn.
Add Lavender Stripe
Round 13 (CC – Lavender):
- Attach Color B with a slip knot directly into the corner ch-1 space where you just fastened off.
- Work ch 3, 2 dc, ch 1, 3 dc in the same corner space.
- Work 3 dc in each of the 11 side gaps along each edge.
- Work (3 dc, ch 1, 3 dc) in all 6 corners.
- Join with a sl st to the starting ch-3, sl st across the next 2 dc, and sl st into the corner sp.
- Ch 1 and cut Color B yarn.
78 clusters total.
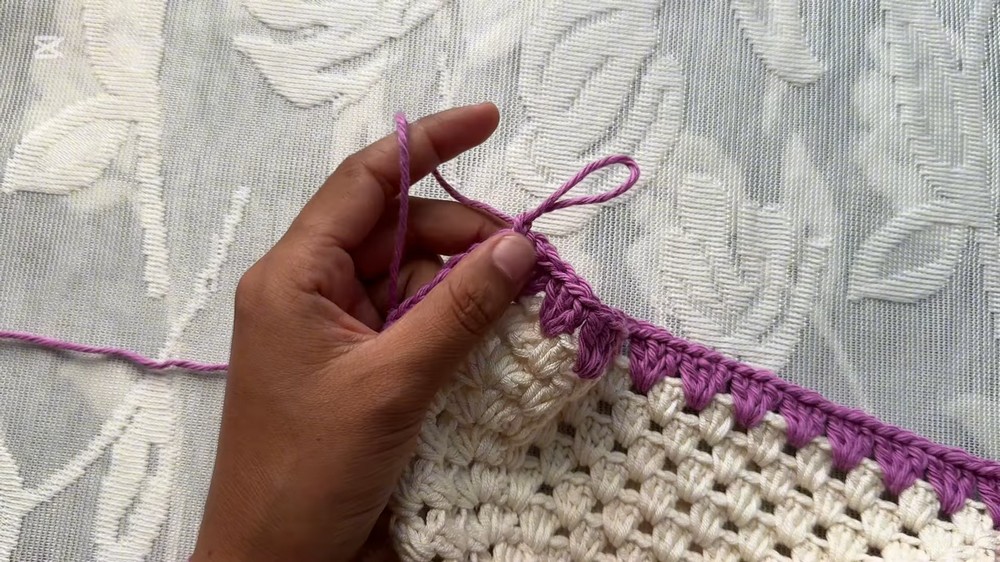
Return to Cream
Rounds 14–18 (MC – White):
- Attach Color A with a slip knot into the corner ch-1 space.
- Work 5 full rounds in Color A, following the established corner-and-gap increase pattern.
| Round | Side gaps per edge | Total clusters |
|---|---|---|
| 14 | 12 | 84 |
| 15 | 13 | 90 |
| 16 | 14 | 96 |
| 17 | 15 | 102 |
| 18 | 16 | 108 |
At the end of Round 18, sl st across to the corner, ch 1, and cut Color A yarn.
Work Lavender Rounds
Rounds 19–20 (CC – Lavender):
- Attach Color B in the corner ch-1 space.
- Work 2 full rounds in Color B.
| Round | Side gaps per edge | Total clusters |
|---|---|---|
| 19 | 17 | 114 |
| 20 | 18 | 120 |
At the end of Round 20, sl st across to the corner, ch 1, and cut Color B yarn.
Finish with Cream
Rounds 21-22 (MC – White):
- Attach Color A in the corner ch-1 space.
- Work 2 full rounds in Color A.
| Round | Side gaps per edge | Total clusters |
|---|---|---|
| 21 | 19 | 126 |
| 22 | 20 | 132 |
After Round 22, join with a sl st, ch 1, and fasten off completely.
Repeat all instructions from Round 1 through Round 22 to make the second identical hexagon panel.
Panel check: Before moving on, place both hexagons side by side and compare their size, stripe placement, and corner shapes. Matching panels make folding and joining easier.
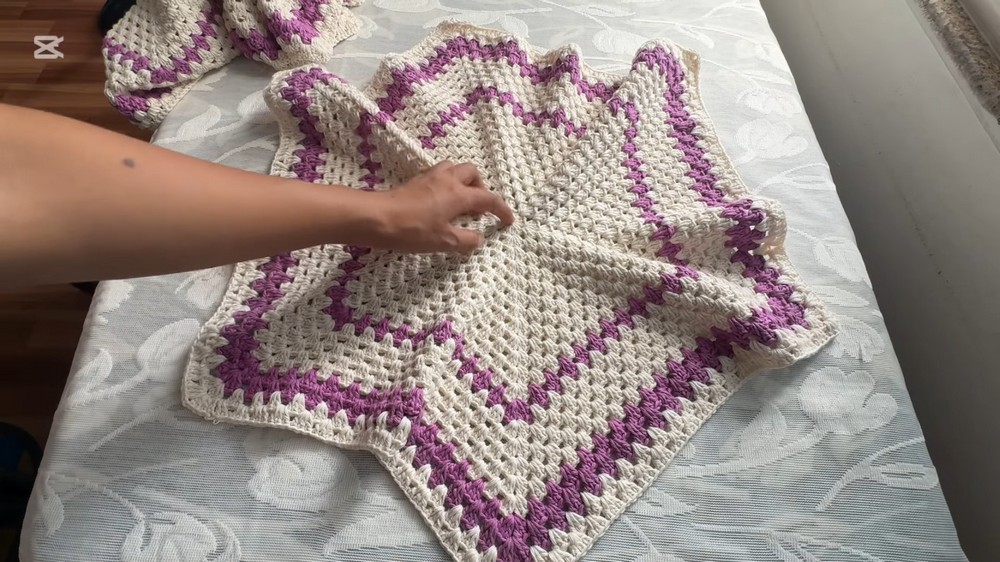
Component 2: Seam the Sleeves
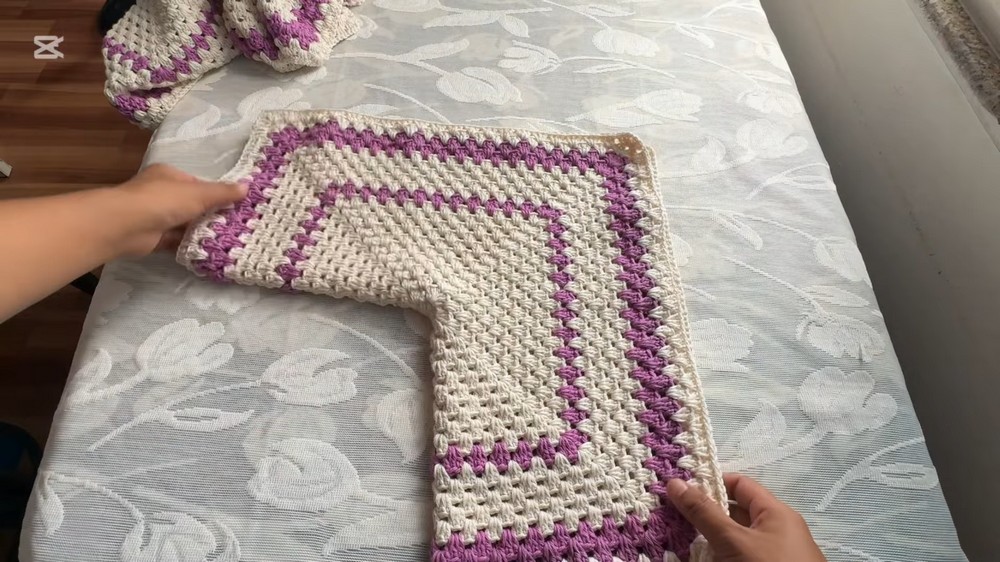
Each hexagon becomes an L-shape when folded. The top edges of the folded shape form the sleeve seam.
- Lay one hexagon panel flat on your table.
- Fold the hexagon along opposite corners to form an L-shape. The top fold represents the top of the sleeve and shoulder seam.
- Flip the folded panel so the wrong side is facing outward.
- Align the top edges of the sleeve, from the outer wrist cuff corner to the neck/shoulder corner.
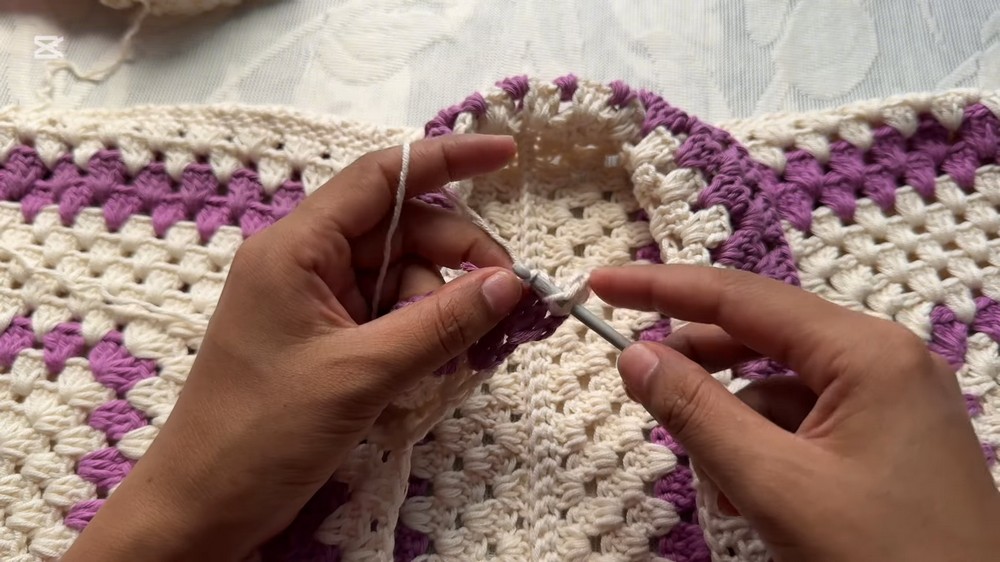
- Create a slip knot with Color A on your hook. Insert the hook through both corresponding outer corner loops at the cuff end, pull the slip knot through, and ch 1.
- Work 1 single crochet (sc) into every matching stitch across both layers:
- Insert the hook through both loops of the front layer and both loops of the back layer simultaneously.
- Yarn over and pull up a loop.
- Yarn over again and pull through both loops.
- Continue working sc evenly along the entire top sleeve edge until reaching the shoulder corner fold.
- Ch 1, cut yarn, and pull tight.
- Turn the sleeve right-side out.
- Repeat the same seaming process for the second panel.
Seaming guide: Keep corresponding stitches from both layers aligned as you work. If one edge begins to extend beyond the other, pause and reposition the fabric before continuing. This helps prevent a twisted sleeve seam.
Component 3: Extend the Back Panels
Two extra granny-stitch rows are worked exclusively along the back edge. They add room across the back and shoulder blades without making the front neck opening too wide.
Back Extension Row 1 (MC)
- Lay the panel flat with the back edge exposed.
- Attach Color A with a slip knot in the bottom back corner space.
- Ch 3. This counts as 1 dc.
- Work 2 dc into the same corner space to create the first 3-dc cluster.
- Work 3 dc into every consecutive side gap up along the back edge until reaching the top shoulder corner.
- Work 3 dc into the final top corner space.
- Ch 1, cut yarn, and fasten off.
Do not turn the work back and forth; this preserves the stitch texture.
Back Extension Row 2 (MC)
- Return to the bottom starting corner of Row 1.
- Insert the hook under the very first beginning ch-3 space of Row 1 and attach Color A with a slip knot.
- Ch 3. This acts as the edge space/turning stitch; do not place any dc in this beginning gap.
- Work 3 dc into the very next side gap between clusters.
- Continue working 3 dc into each side gap across the entire back edge until reaching the last gap before the edge.
- In the final gap, work a 3-dc cluster.
- To finish the row with a straight edge, work 1 dc directly into the top of the final dc of the Row 1 cluster below.
- Ch 1, cut yarn, and fasten off.
Repeat Back Extension Row 1 and Row 2 on the back edge of the second panel.
Back-width adjustment: The sample uses 2 back extension rows. If you need extra ease across the shoulders and chest, the supplied customization guidance recommends working 4 back extension rows instead of 2.
Component 4: Join the Back Panels
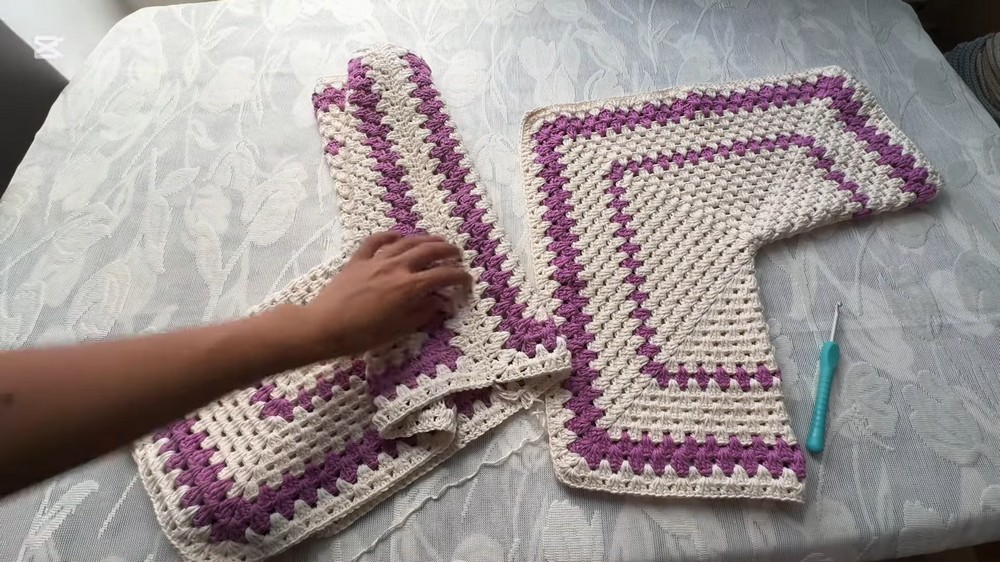
- Place both L-shaped panels side by side with wrong sides facing out and the newly extended back edges touching.
- Align the bottom hem corners and the top neck corners.
- Attach Color A with a slip knot through both corner stitches at the bottom hem.
- Ch 1.
- Work 1 sc through matching stitches across both layers, continuing all the way up the center back seam to the neck opening.
- Ch 1, cut yarn, and fasten off.
Alignment tip: Match the two back edges from hem to neckline before beginning. Use pins or stitch markers to hold the corners together and keep the seam from shifting as you crochet.
Component 5: Crochet the Collar
The collar is worked directly onto the front neckline. It extends from the mid-chest of the right front, across the shoulder points, around the back neck, and down to the mid-chest of the left front.
Collar Placement
Use the following placement guide when locating the starting spaces:
- Back neck seam sits at the center of the back neckline.
- Shoulder points are on either side of the back neck.
- Count down 8 gaps from the shoulder/neck corner along each front neckline.
- The collar begins at the 8th gap on the right front and finishes at the 8th gap on the left front.
Collar Row 1 (MC – White)
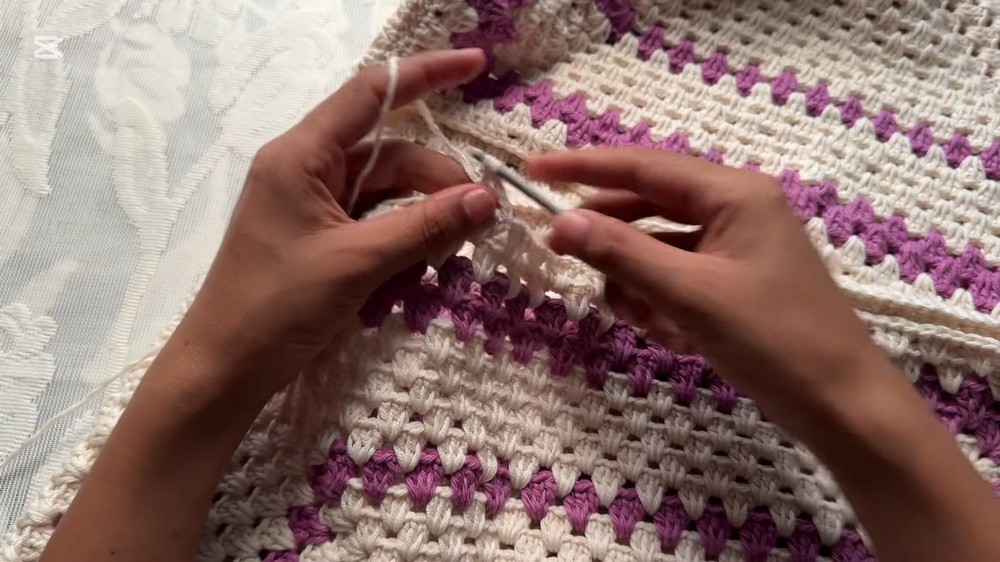
- Locate the front right panel neck opening. Starting from the shoulder/neck corner, count downward toward the front hem: 1, 2, 3, 4, 5, 6, 7, 8 gaps.
- Attach Color A into the 8th gap space.
- Ch 4. This counts as 1 dc + ch 1 space. Do not work any more dc into this space.
- In the next gap (7th gap), work 2 dc, ch 1.
- In the next gap (6th gap), work 3 dc, ch 1.
- Continue working (3 dc, ch 1) into each gap up the right front edge.
- When reaching the shoulder corner, skip the small corner dip, work 3 dc into the space under the adjacent double crochet, ch 1, and work 3 dc into the ch-3 space along the back neck extension.
- Skip the center back seam join. Work 3 dc under the next dc space, ch 1, and continue across the back neckline.
- Work (3 dc, ch 1) into each gap down the left front neckline until reaching the 7th gap from the shoulder corner.
- In the 7th gap, work 2 dc, ch 1.
- In the 8th gap, work 1 dc.
- Fasten off or prepare to turn.
Collar Row 2 (MC – White)
- Ch 3 and turn work.
- Work 2 dc directly into the first ch-1 space. This counts as the first 3-dc cluster.
- Ch 1, then work 3 dc in the next ch-1 space.
- Repeat this sequence in every ch-1 space all the way around the collar.
- Work 3 dc in the final space, ch 1, pull a long loop, and cut Color A yarn.
Collar Row 3 (CC – Lavender)
- Turn work.
- Attach Color B with a slip knot into the top of the beginning stitch.
- Ch 3, then work 2 dc into the first space to complete the first cluster.
- Ch 1, then work 3 dc in the next ch-1 space.
- Repeat across the collar.
- Do not cut yarn; turn work.
Collar Row 4 (CC – Lavender)
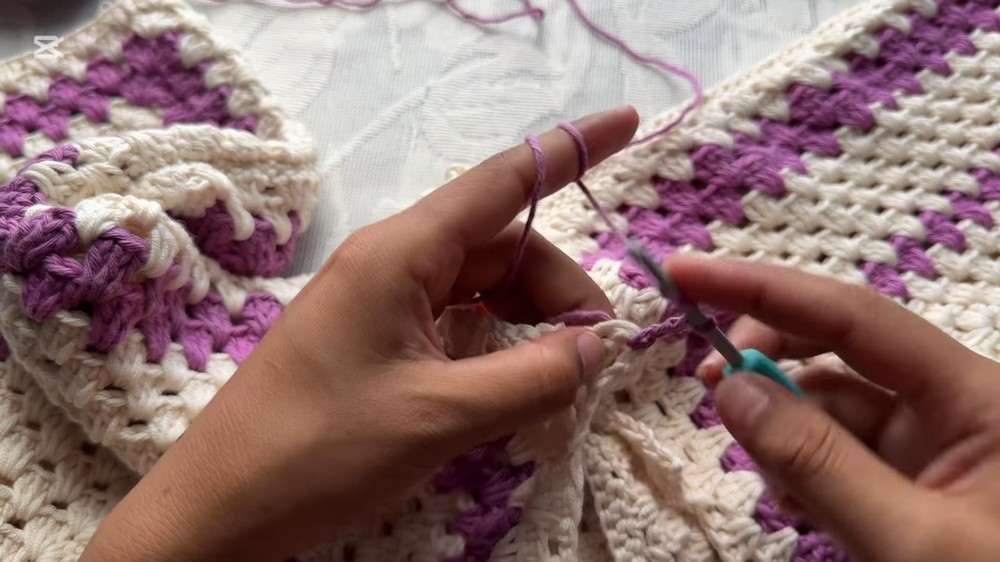
- Ch 3.
- Work 2 dc in the first ch-1 space.
- Ch 1, then work 3 dc in the next ch-1 space.
- Repeat across the collar.
- Fasten off Color B and cut yarn.
Collar Row 5 (MC – White)
- Turn work.
- Attach Color A into the end stitch with a slip knot.
- Ch 3, then work 2 dc in the first space.
- Ch 1, then work 3 dc in the next ch-1 space.
- Repeat across the entire perimeter of the collar.
- Work the final cluster, ch 1, and fasten off completely.
Collar guidance: Keep the ch-1 spaces visible as you work each row. These spaces are the locations for the next granny clusters. Check that the collar follows the neckline evenly and that both front edges finish at the intended matching positions.
Final Assembly Checklist
- Complete both identical 22-round hexagon panels.
- Fold each hexagon into an L-shape.
- With wrong sides facing outward, sc-seam the top sleeve edges from cuffs to shoulders.
- Turn both sleeves right-side out.
- Work 2 granny extension rows along the back edge of each panel.
- Place panels with wrong sides facing out and sc-seam down the center back line.
- Work all 5 collar rows around the neckline.
Finishing
Weave in Yarn Ends
Thread each yarn tail onto your tapestry needle. Weave the tails through the thick center of the granny dc clusters on the wrong side of the garment. Reverse direction 2–3 times to help prevent ends from poking out during wear.
Block the Shirt
Lay the finished cotton shirt flat on foam blocking boards. Pin the sleeve seams, hem edges, and collar flat.
You can use either of these blocking methods:
- Steam blocking: Hold an iron 1–2 inches away from the cotton fabric and steam lightly. Never touch the yarn directly with the iron.
- Wet blocking: Soak the shirt in lukewarm water, gently press out excess moisture in a towel, and pin it to shape until completely dry.
Blocking opens up the granny stitch gaps and creates a smooth drape for the collar.