
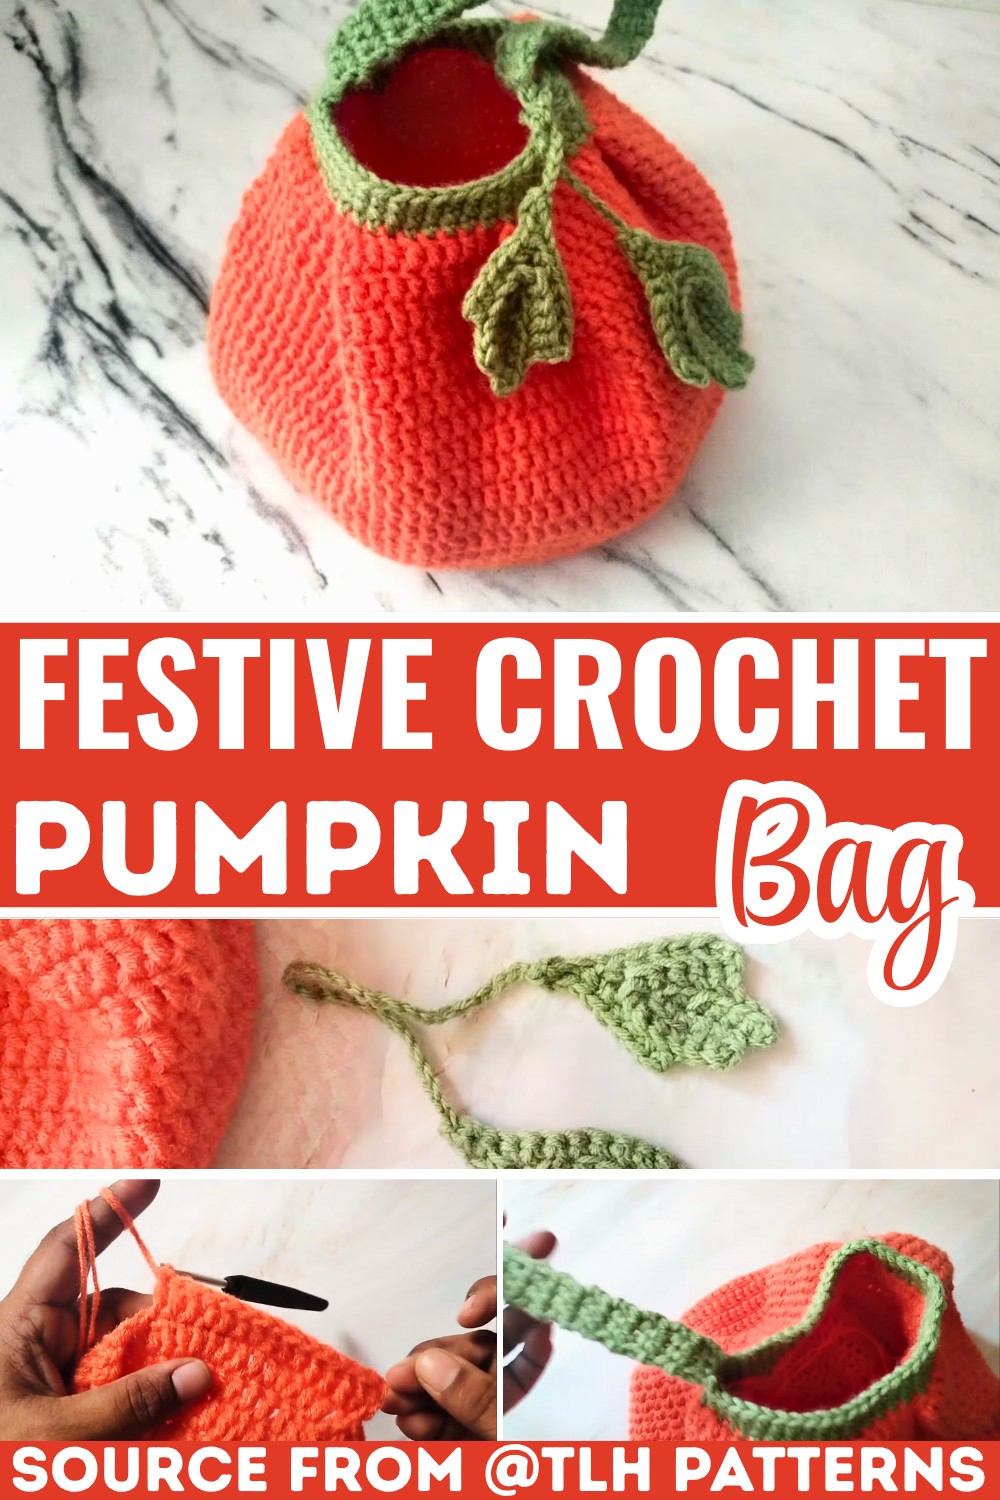
Craft your own adorable pumpkin-themed crochet bag, perfect for Halloween trick-or-treating or seasonal decor, featuring pleated texture, vibrant colors, and a sturdy handmade handle.
Free Crochet Pumpkin Bag Pattern
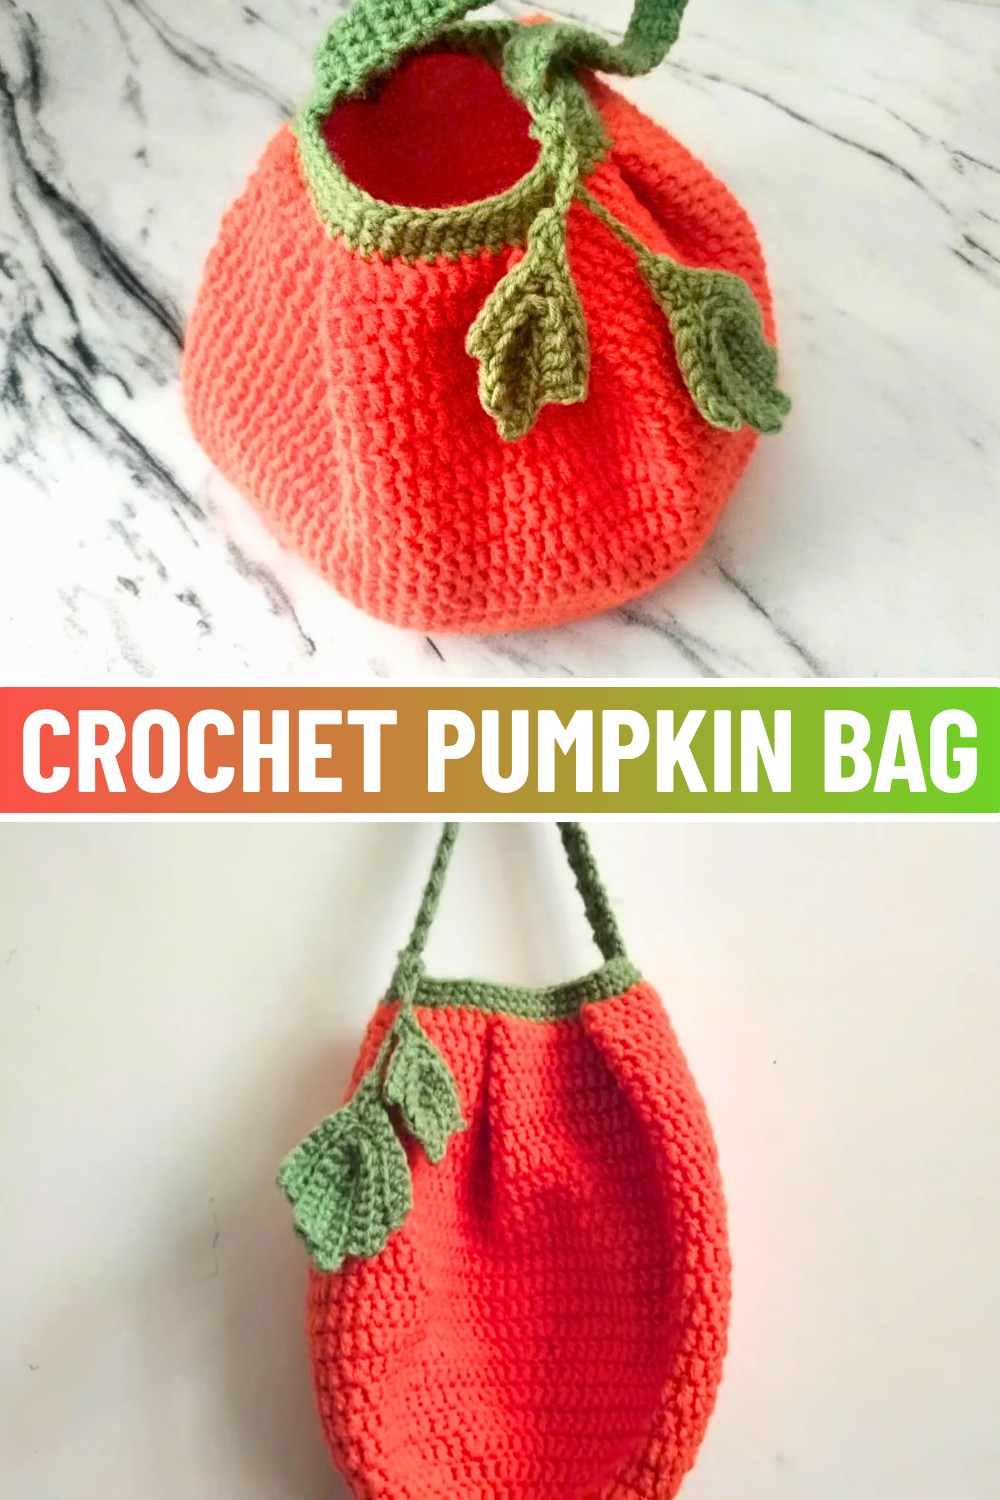
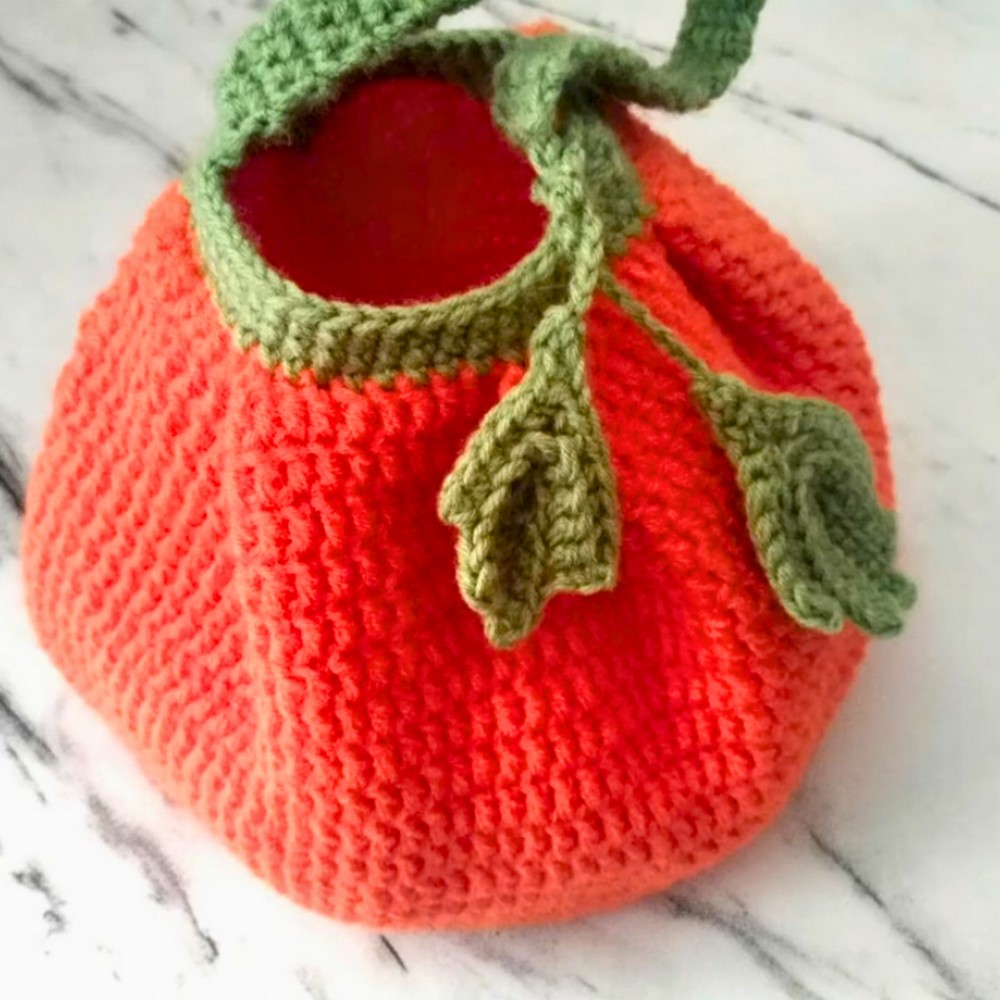
This crochet pumpkin bag is perfect for Halloween fun. Shaped like a cute, round pumpkin, it’s great for trick-or-treating or as a charming seasonal decoration. With its warm orange hue, green accents, and adorable pleated design, it’s both practical and eye-catching. The bag also includes a sturdy handle and playful leaf details, making it a standout choice for any festive occasion.
The process of making a crochet pumpkin is simple yet rewarding. Using just two strands of yarn, this bag comes together beautifully, creating a solid, textured shape ideal for carrying candy or lightweight items. You’ll enjoy shaping its pleats, forming the pumpkin pattern, and adding the decorative leaves for a finished touch. Beginners will find it approachable, and the result is a fun accessory you’ll love to show off.
Credit TLH Patterns
Key Features and Construction Summary
- Materials: Created using two strands of sport-weight yarn held together in orange and green. Requires a 4mm crochet hook and six stitch markers.
- Size: Measures 26 inches at its widest circumference and 13 inches in height, excluding the handle.
- Base and Body: Constructed with increasing rounds of double crochet, starting from a small circular base and expanding outward.
- Pleating: Clever shaping is achieved by folding and pinning stitches together to create six evenly spaced pleats around the bag.
- Handle and Embellishments: Includes a simple single-crochet strap and optional decorative leaves and ties for added charm.
The foundation of the bag begins with a small circular base worked in continuous rounds. Starting with five chain stitches and forming a ring, the pattern grows through systematic increases of double crochet stitches. This step builds a smooth, flat base, forming the foundation of your pumpkin bag. You’ll love how the base takes shape quickly, offering tangible progress right from the start.
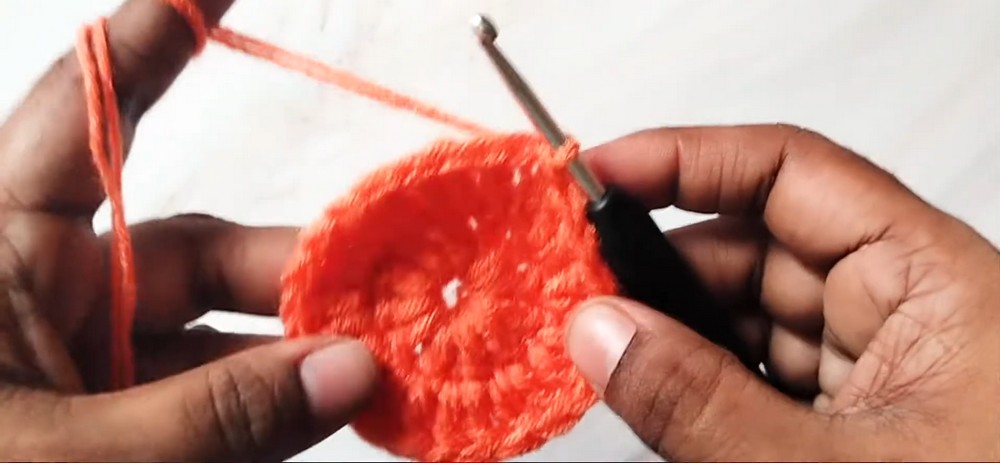
As the bag progresses, the double crochet rounds expand gradually, shifting from 12-stitch increases per round to six-stitch increases. This subtle adjustment ensures the bag achieves its wide, rounded pumpkin-like shape without becoming bulky or distorted. The technique is straightforward yet satisfying, making this project suitable for beginners looking to practice their increasing skills.
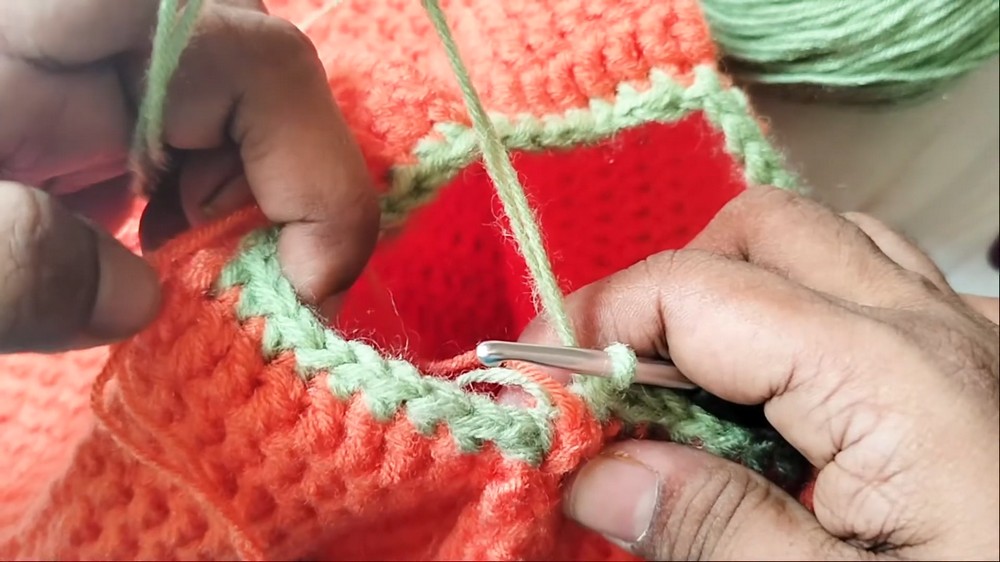
One of the most delightful design elements is the pleated texture, added after the main body is constructed. Using stitch markers, small sections of the bag are folded and pinned in a rhythmic pattern. These folds are secured with single crochets worked in green yarn, mimicking the ridges of a pumpkin. This clever shaping method gives the bag depth and volume while keeping the process fun and engaging.
After the body and pleats are completed, the bag transitions seamlessly to its functional yet stylish handle. Crafted with simple rows of single crochet stitches, the handle is straightforward to make but sturdy enough to support Halloween candy or other goodies. The optional addition of crochet leaves, combined with chain ties, adds a playful and decorative element to complete the pumpkin theme.
How To Crochet Pumpkin Bag
Materials & Tools Needed
- Yarn:
- 470 meters (approx.) of sport weight yarn in orange.
- 60 meters (approx.) of sport weight yarn in green.
- Work with two strands of yarn held together.
- Crochet Hook:
- 4mm crochet hook.
- Stitch Markers:
- You’ll need six stitch markers.
- Additional Tools:
- Yarn needle for sewing and weaving in ends.
Finished Size & Customization Ideas
- Approximate Size:
- Circumference (widest part): 26 inches.
- Height (excluding handle): 13 inches.
- Customization Ideas:
- For a larger bag: Use bulkier yarn and a larger hook.
- Add embellishments, such as crocheted flowers or appliqués, to personalize the bag.
- Use a contrasting or variegated yarn for a unique look.
Pattern Abbreviations & Terminology
(US Crochet Terms)
- ch – Chain.
- dc – Double Crochet.
- sc – Single Crochet.
- sl st – Slip Stitch.
Step-by-Step Detailed Instructions
Base of the Pumpkin Bag
- Round 1:
- Make a slip knot.
- Chain 5 (ch 5), then join the last chain to the first with a slip stitch to form a ring.
- Chain 3 (counts as the first double crochet), then work 11 dc into the ring. (Total: 12 stitches).
- Join the last stitch to the top of the 3rd chain with a slip stitch.
- Round 2:
- Chain 3 (counts as the first double crochet), then work 1 dc in the same stitch.
- Work 2 dc in each stitch around (increase 12 stitches in total). (24 stitches).
- Join the last stitch to the top of the 3rd chain with a slip stitch.
- Round 3:
- Chain 3, dc in the same stitch.
- Work 1 dc in the next stitch, then 2 dc in the next stitch. Repeat this pattern around, alternating between 1 dc and 2 dc. (36 stitches).
- Join with a slip stitch.
- Round 4:
- Chain 3, dc in the same stitch.
- Work 1 dc in the next 2 stitches, then 2 dc in the next stitch. Repeat this pattern around. (48 stitches).
- Join with a slip stitch.
- Rounds 5–7:
- Follow the same increase pattern:
- Round 5: Increase after every 3 stitches (60 stitches total).
- Round 6: Increase after every 4 stitches (72 stitches total).
- Round 7: Increase after every 5 stitches (84 stitches total).
- Follow the same increase pattern:
Body of the Bag
- Rounds 8–12 (Shaping the Bag):
- Switch to increasing 6 stitches per round:
- Round 8: Increase after every 13 stitches (90 stitches total).
- Round 9: Increase after every 14 stitches (96 stitches total).
- Round 10: Increase after every 15 stitches (102 stitches total).
- Round 11: Increase after every 16 stitches (108 stitches total).
- Round 12: Increase after every 17 stitches (114 stitches total).
- Switch to increasing 6 stitches per round:
- Rounds 13–25:
- Work evenly: 1 dc in every stitch (no increasing). Continue this pattern until you have completed Round 25.
Creating the Pleats
- Forming the Pleats (Using Stitch Markers):
- Fasten off the orange yarn.
- Using stitch markers:
- Place a marker in the 1st stitch.
- Skip 11 stitches; place a marker in the 12th stitch.
- Pin these two stitches together to form the first pleat.
- Repeat this around, skipping 7 stitches between pleats, marking and pinning, until you have 6 pleats total.
- Joining the Green Yarn:
- Holding two strands of green yarn together, reinsert your hook into the 1st marked stitch and the 12th marked stitch (both pinned together).
- Pull the green yarn through both stitches.
- Chain 1, work 1 sc through both stitches.
- Round 26 (Pleat Details):
- Work:
- 4 sc in the next 4 stitches.
- 3 sc through the folds of the pleat.
- 1 sc in the next pair of pinned stitches.
- Repeat this sequence until you’ve completed all pleats. (48 stitches total).
- Join with a slip stitch.
- Rounds 27–28:
- Work one sc in every stitch for two more rounds.
- Join with a slip stitch.
Handle
- Creating the Handle:
- Chain 1, sc in the next 3 stitches.
- Chain 1, turn, sc in the 3 stitches.
- Repeat this pattern, working back and forth, until the strap measures about 12 inches.
- Attaching the Handle:
- Using the yarn needle, sew the end of the strap to the opposite side of the bag.
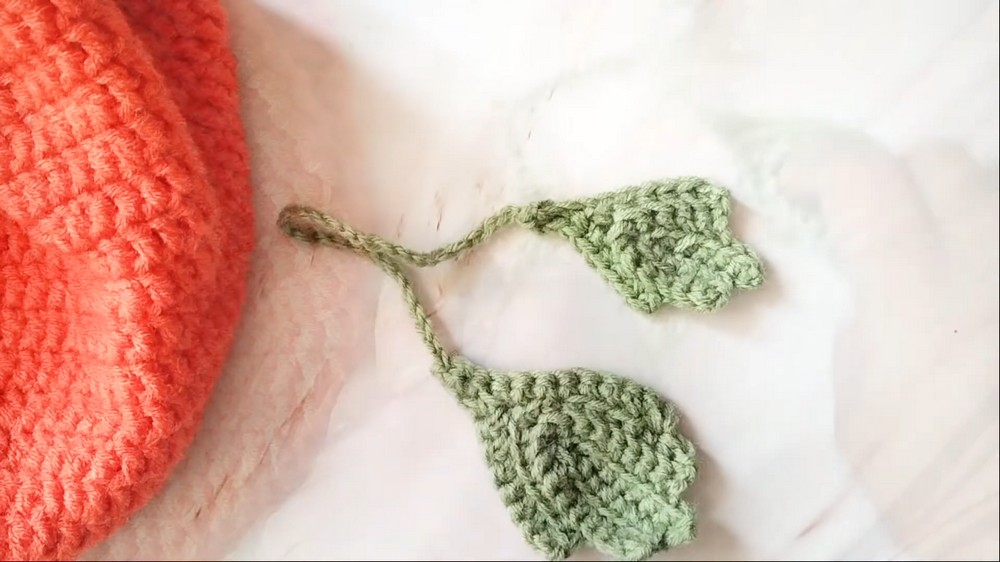
Decorative Leaves
- Adding Leaves (Optional):
- Follow the pattern for the Irish Leaf (linked in the original video description).
- Attach one end of green yarn to the stem of the first leaf, chain until you’ve reached the desired length, then attach the opposite end to the stem of the second leaf.
- Use this as a decorative tie to accessorize the handle.
Finishing Touches
- Fasten off all threads and use a yarn needle to weave in all loose ends.
- Shape the pleats gently to ensure an even appearance.
Troubleshooting and Suggestions
Common Issues & Solutions:
- Inconsistent stitch tension: Holding two strands together can be tricky. If you’re facing gaps or uneven stitches, practice a small swatch first to get comfortable with tension.
- Losing count of increases/pleats: Use stitch markers liberally to mark your increase points and the ends of your pleats. This makes counting much easier.
- Clean edges on pleats: Ensure that your folds are aligned correctly before securing with the green yarn. A little patience here leads to a polished look.
Creative Modifications:
- Experiment with different color combinations for a non-traditional pumpkin, like white and gold for a chic autumn vibe or pastel shades for a spring twist.
- Add a drawstring closure instead of a handle for a custom gift bag design.
- Embroider a jack-o’-lantern face onto the pleats for a spooky Halloween version of the bag.
- Turn the bag into a home decor piece by stuffing it with fiberfill and cinching the top for a unique, reusable pumpkin decoration!
With its standout shape, seasonal colors, and charming details, this Crochet Pumpkin Bag is the perfect project for fall. Whether you’re trick-or-treating or decorating your home, it’s sure to add a festive touch to your crochet collection.


