Crochet Ribbed Beanie Pattern with Custom Sizing & Cinched Crown
Here’s how to crochet a stretchy ribbed beanie from a simple panel, with a shaped crown and measurement-based sizing for children, teens, or adults.

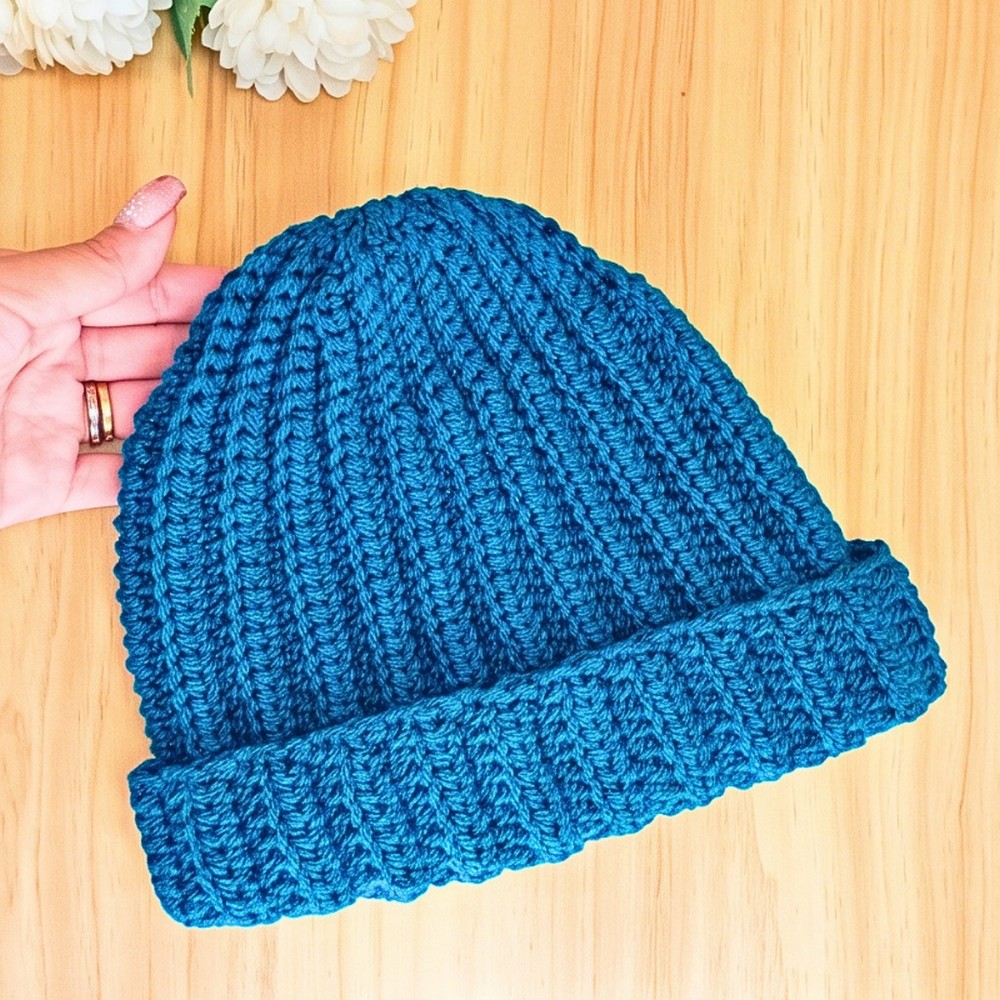
Different stitch heights give this crochet beanie its distinctive shape without requiring complicated shaping rows. The main Hdc section forms the larger body of the crochet hat, while a shorter Sc section is reserved for the crown so the top can be gathered neatly at the end.
Once the rectangular panel reaches the right circumference, the finishing steps are quite simple. The sides are joined with slip stitches, the crown is drawn closed with a long yarn tail, and the Hdc section folds up to create the finished crochet brim.
Credit Tejidos Joss Ropa
Materials & Tools
- Yarn: Medium-weight 100% premium acrylic yarn. The tutorial uses Revés Derecho, 100g / 200m, with approximately 80g needed for an adult-sized hat.
- Crochet Hook: 4.0 mm
- Scissors
- Yarn/Tapestry Needle
- Stitch Markers
- Measuring Tape
Finished Size and Customization
The adult-sized hat shown in the tutorial measures 25 cm in height and approximately 45 cm across when laid flat before stretching.
For a custom height, make the foundation chain until it reaches the desired height of the hat. The final 5 cm of the chain are reserved for the crown section.
To determine the panel width, measure the intended wearer’s head circumference and subtract 5 cm. The result is the width to reach before finishing the rectangular panel. For example, a 50 cm head circumference requires a 45 cm wide panel.
This method can be used for children, teens, or adults because the measurements—not one fixed adult stitch count—determine the finished size.
Abbreviations
- ch = chain
- sc = single crochet
- hdc = half double crochet
- sl st = slip stitch
- BLO = back loop only
- st(s) = stitch(es)
Before You Start: Identify the Crown Section
The panel uses two different stitch sections. The Hdc portion forms the main body, while the Sc portion marks the crown area that will later be gathered closed.
For a clean, straight edge, the first and last stitches of every row are worked under both loops. All stitches between those edge stitches are worked in BLO.
The stitch markers are especially useful here because they show exactly where the crown section begins and ends as the rows are turned.
Crochet the Rectangular Beanie Panel
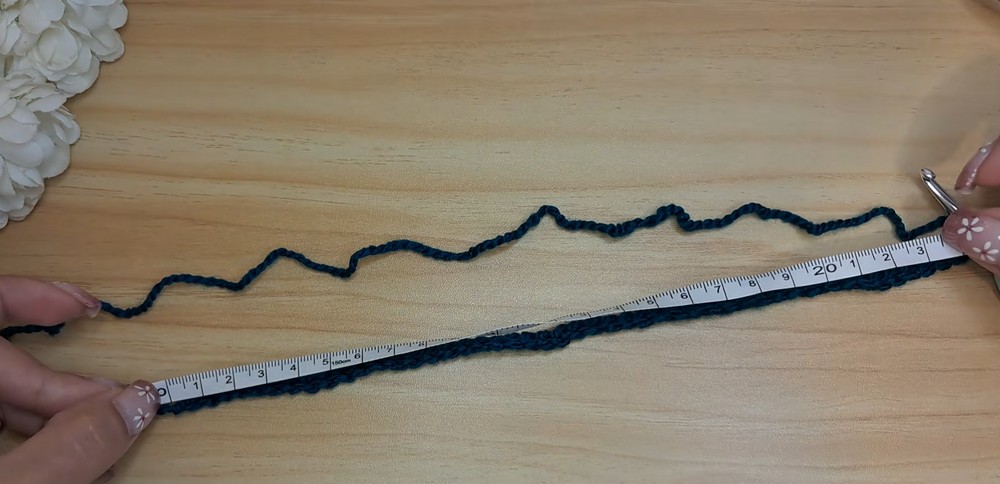
Row 1 (Foundation): Make a slip knot and ch 48, or until the chain measures 25 cm; measure 5 cm down from the end of the chain and place a stitch marker to mark the crown section, which equals 9 chains in the tutorial; ch 1 to turn; starting in the second chain from the hook, work 1 hdc in each chain until the stitch marker; remove the marker; work 1 sc in each of the remaining 9 chains, then place a stitch marker in the very first sc and another in the very last sc.
Row 2: Ch 1 and turn; work 1 sc under both loops in the first stitch; work 1 sc in BLO of each stitch until the section marker; move the marker up to the new row; work 1 hdc in BLO across the remaining stitches, stopping before the final stitch; work 1 hdc under both loops in the final stitch.
Row 3: Ch 1 and turn; work 1 hdc under both loops in the first stitch; work 1 hdc in BLO of each stitch until the section marker; work 1 sc in BLO across the remaining stitches, stopping before the final stitch; work 1 sc under both loops in the final stitch.
Row 4 and Onward: Repeat Rows 2 and 3 until the rectangular panel reaches the required width for your chosen size; for the adult size, continue until the widest Hdc section measures exactly 45 cm.
Teaching Guide: Keep the Stitch Sections Consistent
The crown markers divide the panel into the two areas that use different stitches. After every turn, work toward the marker using the stitch specified for that section, then continue with the other stitch across the remaining portion.
The edge rule is just as important as the stitch placement. The interior stitches are worked in BLO, but the first and last stitch of every row are worked through both loops. Keeping those edge stitches consistent helps maintain the straight outline needed for the later side join.

Move the section marker upward as you work so the crown area stays easy to recognize. For the adult size, the Hdc section should eventually measure 45 cm before stretching. For another size, stop when the panel reaches the calculated head circumference minus 5 cm rather than relying on the adult measurement.
Check the Panel Before Joining
Lay the completed panel flat before beginning the seam. Measure the widest Hdc section and compare it with your target measurement.
For the adult version, this should be 45 cm before stretching. If you are making a different size, your target is the intended head circumference minus 5 cm.
Also check that the Sc crown section is still clearly marked at the correct end of the panel. This is the section that will be gathered closed, so identifying it correctly now makes the finishing stage much easier.

Join the Hat at the Side
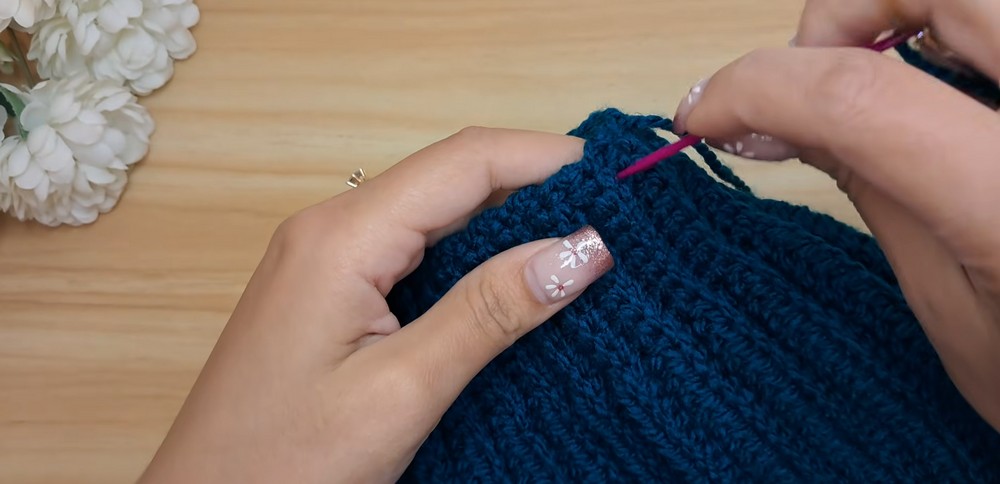
Side Joining: Fold the rectangular panel in half so the first and last rows touch; ch 1, insert the hook into the back loop of the final row and through the full stitch of the foundation chain on the opposite side, yarn over and pull through everything to create a sl st, then repeat this same joining method—back loop of the current row plus full stitch of the foundation row—all the way up the side until the hat is completely seamed.
Close the Crown
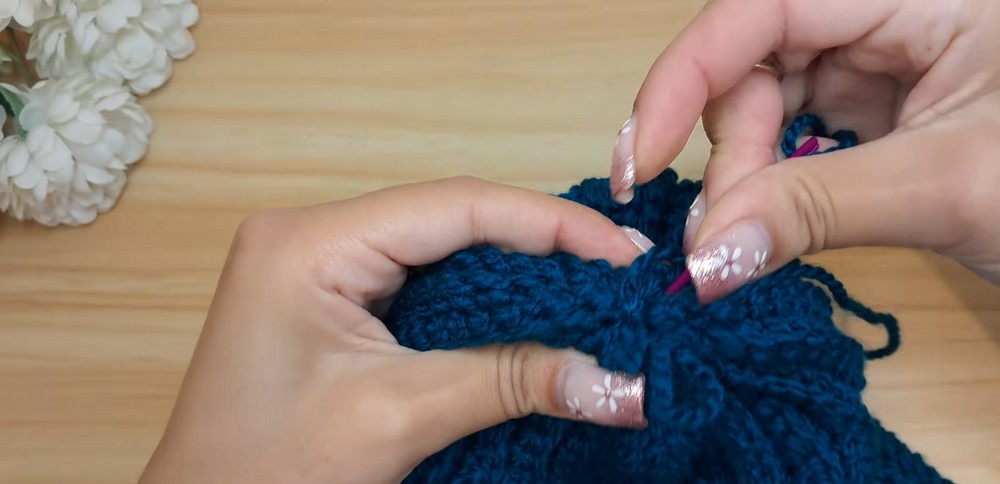
Fasten Off: Once you reach the top edge at the Sc side, make a chain and cut the yarn, leaving a very long tail for sewing; pull the yarn through to fasten off.
Prepare the Tail: Thread the long yarn tail onto a yarn or tapestry needle.
Gather the Opening: Weave the needle in and out of the top-edge stitches in a zig-zag running-stitch pattern all the way around the crown opening.
Cinch the Crown: Pull the yarn tail tightly to close the top opening completely.
Secure the Crown: Tie a secure double knot using the long tail and the original starting tail, then sew the needle back and forth across the closed opening several times to reinforce it.
Finish: Tie a final knot, weave in the remaining end to hide it, and cut the yarn.
Care & Storage
Keep the finished beanie folded or stored in a way that does not unnecessarily stretch the ribbed fabric when it is not being worn. When putting it away, avoid pulling on the gathered crown or leaving the brim stretched for long periods.
Because the tutorial uses 100% premium acrylic yarn, follow the care instructions provided for the specific yarn you choose, especially if you substitute a different brand or fiber.