Free Crochet Mesh Top Pattern
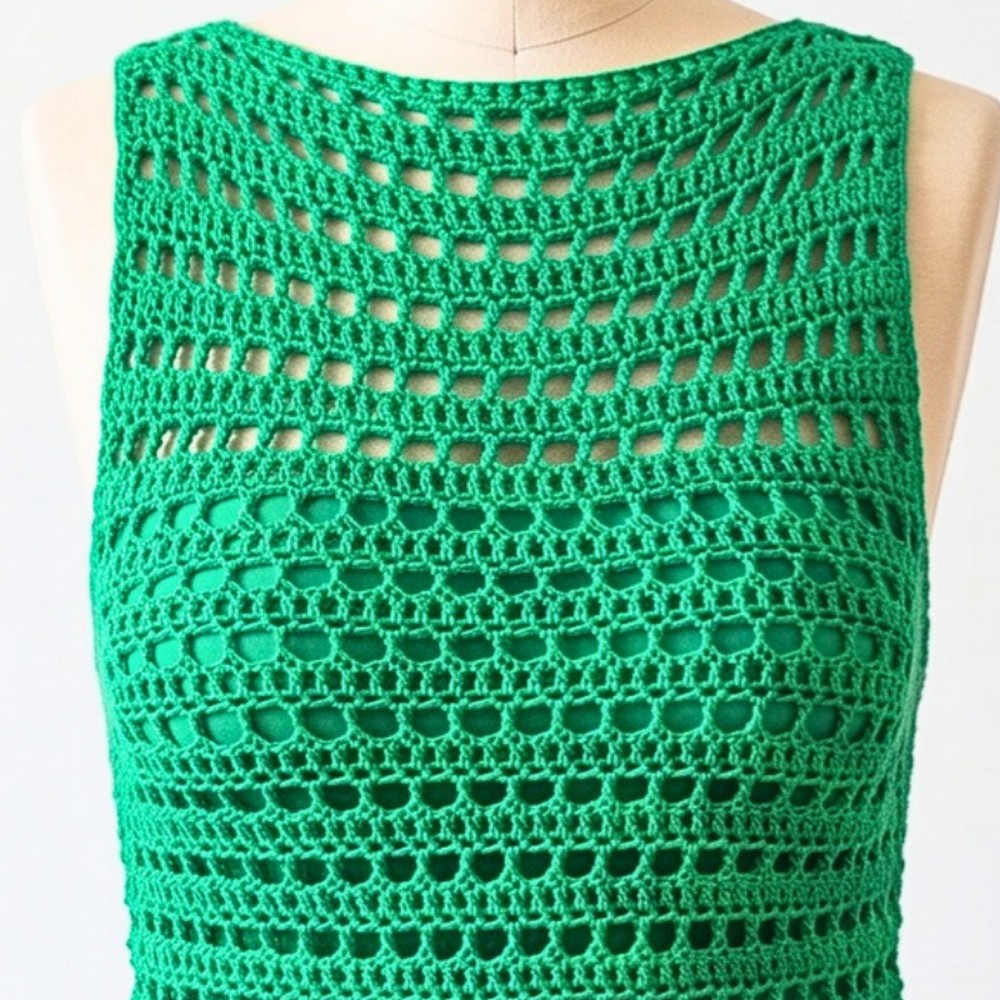
Want a breezy crochet top that follows your own measurements? This mesh design starts across the upper chest and grows into a softly flared waist for an easy summer fit.

Across the upper chest, this crochet top begins with a simple measured foundation chain and gradually develops into an airy mesh fabric. The alternating solid and open rows give it a lightweight look, while the gentle flare at the lower body keeps the shape from feeling too straight or restrictive.
Once you know your chest measurement and desired length, the rest of the crochet pattern follows a repeatable rhythm that makes the changing sections easier to recognize. You’ll learn where the underarm increases belong, how the shoulder and back-neck chain are calculated, and how to keep the side seams loose enough for the finished crochet top to move comfortably.
Credit eliznuts
What You’ll Need
- Weight 4 / Worsted-weight cotton yarn: Cotton is recommended for its breathability and comfortable feel in summer. The tutorial uses Modern Cotton by Berroco in the color Warf.
- 5.0 mm crochet hook
- Scissors
- Yarn needle
- 2–4 stitch markers
Fit and Length
This top is made to measure rather than following a fixed size chart. Your first measurement is taken across the upper chest from bra strap to bra strap.
For a shorter crop top, stop the lower body sooner. For more coverage, continue the alternating rows until the top reaches your desired length, such as the pants line.
A useful fitting trick is to wear a tight, thin shirt underneath while crocheting. You can then hold the front and back panels against your body to check the width and length without repeatedly changing clothes.
Pattern Abbreviations
- ch: Chain
- st(s): Stitch(es)
- sl st: Slip Stitch
- sc: Single Crochet
- dc: Double Crochet
- sk: Skip
- sp: Space
- inc: Increase – working multiple stitches into the same space
Front Panel: Build the Upper Chest
The front panel starts at the upper chest and works downward. The first section alternates between a dense solid row and an open mesh row, creating the fabric pattern that continues through the body.
Foundation Chain
Make a slip knot and chain an even number of chains that stretches from one bra strap to the other across your upper chest. The tutorial uses 44 chains for its example.
Add 2 extra chains for the turning chain.
Before moving on, hold the chain across your upper chest while wearing your thin fitted shirt. It should span the intended area without pulling tightly. This is the point to adjust the chain length rather than trying to correct the fit much later.
Establish the Solid-and-Mesh Pattern
Row 1 – Solid Row: Turn the foundation chain over so the back bumps are facing you; sk the first 2 chains, then work 1 dc into the back bump of the 3rd ch from the hook and 1 dc into each back bump across.
Working into the back bumps gives the lower edge a clean starting line. Keep your chain tension consistent because an unusually tight foundation can make the finished top narrower than expected.
Row 2 – Mesh Row: Ch 3 (counts as 1 dc and 1 ch-1 sp), turn, place a stitch marker in the 3rd chain, sk the first st and next st, then [dc in next st, ch 1, sk 1 st] across until 2 sts remain; dc in the final st.
The stitch marker is placed in the top of the turning chain because that point becomes important for the final stitch of the next solid row.
Row 3 – Solid Row: Ch 2 (does not count as a st), turn, dc in the first dc st, then [dc in the open ch-1 sp, dc in the top of the next dc st] across; work the final dc into the marked 3rd chain from Row 2.
Notice that this row works directly into the mesh openings rather than trying to find a tiny chain stitch. That keeps the solid fabric even and makes the transition between the two row types easier to see.
Rows 4-14: Continue alternating Mesh Row and Solid Row in the same manner until the panel reaches the underarm area; make sure this section ends on a Mesh Row.
After Row 14, look at the panel before starting the shaping. You should have an open mesh/solid texture running evenly from the upper chest downward, with the wider body increases still to come.

Add Room at the Underarm
The next shaping section introduces increases on the Solid Rows only. The mesh row between them remains unchanged.
Row 15 – Increase Solid Row: Ch 2, turn; work 2 dc in the first st, 2 dc in the first ch-1 sp, continue across with the regular sequence of 1 dc in each st and 1 dc in each sp until 4 spaces remain, then work 2 dc in the last ch-1 sp and 2 dc in the top of the turning chain.
There are two sets of increases at each side of this row. These additions begin widening the panel around the underarm rather than making the entire upper section wider.
Row 16 – Mesh Row: Work a normal mesh row with ch 3, sk 1, [dc, ch 1, sk 1] across, ending with 1 dc.
No increases are added here. Keeping this row regular lets the new width created on Row 15 settle naturally into the mesh pattern.
Row 17 – Increase Solid Row: Repeat the increase arrangement from Row 15, working 2 sets of increases at the beginning and 2 sets at the end, with the regular dc-and-space sequence through the center.
At this point, the panel should visibly begin moving outward from the narrower chest area. If the sides look uneven, check the increase placement before continuing rather than trying to compensate in later rows.

Continue Toward the Waist
Once the underarm shaping is complete, the remaining body becomes more gradual.
Rows 18–28: Continue alternating Mesh and Solid Rows for approximately 11 more rows, or until the front panel reaches your desired waist length; on each Solid Row, work 1 set of increases at each side only — 2 dc in the first st, work normally across, then 2 dc in the last st.
The single increase set on each side creates the gentle outward flare. For a cropped version, stop once the panel reaches your preferred length; for a longer top, continue the established alternating pattern until the body reaches the desired position.
When the front panel is the length you want, tie off.
Turn the Top Edge Into Shoulders and a Back Neckline
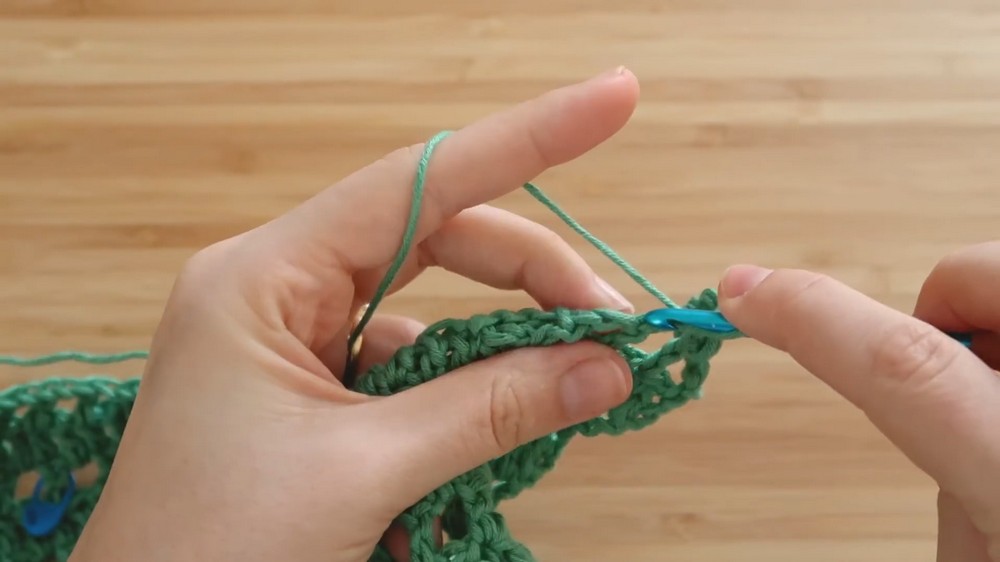
Rather than making a separate back neckline piece, the top edge of the front panel becomes the starting point for the shoulder straps and long chain across the back neck.
Lay the completed front panel flat with its top foundation edge facing you.
Right Shoulder
Attach the yarn with a slip knot to the very first stitch at the top right corner.
Ch 2, then work 1 dc in each of the next 6 sts.
For a larger size, the tutorial notes that you may prefer 8–10 dc for the shoulder section.
Measure the Back Neck Chain
Place a stitch marker 6 stitches inward from the far-left corner of the front panel.
Now count the unworked stitches between the right shoulder section and the marked point. The tutorial example has 32 unworked stitches.
Chain exactly that number. In the example, this means ch 32.
This chain forms the open back neckline. Its length is tied to the actual width of the front panel, so count your stitches rather than automatically copying 32 chains if your measurement differs.

Left Shoulder
Insert your hook into the marked stitch on the left side and work 1 dc. Continue with 1 dc in each of the remaining 5 sts to complete the left shoulder.
The top edge should now have a shoulder section on each side with the long chain creating the opening between them.
Work the Back Panel
The back begins from the shoulders and neck chain, then follows the same fabric sequence as the front.
Back Panel Row 1 – Solid Row: Ch 2, turn, work 1 dc in each of the first 6 shoulder sts; twist the long chain so its bumps face you and work 1 dc into the back bump of all 32 chains; work 1 dc in each of the remaining 6 shoulder sts.
Working into the back bumps of the chain gives the neckline a defined starting edge and connects both shoulders into one continuous row.
Continue the Back
Work the back panel identically to the front panel:
- Rows 1-14: Alternate Mesh and Solid Rows, ending this section on a Mesh Row.
- Rows 15-17: Repeat the underarm shaping, using 2 sets of increases at each side on the Solid Rows.
- Rows 18-28: Continue the lower body with 1 set of increases at each side of the Solid Rows, adjusting the number of rows if you changed the desired length of the front.
Before sewing the sides, place the front and back panels together and check the length and underarm position against your body. Both panels should meet naturally at the sides.

Join the Side Seams
Turn the top inside out, so the right sides are facing one another.
Place a stitch marker on each side edge directly beneath the underarm increases at Row 15. This marks where the side seam should stop.
Attach the yarn at a bottom hem corner and begin joining the front and back panels with slip stitches.
Keep the tension loose because slip stitches have very little stretch. Insert the hook through corresponding spaces on both panels rather than pulling one side tighter than the other.
As a guide, use approximately 1 sl st per mesh row and 2 sl sts along the side of each solid dc row.
Stop when you reach the stitch marker at the underarm. Tie off, then repeat the same process on the opposite side.
Finish the Armholes
Turn the top right side out before trimming the armhole edges.
Attach the yarn at one underarm seam and work sc evenly around the raw armhole edge, placing approximately 1 sc into each mesh gap and 2 sc into the sides of the solid dc rows.
Keep your tension loose and comfortable so the finished armhole does not become tight or restrictive.
When you return to the beginning, sl st into the first sc, tie off, and weave in the yarn end. Repeat around the second armhole.

Let the Mesh Open Up With Steam Blocking
The final shaping step is especially useful for this garment because blocking affects both the drape and the appearance of the mesh.
Pin the dry top to a foam board or blocking mats. Gently stretch the chest area wider and pull the body lengthwise to open the mesh gaps. Pin the side seams flat.
Use a garment steamer or iron to apply steam without allowing the hot iron to touch the yarn. Steam until the fibers are damp, paying particular attention to the bulky side seams.
Leave the top pinned overnight so it can cool and dry completely.
Once released, the relaxed fibers should give the top a more comfortable drape, while the opened mesh helps the fabric settle into the intended shape.