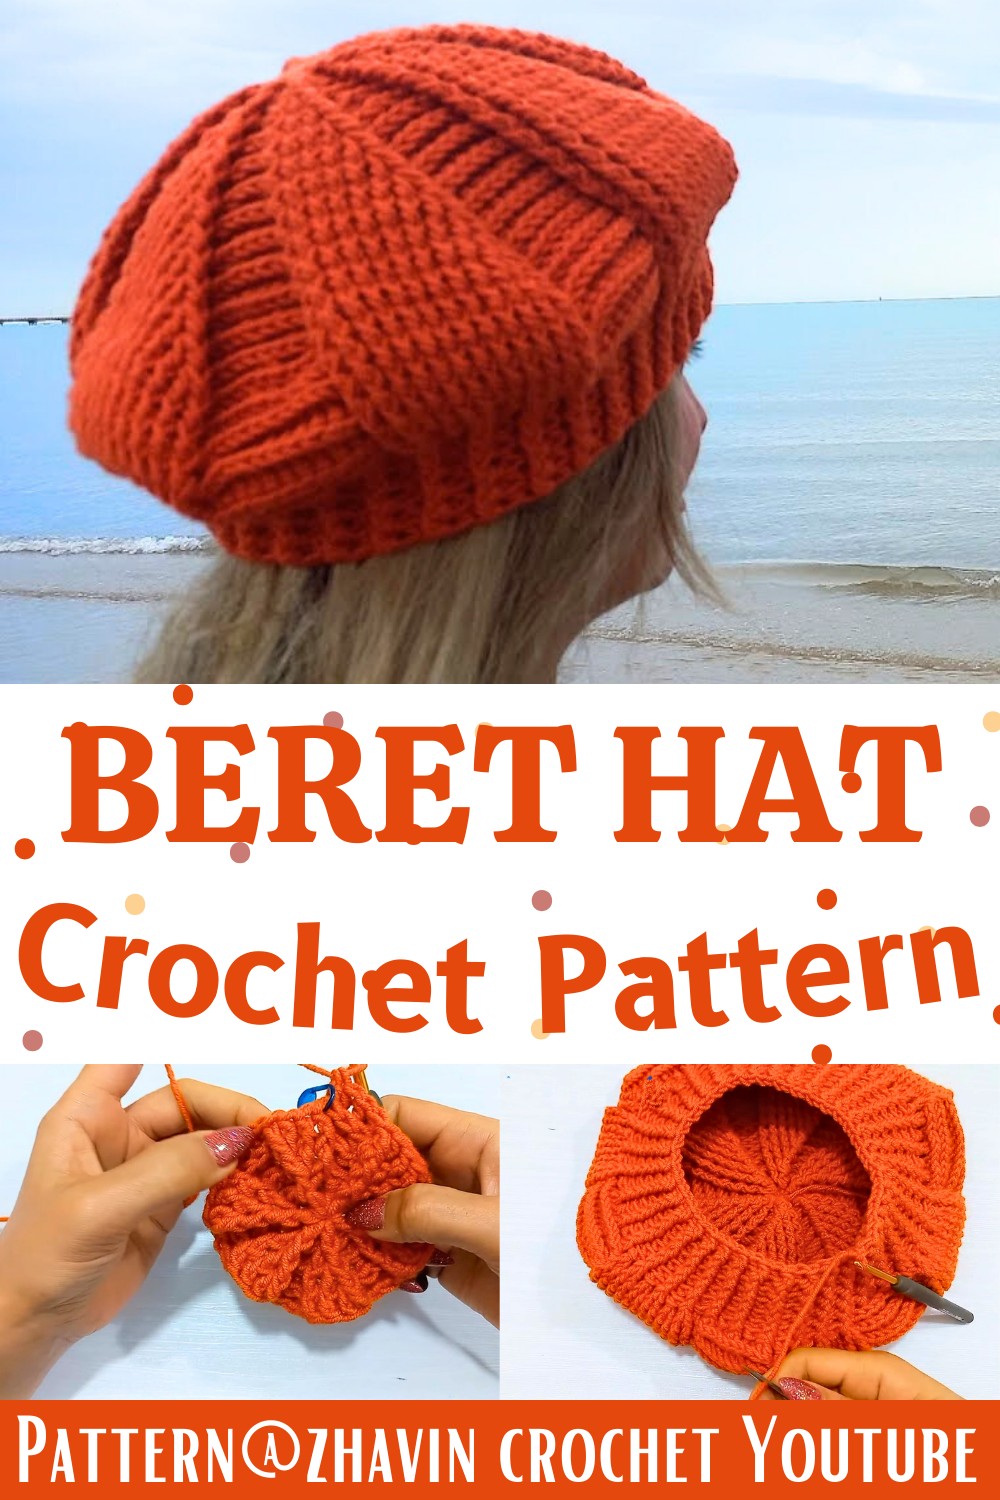
Step-by-Step Crochet Beret Hat Pattern for Beginners
The charm of a handmade beret never goes unnoticed, especially when every stitch adds texture and style. This elegant crochet piece combines a soft, relaxed shape with a comfortable fit that makes it easy to wear throughout the year.
Using worsted-weight yarn and two hook sizes, the pattern creates a polished finish while remaining approachable for beginners. The result is a timeless accessory that looks beautiful with both casual and dressy outfits.
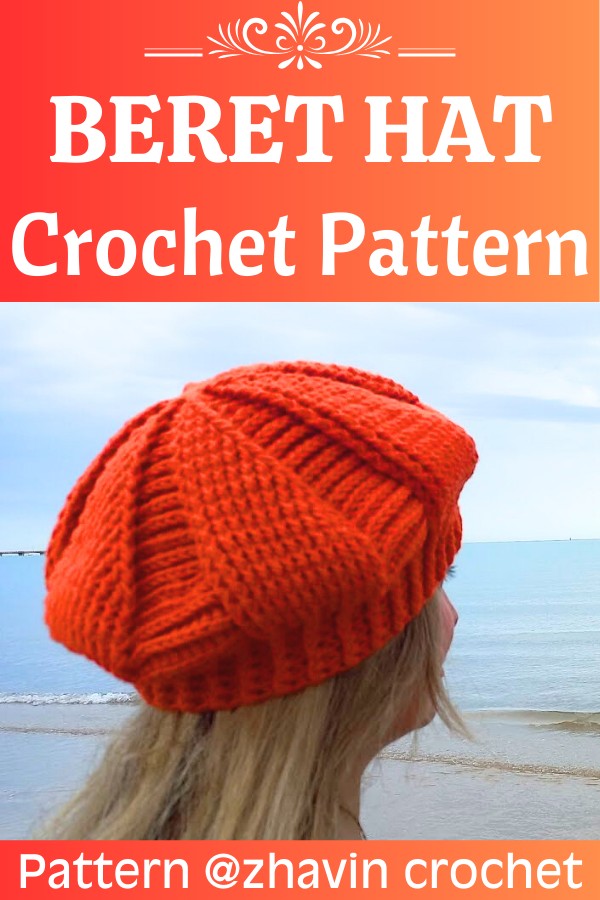
A few simple stitch changes are all it takes to shape this classic crochet piece into something truly eye-catching. The stretchy brim provides a secure yet comfortable fit, while the textured design gives the hat a refined handmade appearance.
You can easily adjust the size or make it in different colors to match your personal style or create thoughtful gifts. Every crochet step builds naturally toward a cozy, stylish item you’ll enjoy wearing again and again.
Credit zhavin crochet
Materials & Tools Needed
- Yarn: Worsted weight yarn (medium / #4)
- Hook for body: 5.0 mm crochet hook
- Hook for brim: 4.5 mm crochet hook
- Notions:
- Stitch marker (used to mark the first stitch of each round)
- Yarn needle (for weaving in ends)
- Scissors
Gauge
The tutorial gives one concrete measurement:
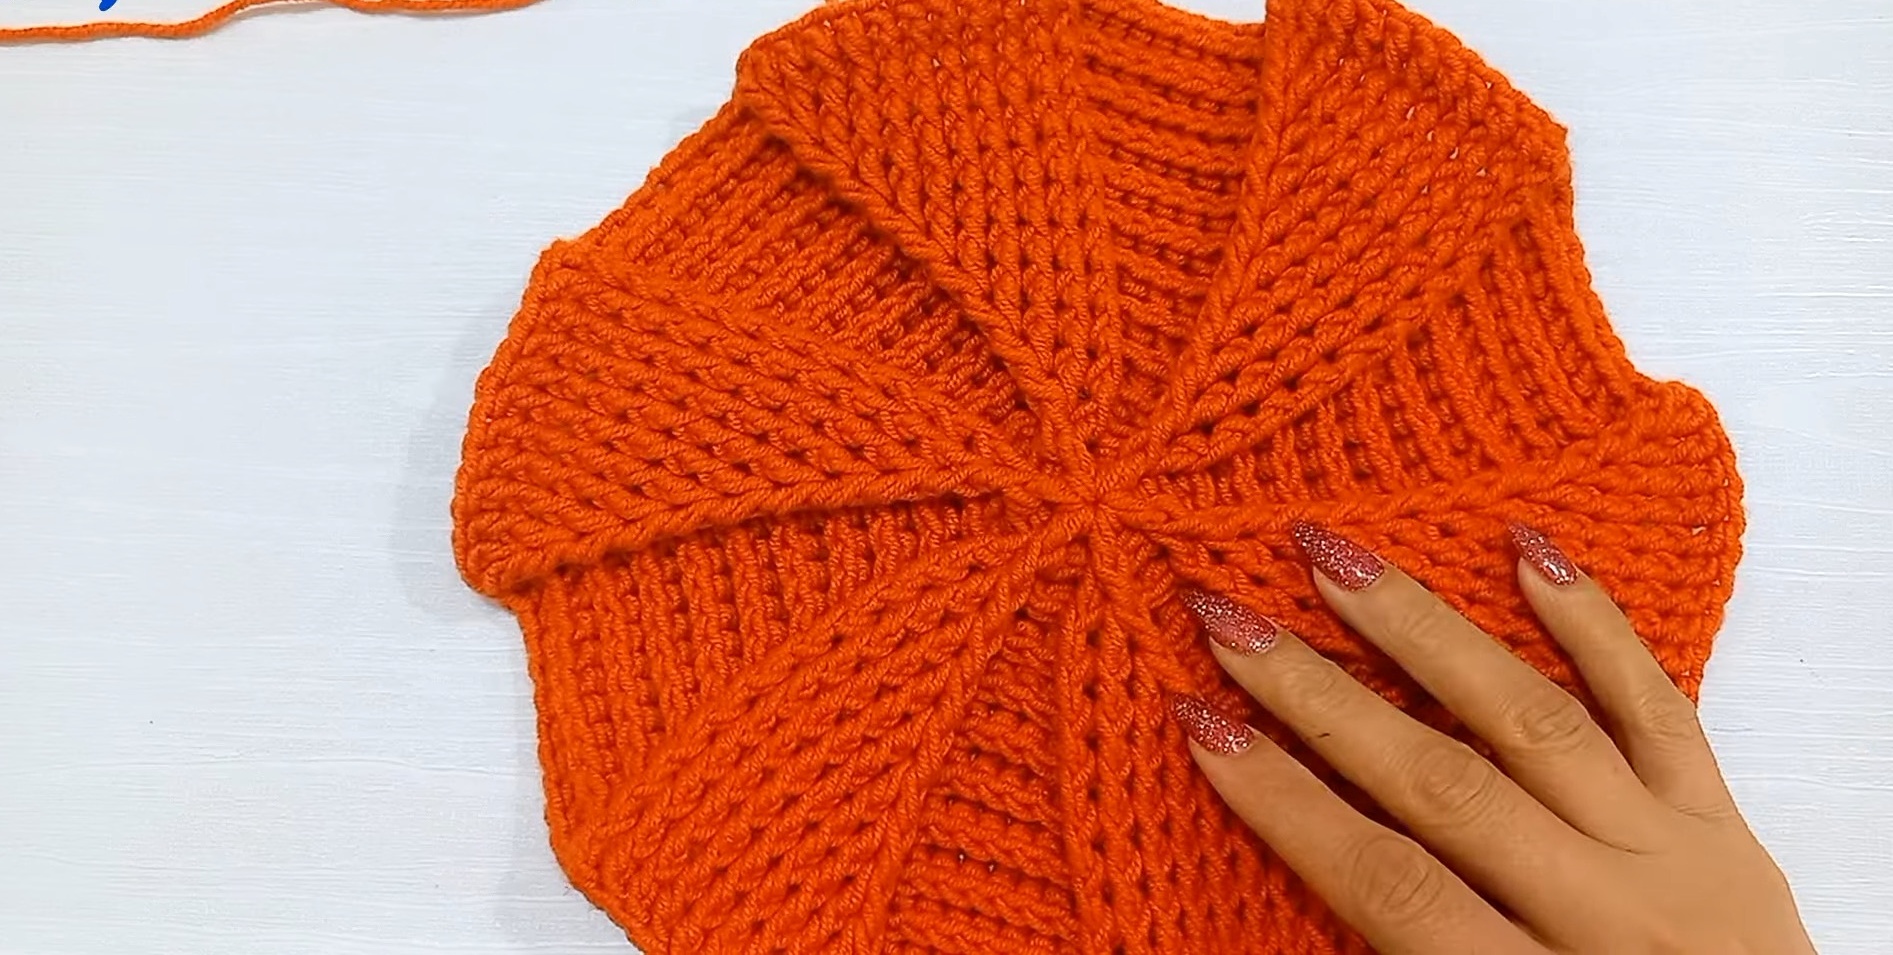
- After Round 12, the diameter of the circle is about 10.5 inches (26.5–27 cm).
The whole hat is worked in post double crochets (front and back), but the key reference is that by Round 12 you have a 10.5″ circle with:
- 6 groups of 12 front post double crochets
- 6 groups of 12 back post double crochets
(72 stitches total)
Use worsted weight yarn and a 5.0 mm hook. If your diameter at Round 12 is very different from 10.5″, adjust hook size or tension.
Pattern Notes
- Worked in the round, in a spiral:
There are no slip stitches at the end of rounds (except the very last round of the brim). You simply continue into the next round. - Use a stitch marker:
Place a marker in the top of the first stitch of each round to keep track of your round start. - Post stitches build the texture:
The hat uses front post double crochet (FPdc) and back post double crochet (BPdc) almost exclusively. - Body shaping:
- From Rounds 2–12, you are increasing stitch counts by adding extra post stitches at the last stitch of each group.
- Rounds 13–20 work even (no increases).
- Round 21 is a decrease round to shape the hat and prepare for the brim.
- Brim worked with smaller hook:
Switch to a 4.5 mm hook for the brim to make it snug. - The tutorial is for an adult size, but you can make it more slouchy by repeating Round 13 more times before doing the decreases.

Finished Size & Customization Ideas
- Adult size beret:
- Circle diameter (top of beret) after Round 12: about 10.5″ (26.5–27 cm).
- Intended to fit an average adult head using worsted weight yarn.
- To make more slouchy:
After Round 12, repeat Round 13 more than 7 times (e.g., up to Round 21+ with no increases) before starting decrease round. - To adjust for different sizes:
- Smaller head: Stop increasing earlier (before Round 12) or use lighter yarn/smaller hook.
- Larger head / more volume: Work additional increase rounds (following the same increase logic) until the circle is larger than 10.5″.
- The brim height in the tutorial is 6 rounds of alternating FPdc and BPdc. You can reduce or increase the number of brim rounds to change brim height.
Pattern Abbreviations & Terminology
- ch = chain
- dc = double crochet
- FPdc = front post double crochet
- BPdc = back post double crochet
- dec FPdc = decrease front post double crochet (2 stitches together)
- dec BPdc = decrease back post double crochet (2 stitches together)
- sl st = slip stitch
- st(s) = stitch(es)
- MR = magic ring / magic circle
Post stitch explanation (brief):
- Front Post Double Crochet (FPdc):
Yarn over, insert hook from front to back to front around the post of the stitch, yarn over and pull up a loop, yarn over and pull through 2 loops, yarn over and pull through 2 loops. - Back Post Double Crochet (BPdc):
Yarn over, insert hook from back to front to back around the post of the stitch, yarn over and pull up a loop, yarn over and pull through 2 loops, yarn over and pull through 2 loops.
Step-by-Step Detailed Crochet Instructions
Set-Up
Hook: 5.0 mm (larger hook)
Yarn: worsted weight
Round 1
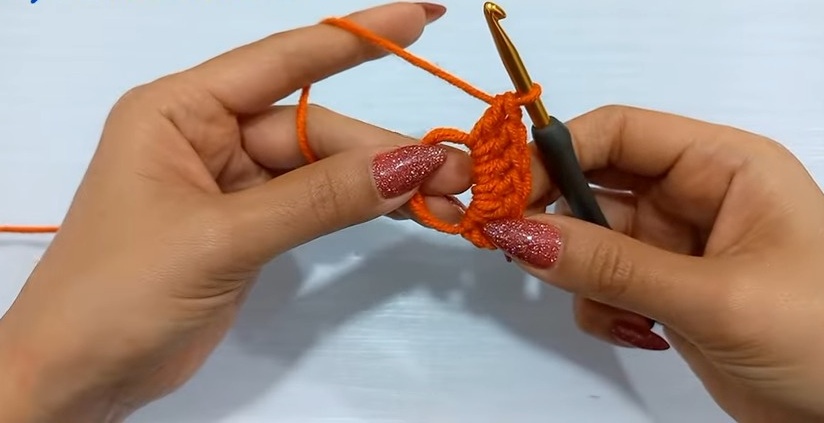
- Make a magic ring (MR).
- Ch 1 (in the video, she also notes you can: ch 3 as your first dc and then do 11 more dc; total 12 dc).
- Work 12 dc into the magic ring.
- Pull the tail yarn tightly to close the ring completely.
- Do not join with a slip stitch.
You now have 12 dc. Round 1 is finished; you will start Round 2 in a spiral.
Increasing Rounds (Crown of Beret)
Round 2
- Begin working in a spiral (no joining).
- All stitches are post double crochets.
- Around the first stitch of Round 1 (the ch-3 or first dc):
- Work 1 FPdc around that stitch.
- Place a stitch marker in the top of this FPdc (first stitch of Round 2).
- Work 1 more FPdc around the same stitch (so: 2 FPdc around the first stitch).
- Around the second stitch of Round 1:
- Work 2 BPdc.
- Around the third stitch:
- Work 2 FPdc.
- Around the fourth stitch:
- Work 2 BPdc.
- Continue this sequence around:
- 2 FPdc in next stitch, 2 BPdc in next stitch, repeat until you reach the end of the round.
At the end of Round 2:
- You have 12 FPdc and 12 BPdc
- Total stitches: 24
Round 3
- Remove stitch marker.
- Work 1 FPdc around the first FPdc of Round 2.
- Mark the top of this stitch as the first stitch of Round 3.
- Around the next FPdc:
- Work 2 FPdc (increase).
- Move to the back post stitches:
- Around the first BPdc: work 1 BPdc.
- Around the next BPdc: work 2 BPdc.
- Repeat this sequence across:
- For front posts:
- 1 FPdc around the first FPdc of the pair
- 2 FPdc around the next FPdc
- For back posts:
- 1 BPdc around the first BPdc of the pair
- 2 BPdc around the next BPdc
- For front posts:
At the end of Round 3:
- You have 36 stitches total.
Round 4
You now have groups of FPdc followed by groups of BPdc. In this round you expand each group to 4 stitches.
- Remove stitch marker.
- Work 1 FPdc around the first stitch of the round; mark it.
- Work 1 FPdc around the next FPdc.
- Work 2 FPdc around the last FPdc of that front-post group.
- Move to the next group (back posts):
- Work 1 BPdc around the first BPdc.
- Work 1 BPdc around the next BPdc.
- Work 2 BPdc around the last BPdc of that group.
- Repeat across:
- For front-post groups:
- 1 FPdc, 1 FPdc, then 2 FPdc in last FPdc of the group
- For back-post groups:
- 1 BPdc, 1 BPdc, then 2 BPdc in last BPdc of the group
- For front-post groups:
At the end of Round 4:
- You have 12 groups of 4 stitches:
- 6 groups of 4 FPdc
- 6 groups of 4 BPdc
- Total stitches: 48
Round 5
Increase each group to 5 stitches.
- Remove stitch marker.
- Around the first FPdc: work 1 FPdc, mark it.
- Around each of the next two FPdc of that group: work 1 FPdc in each (total 3 FPdc worked so far).
- Around the last FPdc of that group: work 2 FPdc (increase).
- Move to the back-post group of 4 stitches:
- Work 1 BPdc in each of the first 3 BPdc.
- Work 2 BPdc around the last BPdc (increase).
- Repeat this sequence for all groups.
At the end of Round 5:
- 6 groups of 5 FPdc
- 6 groups of 5 BPdc
- Total stitches: 60
Rounds 6–12 (Continuing Increases)
From here, you follow the same logic:
- In each front-post group:
- Work 1 FPdc around each stitch except the last stitch of the group.
- Work 2 FPdc around the last FPdc of each group.
- In each back-post group:
- Work 1 BPdc around each stitch except the last stitch of the group.
- Work 2 BPdc around the last BPdc of each group.
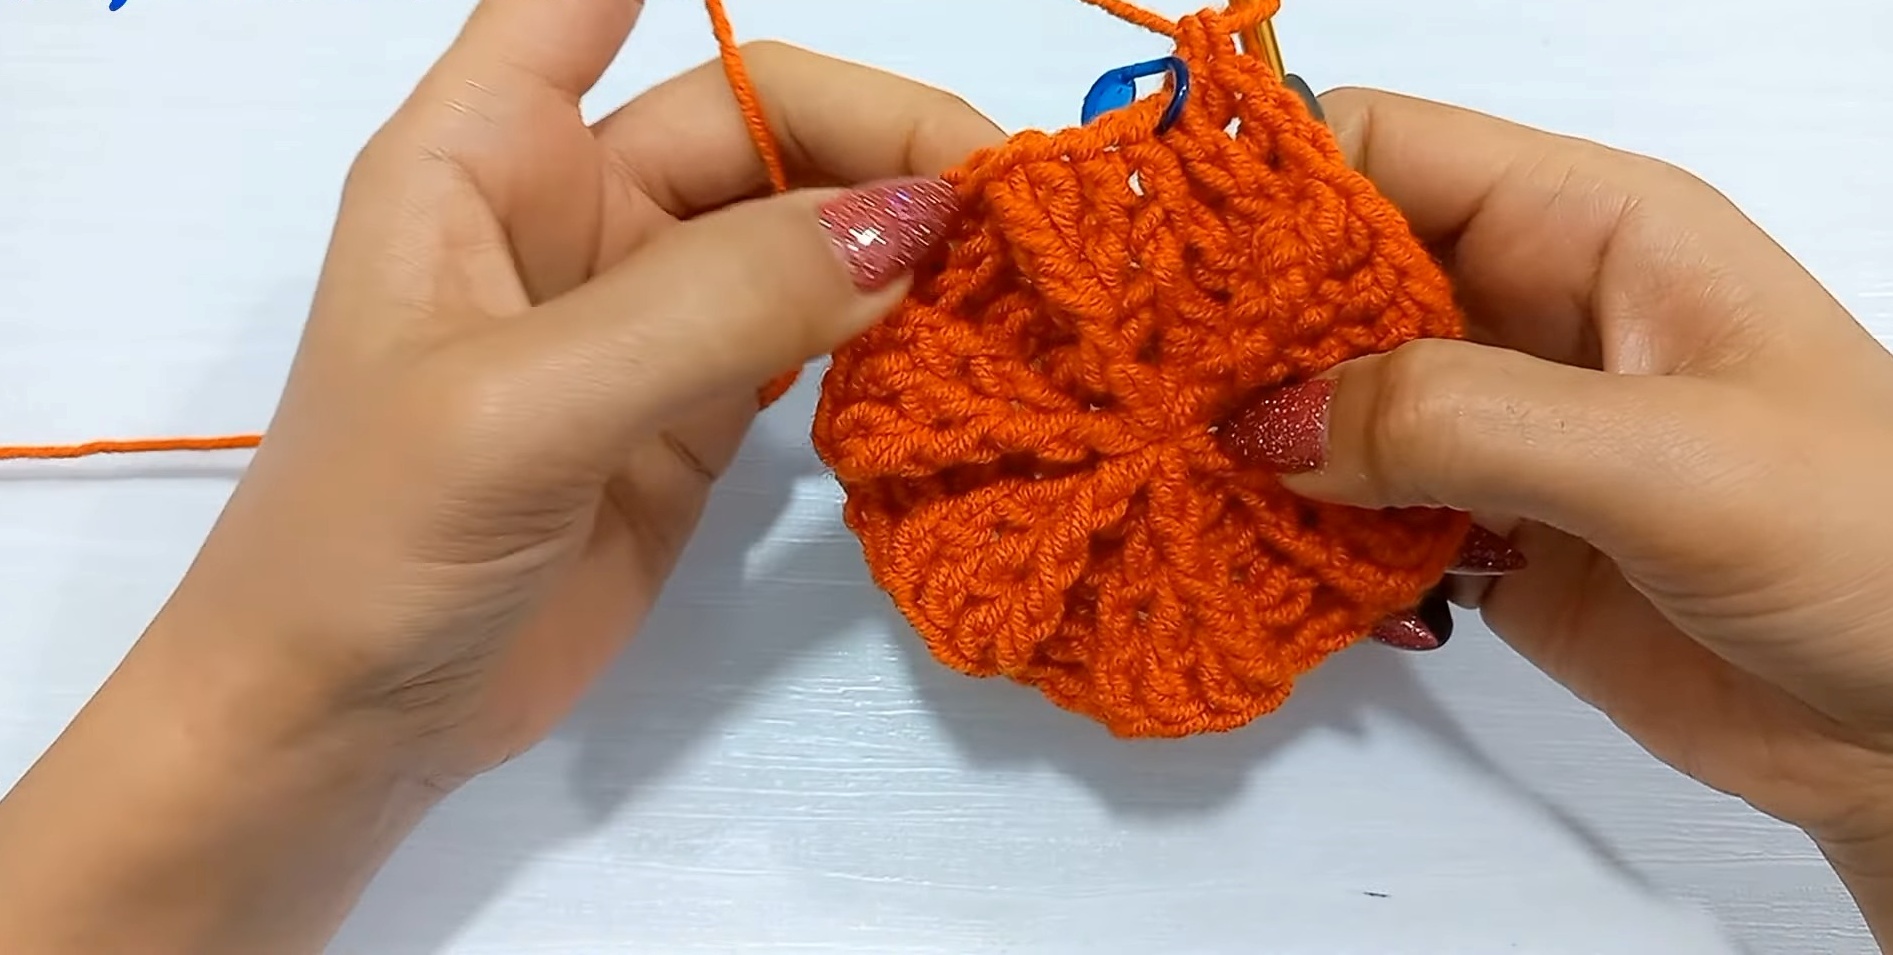
Each round increases the size of each group by 1 stitch. By Round 12:
- You have:
- 6 groups of 12 FPdc
- 6 groups of 12 BPdc
- Total stitches: 72
- The diameter of the circle is about 10.5 inches.
(These rounds are worked exactly based on the chart mentioned in the tutorial.)
Even Rounds (No Increases, Build Slouch)
Round 13
From this round onward, you stop increasing.
- Remove stitch marker.
- Around the first FPdc: work 1 FPdc, mark it.
- Work 1 FPdc around each of the next 11 FPdc, so you have 12 FPdc total in this group.
- Note: Do not work 2 FPdc in any stitch now; no increases.
- Move to the BPdc group:
- Work 1 BPdc around the next BPdc.
- Then 1 BPdc around each of the next 11 BPdc (12 BPdc total in that group).
- Repeat:
- 12 FPdc in the next front-post group (1 in each stitch)
- 12 BPdc in the next back-post group (1 in each stitch)
- Repeat this sequence for all groups around.
At the end of Round 13:
- You still have 72 stitches total (no change in count).
Rounds 14–20
- Repeat Round 13 (work 1 FPdc in each FPdc, 1 BPdc in each BPdc, no increases).
- The tutorial repeats Round 13 for 7 more rounds, meaning Rounds 13–20 are all even.
Note from tutorial:
- If you want the hat more slouchy, you can repeat Round 13 more times before decreasing.
Decrease Round (Shape Before Brim)
Round 21 – Decrease Round
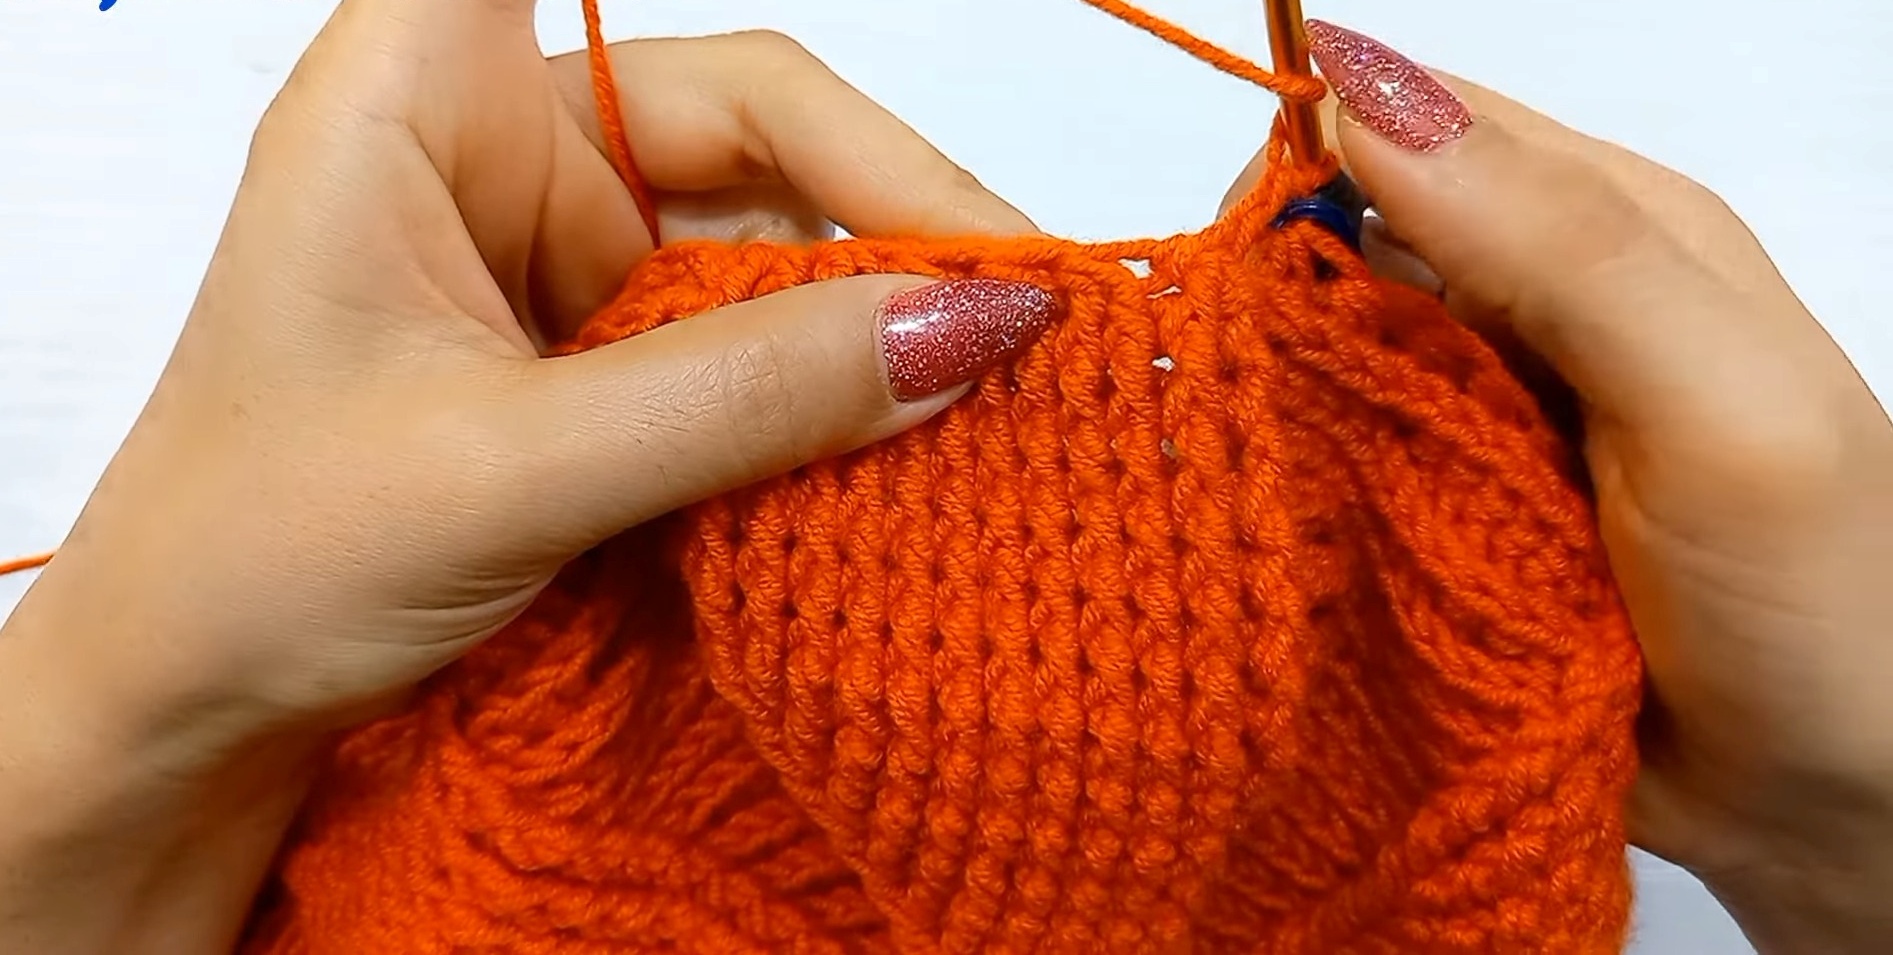
You will now decrease across the groups to bring the body in and transition to the brim. She ends this round with 72 stitches, but they are now arranged differently (as decreases).
Decrease front post double crochet (dec FPdc):
- Yarn over, insert hook around first FP post, yarn over and pull through, yarn over and pull through 2 (leave 2 loops on hook).
- Yarn over, insert around next FP post, yarn over and pull through, yarn over and pull through 2 (now 3 loops on hook).
- Yarn over, pull through all 3 loops.
Decrease back post double crochet (dec BPdc): same principle, but worked around BP posts.
Steps:
- Remove stitch marker.
- Work 1 dec FPdc over the first two FPdc of the round.
- Mark the top of this dec FPdc as the first stitch of Round 21.
- Continue to work dec FPdc over each pair of FPdc in this group:
- Next pair: dec FPdc over stitches 3 and 4
- Next pair: dec FPdc over stitches 5 and 6
- Keep going until you have formed 6 dec FPdc for the front-post section.
- Move to the back posts:
- Work dec BPdc over the first two BPdc.
- Work another dec BPdc over the next two BPdc.
- Continue until you have 6 dec BPdc.
- Repeat this sequence:
- 6 dec FPdc in the next front-post section
- 6 dec BPdc in the next back-post section
- Continue this pattern around.
At the end of Round 21:
- You have 72 stitches total, now in the form of decrease post stitches (fp and bp decreases).
This completes the body shaping and prepares for the brim.
Brim of the Beret
Now change to the smaller hook (4.5 mm).
Brim Round 1
You will work regular FPdc and BPdc alternating around the decrease stitches from Round 21.
- Attach yarn (if needed) and with 4.5 mm hook, begin around the first decrease FP section:
- Work 1 FPdc around the post made from the two incomplete FPdc (the dec FPdc).
- Place stitch marker in the top of this FPdc (first stitch of Brim Round 1).
- Around the next decrease stitch (still the FP side):
- Work 1 BPdc around that dec FPdc.
- Continue across the front-post decrease section:
- Alternate: 1 FPdc, 1 BPdc around each decrease stitch.
- Move on to the back-post decrease section (dec BPdc stitches):
- Work 1 FPdc around the first dec BPdc.
- Work 1 BPdc around the next dec BPdc.
- Continue the sequence all the way around:
- Work 1 FPdc, 1 BPdc alternately around each decrease stitch from Round 21.
You will now have a round with alternating FPdc and BPdc all the way around.
Brim Rounds 2–6
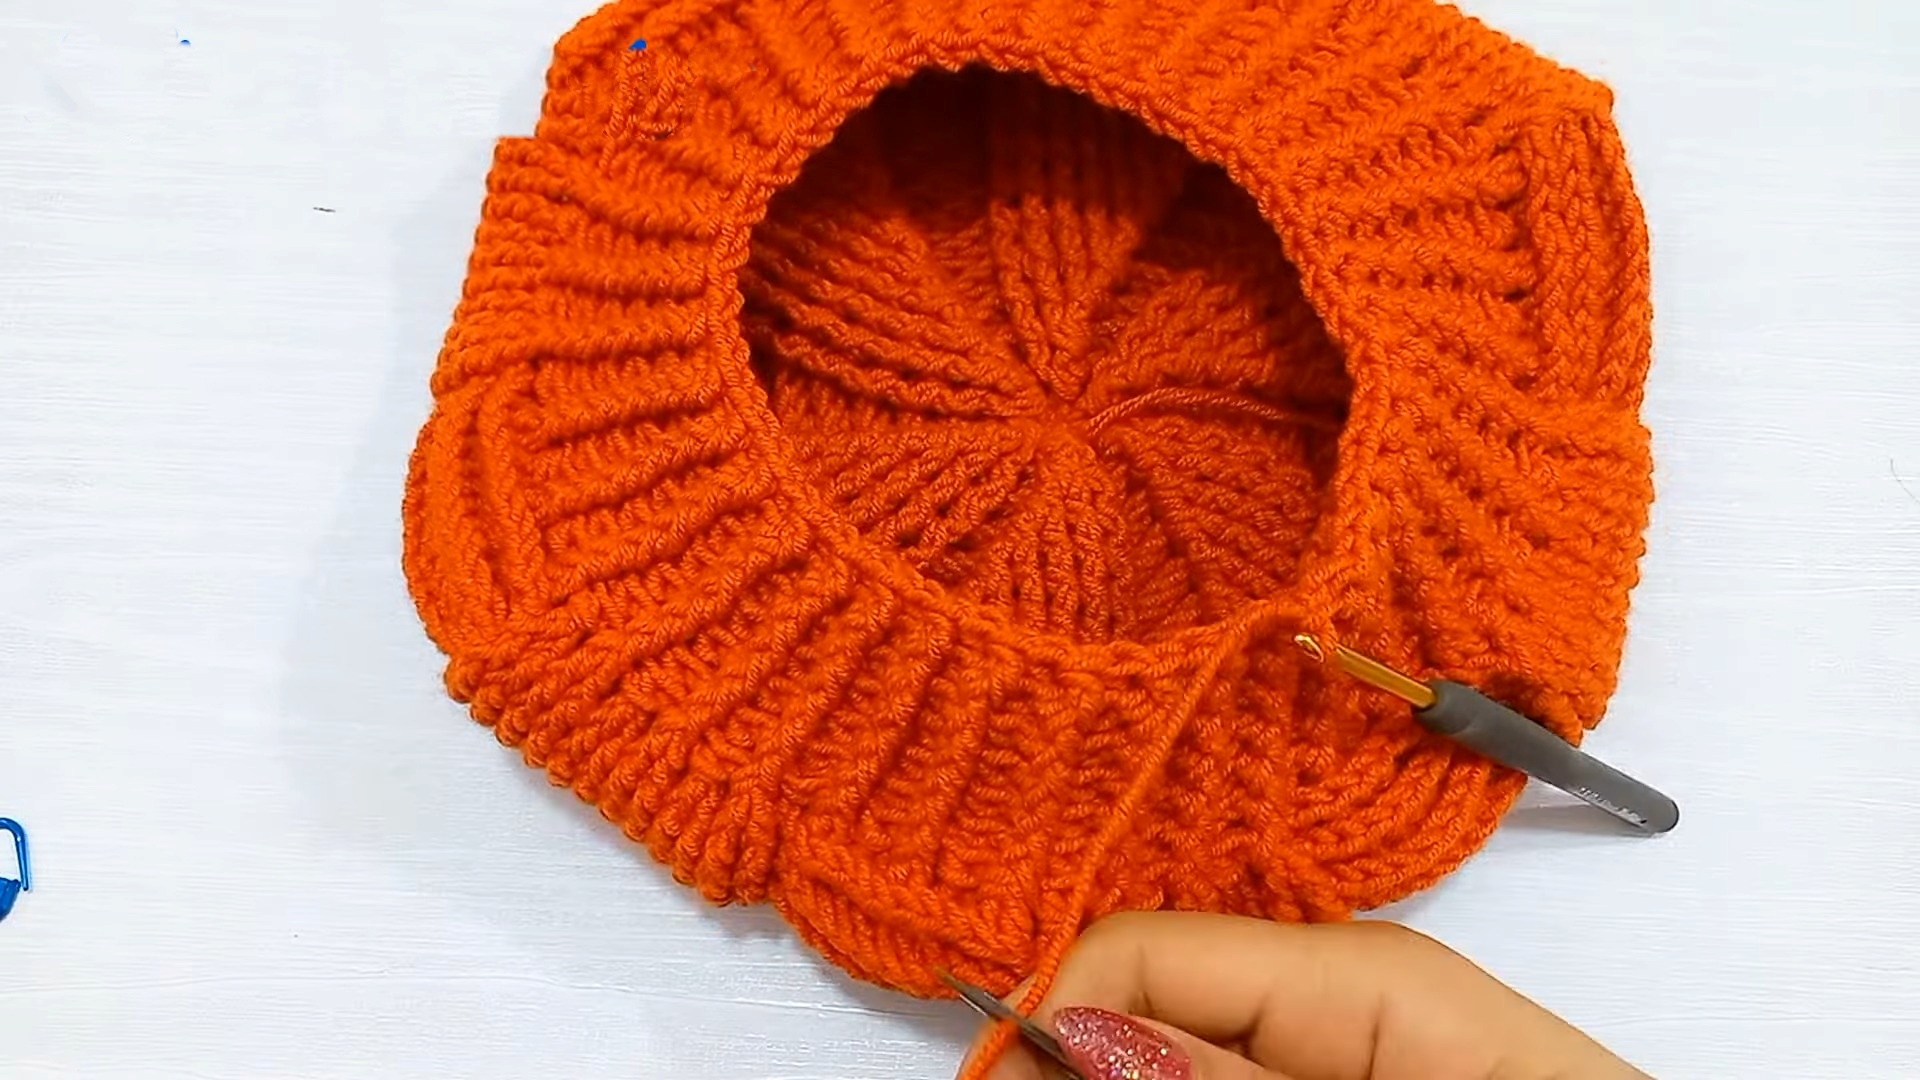
Work the brim in ribbing pattern using post stitches:
- At the start of each round:
- Work 1 FPdc around the first FPdc from the previous round.
- Place a marker in the top of the first stitch (for each round).
- Work 1 BPdc around the next BPdc from the previous round.
- Continue around:
- 1 FPdc around each FPdc from the previous round.
- 1 BPdc around each BPdc from the previous round.
- Do not increase or decrease. Maintain stitch count.
Repeat this for a total of 6 rounds of brim (including Brim Round 1):
- The tutorial states: “I’ve made six rounds of front posts and back posts in total for the brim.”
Finishing
- After completing the 6th brim round, remove the stitch marker.
- Work 1 sl st into the top of the first FPdc of the brim round to join.
- Fasten off: cut the yarn.
- Thread tail onto a yarn needle and weave in the end through the stitches of the last round neatly.
- Weave in all yarn ends.
- Shape the beret gently.
Your beautiful beret hat is now finished.