Crochet Colorful Braided Headband Pattern – 5 Strand Tutorial
Here’s a colorful crochet headband with five easy hdc strands braided together and finished around a hair tie for a stretchy, comfortable fit.
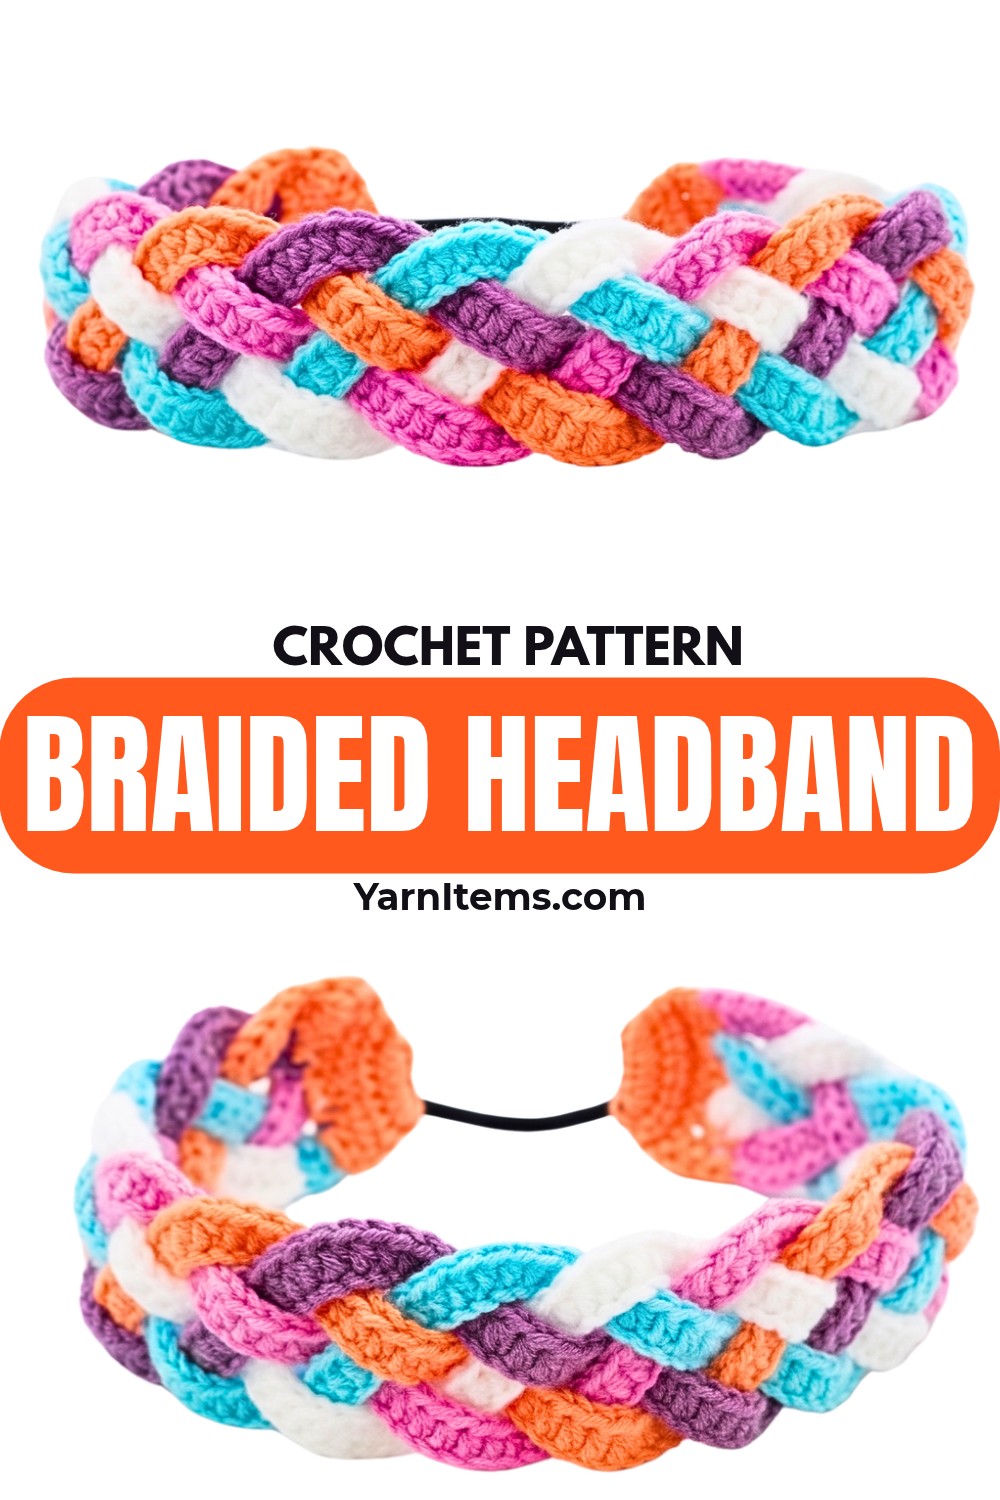
Bright strips of crochet become much more interesting once they are braided together. This crochet headband uses five different colors to create a bold woven effect across the front, while the simple elastic at the back keeps it flexible enough for everyday wear.
Each strand is made separately with half double crochet stitches, so the repetitive part goes quickly once your foundation chain is established. The tutorial then shows you how to join the five pieces, attach the first end to a hair tie, braid them neatly, and secure the opposite end without letting the braid loosen.
Credit Crochet & Crafts Therapy by Chompu
Materials & Tools Needed
- Yarn: 5-ply Cotton Milk yarn in 5 different colors, such as pink, purple, white, orange, and blue
- Crochet Hook: No. 5 / 3.0mm
- Elastic Hair Tie: 1 standard hair elastic or hair band
- Scissors
- Tapestry/Yarn Needle: For weaving in the ends
Finished Size & Customization
For the standard adult size, each strand begins with 100 foundation chains and measures approximately 50 cm before braiding.
The same idea can be adapted for smaller heads. For a toddler or child, make fewer foundation chains and check the finished strand against the desired head circumference, allowing for the width of the elastic at the back.
The five colors can also be changed to suit the occasion. Try school colors, holiday shades, soft pastels, or a mix of favorite everyday colors.
Pattern Abbreviations
- ch: Chain
- sc: Single crochet
- hdc: Half double crochet
- sl knot: Slip knot
- st(s): Stitch(es)

Step-by-Step Crochet Colorful Braided Headband
Part 1: Make the Five Crochet Strands
Begin by making one identical strand in each of your five chosen colors. Keeping all five strands the same length is important because they need to line up evenly when you begin joining and braiding.
Step 1: Make a slip knot on your 3.0mm crochet hook.
Step 2: Chain 100 for an adult-sized strand, giving you approximately 50 cm of length.
Step 3: Chain 2 more to create the turning chain.
Step 4: Work 1 hdc into the third chain from the hook.
Step 5: Continue working 1 hdc in each foundation chain across the entire row. You will have 100 hdc stitches.
Step 6: Fasten off and weave in the yarn ends.
Step 7: Repeat Steps 1-6 with the remaining four colors until you have exactly 5 separate crocheted strands.

Lay the strands beside one another before continuing. Their lengths should match closely, with no strand noticeably shorter or longer than the others.
Part 2: Join the First End
Place all five strands flat beside one another and align their short top edges carefully. This first joined section creates the solid end that will eventually wrap around the elastic.
Step 1: Make a slip knot on your hook.
Step 2: Insert the hook into the first stitch of the first strand and work single crochets evenly across the top edges of all five strands, securing them together into one joined block.
Step 3: Chain 1 and turn your work.
Step 4: Work 1 sc in each stitch across the row.
Step 5: Chain 2 and turn your work.
Step 6: Work 1 hdc in each stitch across the row. Do not fasten off.

The joined end should now feel noticeably more stable than the five individual strands. Keep this section flat because it will be folded around the elastic in the next part.
Part 3: Attach the First End to the Hair Tie
Take your standard elastic hair tie and position it against the solid crocheted end.
Step 1: Fold the joined crocheted end over the elastic hair tie.
Step 2: Working through both the top stitches of the current row and the stitches on the back of the folded section, work single crochets all the way across to close the fold around the elastic.
Make sure your stitches pass through both layers. When finished, the elastic should be completely enclosed inside the crocheted loop while remaining free to stretch.
Fasten off.

Part 4: Braid the Five Strands
Now comes the part that gives the headband its distinctive look.
Lay the headband flat with the attached elastic at the top. Separate the five strands so each color is easy to identify before you begin.
Carefully weave the strands into a standard flat five-strand braid, keeping the tension as even as possible as you work toward the opposite end.
Try not to pull one color tighter than the others. Uneven tension can make one strand look shorter and cause the braid to curve or bunch. Also watch the individual strips as you cross them so they remain facing the same way rather than twisting upside down.
Pause occasionally and flatten the braid with your fingers. This makes it easier to spot a twisted strand before you get too far along.

Part 5: Secure the Second End
Once the braid reaches the bottom, pinch the five strand ends together and keep them flat.
Step 1: Make a new slip knot on your hook and work single crochets across the bottom edges of all five strands to secure the braid and prevent it from unraveling.
Step 2: Repeat the same border sequence used for the first end: chain 1 and turn.
Step 3: Work 1 sc in each stitch across.
Step 4: Chain 2 and turn.
Step 5: Work 1 hdc in each stitch across. Do not fasten off.
Check the braid before attaching the second side. The five colors should still be arranged neatly, and the braid should remain flat rather than twisting along its length.

Part 6: Finish the Elastic Connection
The remaining crocheted end now needs to be secured to the free side of the elastic hair tie.
Step 1: Bring the free end of the elastic hair tie down to your active hook.
Step 2: Fold the crocheted edge over the free side of the elastic.
Step 3: Just as you did with the first end, work single crochets across through both crocheted layers to enclose the elastic securely inside the fold.

Because both ends are attached around the elastic, the braided portion stays decorative across the front while the hair tie provides stretch at the back.