Blue Crochet Hat Pattern with Textured Spike Stitches
Want a hat with more visual interest than a solid-color design? This striped blue crochet beanie combines layered shades with textured spike stitches for a distinctive finish.

Layered blue shades give this crochet hat a more eye-catching look than an ordinary single-color beanie. The changing colors create clear bands around the crown, while the raised spike-stitch crochet pattern adds depth and texture, making each section stand out against the surrounding rows.
This tutorial guides you through crocheting the ribbed brim, joining it into a band, changing colors, and repeating the spike-stitch sequence to build the hat. You’ll also learn how the crown decreases work and how to adjust the brim circumference and hat height, with room to choose your own combination of blue shades.
Credit zhavin crochet
Materials & Tools Needed
- Yarn: Four colors of medium-weight (4-weight) yarn. For a blue-themed hat, choose four shades that complement one another.
- 4.5 mm crochet hook: For the ribbed brim.
- 5.0 mm crochet hook: For the hat body.
- Scissors: For cutting yarn between color sections and at the finish.
- Yarn needle: For weaving in ends and closing the crown.
Finished Size & Customization
The featured sample is made in a child size. The supplied pattern does not provide an exact finished measurement, so adjust the fit by measuring the intended wearer’s head and checking the hat as you work.
- Adjust the circumference: Make the brim band longer or shorter to fit the desired head circumference.
- Keep the pattern aligned: The total number of brim rows must be a multiple of 5 so the body pattern sequence lines up correctly. The sample uses 50 rows.
- Adjust the height: Repeat the main body pattern block—Rounds 6–10—more or fewer times before beginning the crown decreases.
- Choose your colors: Use four shades of blue for a coordinated look, or choose another four-color palette. Keep the colors in a consistent order to make the textured bands easy to follow.
Crochet Abbreviations
- ch: Chain
- sl st: Slip stitch
- sc: Single crochet
- BLO: Back loop only
- Spike sc: Spike single crochet, worked into a specified stitch several rows below the current round
- inv-dec: Invisible decrease
- st(s): Stitch(es)

Invisible decrease (inv-dec): Insert the hook into the front loop of the first stitch, then into the front loop of the next stitch. Yarn over and pull through both front loops, yarn over again, and pull through the remaining two loops.
Step-by-Step Blue Crochet Hat Pattern
Part 1: Crochet the Ribbed Brim
The brim is worked flat in rows before being joined into a circle. Its ribbed texture comes from working into the back loop of the middle stitches while keeping both loops of the first and last stitches intact.
Step 1: Make the foundation chain
Using the 4.5 mm hook and your first yarn color, make a slip knot and chain 9.
Step 2: Work the foundation row
Skip the first chain from the hook. Work 1 sc into the second chain and 1 sc into each remaining chain across. You should have 8 sc.
Chain 1 and turn.

Step 3: Create the ribbed texture
- Work 1 sc under both loops of the first stitch.
- Work 1 sc into the back loop only (BLO) of each middle stitch.
- Work 1 sc under both loops of the final stitch.
- Chain 1 and turn.
Working both loops at the edges creates a neater border, which helps when you join the short ends later.
Step 4: Continue the brim rows
Repeat the same row: 1 sc under both loops of the first stitch, BLO sc across the middle stitches, and 1 sc under both loops of the last stitch. Chain 1 and turn after each row.
Continue until the band reaches the circumference you need. The original child-size sample uses 50 rows.
Important: The total number of rows must be a multiple of 5. For example, 45, 50, or 55 rows satisfy this requirement. Check the band length around the intended wearer’s head before joining it.
Part 2: Join the Brim and Begin the Hat Body
Step 5: Join the short ends
Bring the two short ends of the brim together to form a circle.
Chain 1. Insert the hook under the two loops at the top of the first stitch on the last row, then into the remaining loop of the corresponding front stitch from the foundation row. Yarn over, pull through, and pull through the loop on the hook to make a sl st.
Continue joining the corresponding stitches along the seam with sl sts. Fasten off the current yarn.
Turn the brim right-side out to conceal the join.
Step 6: Switch hooks and attach the next color
Replace the 4.5 mm hook with the 5.0 mm hook for the hat body.
Make a slip knot with your next yarn color and attach it to the joining space with a sl st. Chain 1 and work 1 sc into the same stitch.
Step 7: Work the foundation round
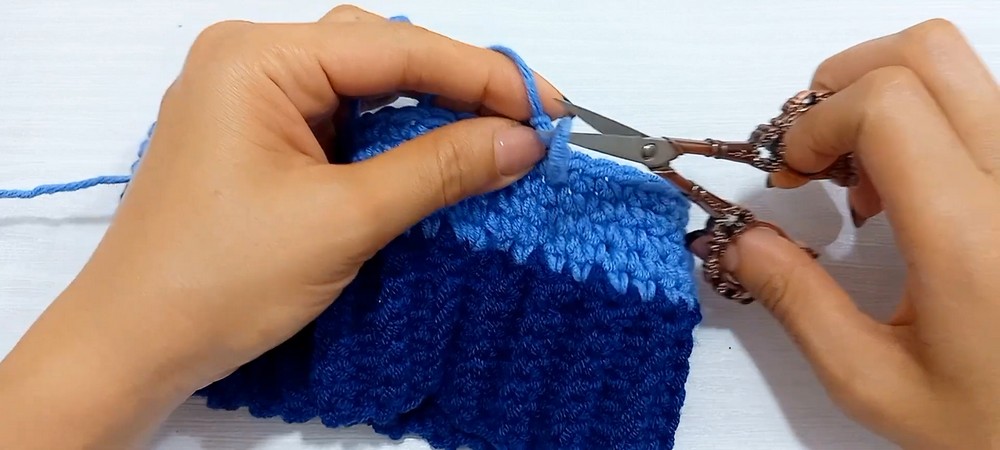
Work 1 sc evenly into the top of each brim row, moving all the way around the band. Join with a sl st to the top of the first sc.
Do not add an extra sc at the end: the initial joining stitch already counts, according to the supplied instructions.
Part 3: Build the Main Body and Color Pattern
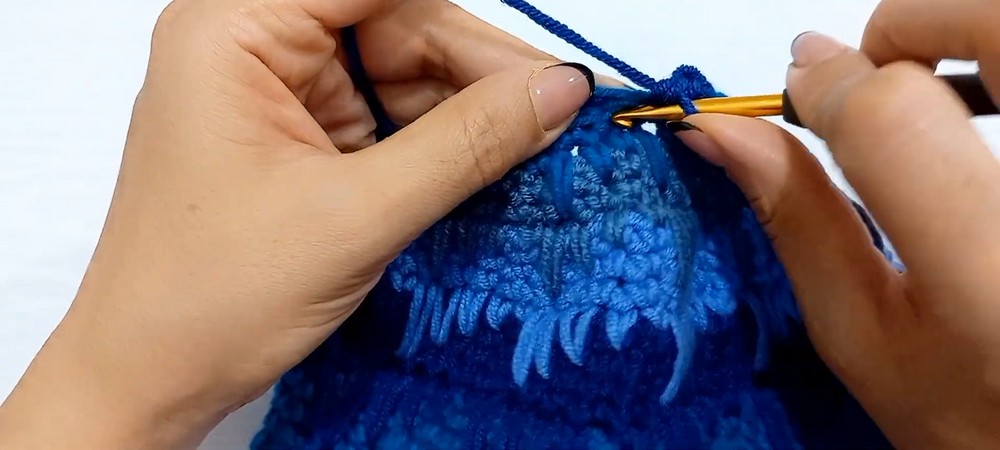
The body alternates plain single-crochet rounds with a decorative spike-stitch round. The spike stitches reach down into earlier rows, creating the raised pattern that distinguishes this hat from a plain beanie.
Step 8: Work the first plain rounds
For Rounds 2-5:
- Chain 1 and work 1 sc into the same stitch.
- Work 1 sc in each stitch around.
- Join with a sl st to the top of the first sc.
Repeat until you have completed five single-crochet rounds in total, counting the body’s foundation round as Round 1. Fasten off the yarn.
These plain rounds provide a solid section beneath the first decorative band.
Step 9: Make the first spike-stitch round
Attach a new color at the joining stitch with a sl st. Chain 1 and work 1 sc into the same stitch.
Repeat this five-stitch sequence around:
- Stitch 1: Work 1 regular sc in the current round.
- Stitch 2: Work 1 spike sc into the stitch 2 rows below.
- Stitch 3: Work 1 spike sc into the stitch 3 rows below.
- Stitch 4: Work 1 spike sc into the stitch 4 rows below.
- Stitch 5: Work 1 spike sc into the stitch 5 rows below.
To make each spike sc, insert your hook into the specified stitch in the lower round, draw up a loop, and complete the single crochet. Keep the drawn-up loop long enough to reach the working round without pulling the fabric out of shape.
Repeat the sequence around the hat and join with a sl st.
Step 10: Complete the first plain block
With the current body section, work four plain single-crochet rounds:
- Chain 1 and work 1 sc into the same stitch.
- Work 1 sc in each stitch around.
- Join with a sl st.
Repeat until four plain rounds have been completed, then fasten off.
Step 11: Repeat the body pattern
Continue repeating the main pattern block:
- One spike-stitch round using a new color.
- Four plain single-crochet rounds.
Repeat the block until the hat reaches your desired height. The supplied tutorial identifies Rounds 6–10 as the main repeat block.
For a layered blue design, use your shades in a planned order and keep that order consistent across repeated blocks. This makes the color pattern look deliberate rather than randomly striped.
Part 4: Shape the Crown
The crown is shaped in stages, reducing the repeating stitch sequence from five stitches to four, then three, then two. Plain rounds and shorter spike-stitch sequences follow each decrease stage.
Step 12: Decrease from five stitches to four
Join the next yarn color and chain 1.
- Work 1 inv-dec over the first two stitches: the front loop of the first sc and the front loop of the next spike stitch.
- Work 1 sc in each of the next three spike stitches.
- Repeat this four-stitch sequence around and join with a sl st.
Then work four plain rounds, making 1 sc in every stitch around and joining each round with a sl st.
Next spike round: Attach a new color and chain 1. Repeat this four-stitch sequence around:
- 1 regular sc.
- 1 spike sc into a stitch 2 rows below.
- 1 spike sc into a stitch 3 rows below.
- 1 spike sc into a stitch 4 rows below.
Join with a sl st.
Step 13: Decrease from four stitches to three
Chain 1, work 1 inv-dec over the first two stitches, then work 1 sc in each of the next two stitches. Repeat this three-stitch sequence around and join.
Work three plain rounds of sc, joining each round with a sl st.
For the next spike round, attach a new color and chain 1. Repeat this three-stitch sequence around:
- 1 regular sc.
- 1 spike sc into a stitch 2 rows below.
- 1 spike sc into a stitch 3 rows below.
Join with a sl st.
Step 14: Decrease from three stitches to two
Chain 1, work 1 inv-dec over the first two stitches, then work 1 sc in the next stitch. Repeat this two-stitch sequence around and join with a sl st.
Work two plain rounds of sc, joining each round.
For the next spike round, attach a new color and chain 1. Repeat the following two-stitch sequence around:
- 1 regular sc.
- 1 spike sc into a stitch 2 rows below.
Join with a sl st.
Step 15: Close the remaining crown opening
Chain 1 and work invisible decreases over every pair of remaining stitches around. Join with a sl st to the first stitch.
This final decrease round brings the crown opening together so it can be closed neatly with the yarn tail.

Part 5: Close and Finish the Hat
Step 16: Cinch the crown
Cut the working yarn, leaving a long tail. Thread the tail onto your yarn needle and weave it through the front loops of the final stitches around the opening.
Pull the tail firmly to close the hole. Secure the closure and weave all remaining yarn ends into the inside of the hat.
Check the crown for gaps and gently shape the hat with your hands. The top should be closed securely, with the colored sections sitting smoothly below it.

Tips for a Neat Multicolor Finish
- Plan the shade order: Decide the order of your four colors before starting the body so the spike-stitch bands remain visually consistent.
- Keep spike stitches relaxed: Pulling these stitches too tightly can distort the lower rows and make the texture uneven.
- Check the brim before joining: Measure the band and confirm that its row count is a multiple of 5.
- Adjust height before crown shaping: Add or remove complete five-round body blocks before beginning the decrease phases.
Your blue crochet hat is now ready to wear or give as a handmade gift. The combination of ribbed edging, layered color bands, and raised spike stitches gives it a distinctive look, while the adjustable brim and repeatable body sections allow you to personalize its fit and height.