Easy Crochet Lemon Hair Clip Tutorial for Beginners
Bring a cheerful touch to your accessories with this charming Crochet Lemon Hair Clip tutorial! Perfect for beginners and seasoned crafters alike, this pattern combines simplicity with vibrant creativity to create a playful and elegant design. Using accessible techniques like magic rings and single crochet stitches, you’ll craft a bright lemon that’s ideal for adding personality to your hairstyling or gifting.

Crochet Lemon Hair Clip
What makes this hair clip tutorial stand out is the clever detailing, from crafting realistic citrus lines with white yarn to adding extra leaves for a refined finish. Using milk cotton yarn in a mix of vivid orange, yellow, and green, paired with a 2.75mm crochet hook, this crochet guide ensures a smooth crafting process. The tutorial also demonstrates thoughtful adaptations inspired by its keychain counterpart, making it versatile and fun.
Pattern Highlights:
- Special colorwork techniques create striking segments in the lemon pattern.
- Crafted with milk cotton yarn (4ply & 5ply) for easy handling and lasting durability.
Credit Molina.D DIY
Step-by-Step Pattern
Materials
- Yarn:
- Milk Cotton Yarn
- Orange: 50g, 4-ply
- Yellow, White, and Green: 125g, 5-ply
- Milk Cotton Yarn
- Crochet Hook: 2.75mm
- Scissors
- Darning Needle
- Optional Tools: Hair clip base
Stitch Guide
Basic Stitches You’ll Use:
- Magic Ring: A technique used to create a tightly closed loop. Form a ring with the yarn, crochet directly inside the ring, then pull the tail to tighten.
- Single Crochet (sc): Insert hook into stitch, yarn over, pull through, yarn over again, and pull through both loops.
- Slip Stitch (sl st): Insert hook into stitch, yarn over, pull through stitch and the loop on your hook.
- Increase: Achieved by making two single crochets into the same stitch for growth.
- Half Double Crochet (hdc): Yarn over, insert hook, pull through, yarn over again, and pull through all three loops on your hook.
Notes and Tips
- Gauge Adjustment: If your stitches feel too tight or loose, adjust by using a smaller or larger hook or modifying yarn tension.
- Customizations: Customize the color palette for a unique fruit design—lime green for limes or mauve for a fig variant!
- Watch the Yarn Tails: When switching colors, leave extra yarn tails to sew and secure the lemon parts together.

Pattern Instructions
1: Crochet the Lemon Base
- Round 1:
- Create a magic ring, chain 1 (ch 1), and crochet 8 single crochets (sc) into the ring.
- Close the ring tightly and connect the round with a slip stitch (sl st). (8 stitches total)
- Round 2:
- Ch 1, make an increase (crochet 2 sc into each stitch).
- Close the round with a sl st. (16 stitches total)

- Round 3:
- Ch 1, (make 1 sc, increase in the next stitch). Repeat this process 8 times.
- Close the round with a sl st. (24 stitches total)
- Round 4:
- Ch 1, (make 2 sc, increase in the next stitch). Repeat this process 8 times.
- Attach white yarn to mark the edges and finish the round with a sl st. (32 stitches total)
- Round 5:
- Ch 1, (make 3 sc, increase in the next stitch). Repeat this process 8 times.
- Attach orange yarn and leave the white yarn tail long enough to sew lemon lines. Finish the round with a sl st. (40 stitches total)
- Round 6:
- Ch 1, (make 4 sc, increase in the next stitch). Repeat 8 times.
- Finish with a sl st. (48 stitches total)

2: Add Decorative Leaves
- Using green yarn, make a slip knot and begin the leaf design:
- Ch 6.
- Skip 1 stitch, sc in the next, hdc in the next, and sl st.
- Ch 1 and sl st.
- On the opposite side, repeat: sc, hdc, and sl st.
- Make as many leaves as you desire (the original tutorial adds one extra leaf).
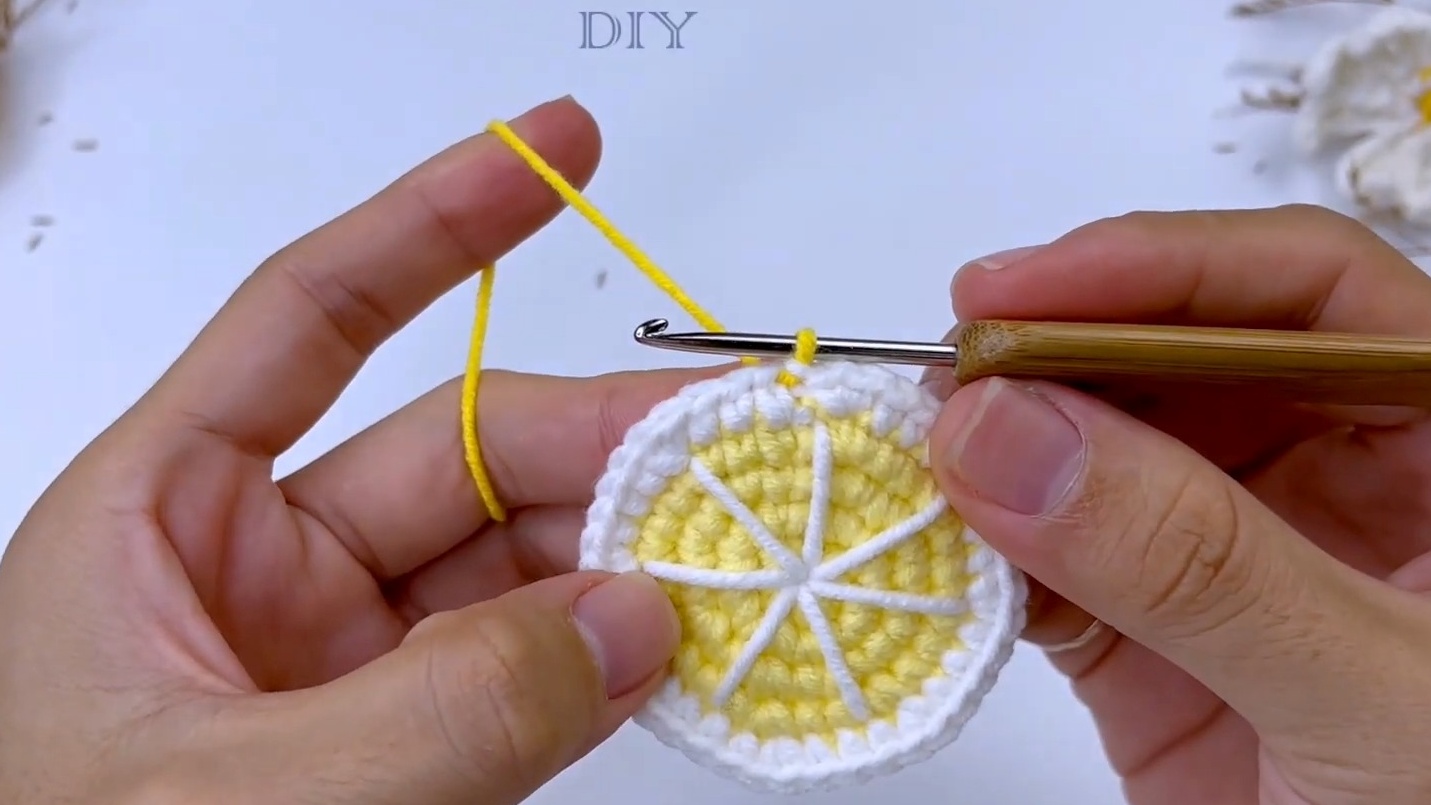
3: Sew and Assemble
- Using the white yarn tail you left earlier, sew straight lines on the front of the lemon to represent lemon segments. Use a darning needle to secure the lines, ensuring symmetry.
- Attached the green leaves to the top edge of the lemon design, sewing or crocheting them in place.
- Fix the completed lemon onto a hair clip base using yarn, hot glue, or sewing thread for a secure fit.