
Crochet a charming crochet flower headband—a stylish, handmade accessory with a delicate flower embellishment perfect for gifting, everyday wear, or special occasions.

The crochet flower headband is a charming and simple accessory that’s perfect for adding a touch of beauty to any outfit. If you wear a crochet headband for special occasions, keep it casual, or share it as a thoughtful handmade gift, it’s something everyone will appreciate. The dainty flowers and soft design make it both stylish and gentle to wear.
Crochet Flower Headband
This crochet headband doesn’t just look great, it’s also incredibly fun to create. Using basic crochet techniques, you can make a headband that feels personal and unique. Beginners will find this headband pattern inspiring as it combines simplicity with striking details like floral accents. With just a few steps, you’ll have an elegant piece showcasing your creativity in a practical, wearable way.
Credit Creative Gummi
Key Features and Construction
- Headband Base: Made using rows of single crochet for a snug yet flexible fit.
- Crocheted Flower: Created with a magic circle and finished with textured petals.
- Assembly: The flower is securely attached to the headband.
- Optional Embellishments: Beads, ribbons, or other decorations can add extra personality!
The foundation of this pattern is the headband, made by chaining enough stitches to comfortably fit the wearer’s head circumference. After creating a slip knot and chaining 80–100 stitches (depending on the size needed), the ends of the chain are joined into a loop with a slip stitch. This step requires attention to prevent twisting—a common beginner hiccup!
Once joined, you’ll work in rows of single crochet to build the base. The result is a neat, sturdy band that’s flexible enough to ensure a comfortable fit. A width of 1–2 inches offers just the right balance between style and practicality, though you can adapt the width to suit your personal preference.

Shaping the Flower
The true star of this pattern is the playful flower embellishment. Starting with a classic magic circle, you’ll crochet single stitches to form a round base. The petals—worked directly onto this base—are small arcs made by alternating single crochets and double crochets within the same stitch. Skipping stitches between petals enhances their definition and creates that signature flower shape.
If this is your first time working petals, take your time with the rhythm of “1 sc, 2 dc, 1 sc.” Once complete, the flower will feature 5–6 soft, rounded petals that pop beautifully against the band.

Bringing It Together
The final assembly involves positioning the flower on the headband. Using a yarn needle, you can secure the flower with whip stitches, ensuring it stays firmly attached even with wear. Consider centering the flower, but feel free to explore asymmetric placement for a fun twist!
Finishing Touches
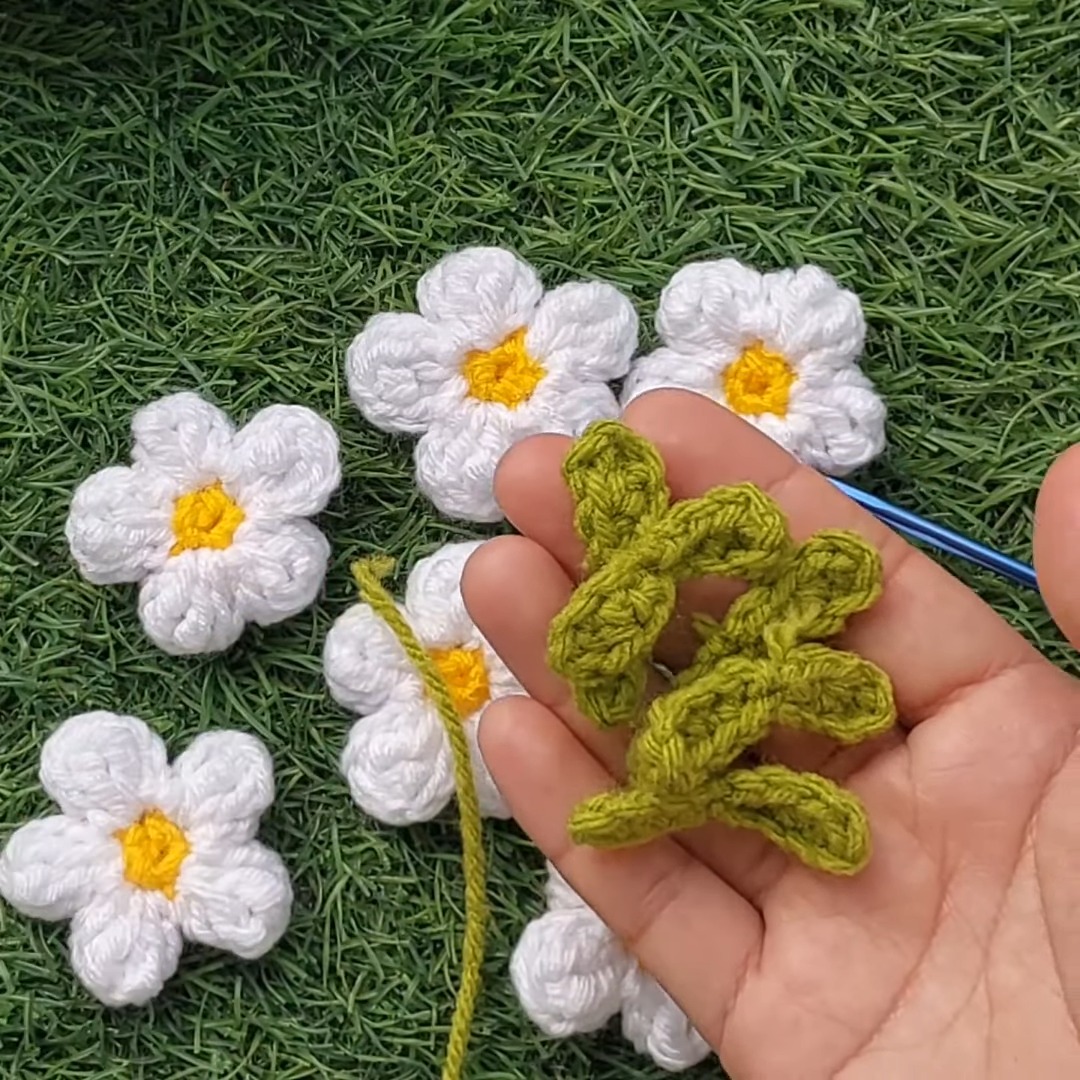
Now it’s time for the details! Smooth out the pattern by weaving in all loose ends using a yarn needle. This final step ensures a polished appearance and prevents loose threads from unraveling. Optional embellishments like beads or sequins can be stitched into the center of the flower. For a more textured look, consider wrapping a ribbon around the band or adding small crocheted leaves.
Video Tutorial
Step-by-Step Pattern
Materials
Here’s everything you’ll need to make the crochet flower headband:
- Yarn:
- Use lighter-weight yarn (e.g., sport weight or DK weight) for a delicate flower headband. Cotton or acrylic yarn works well.
- Choose contrasting colors for the flower and the headband for added visual interest.
- Crochet Hook:
- Size 4.0 mm (G) or adjust based on the yarn you use.
- Optional Tools:
- Scissors
- Yarn needle (for sewing in loose ends)
- Measuring tape (to customize the headband size)

Pattern Instructions
Step 1: Create the Headband Base
- Begin with a slip knot, then chain (ch) the number of stitches required to match the head circumference. For adults, this is typically around 80–100 chains.
- Connect the ends of the chain with a slip stitch to form a loop (make sure it isn’t twisted).
- Work successive rows of single crochet (sc) to create the band. Continue until the band is about 1–2 inches wide, or your desired width.
Step 2: Make the Flower
- Start with a magic circle to form the base of the flower.
- In the circle, crochet:
- 10 single crochets (sc) or the number of stitches needed for a round shape. Close the circle with a slip stitch.
- Create the petals:
- In one stitch, crochet: 1 single crochet (sc), 2 double crochets (dc), 1 single crochet (sc).
- Skip the next stitch and repeat the petal sequence in the following stitch. Continue around the flower base until you have 5–6 petals.
- Finish with a slip stitch in the first stitch of the round.
Step 3: Assemble the Headband
- Position the flower on the headband, ensuring it’s centered.
- Use a yarn needle to attach the flower securely to the band using whip stitches or a stitch style of your choice.
Step 4: Finishing Touches
- Weave in all loose yarn ends using a yarn needle.
- Optional: Add decorations like beads to the flower center or wrap a ribbon around the headband’s edge.

Troubleshooting & Suggestions
- Twisting the chain: Make sure the chain is laid flat before joining the loop with a slip stitch. Take it slow for accuracy!
- Uneven petals: Consistent tension is key when shaping the flower petals. If one petal feels larger or smaller, you may need to adjust your stitch tension.
- Positioning the flower: Experiment with placement before attaching. Centered flowers are classic, but side positioning adds a whimsical effect.
- Creative Modifications: Use variegated yarn for dimension, alternate petal colors for a striking contrast, or make multiple flowers and stagger them along the band.


