Crochet Rose Cardigan Pattern- Textured V-Stitch Cardigan
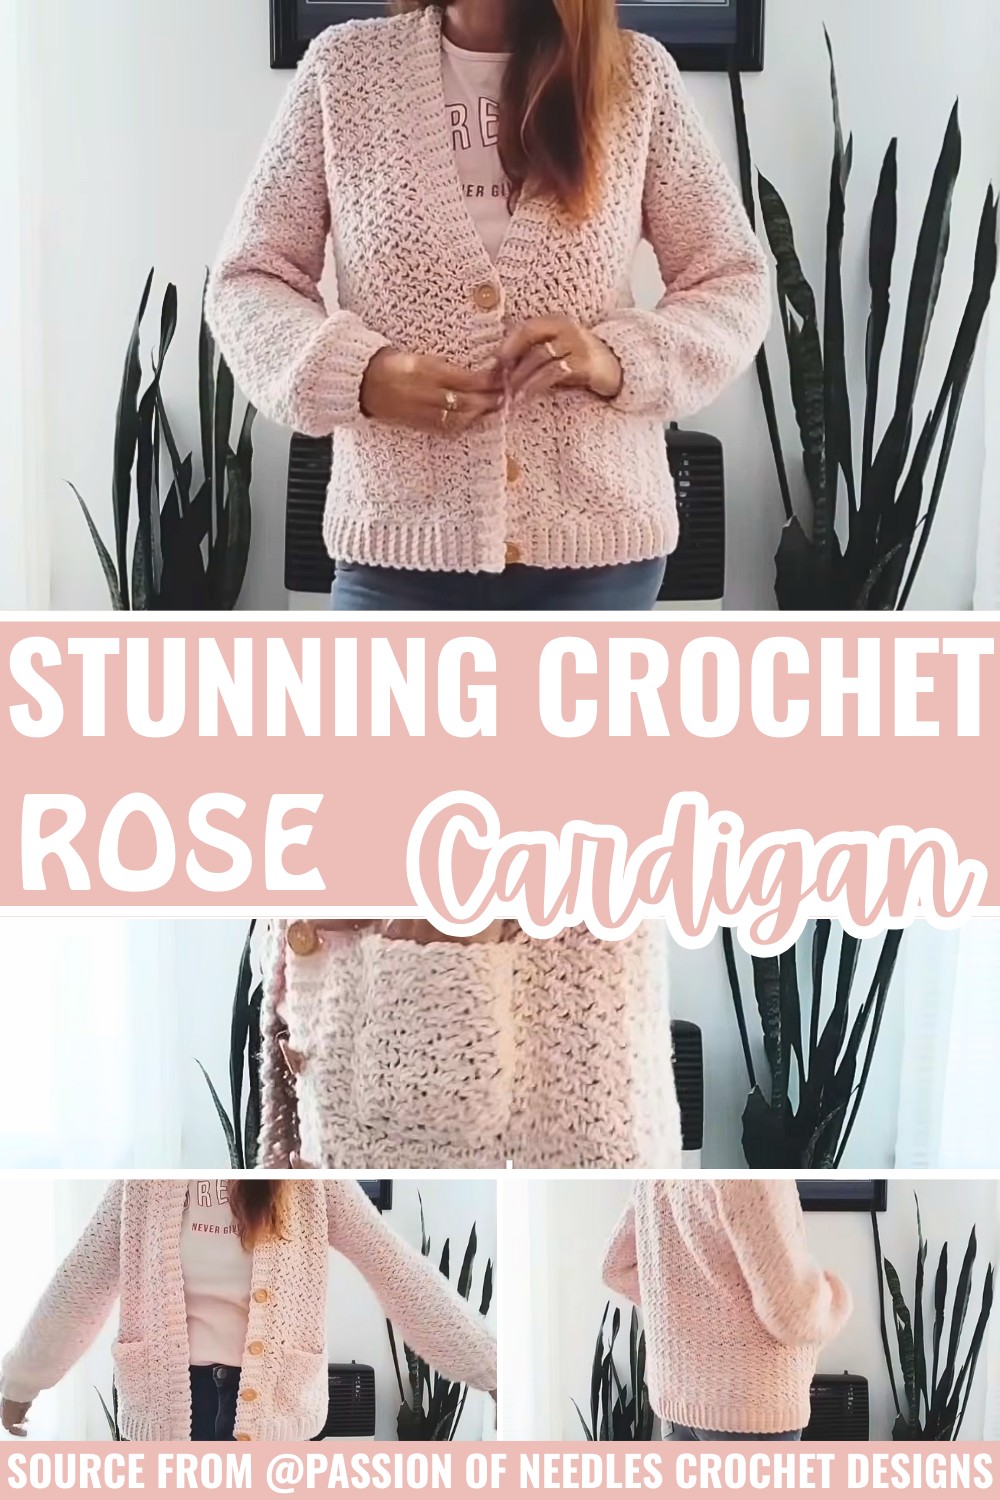
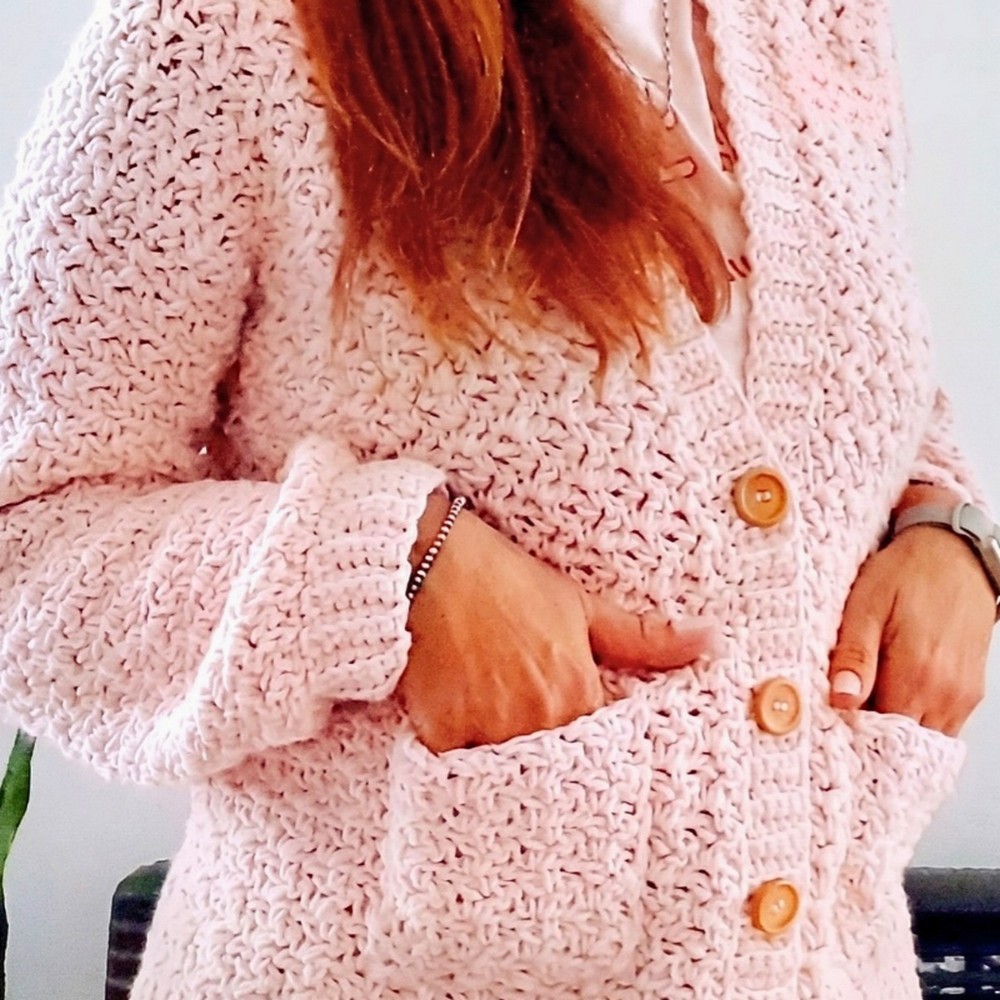
Soft rose-like motifs give this crochet cardigan its character, while the ribbed edges, roomy sleeves, and front buttons bring together a practical shape that feels polished without being overly complicated.
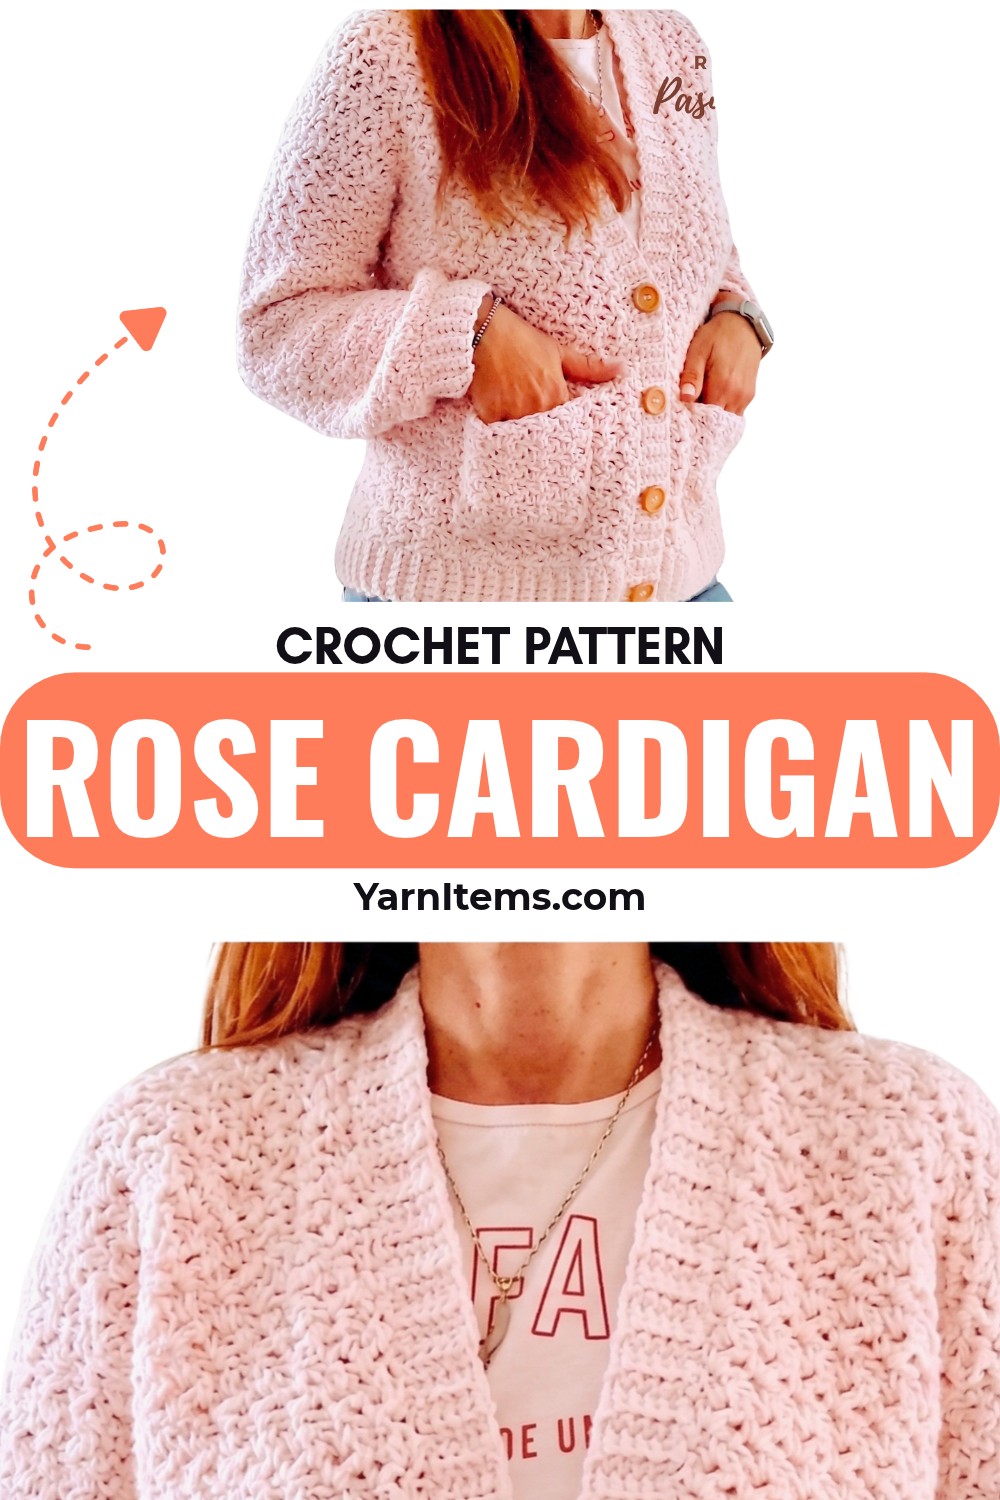
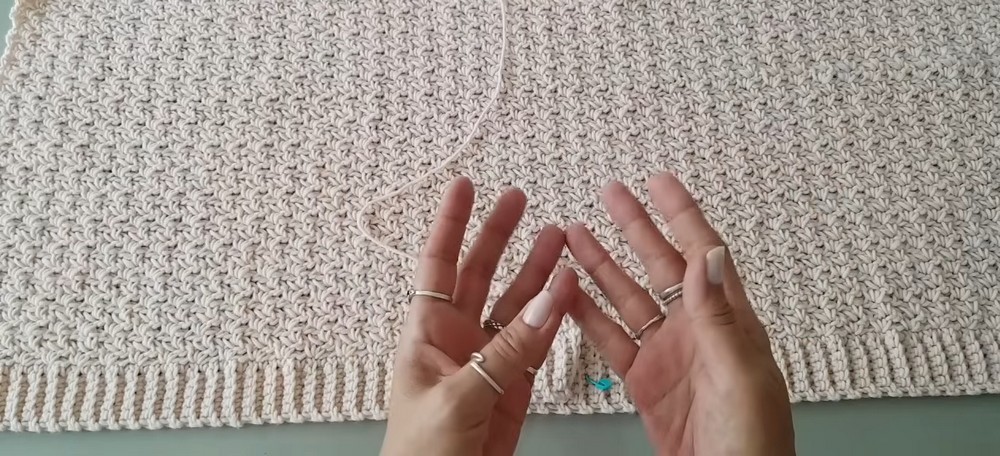
The construction starts from the bottom with a stretchy ribbed band before moving into the repeating V-stitch variation. Because the stitch crochet pattern is built around a multiple of 3 + 1, keeping the motif count accurate is important when the cardigan is divided into the front and back sections.
One detail worth watching is the transition from the flat body to the sleeves. The crochet sleeve motifs need to be distributed evenly around the armhole; otherwise, the fabric can twist or pull. Taking a moment to mark the armhole and count the motifs before joining the sleeve can save considerable adjustment later.
Credit Rita Crochet | Passion of Needles
Materials & Tools Needed
- Yarn: Medium-weight/semi-thick acrylic yarn, approximately 3 mm thickness.
- 6 mm crochet hook: For ribbing and elastic sections.
- 7 mm crochet hook: For the main cardigan pattern.
- Stitch markers: For marking important stitches and construction points.
- Tapestry needle: For shoulder seams, pockets, and weaving in ends.
- Measuring tape: For checking the cardigan dimensions.
- Buttons: Four functional buttons, approximately 2.5 cm in diameter.
Pattern Abbreviations & Terminology
- ch: Chain
- sl st: Slip stitch
- sc: Single crochet
- BLO: Back loop only
- dc: Double crochet
- V-motif: 1 sc, 1 ch, 1 dc worked into the same stitch or space
Finished Size & Customization
The cardigan is constructed bottom-up, beginning with a continuous ribbed band and continuing upward into the main textured pattern. The body is then separated into the two front panels and back, followed by the sleeves, front band, and optional pockets.
The main pattern uses a multiple of 3 + 1, so keep this stitch relationship in mind when changing the cardigan width.
For the sample:
- Bottom ribbing is approximately 50 cm wide.
- The ribbing uses approximately 127 rows.
- Main body height to the armholes is approximately 35 cm.
- The body section contains approximately 27 rows of the main motif.
- Each front panel contains 10 motifs.
- The back contains 22 motifs.
- Each sleeve contains 16 motifs.
- Sample sleeves measure approximately 40 cm long.
For a larger or smaller cardigan, adjust the ribbing circumference first, then make sure the stitch count introduced along its top edge maintains the required multiple of 3 + 1.
Before Starting
The bottom band determines much of the cardigan’s overall circumference. It should fit around the fullest part of the bust with at least about 5 cm of ease.
Rather than relying only on the number of ribbing rows, wrap the band around the intended body measurement as you work. The ribbing naturally has some stretch, so checking the actual fit gives a more reliable result than counting rows alone.
Step-by-Step Pattern
Bottom Elastic Band
Use the 6 mm hook for the ribbing.
Row 1: Make a slip knot, ch 7, turn the chain upside down, locate the lower loops/back bumps, skip the first chain from the hook, work 1 sc in each remaining chain across [6 sc], and place a marker along the bottom edge.
Row 2: Ch 1, turn, work 1 sc in BLO across until the final stitch, then work the last sc through both loops to create a clean outer edge.
Row 3: Ch 1, turn, work 1 sc in BLO across all 6 stitches.
Rows 4 onward: Repeat the ribbing sequence, alternating the edge treatment as established, until the band reaches the desired bust circumference plus approximately 5 cm of ease.

Ribbing Check
Keep the last stitch of the appropriate rows worked through both loops where specified. This small detail helps prevent the long ribbed band from developing an uneven edge.
For the sample, the ribbing is worked to approximately 50 cm, using around 127 rows.
Transition into the Main Body
Continue with the 6 mm hook for the transition.
Transition Row: Ch 1 and work 1 sc evenly into each row end along the top edge of the ribbed band, then place a stitch marker to identify the right side.
Switch to the 7 mm hook for the main stitch pattern.
Foundation Motif Row
Row 1: Ch 2 and mark the second chain so it can be identified later, turn, work [1 sc, 1 ch, 1 dc] into the first stitch, skip the next 2 stitches, work the same V-motif into the third stitch, and continue this sequence across; when 3 stitches remain, skip 2 and work 1 sc into the final stitch.
Main Motif Row
Row 2: Ch 2, turn, skip the edge sc and dc from the previous row, work [1 sc, 1 ch, 1 dc] into the 1-ch space at the center of the next motif, and repeat across; finish by working 1 sc into the marked second chain of the turning chain.
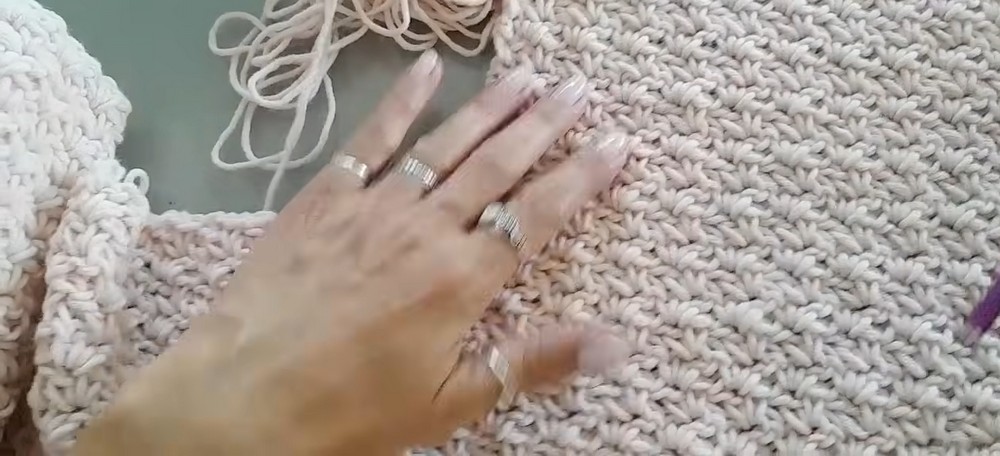
Rows 3 onward: Repeat the main motif row, placing every new V-motif into the center 1-ch space of the motif below.
Continue until the cardigan reaches the desired underarm height. The sample reaches approximately 27 rows / 35 cm from the top of the ribbing to the armholes.
Divide the Body for the Fronts and Back
At this stage, the continuous body needs to be separated into three working sections.
For the sample, the distribution is:
- First front: 10 motifs
- Back: 22 motifs
- Second front: 10 motifs
- Neckline/gaps: 2 motifs left unworked between sections
Before crocheting the separate sections, fold the cardigan and check that the two front areas are symmetrical. This is one of the easiest places to catch an incorrect motif count before it affects the shoulders.
First Front Panel
Front Panel Rows: Continue the established V-motif pattern back and forth across the 10 motifs of the first front panel.
Work approximately 18 rows / 20 cm for the armhole section, finishing on a wrong-side row and leaving a yarn tail long enough for shoulder seaming.
Second Front Panel
Attach new yarn at the beginning of the second front section.
Front Panel Rows: Ch 2, work the first V-motif into its designated space, then continue across all 10 motifs, repeating the established pattern for approximately 18 rows / 20 cm.
Make the second panel the same height as the first before fastening off.
Back Panel
Attach new yarn at the beginning of the back section.
Back Rows: Ch 2 and work the established V-motif pattern across the 22 motifs of the back.
Continue until the back is one row shorter than the front panels, allowing the shoulder seams to meet neatly.
Join the Shoulders
Turn the cardigan inside out and place the front panels over the corresponding back shoulders.
Shoulder Alignment: Match the 10 motifs on each front with the corresponding back motifs, leaving the center 2 motifs open for the neckline.
Shoulder Seam: Using a tapestry needle and the yarn tails, sew through both loops from the bottom of the shoulder toward the neckline, keeping the seam flat and even.
Keep the Seam Flexible
Do not pull the sewing yarn excessively tight. A very tight seam can make the shoulder narrower and affect how the cardigan sits when worn. A firm but flexible seam will preserve the drape of the V-motif fabric.

Work the Sleeves in the Round
Once the shoulders are joined, the sleeves can be built directly from the armholes.
Base Round: Attach new yarn inside the armhole, ch 1, and distribute 16 V-motifs evenly around the entire opening.
Joining: Finish the round with a sl st into the first ch-1 height.
Sleeve Rounds: Ch 1, turn, and work the established V-motif pattern around the sleeve, alternating between right-side and wrong-side rounds while maintaining 16 motifs around every round.
Continue until the desired sleeve length is reached. The sample contains approximately 34 rounds / 40 cm.
Count Before Continuing
The sleeve should contain the same number of motifs around its circumference after every round. If the count changes, the sleeve can gradually widen or narrow unexpectedly.
For this sample, 16 motifs per round is the checkpoint. Counting one complete round before moving forward is much easier than trying to correct the shape several rounds later.

Finish the Sleeve Cuffs
Switch to the 6 mm hook.
Reduction Round: Ch 1, work 1 sc into each motif’s 1-ch space while skipping the dc, then work 1 sc into the existing sc stitch, giving 2 sc per motif / 32 sc total around the wrist; join with a sl st.
Cuff Ribbing: Ch 7 and work the same short-row ribbing technique used for the bottom elastic, working 6 sc in BLO and joining each ribbing section to the cuff base with 2 sl sts.
Continue around the entire wrist until the cuff is enclosed.
Fasten off and weave in the end.
Repeat the same construction for the second sleeve.
Crochet the Front Button Band & Neckline
Use the 6 mm hook.
Attach yarn at the bottom front corner.
Button Band: Ch 6, then work short-row ribbing along the first front edge, around the neckline, and down the opposite front edge, using 5 sc in BLO and joining each ribbing row to the cardigan with 2 slip stitches.
Continue until the entire opening has a consistent ribbed border.
The buttonholes can be incorporated directly into the ribbed band.
Buttonhole Row: At the desired button position, work 1 sc in BLO, 1 sc through both loops, ch 1 to create the opening, skip the corresponding base stitch, work the next stitch through both loops, then continue the row in BLO.
Return Row: Work 1 sc directly over the chain space to close the buttonhole structure while leaving the opening usable.
Repeat at evenly spaced positions.
The sample uses 4 buttonholes for approximately 2.5 cm buttons.

Add Optional Pockets
Each pocket is made separately using the same main stitch pattern.
Pocket Panel: Crochet a rectangle approximately 4 motifs wide by 11 rows tall, measuring roughly 10 cm × 13 cm.
Placement: Position each pocket approximately 2 motifs above the bottom ribbing and 2 motifs inward from the front button band.
Attachment: Hold the pocket flat against the cardigan and sew around its sides and bottom edge with a tapestry needle and running/basting-style stitches, leaving the upper edge open.
Finishing the Cardigan
Weave in every remaining yarn tail securely on the wrong side of the garment.
Sew the four buttons opposite the buttonholes, checking each position against the corresponding opening before making the stitches permanent.
Finally, lay the cardigan flat and gently arrange the front edges, shoulders, sleeves, and pockets. Light blocking can help the textured motifs settle evenly, especially if the acrylic yarn has developed slight tension differences during construction.
The finished cardigan combines a stretchy ribbed foundation, open V-motif texture, roomy sleeves, functional buttoning, and optional pockets into one practical handmade layer.

Where This Cardigan Needs the Most Attention
For this style of cardigan, I would pay particular attention to the transition between the ribbing and the main motif. The ribbing is dense and stretchy, while the V-motif fabric is much more open. If the stitches are distributed too tightly along that transition, the cardigan can pull inward; if they are spaced too loosely, the lower body can flare.
A quick measurement before committing to the full body is worth the extra minute. It gives you a much better idea of whether the fabric is developing the shape you actually want.