Crochet Star Sweater Pattern with Star Panels & Mesh Sleeves
Here’s a flowy Star Sweater with dramatic five-point panels, easy color changes, and airy sleeve texture you can adjust from shoulder width to wrist length.
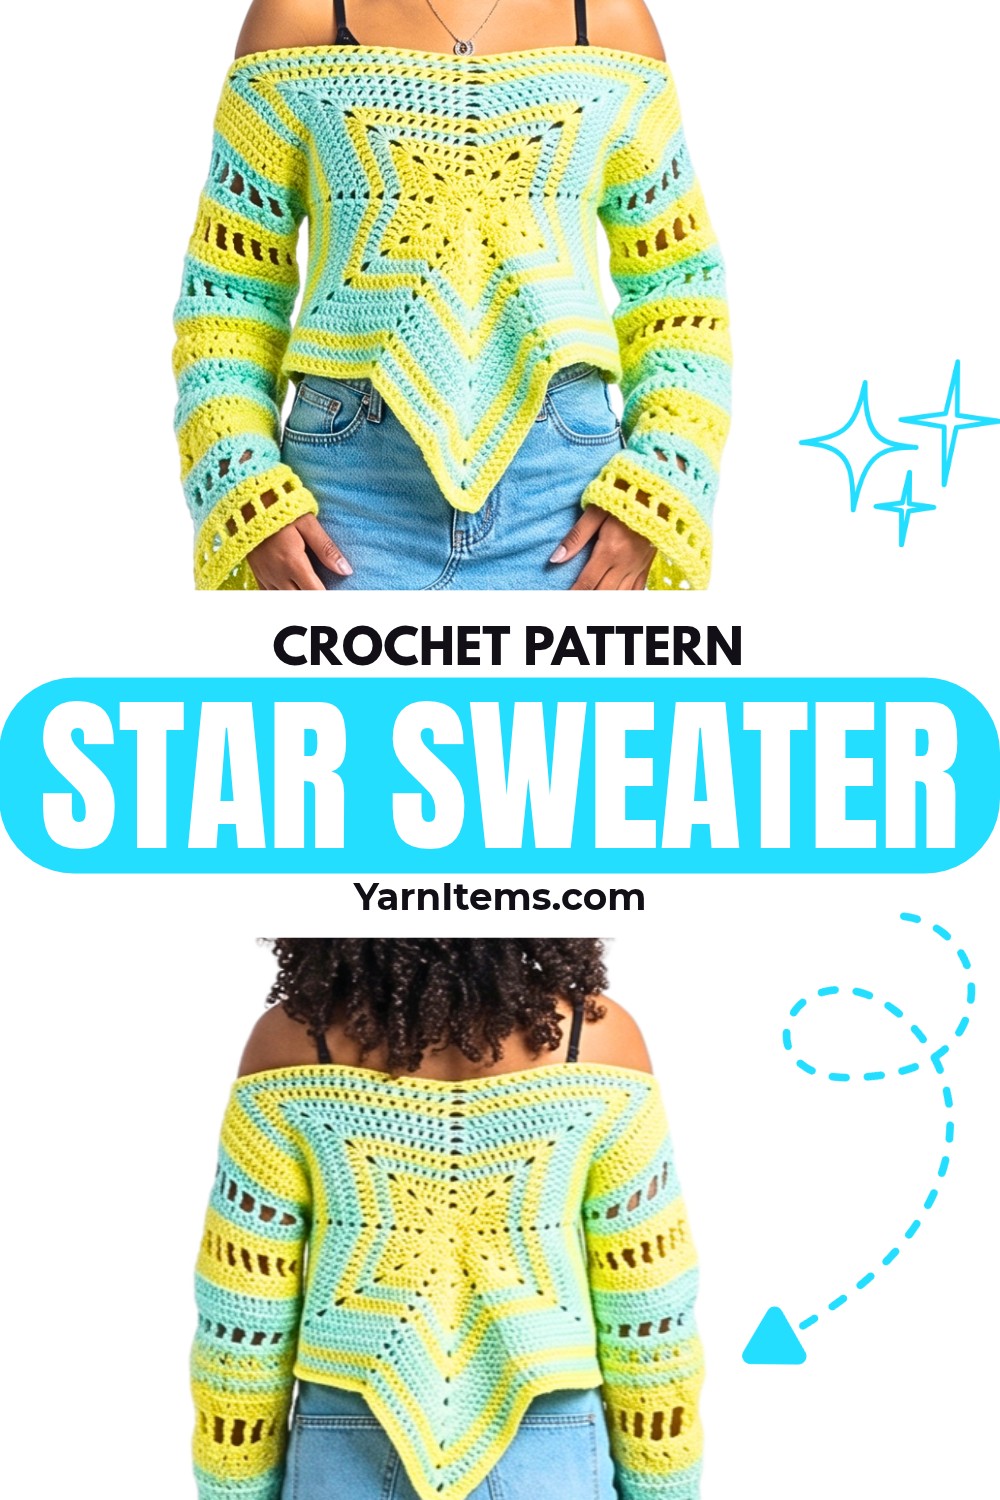
Bold star-shaped panels give this crochet sweater its distinctive silhouette, while alternating solid and mesh stitches bring movement and texture to sleeves. Made-to-measure sizing lets you stop panel increases once they span your shoulders, so finished fit can follow your own measurements.
Work two matching crochet star panels first, then bring them together around shoulders and armholes. Keep sleeve rounds turned as instructed, watch each valley carefully during crochet star increases, and use color changes wherever you want extra visual contrast.
Credit HopieDopeOfficial
Materials & Tools Needed
- Yarn: Weight 4 Medium/Worsted yarn, such as Big Twist Twinkle in yellow and mint, or preferred colors
- Hook: 5.0 mm crochet hook
- Stitch markers
- Scissors
- Darning needle
Size and Fit
This is a made-to-measure sweater, so star panels are increased until each panel spans from top of one outer shoulder across to opposite shoulder.
This approach lets you adapt width without relying on fixed body measurements.
Sleeve length can be changed by adding or removing repeating rounds. Neckline can remain wide for an off-the-shoulder style or be sewn tighter for more standard coverage.
Color changes can be introduced during any round, making it easy to use two shades, several colors, or one solid shade.
Pattern Abbreviations
- Ch: Chain
- St(s): Stitch(es)
- Sl st: Slip stitch
- Sc: Single crochet
- Dc: Double crochet
- Tr: Treble crochet, called triple crochet in tutorial
- Sp: Space
- Cl: Cluster – 3 dc worked into same space
- RS: Right Side
- WS: Wrong Side
Helpful finishing method: Work over yarn tail ends as you crochet whenever possible. This reduces loose ends that need to be woven in later.

How to make Star Panels
Make 2 matching star panels.
The star shape develops through five corner points. Each new increase round adds stitches along star sides while valleys remain controlled by skipped stitches. Keeping those valleys correct is what preserves defined points instead of allowing shape to become too rounded.
Round 1: Ch 4, sl st into first ch to form loop; magic ring can also be used; ch 3, counting as first dc; work 19 dc into center of loop; sl st to top of beginning ch-3 to close; 20 dc total.
Round 2: Ch 3, counting as dc; work 2 dc into same sp; ch 3; work 3 dc back into same sp to form first corner; skip 1 st, sc in next st, skip 1 st; work (3 dc, ch 3, 3 dc) into next st to form next corner; repeat from * around to create 5 corners; when 3 sts remain, skip 1, sc in next, sl st to top of beginning ch-3.
Check five corners before closing round. Each corner should have clear ch-3 space because these spaces become increase points in following rounds.

Round 3: Sl st into next st to move over one space; ch 3, counting as dc; dc in next st; in ch-3 corner sp work (3 dc, ch 3, 3 dc); dc into next 2 sts; skip 3 sts in valley, consisting of dc, sc, dc from previous round; dc into next 2 sts; repeat from * around; skip final 3 valley sts; sl st to top of beginning ch-3.
Valley section is important here. Do not work into those 3 skipped stitches, since removing them helps star points spread outward.
Round 4: Sl st over one sp; ch 3, counting as dc; dc in next 3 sts, giving 4 dc before corner; in ch-3 corner sp work (3 dc, ch 3, 3 dc); dc into next 4 sts; skip ONLY 2 sts in valley; dc into next 4 sts; repeat from * around; sl st to top of beginning ch-3.
Notice valley has changed from 3 skipped stitches to 2 skipped stitches. Keep this change exactly as written so star points continue widening correctly.
Continue Star Increases
Continue increasing along sides of each star point.
Each subsequent increase round: Sl st over 1 st at beginning; dc in each st up to corner; work (3 dc, ch 3, 3 dc) in every corner sp; dc down opposite side of star point; skip 2 sts at every valley.
Continue until each panel reaches from the top of one outer shoulder across to the opposite shoulder.
Measure panel across its widest shoulder-spanning section rather than stopping only after reaching certain round count. This is what makes fit adaptable to individual measurements.

Add Color Changes
Color can be changed at any round without changing star increase sequence.
Color Change: Ch 1 and fasten off old color; grab new color; skip first stitch in valley, which is one of 2 stitches normally skipped; attach new yarn directly to second stitch; tie secure double knot; pull tails toward back and crochet over them; insert hook into attached stitch; ch 3; continue round using established pattern.
Placing new color in valley keeps join visually tucked into recessed portion of star shape. When working over tails, keep them aligned toward wrong side so they do not show through front-facing stitches.
Repeat complete star panel instructions for second panel, matching size and color placement if you want symmetrical panels.

Bring Star Panels Together
Once both panels reach desired shoulder width, arrange them before sewing. Correct positioning now makes armhole placement much easier.
- Place both finished star panels together with Right Sides facing out. Center tail ends on wrong sides should touch.
- Use stitch markers to clip two top ch-3 corner spaces together on both sides. These pinned spaces form shoulder points.
- Pin two valley stitches directly below top corners. These defined points create armhole openings.
Before sewing, look at both sides from front. Shoulder corners should sit directly above corresponding armhole valleys. If one side looks higher, reposition markers before joining.
Build Sleeves in the Round
Sleeves begin at marked armhole valleys and continue outward. Each round creates different texture, so turning direction matters.
Round 1: Attach yarn with double knot at bottom of armhole, at pinned valley, keeping seam hidden; ch 3; work 1 dc into each st around armhole opening; when reaching top shoulder where two corners are pinned together, work both corner spaces together with one dc; continue dc around remaining stitches; sl st to top of beginning ch-3.
Working both shoulder corner spaces together prevents an unwanted gap at top of sleeve.
Round 2: Ch 3; turn work; work 1 dc into each st around; sl st to top of beginning ch-3; if changing color for next round, fasten off here.
Round 3: Attach new color if desired; ch 3; turn work; work 1 dc into each st around; sl st to top of beginning ch-3.
Turning sleeves after each round helps maintain intended stitch direction and texture.
Create Airy Sleeve Mesh
Round 4 – Treble Mesh: Ch 6, counting as 1 tr plus ch-2 sp; turn; skip 2 sts, work 1 tr in next st, ch 2; repeat from * around; if 3 sts remain at end, ignore third stitch and treat remaining section as two; sl st into 4th chain of beginning ch-6 to close.
Mesh spacing creates open sections that make sleeve fabric lighter and more flexible. Keep skipped stitches consistent around sleeve so mesh remains balanced.
Round 5 – Solid Double Crochet: Ch 3; turn; work 2 dc into ch-2 sp, work 1 dc into top of tr st; repeat from * around; sl st to top of beginning ch-3.
This round fills spaces created by mesh round and returns sleeve to solid fabric.
Repeat Sleeve Texture
Continue repeating Round 3, Round 4, and Round 5 until sleeve reaches wrist or desired length.
Sequence remains:
Round 3: Solid dc
Round 4: Treble mesh
Round 5: Solid dc
Turn work at beginning of every sleeve round.
Acrylic yarn may stretch slightly with wear, so consider finished fabric length before stopping. If sleeve already hangs close to wrist during crocheting, additional rounds may make it longer after wearing.
Repeat exact sleeve sequence on opposite armhole.
Adjust Neckline Before Final Finishing
Neckline can stay wide for relaxed off-the-shoulder styling or be narrowed for more standard fit.
Optional Neckline: Thread darning needle and sew 10 to 12 stitches together on both sides of top neckline to create tighter neckline.
Sew only enough stitches to achieve desired opening. Keep neckline wide if off-the-shoulder drape is preferred.

Finish Side Seams
Side seams close body while preserving outer star shape.
Side Seam: Sew side panels together starting from bottom valley and working upward toward corner seam; using darning needle, pick up only outer loops — front loop of front panel and back loop of back panel — for cleaner seam; secure thread with loop knot at end; repeat on opposite side.
Working through outer loops keeps seam line cleaner and helps joined edges sit more naturally.
Check armhole opening before fully securing each side. Sleeve should remain open above marked armhole point while lower body seam closes below it.