Step-by-Step Crochet Floral Mandala Pattern Free
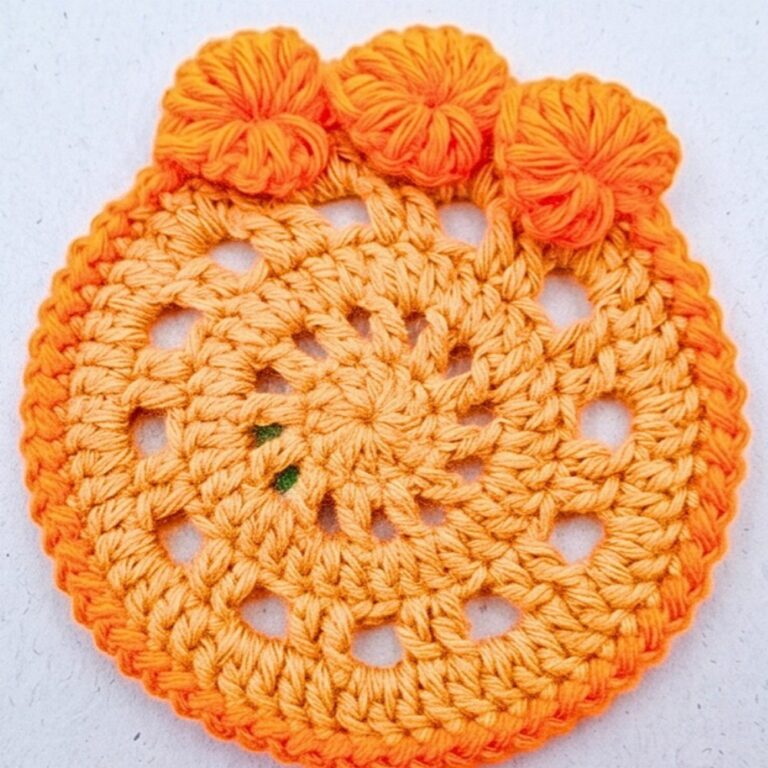
Need a colorful crochet mandala for your table or wall? Follow this floral pattern with layered petals, popcorn stitches, picot details, and contrasting rounds.
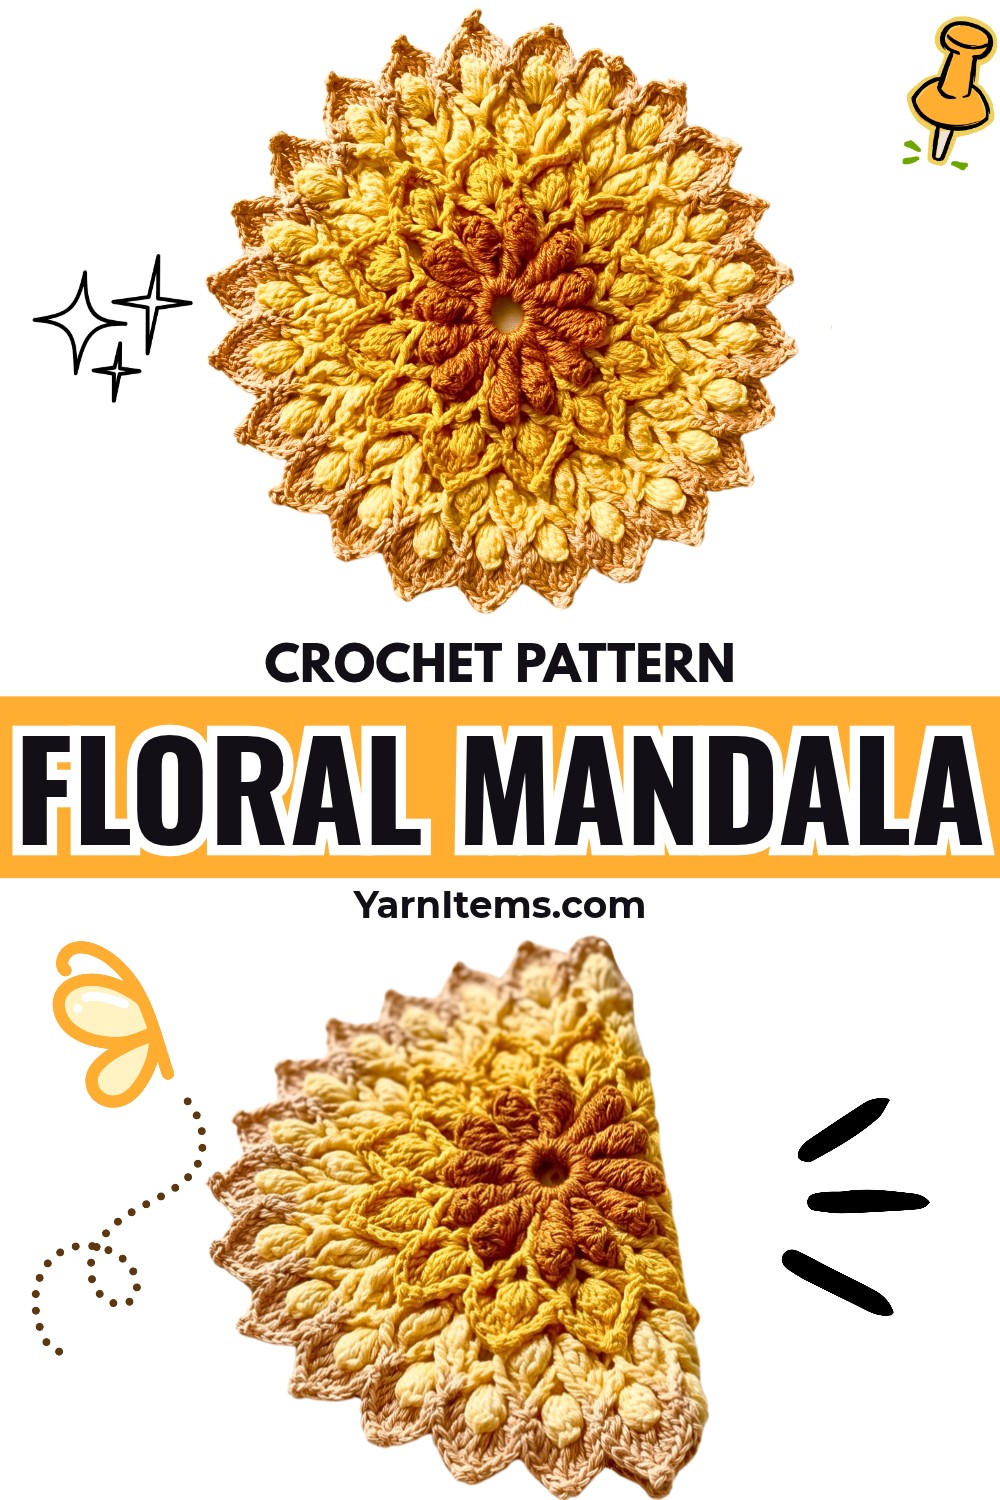
Floral mandalas combine delicate lacework with raised petals, giving cotton crochet a decorative finish. Managing multiple stitch types and color changes can feel challenging at first, especially when later crochet rounds must be worked behind existing petals.
This crochet mandala tutorial guides you through 11 rounds, from a tightly closed center to a detailed floral border. You’ll learn popcorn stitches, front-post techniques, picot points, and hidden foundation loops that support each new layer. Let’s begin.
Credit Beyond Diary
Materials & Tools
- Cotton yarn: Four colors of nature cotton yarn, such as a center shade, light yellow, beige, and another coordinating color. Choose fingering- or sport-weight yarn for a delicate finish.
- Crochet hook: 2.5 mm, or another size suitable for your yarn.
- Scissors: For cutting yarn after each color section.
- Yarn needle: For weaving in ends.
- Blocking board and pins: Recommended for shaping petals and flattening the finished mandala.
Working With Thin Center Yarn
If your center yarn is too thin, the supplied tutorial demonstrates creating a thicker working strand from one ball.
- Arrange the yarn into an S shape.
- Gather three parallel strands from the middle section.
- Hold all three strands together as one working strand.
- Form your magic circle and crochet with the gathered strands.
Keep all three strands together as you work so the center stitches have consistent thickness.
Finished Size & Uses
Finished dimensions depend on yarn weight, hook size, and individual tension. Fingering- or sport-weight cotton with a 2.5 mm hook creates a delicate decorative motif.
You can use the completed mandala as:
- A table doily or centerpiece.
- Decorative wall art.
- A floral motif for a larger handmade display.
Customization tip: Use four coordinating colors for defined floral layers, or work every round in one color for a more subtle, lace-like appearance.
Pattern Abbreviations
-
st(s): Stitch(es)
-
ch: Chain
-
sl st: Slip stitch
-
sc: Single crochet
-
dc: Double crochet
-
tr: Treble crochet
-
dtr: Double treble crochet (yarn over 3 times)
-
fp: Front post
-
FPsc: Front-post single crochet
-
FPdc: Front-post double crochet
-
fpsl st: Front-post slip stitch
-
FPdtr: Front-post double treble crochet
-
popcorn st: Popcorn stitch (5 dc or 5 FPdc worked in the same space, then closed by pulling the dropped loop through the top of the first stitch)
-
picot: Chain 3, then slip stitch into the first two loops of the chain, following the supplied pattern
-
V-st: V-stitch (a specified combination of stitches worked into the same stitch or space)
-
dc2tog: Two double crochets worked together to form a decrease
-
3-tr-cluster: Three treble crochets worked together in the same space
-
sp: Space

Special stitch notes
- Popcorn stitch: Work five dc or five FPdc in the same designated space, drop the working loop, insert your hook into the top of the first stitch, pick up the dropped loop, and pull it through.
- Picot: Chain 3, then slip stitch into the first two loops of the chain as specified in your supplied tutorial.
- V-stitch: Follow the specific combination stated for each round; this pattern uses both double-crochet and treble-crochet V-stitches.
- dc2tog: Work partial double crochets into two adjacent stitches or designated positions, then yarn over and pull through all three loops remaining on the hook.
How to Crochet the Floral Mandala
Work outward from the center, adding raised stitch groups, chain spaces, petals, and contrasting decorative rounds. The later rounds use spaces behind earlier petals, so keep track of both sides of your work.
Step 1: Form the Center – Round 1
Create a magic circle. Chain 1 to secure your starting loop, then chain 2 more, making three chains in total. These three chains count as the first double crochet.
Work 17 double crochets into the magic circle. Including the beginning chain-3, you should have 18 double crochets.
Pull the yarn tail firmly to close the center, then join with a slip stitch into the third chain of the beginning chain-3.
Check your work: The center should close into a compact circle without a large opening.
Helpful tip: Leave enough yarn tail to secure the center later. A loose magic-circle tail can allow the middle of the mandala to open during use.

Step 2: Add Raised Stitch Groups – Round 2
Work a front-post slip stitch around the post of the next double crochet.
Chain 3, counting this as the first front-post double crochet, then work two more FPdc around the same post. You now have three FPdc around that stitch.
Work one FPdc around the next double crochet post.
Continue around the circle, alternating:
- Three FPdc around the next designated stitch.
- One FPdc around the following stitch.
Join with a slip stitch into the third chain of the beginning chain-3.
Why this round matters: These raised groups establish the textured structure used to position the first layer of popcorn decorations.
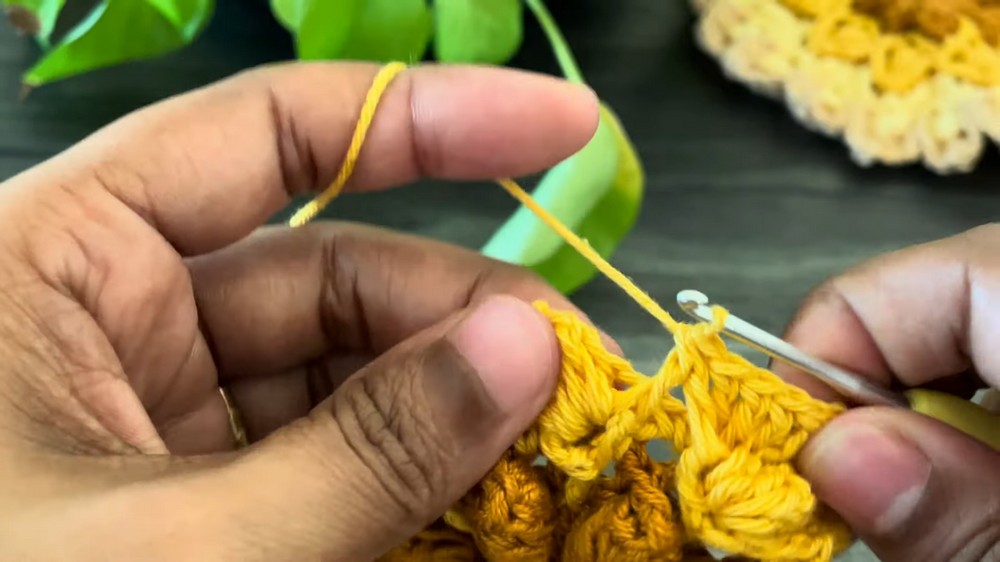
Check your work: The raised groups should form a consistent rhythm around the center. If one group looks unusually crowded, check whether all three stitches were worked around the same post.
Step 3: Create Popcorn Accents – Round 3
Work one single crochet into the next double-crochet space, then chain 1.
Locate the middle stitch of a three-FPdc group from Round 2. Work five FPdc around that middle stitch to create the popcorn stitch.
Drop the working loop, insert your hook into the top of the first FPdc, pick up the dropped loop, and pull it through to close the popcorn. Work one sc into the same designated space.
Next, chain 3, skip the next stitch, and work one sc into the following stitch.
Chain 3 again, skip the specified stitch from the previous group, and form another popcorn over the middle stitch of the next three-FPdc group. Work one sc into the same space.
Continue around using the supplied sequence of popcorn groups, chain-3 spaces, skipped stitches, and single crochets.
Join with a slip stitch to the first stitch, chain 1, and fasten off the current color.
Teaching tip: Keep the popcorns facing outward. Their raised texture will become a useful landmark when positioning the next round.

Step 4: Add V-Stitches Behind the Popcorns – Round 4
Attach light-yellow yarn with a slip stitch in any chain-3 space.
Chain 1 and work one single crochet into that same space.
Yarn over three times and work a front-post double treble crochet around the middle FPdc of Round 2, reaching behind the newer popcorn layer.
Next, work a chain-1 treble V-stitch using the method shown in your supplied tutorial: yarn over twice and work the treble stitch through the middle two loops of the newly formed double-treble structure.
Work one sc into the second chain-3 space. Chain 3, move past the popcorn to the next chain-3 space, and work another sc.
Repeat the sequence around: create the dtr and V-stitch structure behind each designated popcorn, then work the single crochets and chain-3 spaces between them.
Join with a slip stitch to the first single-crochet space and slip stitch into the V-stitch space.
Step 5: Work Popcorns Over V-Stitches – Round 5
Chain 3, counting this as the first double crochet. Work four additional dc into the same V-stitch space, giving you five dc in total.
Form a popcorn stitch by dropping the working loop, inserting your hook into the top of the first dc, retrieving the dropped loop, and pulling it through.
Chain 3 and work one sc into the next chain-3 space. Chain 3 again, then form another five-dc popcorn in the following V-stitch space.
Repeat this sequence around the mandala:
- Chain 3.
- Single crochet in the next chain-3 space.
- Chain 3.
- Popcorn in the next V-stitch space.
Join with a slip stitch into the top of the beginning chain-3.
To reposition for the next round, slip stitch across to the next single-crochet space using the chain-1 and slip-stitch movements specified in your source tutorial.
Check your work: Popcorns should sit above their V-stitch spaces, separated by visible chain arches.

Step 6: Shape the First Petal Layer – Round 6
Begin by working one FPdc around the first dc of the V-stitch below, followed by one regular dc.
Into the next chain-3 space, work three dc and one tr. This creates the first sloping section of a petal.
Over the popcorn stitch, work:
- One dtr.
- Chain 3 for the picot.
- One dtr.
The picot forms the pointed tip of the petal.
On the opposite side, work one tr and three dc into the next chain-3 space.
Now decrease between adjacent V-stitch sections using dc2tog:
- Yarn over and insert your hook into the second dc of the current V-stitch.
- Pull up a loop and pull through two loops, leaving two loops on your hook.
- Yarn over and insert your hook into the first dc of the next V-stitch.
- Pull up a loop and pull through two loops, leaving three loops on your hook.
- Yarn over and pull through all three loops.
Repeat the petal sequence around the mandala: build one side, form the raised picot tip over the popcorn, complete the other side, and decrease between the V-stitch sections.
Finish with one FPdc around the final V-stitch and one dc, then join with a slip stitch.
Teaching tip: Shape each picot gently as you work. Keep the chain-3 point visible instead of pulling it tight against the popcorn.
Step 7: Build a Foundation Behind the Petals – Round 7
This round creates a hidden framework behind the first petal layer. Turn your work so you can access the back of the petals.
Work a slip stitch into the back loops at the dc2tog decrease space.
Chain 6, counting this as one treble crochet plus a chain-2 space. Work a double-crochet V-stitch into the first chain down, as demonstrated in the source.
Chain 2 and work another double-crochet V-stitch into the same designated space.
Now bend the petal forward to reach behind its pointed tip. Anchor the framework behind the four loops of the dtr petal peak with one dc, then work a slip stitch behind the picot loop.
Chain 1 and work the next V-stitch combination behind the dc2tog space: one tr, chain 2, one dc V-stitch, chain 2, and another dc V-stitch, following the supplied sequence.
Continue around the back of all petals. Join with a slip stitch into the third chain of the beginning chain-6, chain 1, and fasten off.
Why this round matters: The hidden chain spaces create attachment points for the next decorative layer without covering the petal tips.
Check your work: Turn the motif over. The new foundation should connect the petals around the circle without pulling their tips inward.
Step 8: Add Treble Clusters – Round 8
Attach the next yarn color with a slip stitch in the first chain space.
Chain 4, counting this as the first treble crochet, then work a three-treble cluster in the same space. Work one sc into that same space.
Chain 3 and work one sc into the next designated dc space.
Chain 3 again. In the following dc space, work a three-tr cluster, followed by one sc in the same space.
Chain 3 and work one sc behind the petal peak, at the slip-stitch position from the previous round.
Repeat the sequence around:
- Chain 3 and work a three-tr cluster plus sc in the designated V-stitch space.
- Chain 3 and work one sc in the next stitch.
- Chain 3 and work another three-tr cluster plus sc in the next space.
- Chain 3 and work one sc behind the next petal peak.
Join with a slip stitch to the top of the first cluster.
Teaching tip: A cluster gathers three treble crochets into one raised group. Complete the cluster as demonstrated before working the accompanying single crochet.

Step 9: Connect the Outer Decorative Layer – Round 9
Chain 1 and work one sc on top of the first treble cluster, followed by one sc in the next chain-3 space.
Yarn over three times and work a double treble crochet between the two treble clusters, placing it into the designated stitch from the previous round.
Chain 1 and work the treble V-stitch through the middle loops of that dtr, following the source demonstration.
Continue with one sc in the next chain-3 space, one sc on top of the next treble cluster, and one sc in the following chain-3 space.
For the next section, work a dtr behind the petal, chain 1, and form the treble V-stitch.
Repeat this sequence around the motif, alternating the single crochets across the chain spaces and clusters with the dtr-and-V-stitch structures behind the petals.
Join with a slip stitch to the first single-crochet space.
Check your work: The outer framework should remain evenly distributed around the floral center, with the V-stitch spaces clearly visible for the next round.
Step 10: Add Popcorn Accents – Round 10
Chain 1 and work one front-post single crochet around the same stitch.
Chain 3, then work five double crochets into the designated V-stitch space. Close them into a popcorn stitch using the same dropped-loop method used earlier.
Chain 3 and work one FPsc around the top of the treble cluster below.
Continue around the motif, repeating:
- Chain 3.
- Popcorn in the V-stitch space.
- Chain 3.
- FPsc around the treble cluster.
Join with a slip stitch to the first single crochet, chain 1, and fasten off.
Helpful tip: Keep the popcorns rounded and raised. Avoid pulling the closing loop so tightly that the decorative bump disappears.
Step 11: Finish With Petal Edging – Round 11
Attach the final color, such as beige, with a slip stitch in the first V-stitch space.
Chain 3, counting this as the first dc. Work three additional dc and one tr into the same V-stitch space.
Over the popcorn stitch, work one dtr, chain 3 for the picot, and one dtr.
Into the next chain space, work one tr and three dc to complete the opposite side of the petal.
Join adjacent V-stitch spaces using dc2tog, following the decrease method from Round 6.
Repeat the final petal sequence all the way around the mandala, working each petal over its designated popcorn and decreasing between adjacent V-stitch spaces.
Finish with one front-post double crochet on the last stitch, join with a slip stitch, chain 1, and fasten off.
Final round check: Look for evenly spaced petal points, consistent scallops, and a border that lies as flat as possible before blocking.

Weave in Ends and Block the Mandala
Secure the Yarn Tails
Thread each tail onto a yarn needle and weave it securely through stitches on the back of the mandala. Where practical, follow the stitches in matching-color sections to keep the tails less visible.
Avoid pulling the tails too tightly, as this can distort the circular shape.
Block for Defined Petals
Blocking helps open up lacework and gives the outer petals a more uniform outline.
- Place the finished mandala flat on a blocking board.
- Gently shape the circular edge and spread the picot points evenly.
- Pin the motif in place without stretching individual stitches excessively.
- Lightly mist the cotton yarn with water, or use a suitable wet-blocking method.
- Allow the piece to dry completely before removing the pins.
Important: Follow the care recommendations for your yarn. Avoid applying direct high heat to delicate fibers.
Display Your Finished Floral Mandala
Once dry, your mandala can be displayed as a centerpiece, used as a decorative doily, or mounted as wall art. Its layered popcorn stitches, raised petals, and contrasting rounds give it dimension from the center to the outer border.
For a neat finish, check that all yarn tails are secure and that the motif remains flat. If the outer points curl, reshape and block those sections again before displaying your work.