Princess Baby Dress Crochet Pattern for Little Ones
Here, you’ll find a Princess Baby Dress crochet pattern with a decorative yoke, expanding shell stitches, and a flared scalloped skirt, plus guidance for sizing and finishing.
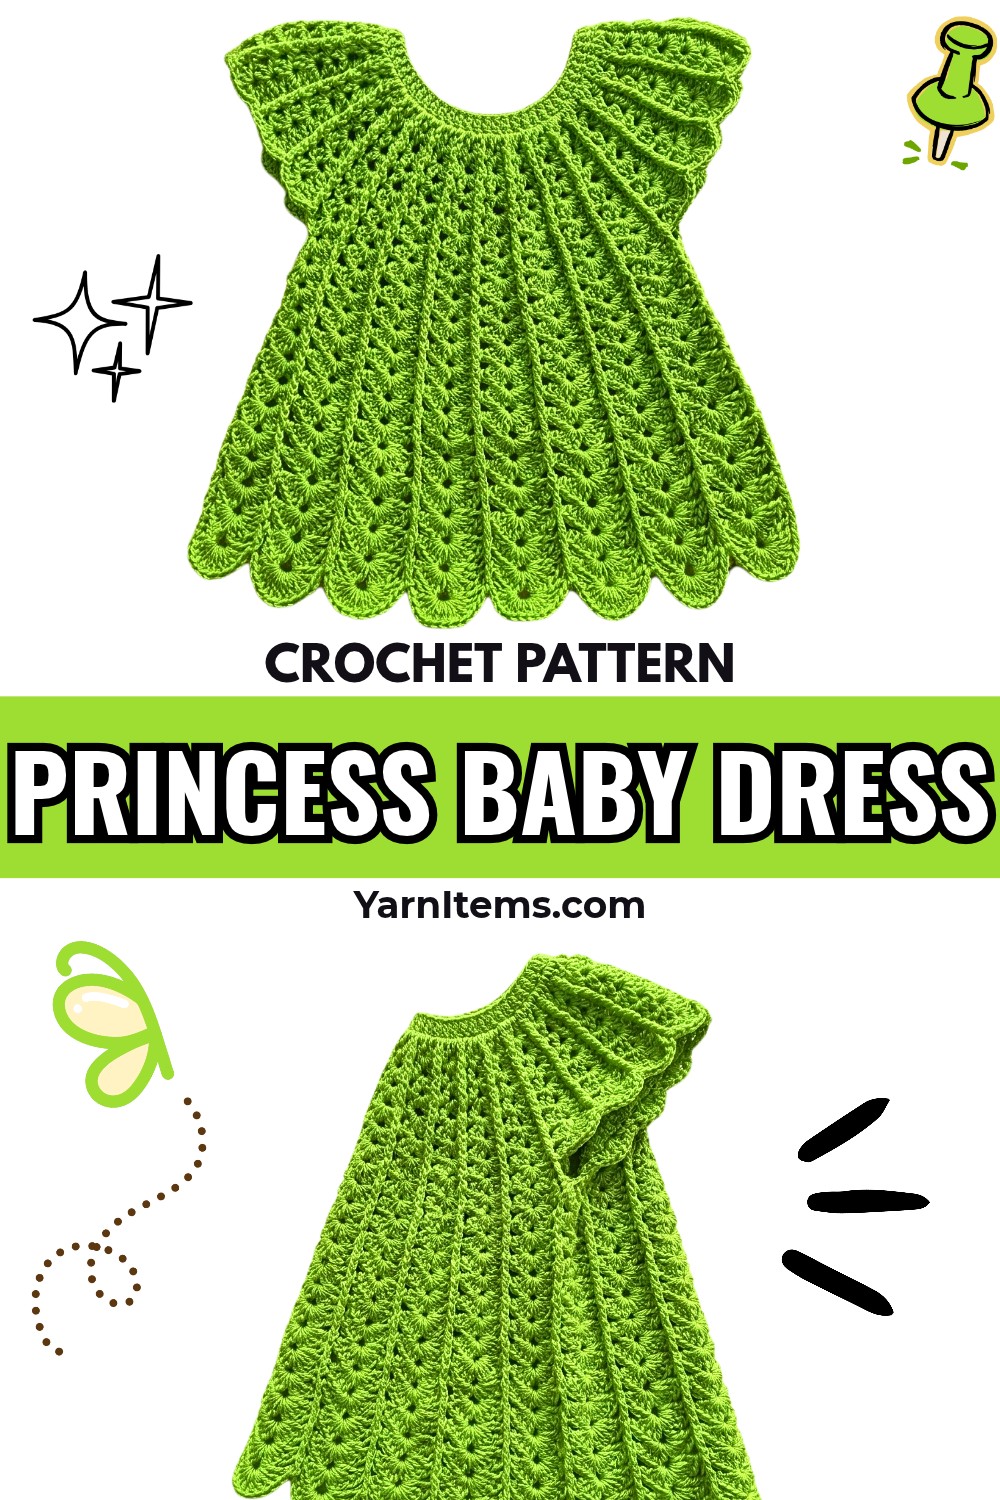
Crochet baby dresses can feel tricky when yoke shaping, armhole spaces, and skirt increases must line up. This crochet pattern breaks down those sections so beginners can follow each stage with greater confidence.
Inside, you’ll follow each crochet yoke row, divide armholes, build skirt shells, and finish the scalloped hem. This crochet guide also covers sizing adjustments, neckline closure, and finishing details. Let’s begin.
Credit: Crochet Patterns
Materials & Tools
- Yarn: Light worsted-weight acrylic or cotton yarn, Category 3 or 4, in one solid color. Lime green is shown in the video.
- Crochet hook: 3.5 mm or 4.0 mm, matched to your yarn and tension.
- Scissors: For cutting yarn during finishing.
- Yarn needle: For weaving in loose ends.
Finished Size & Customization
The supplied tutorial demonstrates a baby or toddler-sized dress, but exact finished measurements are not provided. Check the fit against the intended wearer rather than relying on age alone.
- Yoke: Its width determines how the dress fits around the chest and upper body.
- Skirt length: Add or remove repeated rounds before working the final hem.
- Color: Introduce a contrasting yarn for the scalloped border.
- Decorative detail: Weave a suitable satin ribbon through the yoke’s chain spaces, ensuring it is securely attached and cannot become a hazard for a baby.
Helpful tip: Check the neckline and armholes before continuing into the skirt. These areas are more difficult to adjust once the lower portion is complete.
Pattern Abbreviations
The pattern uses US crochet terminology.
-
ch: Chain
-
dc: Double Crochet
-
tr: Treble Crochet
-
sk: Skip
-
st(s): Stitch(es)
-
sl st: Slip Stitch
-
sp: Space

How to Crochet the Princess Baby Dress
This dress begins with a flat yoke worked in rows. Increasing treble crochet shells create its decorative shape, while skipped chain spaces form the armholes. Once the yoke is joined, the skirt continues in rounds, gradually increasing the size of its shells to create a flared silhouette.
Step 1: Create the Foundation Chain
Chain 65 to begin the yoke.
Keep your chain tension even so the neckline edge does not become noticeably tighter than subsequent rows. Avoid pulling each chain too firmly around the hook.
Check before continuing: Count all 65 chains. An incorrect foundation count can affect stitch placement throughout the yoke.
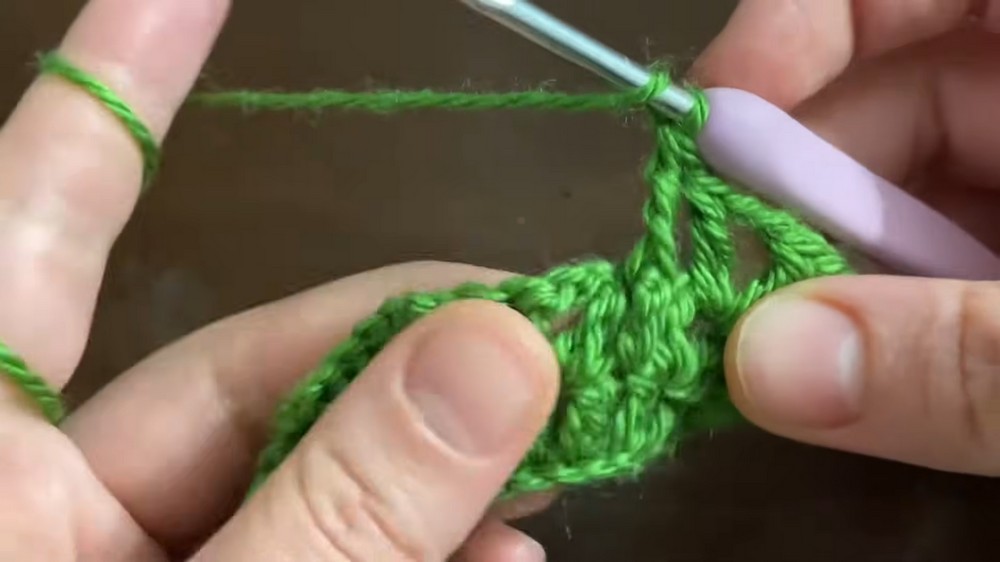
Step 2: Work Row 1 of the Yoke
Chain 3, counting this as one double crochet.
Skip the next 3 chains, then work 1 double crochet into each remaining chain across the foundation, following the supplied pattern.
The purpose of this row is to establish the stitch base for the open V-stitch pattern in Row 2.
Teaching tip: Keep track of your skipped chains and turning chain so you can identify the correct starting and ending positions in the next row.
Pattern note: The supplied Row 1 instructions do not specify a complete stitch-count check or clarify the turning and skipped-chain placement beyond the written directions. Follow the source video if its demonstrated placement differs from this wording.
Step 3: Establish the V-Stitch Pattern in Row 2
Chain 3, counting this as 1 double crochet.
Skip 3 stitches, then work a V-stitch into the next stitch:
- 1 double crochet
- Chain 2
- 1 double crochet in the same stitch
Continue skipping 3 stitches and working a V-stitch across the row. Finish with 1 double crochet in the final stitch.
Why this matters: Each chain-2 space becomes a designated location for the treble crochet shells that shape the upper section of the dress.
Check your work: Look for evenly spaced openings across the row. These spaces will be important in every following yoke row.
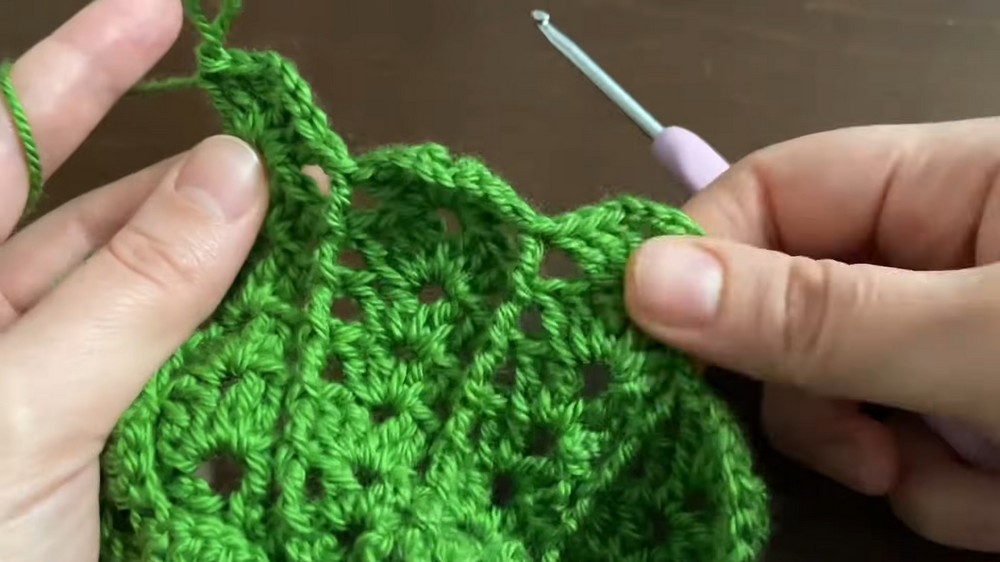
Step 4: Expand the Yoke in Row 3
Chain 5, counting this as 1 treble crochet plus chain 2.
Work 1 treble crochet into the first chain-2 space of the previous row. This establishes the first expanded V-shaped section.
In each subsequent chain-2 space, work:
- 1 treble crochet
- Chain 2
- 1 treble crochet
Finish with 1 treble crochet in the final stitch, as specified in the supplied pattern.
Teaching tip: Place each expanded V-stitch inside its designated chain-2 space rather than into an individual treble crochet. This keeps the openwork structure consistent.
Step 5: Add Treble Crochet Stitches in Row 4
Chain 4, counting this as 1 treble crochet according to the supplied instructions.
Work the following sequence across the row:
- Work (1 tr, ch 2, 1 tr) into the first chain-2 space.
- Work 1 treble crochet into the space between the previous row’s V-stitches.
- Repeat this sequence across the remaining chain-2 spaces and intervening spaces.
Continue alternating expanded V-stitches with single treble crochet stitches in the designated spaces.
Check your work: The extra treble crochet stitches should sit between the V-shaped sections, while the chain-2 spaces remain visible for the next row’s increases.
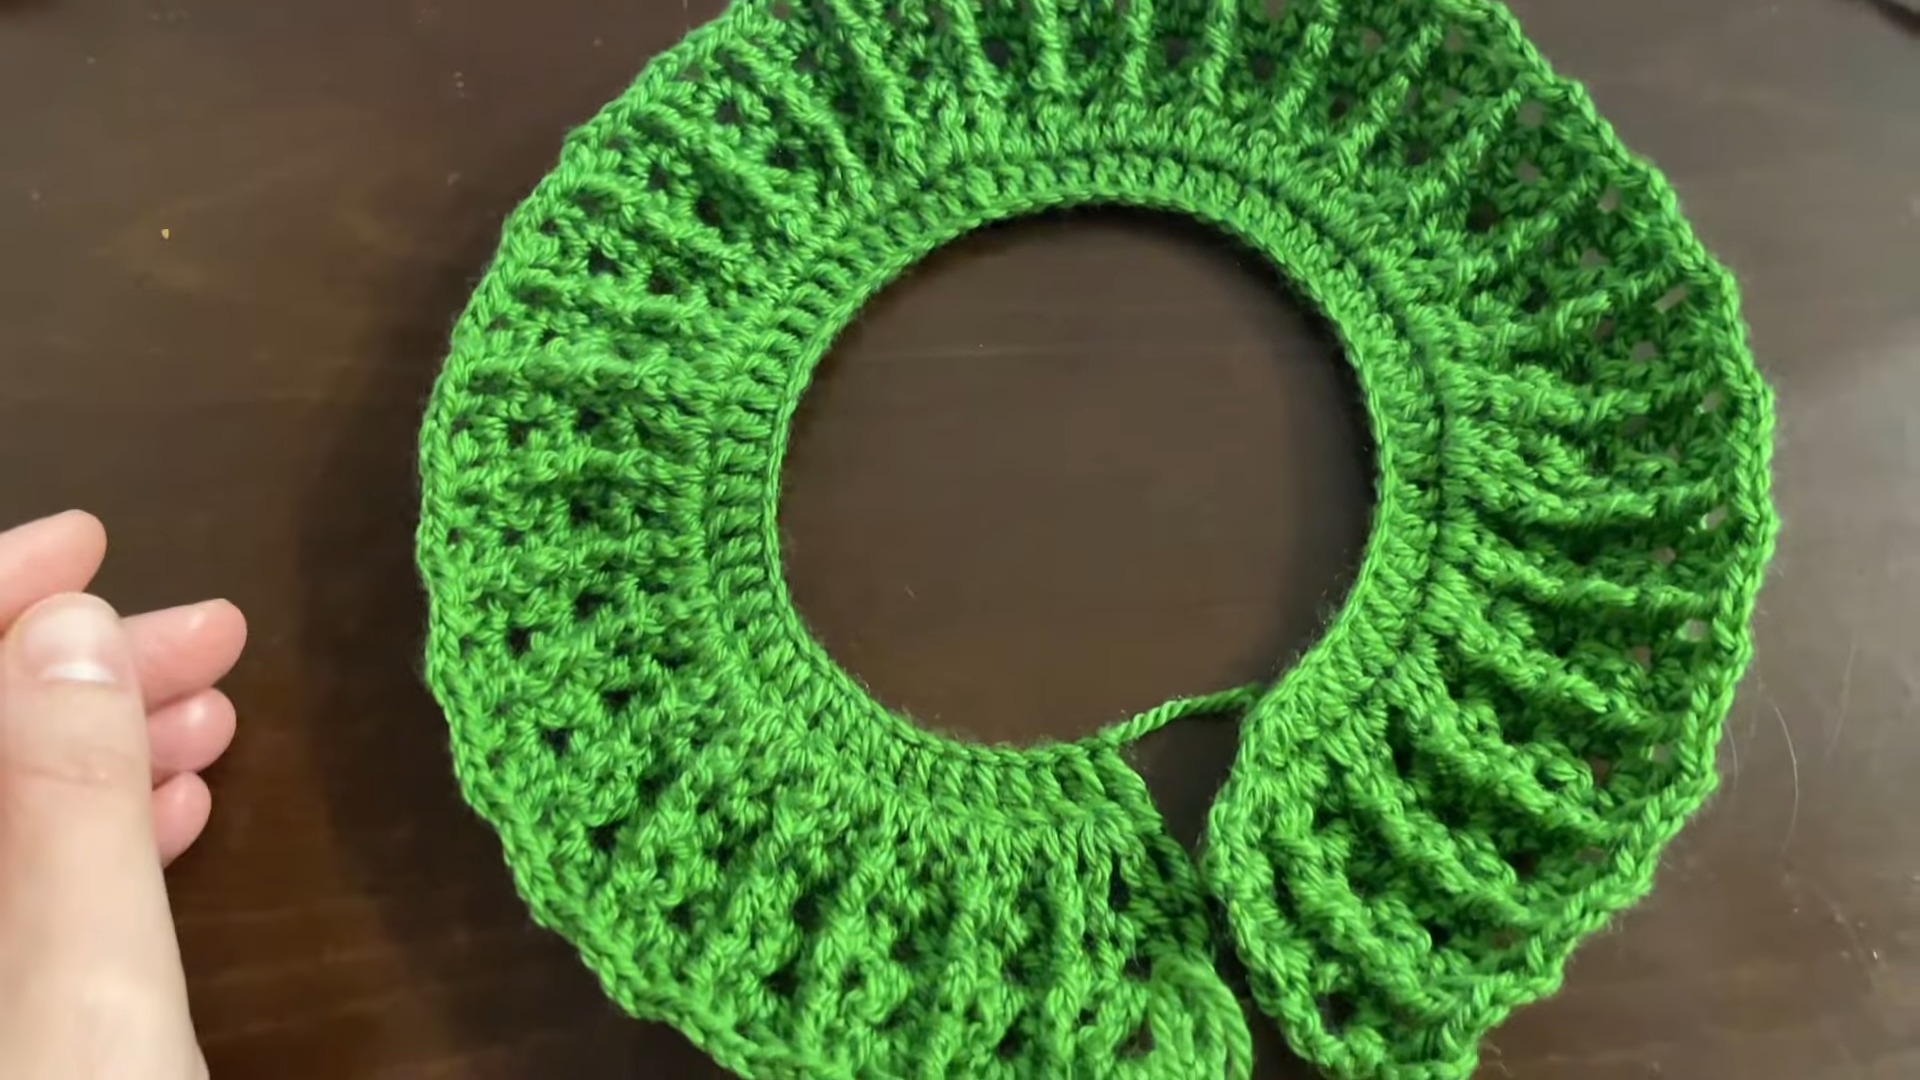
Step 6: Increase the Shells in Row 5
Chain 4, counting it as 1 treble crochet as specified in the source pattern.
Into each chain-2 space, work:
- 2 treble crochets
- Chain 2
- 2 treble crochets
Work 1 treble crochet into each single treble crochet from the previous row, repeating the sequence across.
Why this increase matters: Adding stitches around each chain-2 space widens the decorative sections of the yoke and prepares the garment for its next increase.
Keep the chain-2 spaces open rather than pulling them tight, as they will remain important reference points in Row 6.
Step 7: Complete Row 6
Chain 4, counting it as 1 treble crochet according to the supplied instructions.
Into each chain-2 space, work:
- 3 treble crochets
- Chain 2
- 3 treble crochets
Work 1 treble crochet into each single treble crochet from the previous row, repeating across.
Yoke check: The shell sections should now be fuller than in Row 5. Lay the piece flat and check that its edges are not pulling inward or becoming uneven.
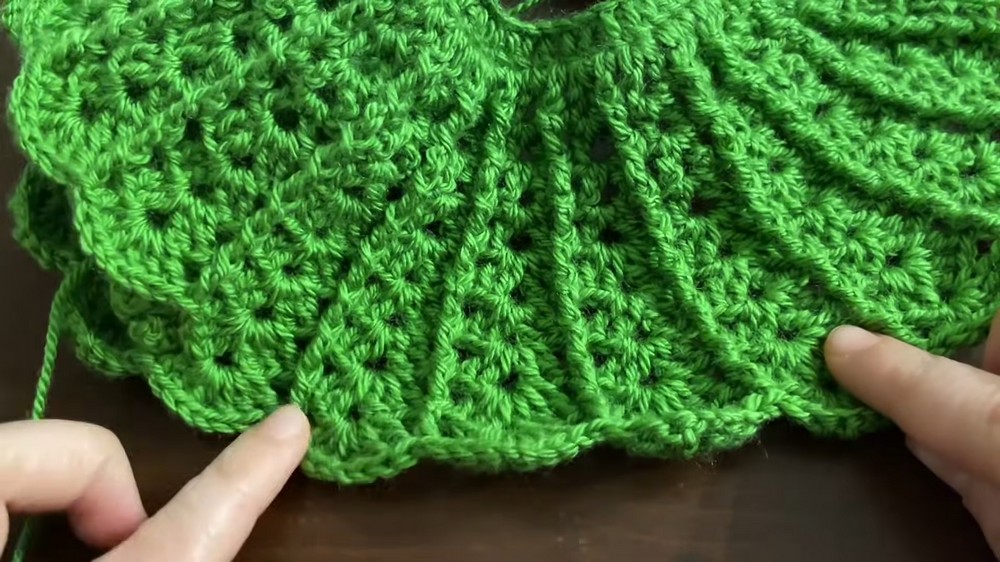
Step 8: Divide the Yoke for Armholes in Row 7
This row separates the upper body into back, front, and back sections while leaving openings for the arms.
Chain 4, counting it as 1 treble crochet according to the supplied pattern.
Follow this sequence carefully:
- Work (3 tr, ch 2, 3 tr) into each of the next 4 chain-2 spaces to form the first half of the back.
- Skip the next 8 chain-2 spaces to form the first armhole.
- Work (3 tr, ch 2, 3 tr) into the next chain-2 space to begin the front panel.
- Continue working the same shell into the next 8 chain-2 spaces across the front.
- Skip the next 8 chain-2 spaces to create the second armhole.
- Work the shell into the next chain-2 space to begin the second half of the back, then continue across the final 4 chain-2 spaces.
- Join with a slip stitch to the top of the turning chain to begin working in the round.
Important fit check: Before proceeding, lay the yoke flat and identify both armhole openings. Check that the front and back sections sit in the correct positions.
Step 9: Begin the Skirt – Rounds 1-4
After joining Row 7, the work continues in rounds.
For each of the first four skirt rounds:
- Chain 4.
- Work (3 tr, ch 2, 3 tr) into each chain-2 space around.
- Work 1 treble crochet into each single treble crochet around.
- Join with a slip stitch.
Keep the shell pattern consistent as you move around the dress. The chain-2 spaces mark where each shell belongs, while the single treble crochets maintain the structure between shells.
Teaching tip: Check that the skirt hangs evenly from the yoke. If one section looks bunched or stretched, review shell placement before beginning the next round.
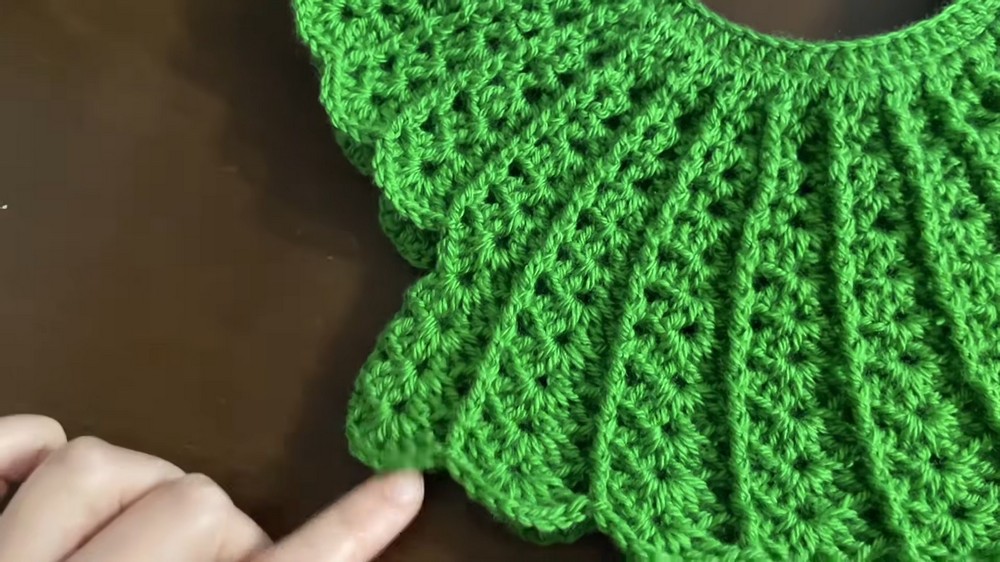
Step 10: Widen the Skirt – Rounds 5-8
For each round, chain 4 and work the larger shell into every chain-2 space: (4 tr, ch 2, 4 tr)
Work 1 treble crochet into each single treble crochet around, then join with a slip stitch.
Repeat this sequence for Rounds 5-8.
What changes here: Each shell now contains more treble crochets on both sides of its center chain space. This increases the amount of fabric in the skirt and helps it flare outward.
Check your work: Spread the skirt gently on a flat surface. The fabric should expand without excessive twisting or uneven bunching.
Step 11: Continue the Skirt – Rounds 9-12
For each round, chain 4 and work the next shell increase into every chain-2 space: (5 tr, ch 2, 5 tr)
Work 1 treble crochet into each single treble crochet around and join with a slip stitch.
Repeat for Rounds 9-12, or continue until the dress reaches your desired length.
Length adjustment: If you prefer a shorter skirt, work fewer rounds before the final hem. For a longer version, continue the established pattern, checking the length as you go.
The supplied instructions do not specify additional shell increases beyond this section, so verify the intended repeat with the original tutorial if extending the skirt substantially.
Step 12: Create the Scalloped Hem
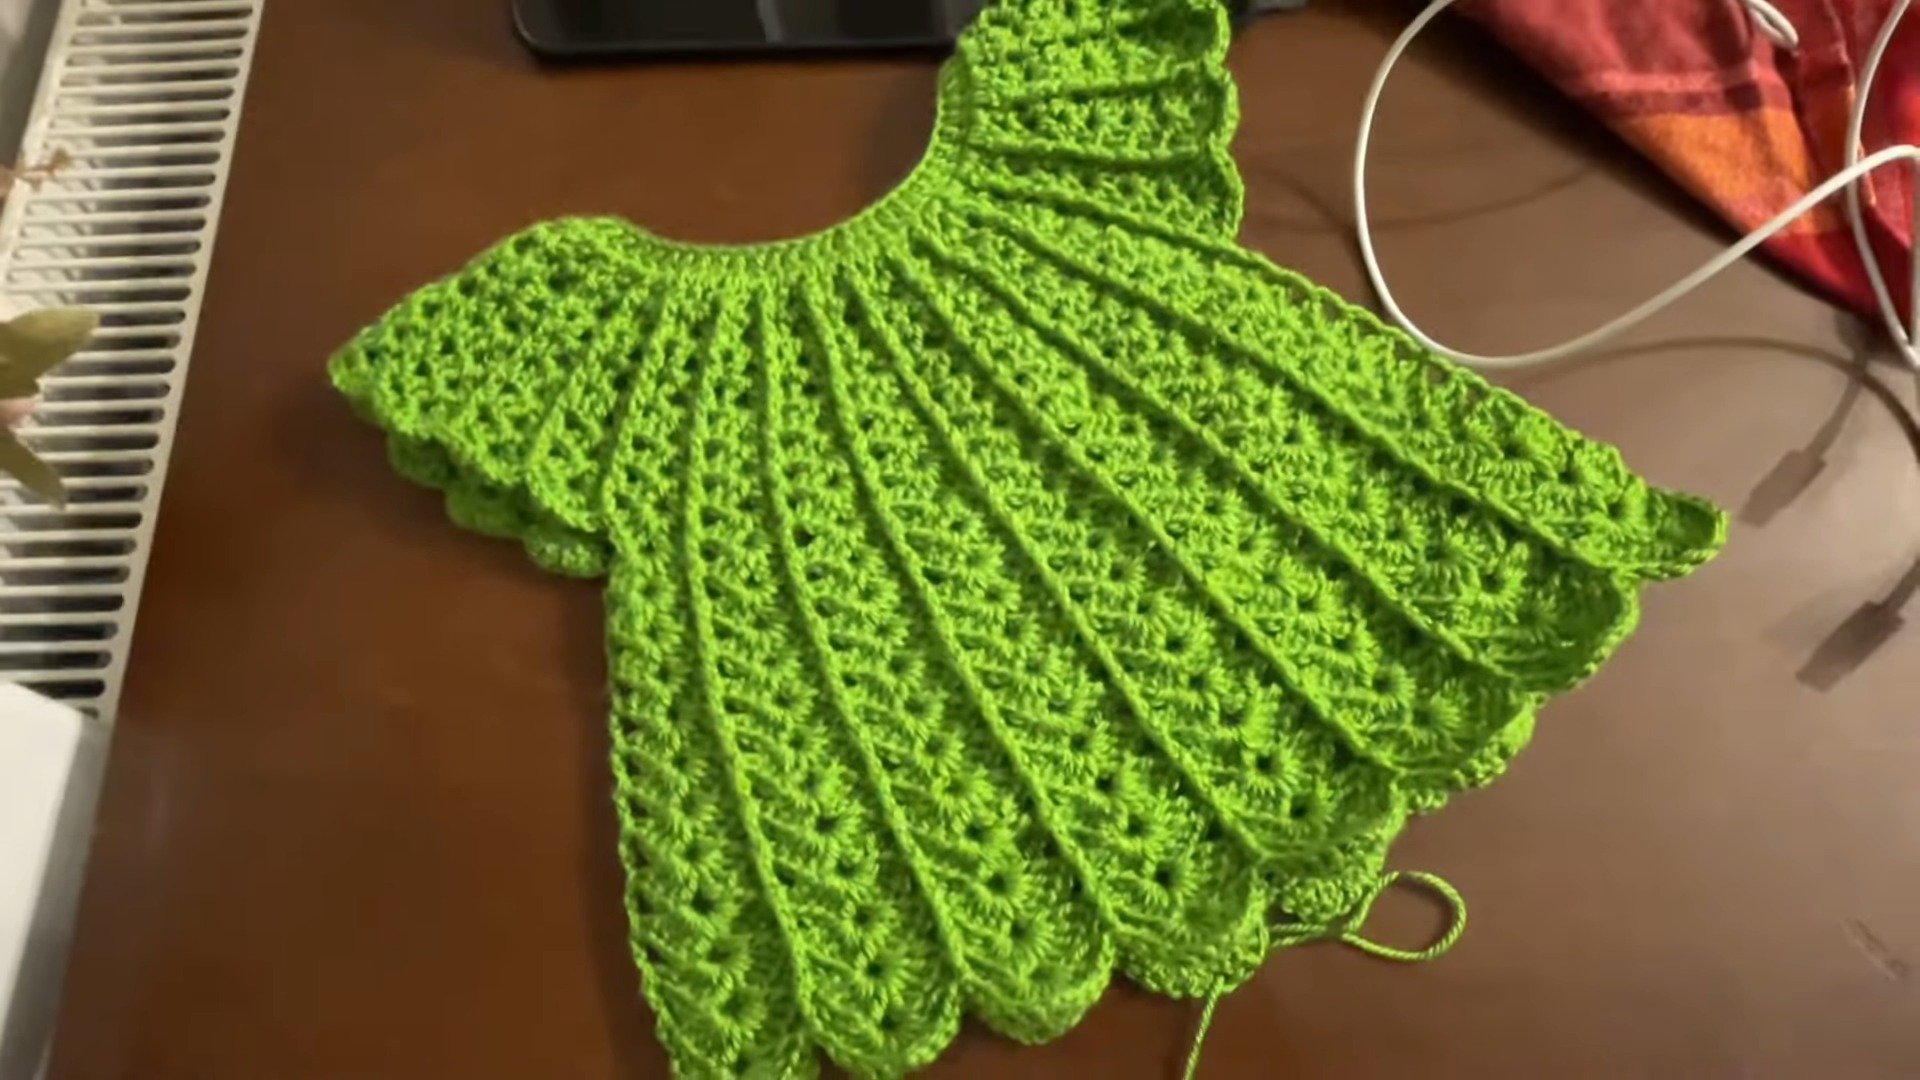
For the final hem round, chain 4 and work the largest shell into every chain-2 space:
(6 tr, ch 2, 6 tr)
Work 1 treble crochet into each single treble crochet around, then join with a slip stitch.
The larger shells create a wide, decorative edge that complements the expanding skirt.
Finishing tip: Check the scallops before fastening off. Make sure each shell is placed in its intended chain-2 space and that the hem spreads evenly around the dress.
Finishing the Dress
Step 13: Fasten Off and Weave in Ends
Cut the yarn, leaving a tail long enough to secure comfortably. Pull the tail through the final loop and use a yarn needle to weave it into the stitches on the wrong side.
Weave in any remaining yarn ends securely, taking care not to pull the fabric out of shape.
Step 14: Finish the Neck Opening
The supplied pattern leaves the back of the neckline open so the dress can be slipped over the baby’s head.
You can use either of these finishing options:
- Button closure: Attach a small button to one side of the opening and use a suitable stitch opening on the opposite side as a buttonhole.
- Tie closure: Attach two short lengths of yarn or ribbon to tie the back closed.
Baby-safety note: Any button, ribbon, or tie must be securely attached and appropriate for the baby’s age. Avoid small detachable decorations and long loose ties that could present a choking or strangulation hazard. Check all closures before every use.
Personalizing Your Princess Baby Dress
A contrasting scalloped hem can highlight the flared shape, while a carefully secured ribbon threaded through the yoke can add a decorative touch. You can also adjust the skirt length to suit your preferred style.
Before changing yarn weight or hook size, check the fit of the yoke and armholes. Altering the yarn or hook can change the finished dimensions, so test your adjustments with a small sample whenever possible.
Final Pattern Check
Before considering your dress complete, confirm that:
- The yoke sits comfortably around the neckline and chest.
- Both armholes are open and evenly positioned.
- Shells follow the chain-2 spaces consistently.
- The skirt length matches your preference.
- The scalloped hem spreads evenly.
- All yarn ends and closures are secure.
The Princess Baby Dress combines an openwork yoke with increasingly wide treble crochet shells to create its flared silhouette. Working through each section in sequence helps you track the shaping, maintain consistent shell placement, and finish with a decorative scalloped hem.