
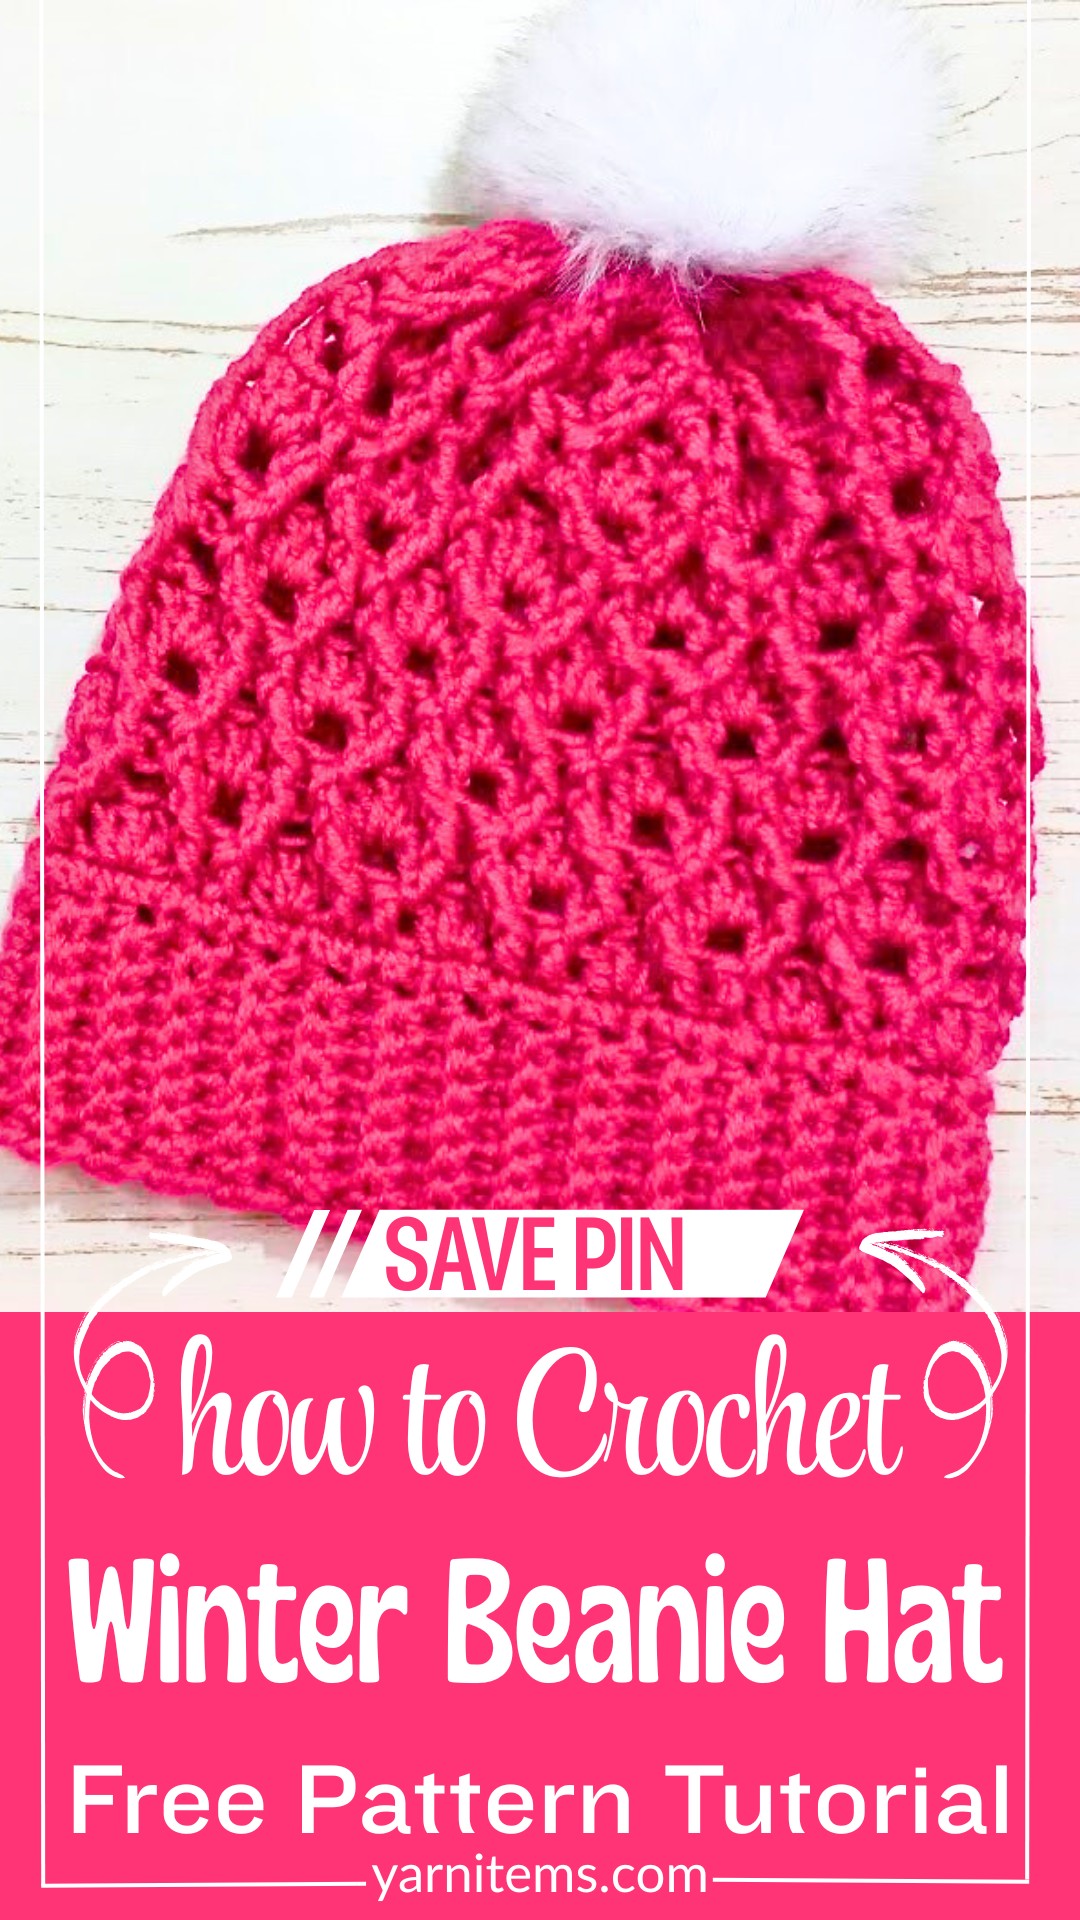
A snug, textured crochet beanie with personality and flair, made with a ribbed brim, bold post stitches, and topped with a playful pom-pom for the ultimate cozy accessory.

A crochet beanie hat is a warm and snug accessory that keeps your head cozy and stylish. This Crochet Hat is perfect for chilly days and adds a touch of personal style to your outfit. The beanie hat is special because you can make it in any size and use it for any occasion, from daily wear to winter outings.
Crochet Winter Beanie Hat Pattern
Making this crochet beanie hat is simple and fun. You only need some yarn, a crochet hook, and a little time. The beanie pattern uses easy stitches that repeat, allowing beginners to create something beautiful. By following these steps, you can make a lovely crochet hat that shows off your creativity and keeps you comfy all season long.
Credit zhavin crochet
A snug, textured beanie with personality and flair.
- Starts with a ribbed brim, worked in rows using single crochet stitches, including a back loop-only (BLO) technique for extra stretch.
- The body is built by transitioning to the round, incorporating dimensional texture with post stitches and clusters for a visually striking pattern.
- Combines front post double crochet (FPdc) and front post treble crochet (FPtc) for bold, raised cables, paired with versatile double crochet clusters.
- Shapes the crown with single crochet decreases, closing it neatly for a polished look.
- Finishes with a pom-pom for fun (optional but highly recommended for extra charm).
This beanie starts with the brim, which is both stretchy and functional thanks to the back loop-only (BLO) single crochet stitches. You’ll work the brim as a flat rectangle in rows, ultimately folding and joining it into a loop to form the base of your hat. Creating a brim this way adds a fitted, elastic quality to the edge that makes the beanie comfortable and secure to wear.

With the brim completed, the pattern transitions to the body, worked in the round along the brim’s edge. The first round of single crochet stitches ensures an even foundation, as you’ll place one stitch at the top of each ribbed row. After that, the real fun begins! Combining front post stitches (FPdc and FPtc) with double crochet clusters creates a striking, cable-like texture. This technique not only enhances the hat visually but also gives it warmth and structure, making it ideal for colder weather.

The pattern alternates between rounds of FPdc and decorative cluster stitches, keeping the texture consistent as you work toward the desired height. The stitches interlock beautifully, creating a rhythmic design that is both rewarding to crochet and visually dynamic. The hat’s body ends with plenty of height for full coverage but stops just short of the crown for seamless shaping.
For the crown, single crochet two stitches together (sc2tog) in decreasing rounds until only a small opening remains. This creates a clean, cinched closure that transitions smoothly from the body. The remaining gap at the top is secured by threading the yarn tail through the stitches, forming a tidy, circular crown.

Finally, you can add a pom-pom to the top for a playful finishing touch. Whether you go for a classic handmade pom-pom, faux fur, or a colorful accent, this embellishment is an easy way to personalize your beanie.
Video Tutorial
Step-by-Step Pattern
Materials
- Yarn: Worsted-weight yarn
- Hooks:
- 5.0 mm crochet hook (for the brim)
- 5.5 mm crochet hook (for the body of the hat)
- Optional Tools:
- Tapestry needle (for weaving in ends)
- Scissors
- Pom-pom (optional for decoration)

Pattern Instructions
1. The Brim
Step 1: Using the 5.0 mm hook, make a slip knot and chain 9.
Step 2: Skip the first chain and make one single crochet in the second chain. Continue making one single crochet into each chain (8 stitches total).
Step 3: Chain 1, turn your work, and make:
- 1 single crochet into the first stitch (under both loops).
- BLO single crochet in the next 6 stitches.
- 1 single crochet in the last stitch (under both loops).
Step 4: Repeat Step 3 until the brim measures the desired circumference of the hat. Ensure the stitch count is divisible by 5 (e.g., 60 rows for an adult beanie).
Step 5: Fold the brim in half and join the two edges together with slip stitches.
2. The Body of the Hat
Step 1: Switch to the 5.5 mm hook. Turn your work to the right side.
Step 2: Work 1 round of single crochets along the long edge of the brim:
- Make 1 single crochet at the top of each ribbed row.
- At the end of this round, you should have as many single crochets as ribbed rows (e.g., 60 stitches).
- Join the round with a slip stitch.
Step 3: Begin the body pattern:
- Round 1:
- Chain 2 (does not count as a stitch).
- Make 2 FPdc around the first two stitches.
- Skip 1 stitch, and make 3 double crochets in the next stitch.
- Skip 1 stitch, and repeat the sequence (2 FPdc, skip 1, 3 dc) until the end of the round. Join with a slip stitch.
- Round 2:
- Chain 1.
- Skip the first post stitch, and make 1 double crochet in the first dc of the group below.
- Work FPtc around the skipped post stitch.
- Skip the next two dc stitches. Work FPtc around the next FPdc from the previous row.
- Continue repeating this crossed pattern (dc, FPtc, skip 2 dc, FPtc) until the round is complete.
- Round 3:
- Chain 2. Repeat the pattern by alternating FPdc stitches and clusters of 3 dc into the spaces between stitches from the previous round.
- Round 4:
- Repeat Rounds 1-3 until the hat measures the desired height, stopping short of the crown.
3. Shaping the Crown
Step 1: Begin decreasing at the top:
- Make single crochet decreases (sc2tog) over the next two stitches until the end of the round.
Step 2: Repeat Step 1 for 2-3 more rounds to close the gap at the top of the hat.
Step 3: Cut a long tail, thread it through a tapestry needle, and weave the tail through the remaining stitches. Pull tight to close the crown completely.
4. Adding the Pom-Pom (Optional)
Attach a pom-pom to the top of the hat for a decorative touch.
Troubleshooting and Suggestions:
- Brim Stretch: When working the ribbed brim, ensure your tension remains consistent—too tight, and the brim won’t stretch comfortably. If the brim doesn’t have adequate give, double-check that you’re crocheting BLO as indicated, or move up a hook size.
- Texture Technique: Front post stitches can be tricky at first, especially FPtc, which requires extra height. Make sure you’re inserting your hook correctly around the posts and pulling your loops up to the same height as surrounding stitches to avoid puckering.
- Decreases and Gaps: When shaping the crown, pay attention to your sc2tog stitches. If there are noticeable gaps, try tightening your tension slightly or working a second round of stitches over the decreases to smooth things out.
- Customization Ideas: This hat is endlessly versatile! Experiment with different color combinations by making the body in color-blocked sections or alternating the FPdc stitches with contrasting yarn. You can also add embellishments like crochet flowers or small appliqué motifs for a personalized touch.


