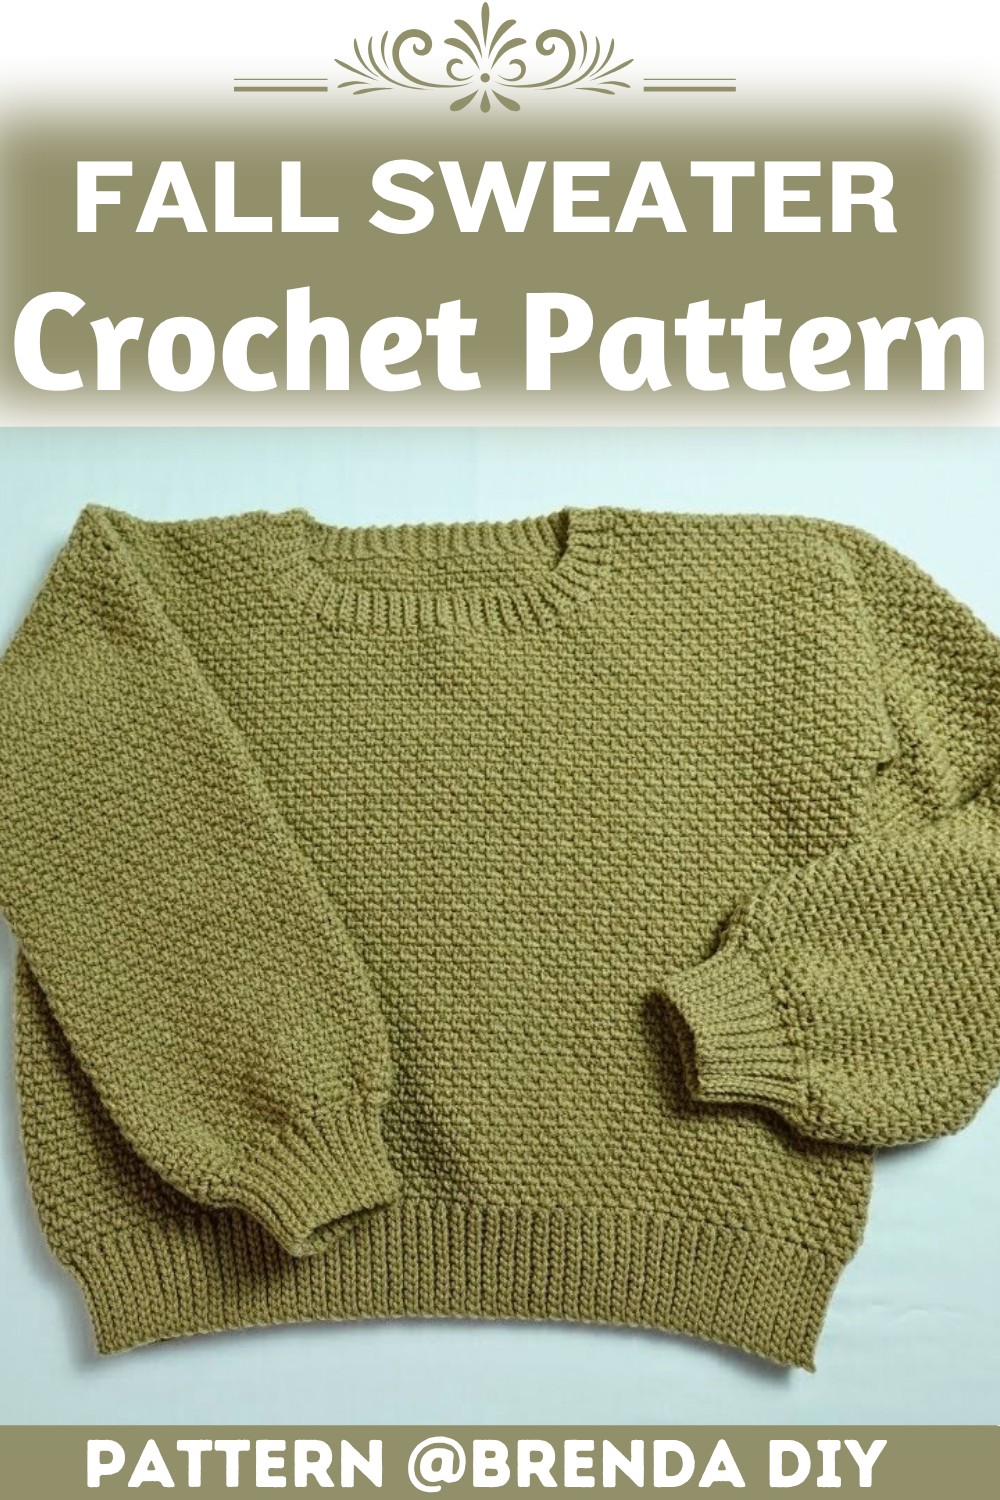
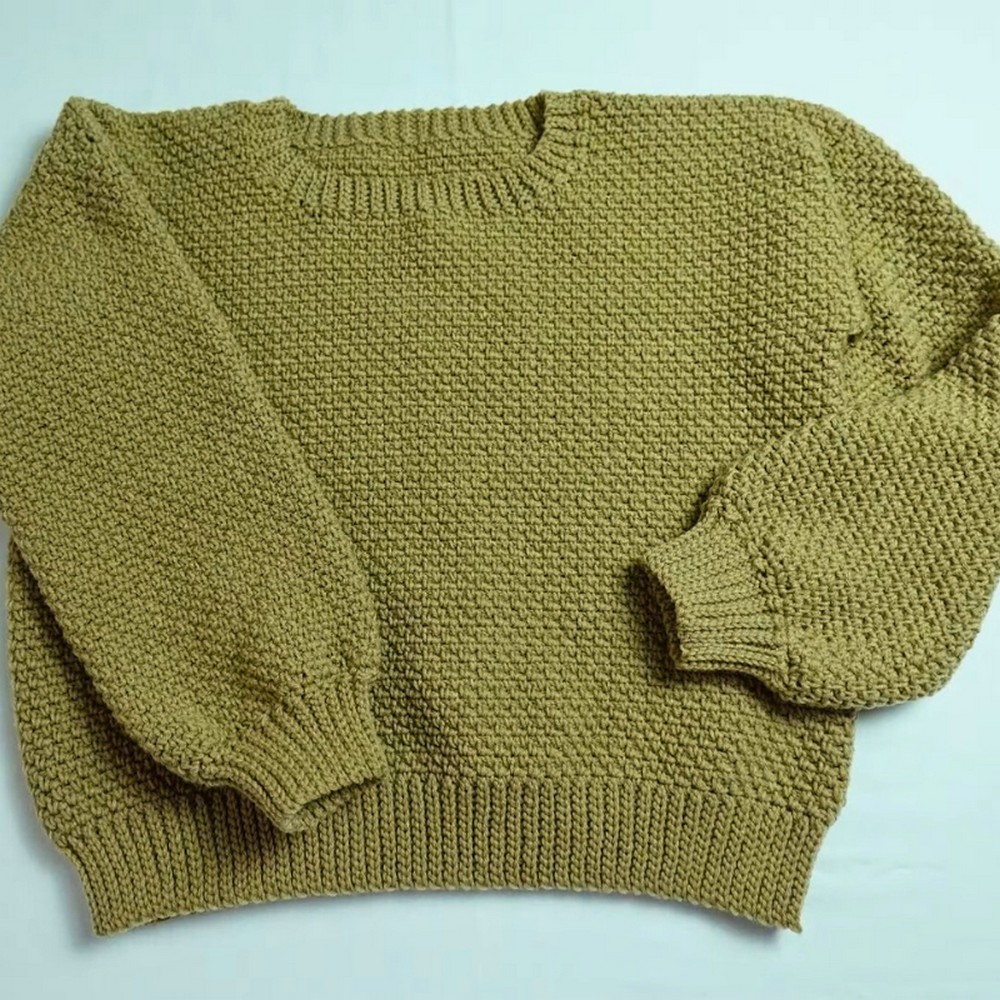
This fall sweater is a classic, warm, and customizable crochet pattern that’s ideal for transitioning into sweater weather. The simple, beginner-friendly design makes it easy to make your own comfy fall wardrobe staple.

A fall sweater is more than just clothing; it’s like a warm hug you can wear on chilly days. This crochet sweater pattern is special because it’s cozy, stylish, and perfect for crisp autumn weather. If you need something comfortable to wear during a walk in the cool breeze or to layer up for a casual evening, this sweater has you covered.
Crochet Fall Sweater
This Crochet Sweater is simple enough for beginners and has a soft, relaxed fit that goes well with your favorite jeans or leggings. The making process is fun, and the result is a sweater you’ll want to wear all season long. Imagine wrapping yourself in something you made with your own hands; it’s not only practical but also very rewarding.
Credit Brenda DIY
Pattern Highlights
- Size options included: Small, Medium, Large, and XL – adjust the foundation chain for your perfect fit.
- Panel construction: Two identical panels (front and back) worked in rows of single crochet.
- Optional cropping: Customize the front panel’s length for a shorter and trendier look.
- Sleeves created seamlessly in the round: Includes optional tapering for a tailored fit.
- Ribbed finishes: Neckline, hem, and cuffs are polished with simple ribbing.
- Decorative touches: Add fall-themed appliqués for personal flair.
This sweater begins with a foundation chain, which sets the width of your sweater’s torso. The chain length varies depending on the size you’re making (from Small to XL), making it easy to tailor the pattern to fit your measurements. Once your chain is ready, the next step is to create individual front and back panels—both worked in single crochet (sc) rows for a simple and sturdy finish. Feel free to modify the length of the panels for a slightly cropped or oversized look, depending on your preference.

Once the panels are complete, they’re joined at the shoulders using a yarn needle and simple seams, leaving an opening for the neckline. This creates the base structure of your sweater. From there, you’ll add arms by crocheting sleeves directly into the armhole openings. Using double crochet (dc) stitches worked in the round, the sleeve length and taper can be customized. Reducing stitch count strategically ensures a clean fit that narrows toward the cuffs.

Finally, the neckline, hem, and sleeves are enhanced with ribbing. Ribbing is worked using single crochet stitches evenly along the edges, which gives the sweater crisp lines, prevents curling, and adds a polished finish. Appliqués like cute crochet pumpkins or maple leaves can then be sewn on for a seasonal accent.

Video Tutorial
Step-by-Step Pattern
Materials & Tools Needed
-
Yarn: Weight 4 (Medium/Worsted) yarn. (The tutorial features an olive/sage green autumn hue).
-
Crochet Hook: 5.0 mm hook (Size H-8).
-
Tools: Yarn needle (darning needle), scissors, and 4 locking stitch markers.
Finished Size & Customization Ideas
-
Size Shown: Standard Women’s Small/Medium (oversized look).
-
Customization:
-
Width: Increase or decrease the initial number of rows made on your waistband to change the body circumference.
-
Length: Add more repeat rows to the body panel before reaching the shoulder shaping section to make the sweater longer, or decrease rows for a cropped fit.
-
Sleeve Length: Adjust the total row count on the sleeves before completing the decrease cuff row.
-
Pattern Abbreviations & Terminology (US Terms)
-
Ch: Chain
-
Sl St: Slip stitch
-
BLO: Back Loop Only
-
SC: Single crochet
-
Sk: Skip
-
Sp: Space
-
PM: Place Marker
-
SC2tog: Single crochet two together (decrease)
-
* to *: Repeat instructions between asterisks
Step-by-Step Detailed Crochet Instructions
1. The Waistband (Ribbing)
-
Row 1: Ch 13. Sl st in the 2nd chain from your hook and in every remaining chain across. (12 sts)
-
Row 2: Ch 1, turn. Work 1 Sl St BLO in each stitch across to the end.
-
Rows 3 – 96: Repeat Row 2. Do not fasten off after the final row.
2. Back Panel
-
Row 1: Turn your waistband horizontally to work along the long, flat side of your ribbing rows. Ch 2, skip the 1st row edge. * SC into the edge of the next ribbing row, ch 1, skip 1 row *. Repeat from * to * across the entire length of the band, ending with a final SC, turn. (96 sts / spaces total)
-
Row 2: Ch 2 (counts as your first SC + ch-1 space). * SC inside the next ch-1 space from the previous row, ch 1 *. Repeat from * to * across the row, placing your final SC into the turning chain space, turn.
-
Rows 3 – 76: Repeat Row 2 continuously.
Shoulder Shaping (Back Section 1):
-
Row 77: Count in exactly 33 stitches from each outer edge toward the center and mark both points with a PM. Ch 2, turn. * SC in the next ch-1 space, ch 1 *. Repeat from * to * up until you reach the final two chain spaces right before your stitch marker. Work a SC2tog decrease across those last 2 spaces, turn.
-
Row 78: Ch 1, turn. * SC into the next ch-1 space, ch 1 *. Repeat from * to * across back to the outer edge of the panel.
-
Row 79: Ch 2, turn. * SC in the next ch-1 space, ch 1 *. Repeat from * to * until the final two chain spaces of the shoulder block remain. Work a SC2tog decrease, turn.
-
Row 80: Ch 2, turn. * SC in the next ch-1 space, ch 1 *. Repeat from * to * across the row to the edge. Fasten off and leave a long tail.
Shoulder Shaping (Back Section 2):
-
Attach your yarn at the opposite outer edge of Row 76.
-
Rows 77 – 80: Repeat the exact same sequence as Section 1 to create your second symmetrical shoulder step. Fasten off.
3. Front Panel
-
Rows 1 – 64: Repeat Rows 1 through 64 exactly as done for your Back Panel.
Neckline & Shoulder Shaping (Front Section 1):
-
Row 65: Count in exactly 37 stitches from each outer edge toward the center and mark both points with a PM. Ch 2, turn. * SC in the next ch-1 space, ch 1 *. Repeat from * to * until two chain spaces remain before your marker. Work a SC2tog decrease across them, turn.
-
Row 66: Ch 1, turn. * SC in the next ch-1 space, ch 1 *. Repeat from * to * across to the outer panel edge.
-
Row 67: Ch 2, turn. * SC in the next ch-1 space, ch 1 *. Repeat from * to * until the final two chain spaces remain before the inner neck edge. Work a SC2tog decrease, turn.
-
Rows 68 – 71: Repeat Rows 66 and 67 sequentially to continue tapering the inner neck line.
-
Row 72: Ch 2, turn. * SC in the next ch-1 space, ch 1 *. Repeat from * to * across the shoulder to the outer edge.
-
Rows 73 – 80: Ch 2, turn. * SC in the next ch-1 space, ch 1 *. Repeat from * to * across. Fasten off.
Neckline & Shoulder Shaping (Front Section 2):
-
Attach your yarn at the marked inner stitch on the opposite side of the neck opening.
-
Row 65: Ch 1. * SC in the next ch-1 space, ch 1 *. Repeat from * to * across to the outer edge of the panel, turn.
-
Rows 66 – 80: Repeat the exact same decreasing and straight-row sequence used on the first shoulder side so they match perfectly. Fasten off.
4. Assembly & Seaming
-
Place the front and back panels perfectly aligned on top of one another with right sides facing in.
-
Using your yarn needle and a mattress or whip stitch, sew across the flat top edges of both shoulders.
-
Align the sides of the sweater. Sew from the bottom waistband upwards along the sides. Stop sewing exactly 32 rows before reaching the top shoulder seam to leave open space for the armholes.
5. Sleeves
-
Round 1: Attach your yarn at the bottom center underarm of your armhole opening. Ch 1, work a SC into that same spot, Ch 1, skip the next row edge. * SC into the edge of the next row, Ch 1, skip 1 row edge *. Repeat from * to * all the way around the circular opening of the armhole. Join with a Sl St to your first SC, turn.
-
Round 2: Ch 1, turn. * SC directly into the next ch-1 space, ch 1 *. Repeat from * to * all the way around the sleeve. Join with a Sl St to the first stitch, turn.
-
Rounds 3 – 73: Repeat Round 2 continuously to build the sleeve length.
-
Round 74 (Decrease Round): Ch 1, turn. * SC in the next stitch, SC2tog across the subsequent 2 stitches *. Repeat from * to * all the way around the wrist opening to gather and cinch it before adding the cuff. Join with a Sl St.
6. Wrist Cuffs
-
Foundation: Ch 13 directly from the sleeve edge.
-
Row 1: Sl st into the 2nd chain from your hook and in every remaining chain down back toward the sleeve wrist line. Sl st into the next 2 unworked stitches along the sleeve edge to anchor it, turn.
-
Row 2: Skip those 2 anchoring slip stitches you just made on the sleeve. Work 1 Sl St BLO in each of the 12 cuff stitches up to the edge, turn.
-
Row 3: Ch 1, turn. Work 1 Sl St BLO back down in each of the 12 stitches. Sl st into the next 2 unworked stitches along the sleeve edge, turn.
-
Rows 4 – 44 (or until circumference is complete): Repeat Rows 2 and 3 all the way around the wrist opening. Sew the final row edges of the cuff together to close it. Repeat for the second sleeve.
7. Collar Ribbing
-
Attach your yarn at any stitch along the back panel’s neckline edge.
-
Foundation: Ch 6.
-
Application: Repeat the exact same structural ribbing process used on your wrist cuffs (working Sl St BLO up and down while anchoring down into every 2 stitches along the neck boundary line) all the way around the collar circumference. Sew the starting and ending edges together to finish.
Finishing Techniques
-
Weave in all remaining loose yarn tails securely on the inside of the sweater using your darning needle.
-
Turn your completed sweater right-side out. You can lightly steam block the fabric if desired to settle your stitches.