Crochet Minions Hat Pattern for Babies (6-12 Months)
Looking for a playful baby hat? This crochet Minions design combines bright yellow and blue stripes, a bold goggle eye, playful hair, and side tassels for a character-inspired finish.
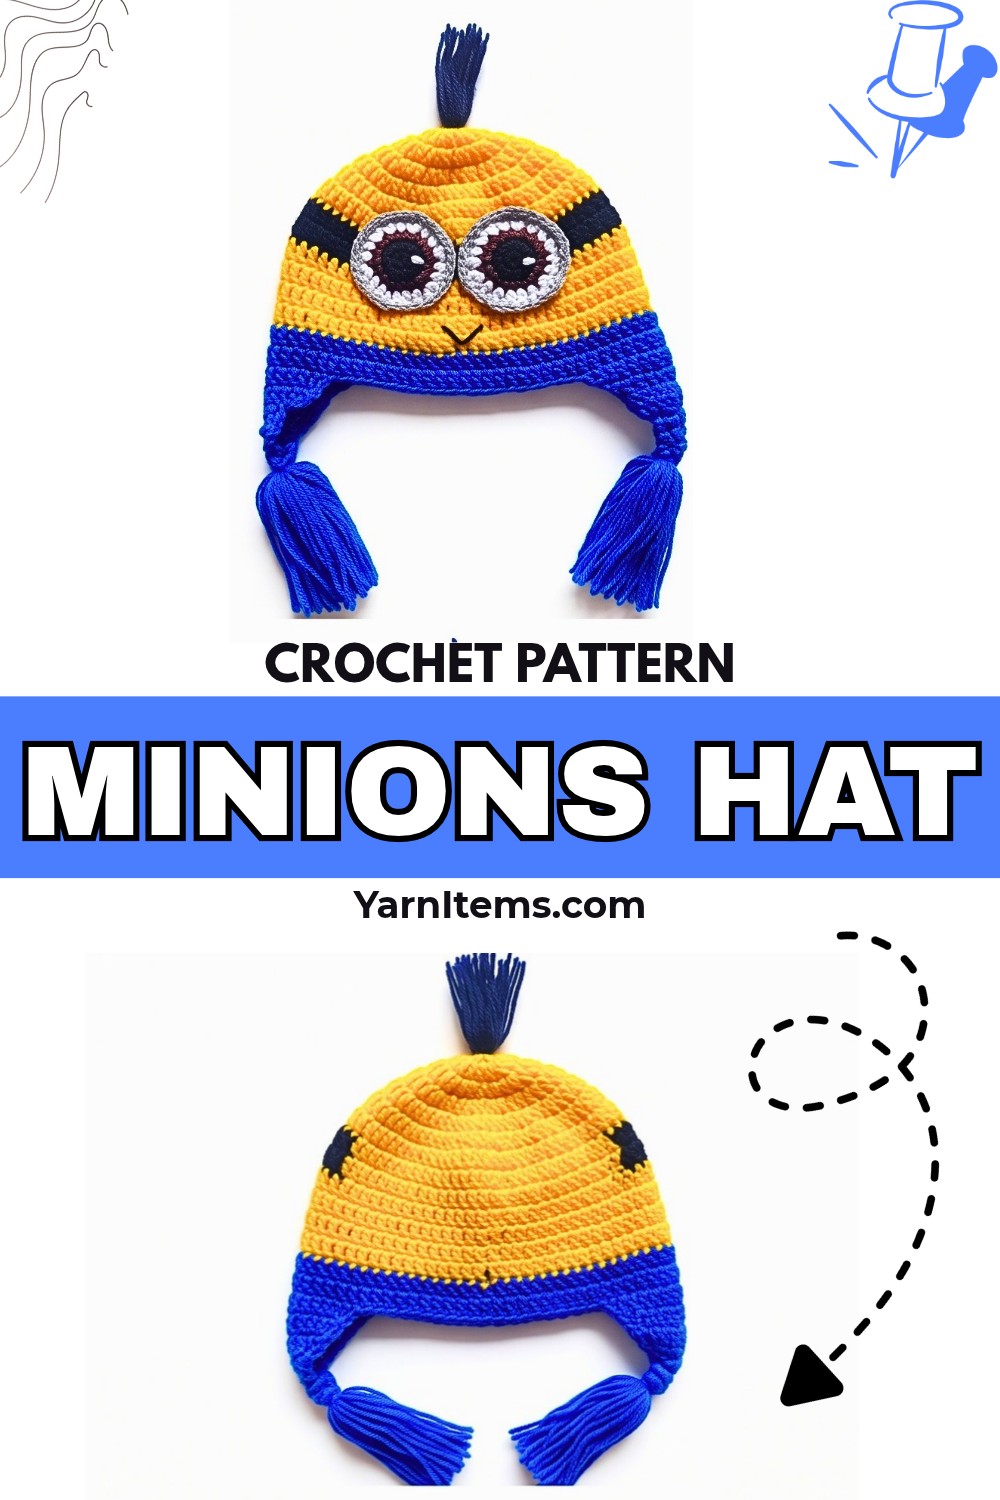
Bright yellow and blue stripes give this crochet Minions hat its recognizable character-inspired look. A large goggle eye, short black hair tuft, and matching blue ear-flap tassels make it stand out from an ordinary crochet hat while keeping its playful style.
This crochet tutorial guides you through building the hat, shaping two ear flaps, making tassels, and creating the eye appliqué. You’ll also learn how to assemble each feature and adjust the design for a different size. Follow the steps below to bring this little character to life.
Credit Dabs Crochet
Materials & Tools
- Yarn: Indophil 4-ply acrylic yarn in yellow, black, blue, grey, brown, and white.
- Crochet hook: 3.5 mm.
- Tools: Tapestry needle, scissors, and a lighter for cautiously sealing acrylic yarn ends if needed.
Finished size: Designed for babies aged 6-12 months.
Customization: Adjust the crown increase rounds before working even rounds, or change yarn weight and hook size. Make two eye appliqués instead of one for a classic two-eyed Minion look.
Crochet Abbreviations
- ch: Chain
- st / sts: Stitch / stitches
- sl st: Slip stitch
- sc: Single crochet
- hdc: Half double crochet
- dc: Double crochet
- dc2tog: Double crochet two together
- Rnd(s): Round(s)
- Row(s): Row(s)

Step-by-Step: Crochet Minions Hat
Follow the sequence below to create the striped hat base first, then add ear flaps, tassels, the goggle eye, and finishing details.
Step 1: Create the Yellow Crown
Begin with yellow yarn to form the rounded top of the hat. The first seven rounds gradually expand the crown, so keeping track of stitch counts helps maintain its shape.
Round 1: Make a magic ring, ch 1, and work 10 sc into the ring. Join with a sl st to the first sc.
Round 2: Ch 2 (counts as 1 dc), work 2 dc in the same stitch, then 2 dc in each stitch around. You should have 20 dc. Join with a sl st to the top of the beginning ch-2.
Round 3: Ch 2, then repeat 2 dc in the next st, 1 dc in the next st around. You should have 30 dc. Join with a sl st.
Round 4: Ch 2, then repeat 2 dc in the next st, 1 dc in each of the next 2 sts around. You should have 40 dc. Join.
Round 5: Ch 2, then repeat 2 dc in the next st, 1 dc in each of the next 3 sts around. You should have 50 dc. Join.
Round 6: Ch 2, then repeat 2 dc in the next st, 1 dc in each of the next 4 sts around. You should have 60 dc. Join.
Round 7: Ch 2, then repeat 2 dc in the next st, 1 dc in each of the next 5 sts around. You should have 70 dc. Join and change to black yarn.
Check your work: The crown should lie relatively flat rather than curl into a tight bowl. If the edges ripple noticeably, check your stitch counts before continuing.
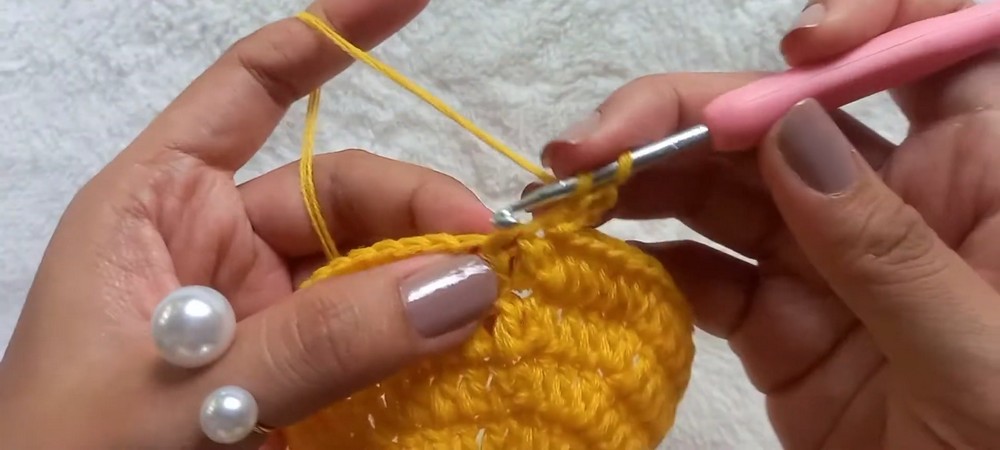
Step 2: Add the Black Goggle Band
The black stripe creates the band behind the Minion’s eye. Keep the stitch count even so the band remains consistent around the hat.
Rounds 8-9: With black yarn, ch 2 and work 1 dc in each stitch around, maintaining 70 dc per round. Join with a sl st at the end of each round.
At the end of Round 9, change back to yellow yarn.
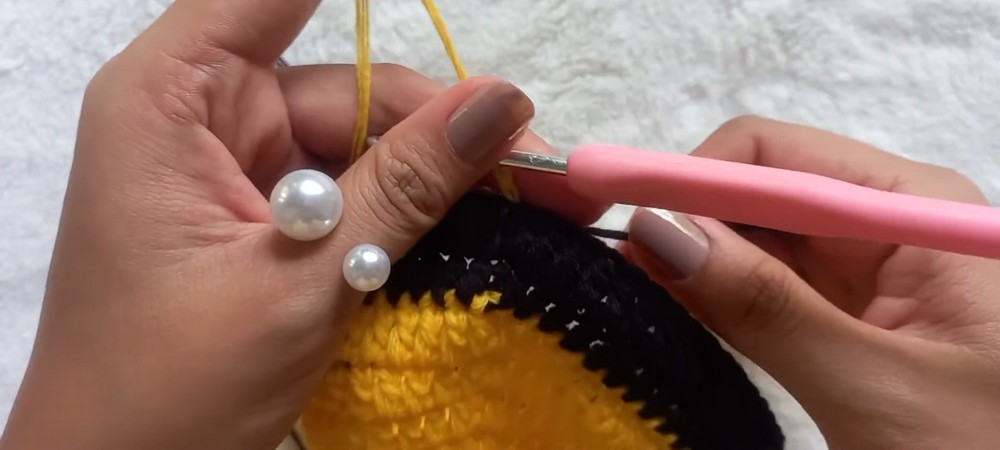
Step 3: Continue the Yellow Body
The yellow section gives the character its familiar bright body color and provides space for the goggle appliqué.
Rounds 10-13: With yellow yarn, ch 2 and work 1 dc in each stitch around. Maintain 70 dc per round and join at the end of each round.
At the end of Round 13, change to blue yarn.
Step 4: Finish the Blue Hat Brim
Blue yarn forms the lower section of the hat and provides the base for both ear flaps.
Rounds 14-15: With blue yarn, ch 2 and work 1 dc in each stitch around, maintaining 70 dc per round. Join with a sl st.
Fasten off and weave in the loose ends.
Check the stripes: The hat should now have a rounded yellow crown, a black band, a longer yellow section, and a blue lower border. Keep the color changes neat because the goggle will sit across the yellow and black sections.
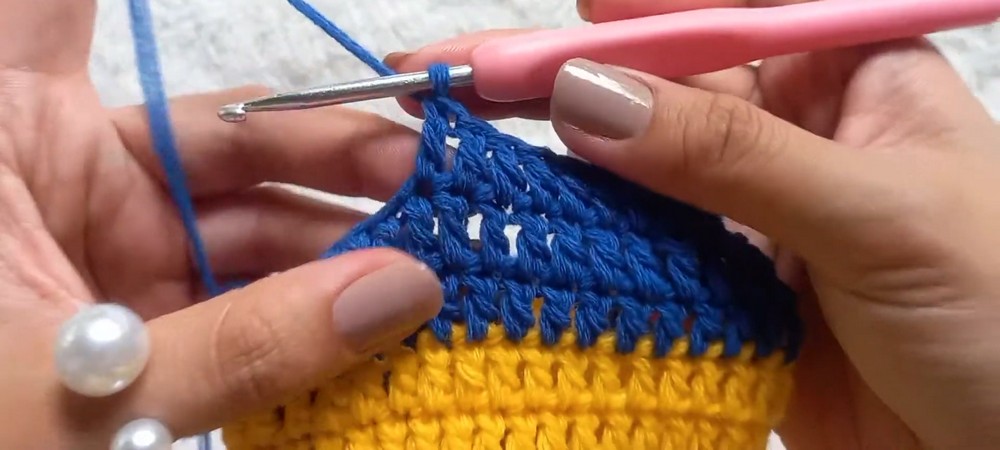
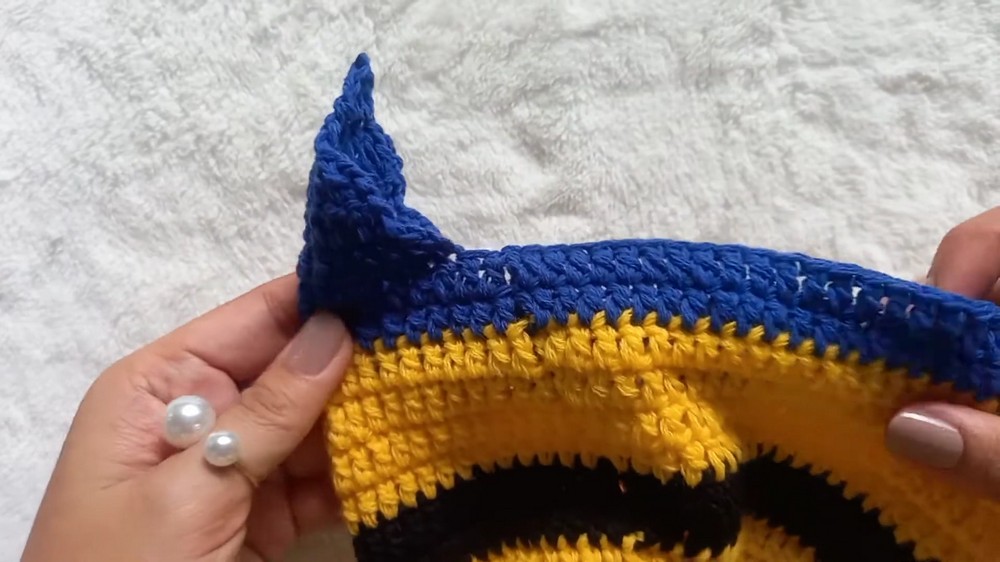
Step 5: Shape the First Ear Flap
Ear flaps extend from the blue border to cover the sides of the baby’s ears. Make two matching pieces and place them symmetrically on opposite sides of the hat.
Join blue yarn at the designated starting point along the lower border.
Row 1: Ch 2 and work 1 dc in each of the next 13 stitches. Turn. You should have 13 stitches.
Row 2: Ch 2, work 1 dc2tog over the first 2 stitches, then 1 dc in each of the next 9 stitches, and 1 dc2tog over the final 2 stitches. Turn.
Row 3: Ch 2, work 1 dc2tog, then 1 dc in each of the next 6 stitches. Turn.
Row 4: Ch 2, work 1 dc2tog, then 1 dc in each of the next 3 stitches. Turn.
Row 5: Ch 2 and work 1 dc2tog. Ch 1, cut the yarn, and pull the end through to secure.
The ear flap should taper toward its bottom point. Keep the decreases aligned so the sides narrow neatly.
Step 6: Make the Second Ear Flap
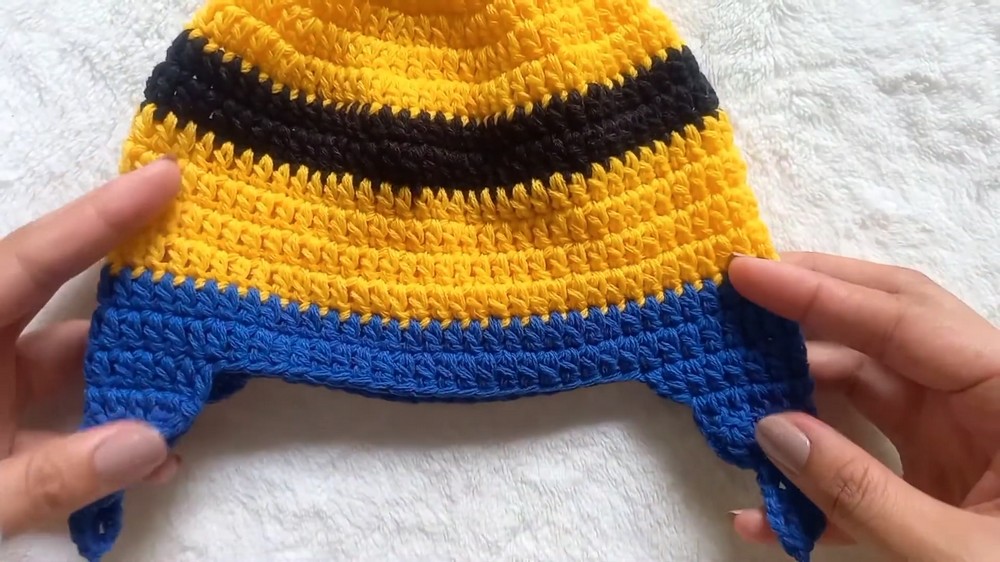
Repeat Rows 1–5 on the opposite side of the hat, following the same stitch counts and decrease sequence.
Placement tip: Compare both flaps before adding tassels. They should begin at similar heights and taper to matching points, giving the finished hat a balanced appearance.
Step 7: Make and Attach the Blue Tassels
The tassels add movement and complete the playful look of the ear flaps.
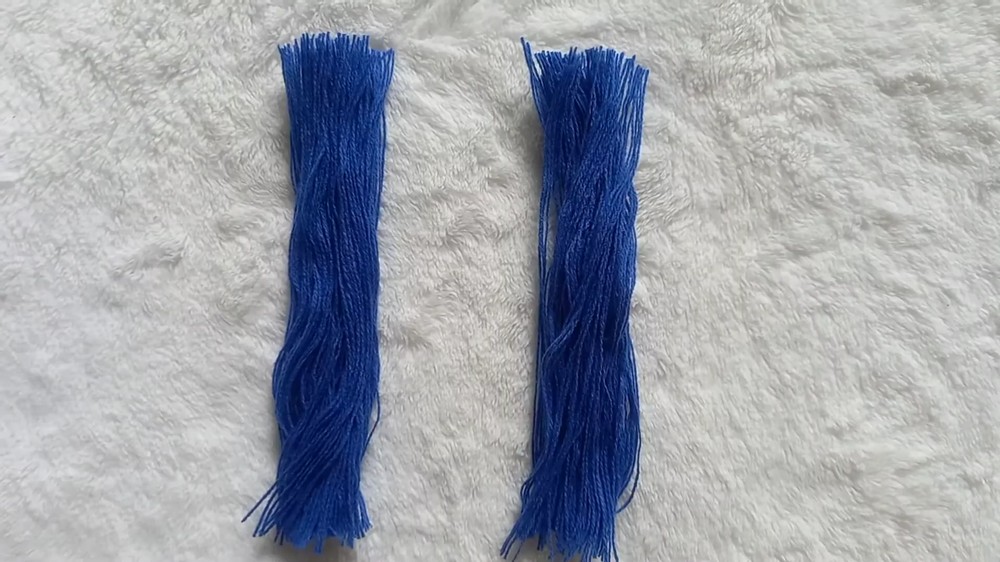
- Cut several strands of blue yarn, each approximately 4-5 inches long.
- Gather the strands together and fold them in half.
- Tie them securely to form a tassel.
- Make a second tassel using the same method.
- Attach one tassel firmly to the bottom point of each ear flap.
Trim the ends so both tassels are approximately the same length. Since this hat is intended for a baby, secure all attachments carefully and check them before use.
Step 8: Crochet the Black Center of the Eye
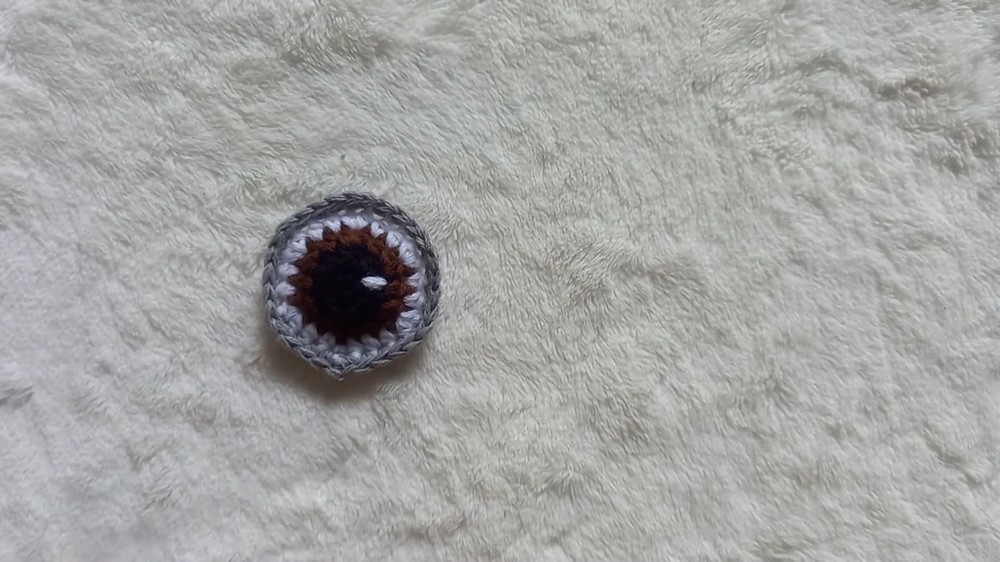
The eye appliqué is built in layers, beginning with black and expanding through brown, white, and grey. These color changes create the pupil and surrounding goggle rings.
Round 1: With black yarn, make a magic ring, ch 1, and work 6 sc into the ring. Join with a sl st.
Round 2: Ch 2 and work 2 hdc in each stitch around. You should have 12 hdc. Join with a sl st, then change to brown yarn.
Step 9: Expand the Brown Iris
Brown forms the next ring around the black center.
Round 3: With brown yarn, ch 2, then repeat 2 hdc in the next st, 1 hdc in the next st around. You should have 18 hdc. Join with a sl st and change to white yarn.
Keep the increases evenly distributed so the appliqué remains rounded.
Step 10: Add the White Goggle Ring
White yarn creates a visible border around the iris and helps separate it from the grey outer frame.
Round 4: With white yarn, ch 2, then repeat 2 hdc in the next st, 1 hdc in each of the next 2 sts around. You should have 24 hdc. Join with a sl st and change to grey yarn.
Step 11: Complete the Grey Outer Frame
The grey edging gives the eye its finished goggle appearance and provides a border for sewing it onto the hat.
Round 5: With grey yarn, ch 2, then repeat 2 sc in the next st, 1 sc in each of the next 3 sts around. You should have 30 sc.
Join with a sl st and fasten off, leaving a long grey yarn tail for sewing.
Two-eye option: To create a two-eyed Minion, make a second appliqué using the same five-round sequence before assembling the hat.
Step 12: Sew the Eye onto the Hat
Position the completed eye centrally over the black and yellow striped section. The grey outer ring should sit neatly against the hat without pulling the fabric out of shape.
Thread the long grey tail through a tapestry needle and whip-stitch around the outer edge of the appliqué, catching the hat fabric with each stitch.
Before securing the final stitches, check that the eye is centered and lies flat. Fasten off and weave in the remaining yarn securely.
Step 13: Add the Black Hair Tuft
Short black strands create the Minion’s recognizable tufted hair at the top of the crown.
- Cut several short strands of black yarn.
- Insert the strands securely through stitches at the top center of the hat.
- Tie them firmly in place.
- Trim the ends evenly to create a small tuft.
Keep the tuft compact and secure rather than leaving long loose strands.
Step 14: Embroider the Smile
A simple embroidered smile adds expression beneath the goggle.
Thread a tapestry needle with black yarn and stitch a small curved smile directly below the goggle strap. Keep the embroidery centered and avoid pulling the stitches so tightly that the yellow fabric puckers.
Weave in the ends and check that the expression looks balanced.
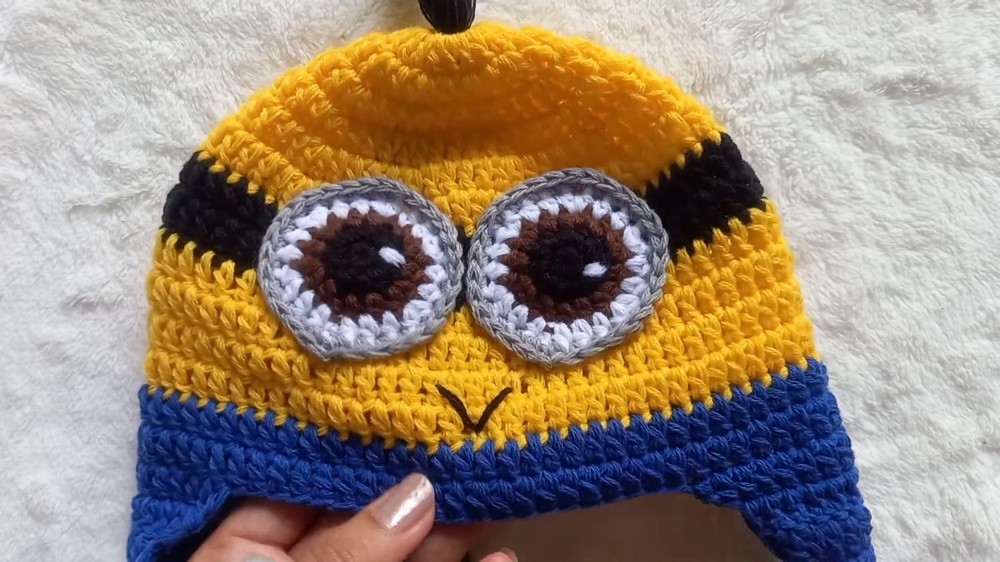
Step 15: Check and Finish the Hat
Inspect the completed hat before use.
- Confirm that the eye is securely sewn in place.
- Check both ear flaps and tassels for loose attachments.
- Weave in all remaining yarn ends.
- Make sure the hair tuft and embroidered smile are secure.
- Check that the hat fits comfortably without stretching or pulling.
The original instructions mention using a lighter to seal acrylic yarn ends. If you choose to do this, keep the flame away from the finished hat and all flammable materials, and never perform this step while the hat is being worn or near a baby. A safer option is to weave in and secure the yarn ends with a tapestry needle.
Your crochet Minions hat is ready to wear once every feature is secure and the fit is suitable for your baby.