Crochet Butterfly Ring Pattern with Adjustable Band
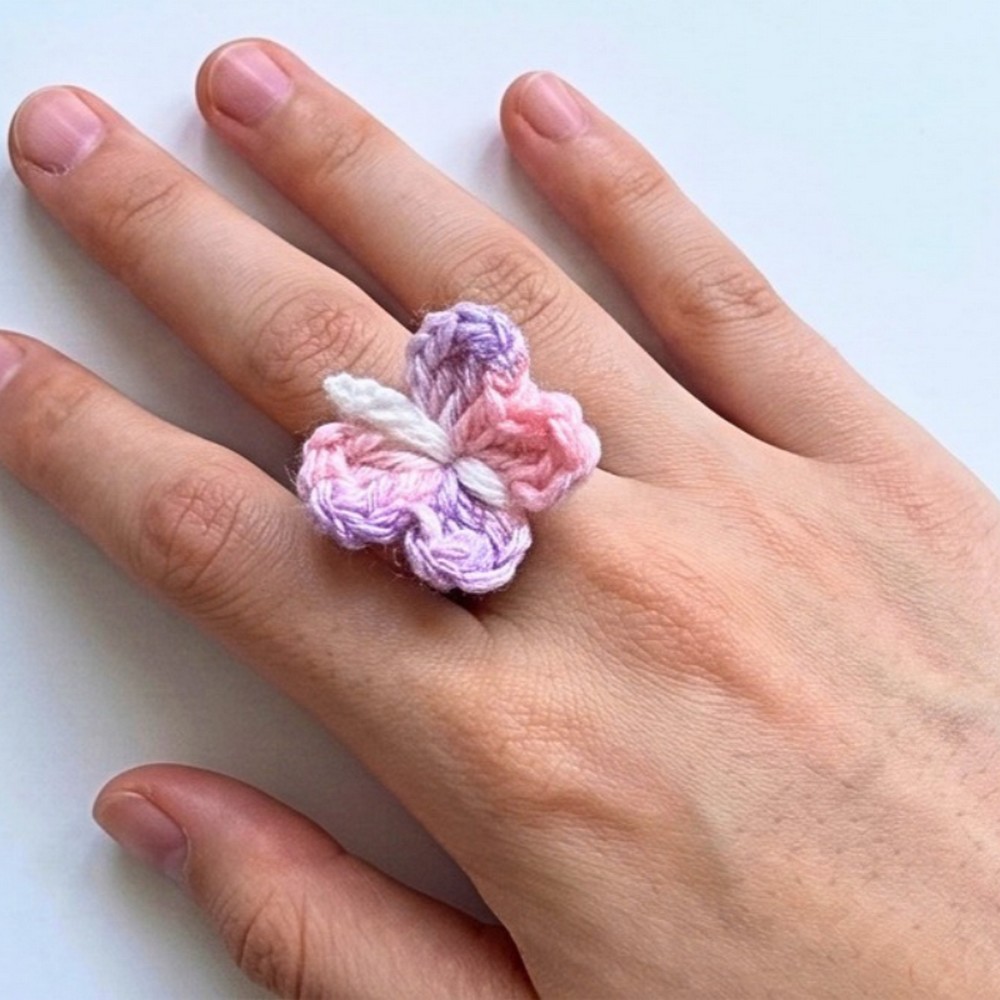
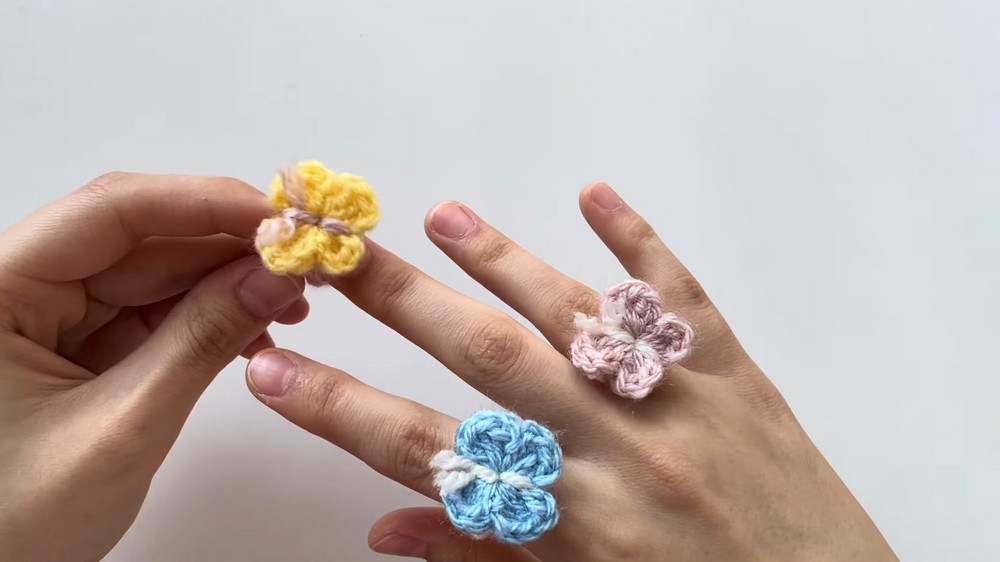
Looking for a tiny crochet accessory? This butterfly ring pairs four delicate wings with an adjustable band, giving a simple handmade ring a playful finish.
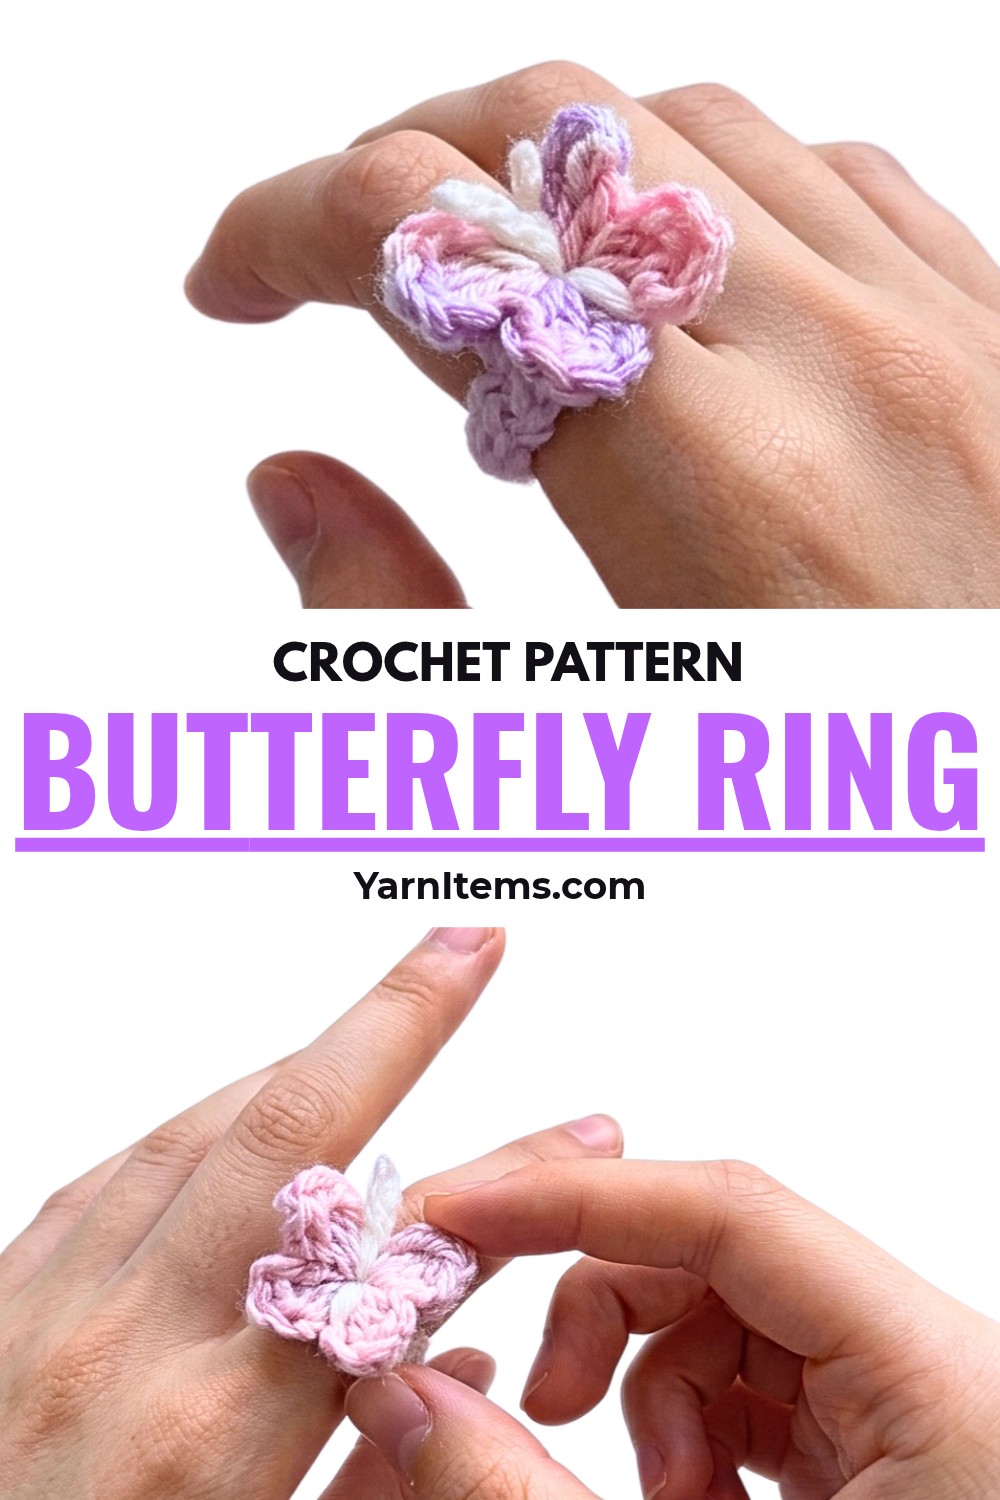
Bright wings can turn this tiny crochet ring into a surprisingly eye-catching accessory. The butterfly is made from just one magic ring, with two larger upper wings and two smaller lower wings that create the recognizable shape.
Choosing your own wing and band colors makes the design easy to personalize, while the crochet ring base can be lengthened or shortened to suit your finger. You’ll also use the long finishing tail to form the butterfly’s body and curled antennae, so very little yarn is needed for the complete crochet piece.
Credit Crochet with ice
Materials & Tools Needed
- Crochet Hook: 3.5 mm
- Yarn: Two colors:
- Color A: Butterfly wings
- Color B: Ring base and butterfly body
- Yarn Needle: For assembly and sewing
- Scissors
Finished Size & Customization
The butterfly itself has a fixed miniature size, while the ring band can be adjusted to fit your finger.
For the band, change the starting chain length rather than altering the butterfly wings. High-contrast combinations can make the wings stand out especially well, such as bright pink with white, pastel wings with green, or another pairing of your choice.
Pattern Abbreviations
- MR – Magic Ring
- ch – Chain
- sc – Single Crochet
- dc – Double Crochet
- sl st – Slip Stitch
- st(s) – Stitch(es)
Crochet Butterfly Wings
Use Color A for the entire butterfly.
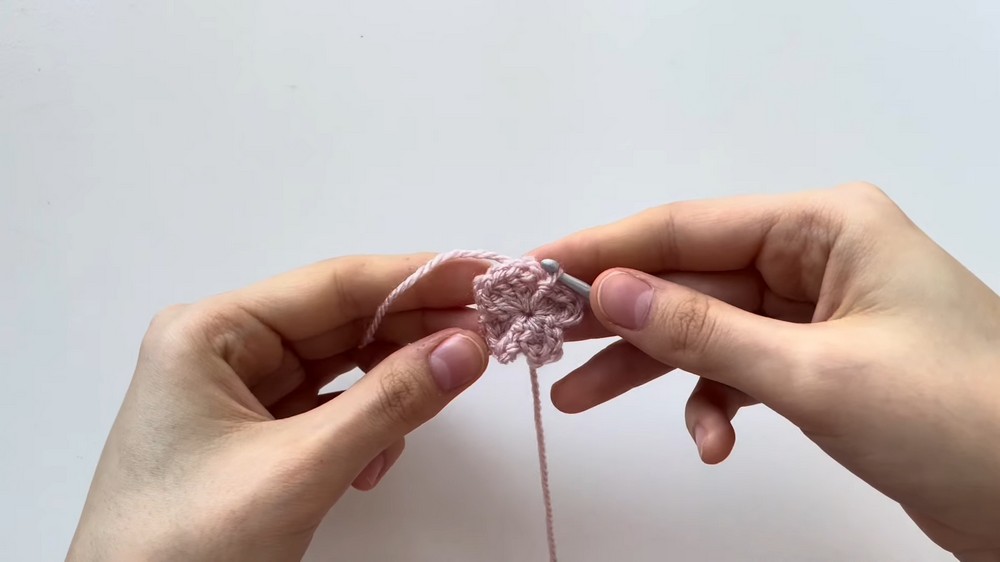
All four wings are worked directly into one Magic Ring. The larger upper wings use chains of 2, while the smaller lower wings use chains of 1.
Form the Four Wings
Foundation: Create a Magic Ring and ch 1.
Top Wing 1: Ch 2, work 3 dc into the MR, ch 2, then sl st back into the MR.
Top Wing 2: Ch 2, work 3 dc into the MR, ch 2, then sl st back into the MR.
Bottom Wing 1: Ch 1, work 3 dc into the MR, ch 1, then sl st back into the MR.
Bottom Wing 2: Ch 1, work 3 dc into the MR, ch 1, then sl st back into the MR.
You should now be able to see four distinct wing sections radiating from the same center: two larger wings above and two smaller wings below.
Pull the magic-ring tail firmly to close the center hole. Fasten off and weave in or trim the excess ends.
Shape check: Before moving on, spread the four wing sections gently with your fingers. Make sure the two larger wings are together at the top and the two smaller wings sit underneath. This orientation matters when the butterfly is attached to the ring.
Crochet the Ring Base
Switch to Color B.
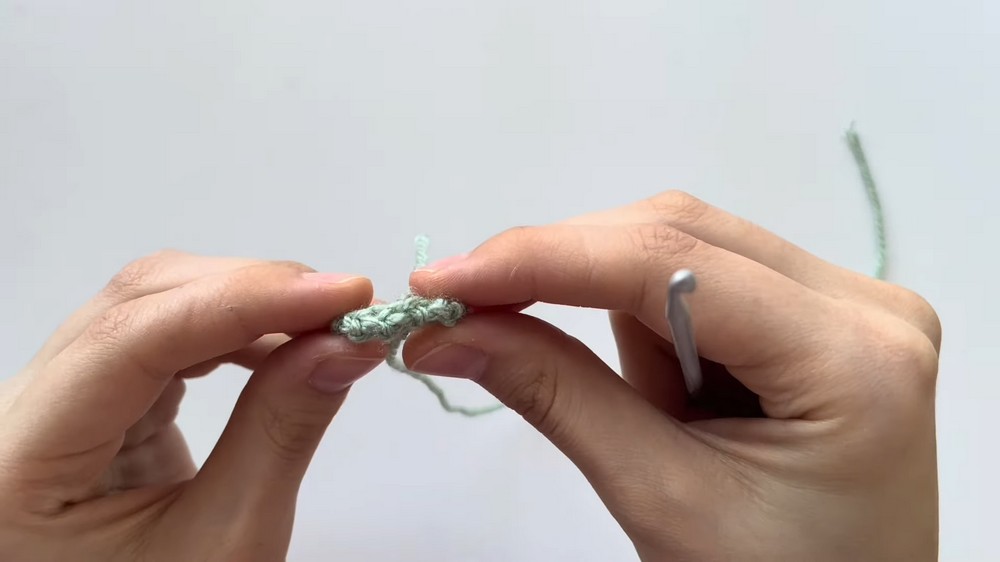
The ring is deliberately adjustable at the foundation stage, so test the chain around your finger before committing to the starting length.
Round 1: Create a slip knot, ch 11 or chain as many stitches as needed to comfortably wrap around your finger, then sl st into the very first chain to form a circle.
Make sure the chain is not twisted before joining it.
Round 2: Ch 1, sc into each chain around the ring, working 10 sc if you began with 11 chains, then sl st into the first sc to close.
Fasten off, leaving a long yarn tail.
Do not cut this tail short—the same strand will be used to attach the butterfly, create its wrapped body, and form the antennae.
Assemble the Butterfly Ring
Position the Butterfly
Thread the long tail from the ring base onto your yarn needle. Lay the butterfly flat over the top of the ring base, keeping the two larger wings pointing upward.
Hold the butterfly in place while beginning the body so the center remains aligned with the ring.
Build the Lower Body
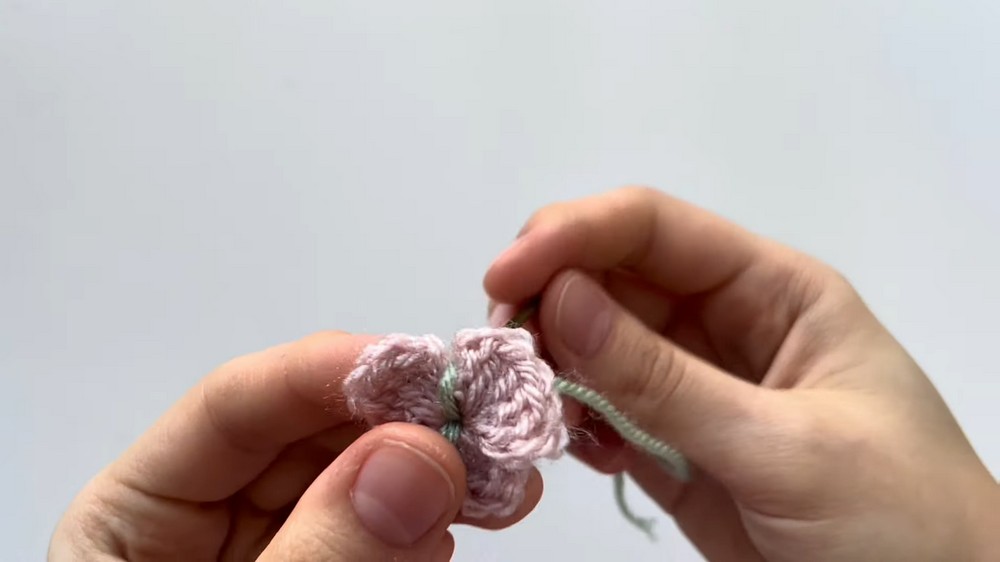
Insert the needle from the bottom edge of the butterfly through the center hole of the closed magic ring.
Bring the yarn around and repeat the same movement several times. The wraps should build a visible vertical line through the butterfly’s center.
Keep the wraps close together so they form a defined lower body rather than spreading across the wings.
Build the Upper Body
Continue the same wrapping technique above the center.
Sew from the top edge of the butterfly down through the center hole and repeat until the upper half of the body has approximately the same thickness as the lower half.
At this point, the contrasting ring-base yarn should clearly define the butterfly’s center from top to bottom.
Form the Antennae
Push the needle upward through the middle of the yarn wraps at the top of the butterfly.
Pass the yarn underneath the top wrapped line to create a loop. Pull this first loop very tightly so the yarn is secured.
Pass the yarn through again to form a second loop, but leave this one large and loose. This larger loop will become both antennae after it is cut.
Push the needle back through the middle of the butterfly to the underside of the ring and tie a tight knot at the back.
Create the Two Antennae
Use your scissors to cut directly through the center of the large loose loop.
One cut separates the loop into two yarn ends, creating the butterfly’s two curled antennae.
Trim the ends slightly if necessary so both antennae are approximately the same length.
Quick Finished Check
Lay the ring flat and look at the butterfly from above. The two larger wings should sit at the top, the smaller wings should sit underneath, and the wrapped body should run straight through the center.
Try the ring on your finger and make sure the band is comfortable. If you want another size, adjust the starting chain of the ring base when making the next one rather than changing the butterfly itself.