Make Easy Crochet Halloween Ghosts For Festive Decor
Every crochet ghost starts with a neat circular base that gradually forms its soft floating shape. Each round adds more definition, while a few carefully placed stitches begin to reveal its playful character.
The smallest finishing details completely transform the final look. Making the last few rounds the most satisfying part of the crochet pattern.
Crochet Halloween Ghosts Pattern
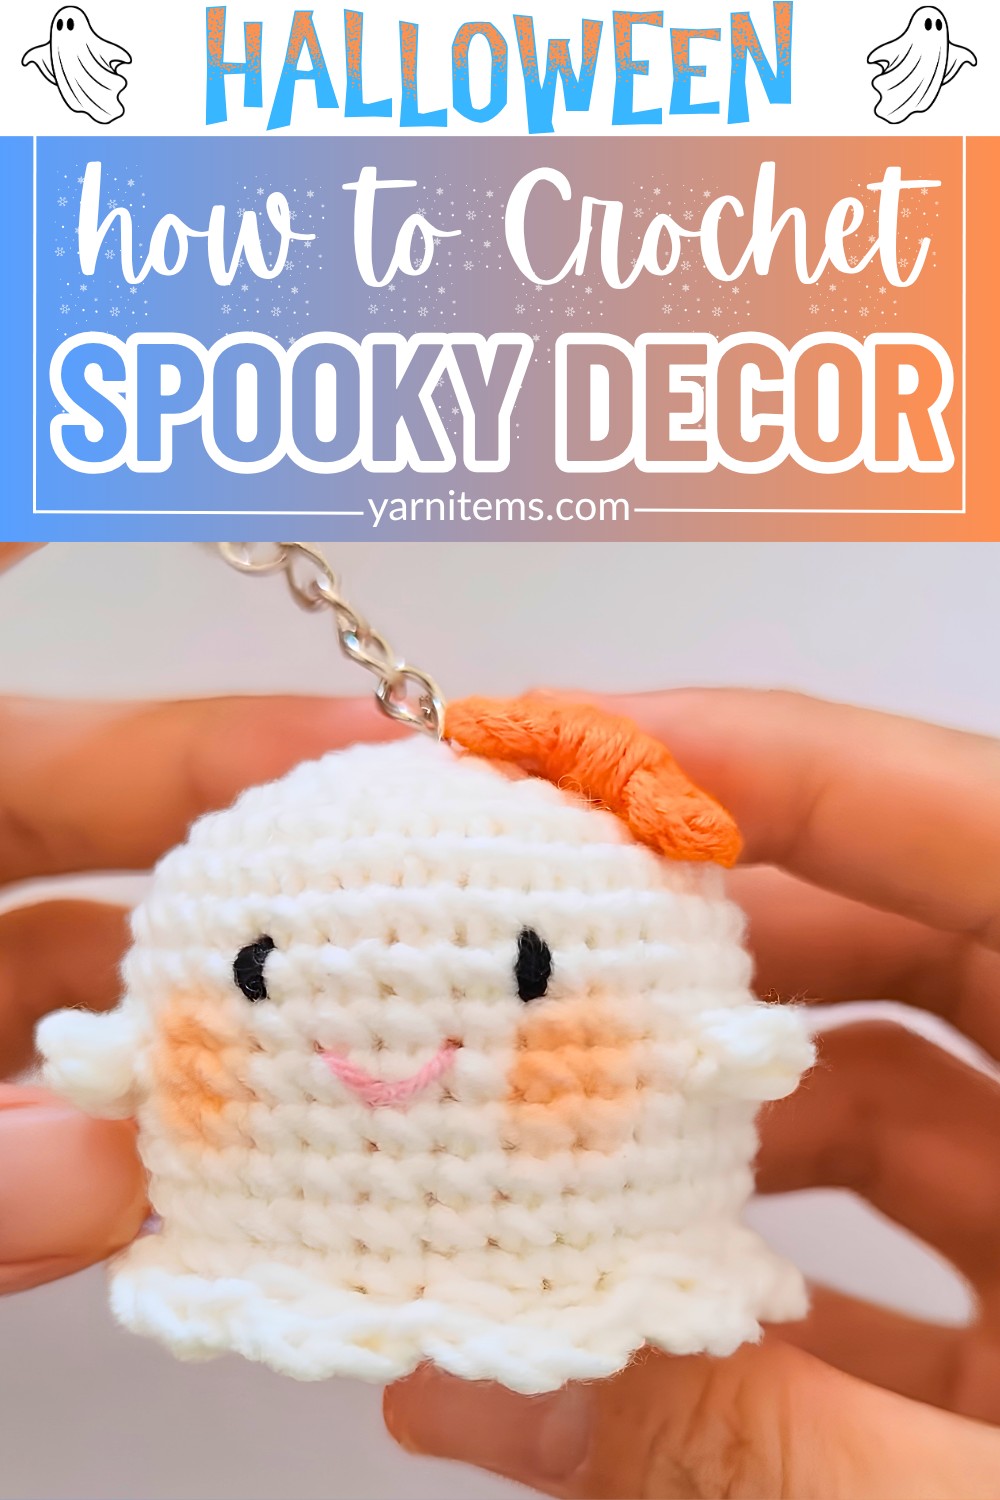
After the body is shaped, light stuffing helps the ghost hold its form while keeping a soft finish. Simple additions like tiny arms, embroidered eyes, or a hanging loop give every ghost a unique personality without changing the main design. By the final crochet step, a handful of basic stitches comes together as a Halloween decoration. That looks far more detailed than the pattern first suggests.
Credit Avocado Handmade
Materials & Tools Needed
- Yarn:
- White 4-ply combed cotton or Sport/DK yarn for the ghost.
- Pink yarn for the mouth/blush.
- Accent color (e.g., Orange or Purple) for optional bow decoration.
- Crochet Hook: 3.0 mm
- Eyes: Black embroidery thread or 5mm/6mm safety eyes for a glossy look.
- Stuffing: Polyester fiberfill (amigurumi stuffing).
- Tools:
- Yarn needle
- Scissors
- Stitch marker
- Pink powder blush + Q-tip (optional) for cheeks
- Keychain ring
Finished Size & Customization Ideas
- Size: Approximately 2” to 2.5” tall. Perfect for keychains, garland, or backpack clips!
- Customization:
- Eyes: Replace embroidered eyes with safety eyes for shine.
- Bow Placement:
- Top of the head (for a “girl” ghost).
- Near the ruffle as a cute bowtie.
Pattern Abbreviations & Terminology (US Terms)
-
MR: Magic Ring
-
ch: Chain
-
sc: Single Crochet
-
dc: Double Crochet
-
inc: Increase (2 single crochets into the same stitch)
-
dec: Decrease (Invisible single crochet decrease over 2 stitches)
-
sl st: Slip Stitch
-
BLO: Back Loop Only
-
FLO: Front Loop Only
-
st(s): Stitch(es)
-
( )*6: Repeat instructions inside parentheses 6 times

Step-by-Step Crochet Instructions
1. Main Ghost Body & Head
This part is worked in continuous rounds. Use a stitch marker to identify the first stitch in each round.
- Round 1:
- Start with an MR and work 6 sc into the ring.
- Pull tight. (6 sts)
- Round 2:
- Work 6 inc (2 sc into each stitch around).
- (12 sts)
- Round 3:
- Repeat (1 sc, 1 inc) around.
- (18 sts)
- Round 4:
- Repeat (1 sc, 1 inc, 1 sc) around.
- (24 sts)
- Round 5:
- Repeat (3 sc, 1 inc) around.
- (30 sts)
- Rounds 6–14:
- Work 1 sc into each stitch around for 9 rounds.
- (30 sts each round)
- This creates the cylindrical ghost body.
- Round 15 (BLO):
- Work 1 sc in the BLO of every stitch.
- (30 sts)
Leave front loops exposed for ruffle later.
- Round 16:
- Repeat (3 sc, 1 dec) around.
- (24 sts)
- Round 17:
- Repeat (1 sc, 1 dec) around.
- (16 sts)
- Stuff the Body:
- Firmly fill the ghost with polyester fiberfill stuffing before the top opening becomes too small to work.
- Round 18:
- Work 8 dec around. (8 sts)
- Fasten off, leaving a long yarn tail.
- Thread your needle through the front loops of the last 8 stitches, pull tight to close, and weave the yarn tail inside the ghost.

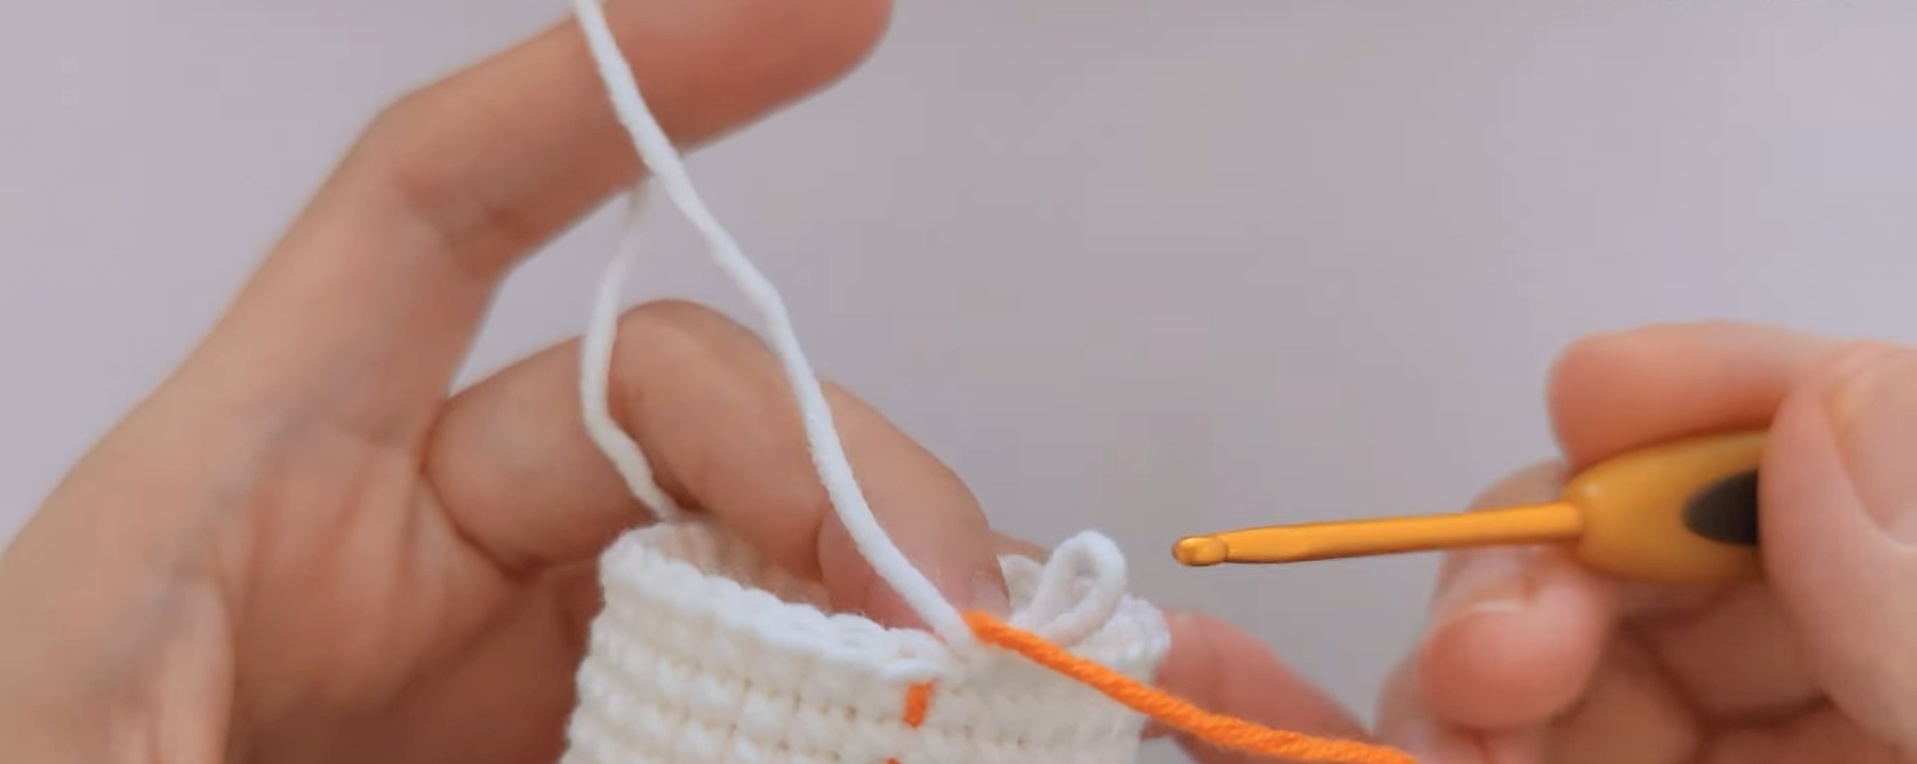
2. Bottom Ruffle Skirt
- Turn the ghost upside down (head facing away from you).
- Attach white yarn to the front loop (FLO) left behind in Round 15.
- Work the following sequence all around:
- (ch 2, 1 dc in the same loop, skip 2 loops, sl st into next loop)
- Fasten off, weave the yarn ends neatly into the body.
3. Small Ghost Arms (Make 2)
The arms are crocheted directly onto the ghost body.
- Locate Round 11, evenly spaced on each side of where the face will be positioned.
- Insert the hook into a horizontal stitch post at that round, and pull up a loop of white yarn.
- Work:
- ch 2, 1 dc into the same stitch post, sl st into the same space or adjacent stitch space.
- Fasten off securely, pull the yarn tails inside the body, knot them, and trim excess.
4. Facial Features & Finishing Touches
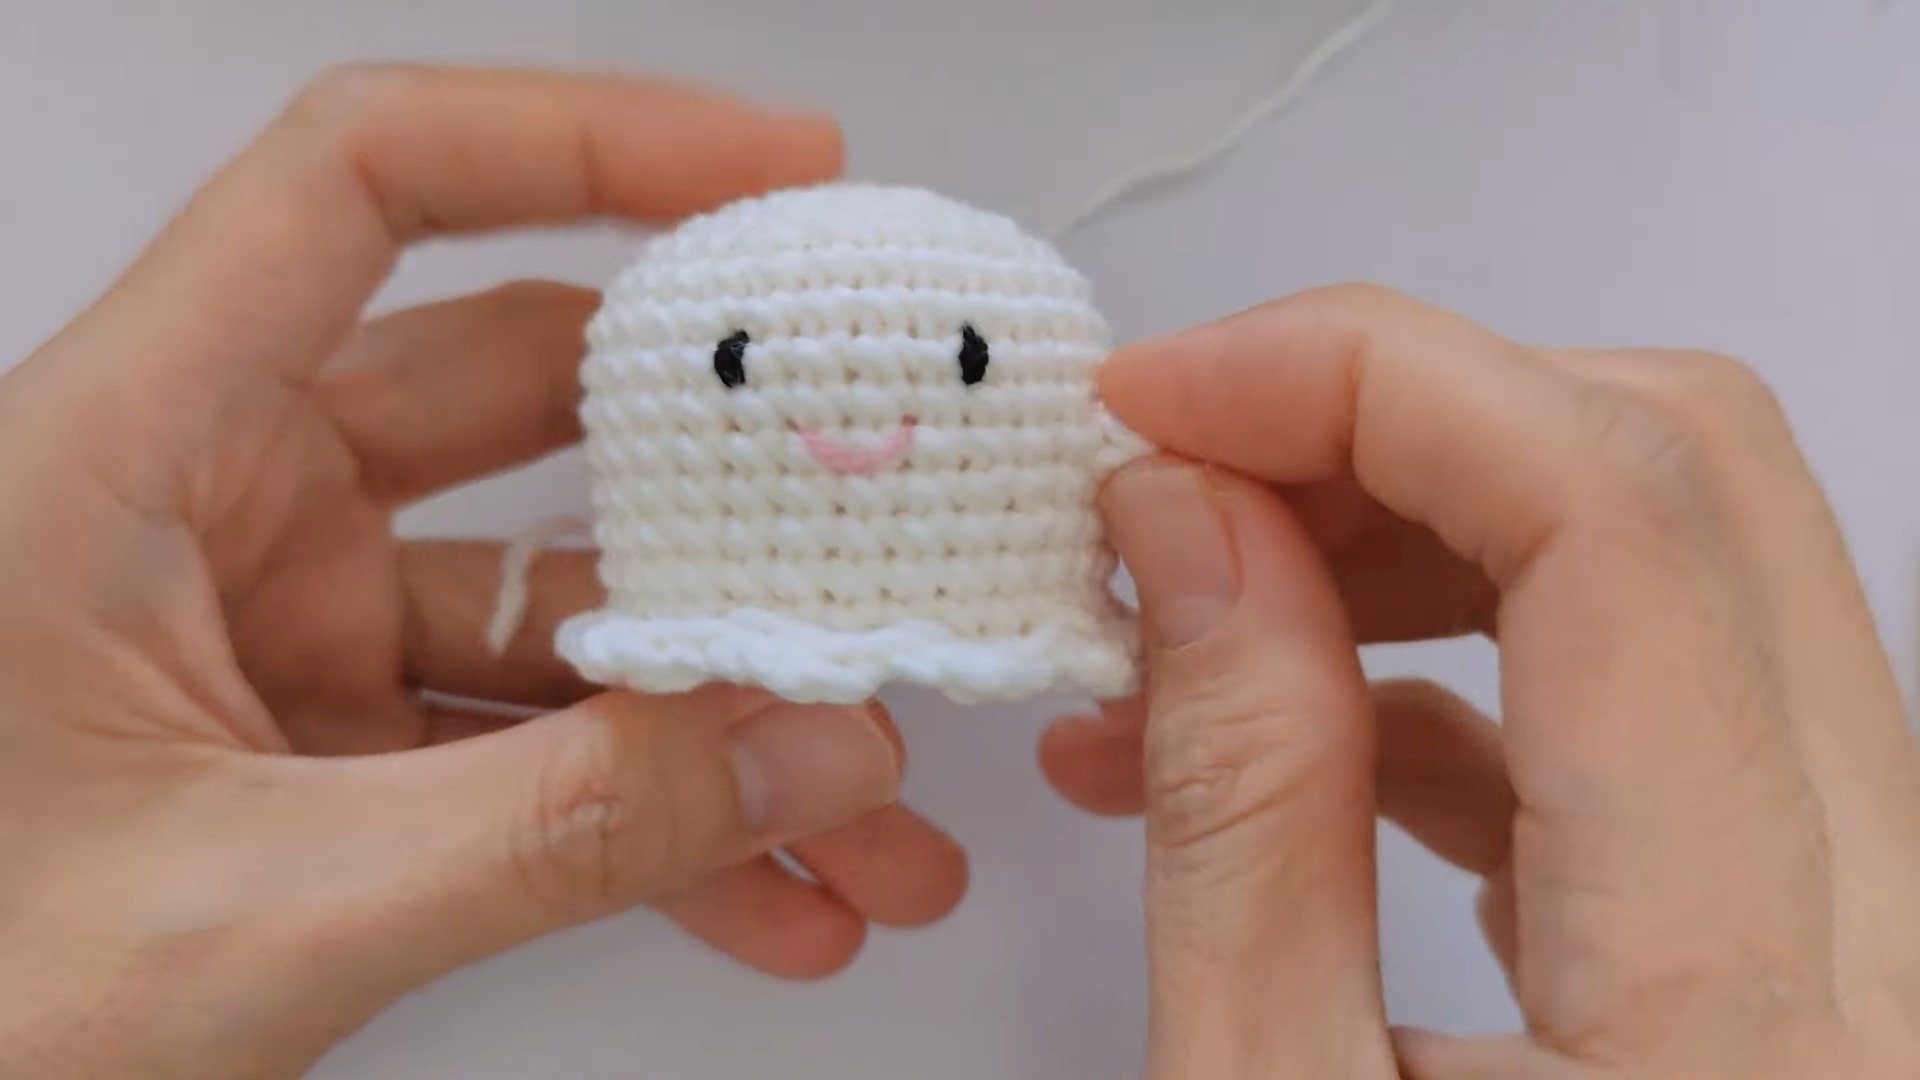
- Eyes:
- Thread a needle with black embroidery floss or insert safety eyes.
- Position on Round 8, spaced 4 stitches apart.
- Use French knots or short vertical bars for embroidered eyes.
- Mouth:
- Using pink yarn, stitch a small “V” or horizontal line on Round 10, centered between the eyes.
- Blush Cheeks (Optional):
- Use a Q-tip dipped in pink blush powder to add a soft rosy effect beneath each eye.
- Bow Accent:
For a bow accessory:- Start with an MR, then inside the ring:
(ch 2, 2 dc, ch 2, sl st) twice. - Pull the MR tightly to form the bow. Wrap yarn around the middle and fasten securely.
- Sew the bow to the ghost’s top or ruffle.
- Start with an MR, then inside the ring:
- Keychain Attachment:
- Loop a keychain ring through Round 1 at the very top of the ghost’s head.