Crochet Little Flowers Tutorial – Perfect Handmade Accents
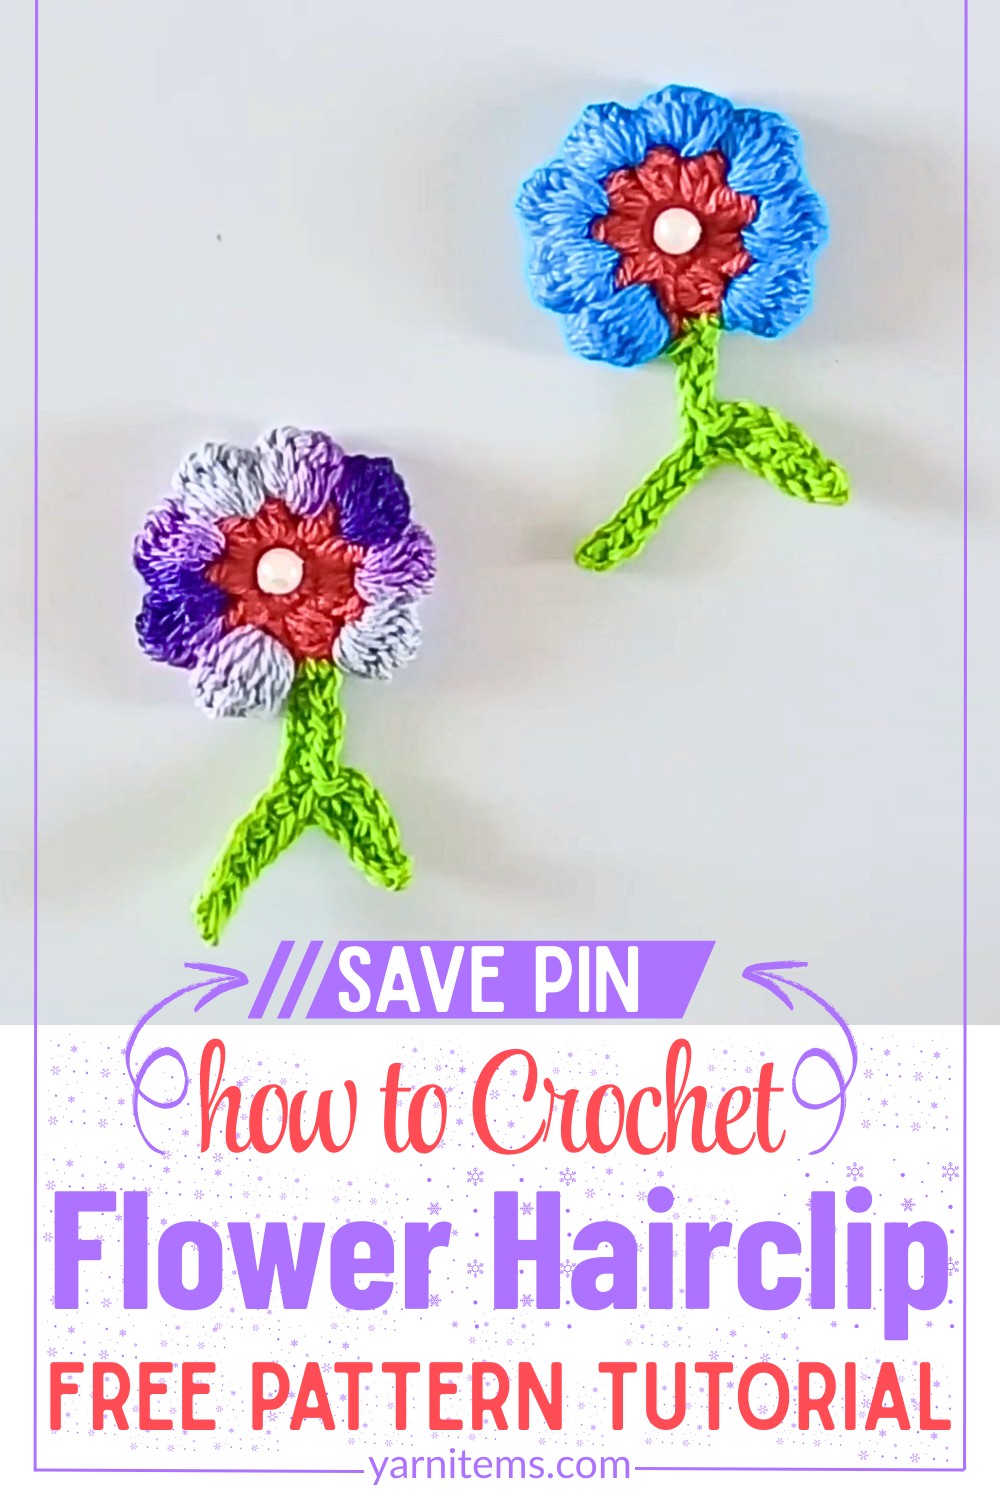
Crochet Little Flowers is a delightful tutorial that teaches you to create charming floral accents, ideal for embellishing a variety of projects, such as garments, accessories, or home décor. The small-scale patterns are perfect for quick crafting sessions, offering crafters of all skill levels an opportunity to add a delicate touch to their handmade creations. This project stands out for its versatility and ability to enhance even the simplest designs with minimal effort.
Crochet Little Flowers
A unique element of this tutorial is its incorporation of simple yet effective crochet techniques to shape the flower petals. With clear step-by-step instructions, the video emphasizes achieving symmetry and texture through thoughtful choices of stitches and yarn weight. Whether you prefer solid-color blooms or multicolored designs, the Flowers tutorial encourages creativity while maintaining a straightforward approach to crafting beautiful, miniature accents.
Credit Dream Weaver Crochet
Pattern Highlights
- Creative flexibility: The tutorial enables customization of both flower size and color palette, making it adaptable to diverse projects.
- Stitch refinement: It features robust instructions for achieving smooth petal edges and intricate detailing through basic stitches.
Step-by-Step Pattern
Materials
To get started, gather the following materials:
- Yarn:
- Lemon yellow cotton yarn (for the flower’s center)
- Pink cotton yarn (for the petals)
- Green cotton yarn (for the stem and leaves)
- Hook: 2.5mm crochet hook
- Tools:
- Scissors
- Pearl bead (optional, for decorative touch)
- Sewing needle and thread (for attaching the bead)

Stitch Guide
Here are some stitches and techniques you’ll use in this project:
1. Magic Circle
A foundational technique for creating circular crochet projects. Begin by making a loop with your yarn, insert the hook, and crochet into the loop as directed. Pull the tail tight to close the circle.
2. Single Crochet (SC)
Insert the hook into the stitch, yarn over, draw up a loop, yarn over again, and pull through both loops on the hook.
3. Double Crochet (DC)
Yarn over, insert the hook into the stitch, yarn over and draw up a loop, yarn over again, pull through two loops, yarn over, and pull through the final two loops on the hook.
4. Double Crochet Together (DC2Tog)
Work one DC halfway (leaving two loops on the hook), yarn over, and start a second DC in the same space. Yarn over and pull through all remaining loops on the hook to complete the stitch.
5. Balloon Stitch (6 DC Together)
Work 6 DC halfway in the same space (leaving 7 loops total on the hook). Yarn over and pull through all loops, finishing with a chain to secure the stitch.
6. Slip Stitch (SL ST)
Insert the hook into the stitch, yarn over, and pull the loop directly through both the stitch and the loop on the hook.
Notes
- Gauge: This pattern does not explicitly require gauge precision but using consistent tension when crocheting will give your flowers a neat appearance.
- Customization Ideas:
- Use different yarn colors for more vibrant blossoms.
- Attach your flower to hair clips or brooch backs for wearable accessories.
- Experiment with yarn thicknesses to create larger or smaller flowers.
Pattern Instructions
Follow these detailed steps to create your crochet flower, stem, and leaves:
Flower Center
- Using lemon yellow yarn, create a magic circle.
- Work 8 single crochets (SC) into the circle.
- Pull the tail of the magic circle to close it tightly.
- Slip stitch (SL ST) into the first SC to complete the round.

Petals
- Switch to pink yarn for the petals.
- Round 2:
- Chain 2 to count as your first double crochet (DC).
- Work another DC into the same stitch; together, this forms DC2Tog.
- Chain 1, and repeat DC2Tog into each SC from the previous round. You’ll have 8 sets of DC2Tog and chain spaces.
- Round 3:
- Turn the work so the wrong side faces.
- Insert your hook into the first chain space and pull up pink yarn. Chain 1.
- Begin forming petals using the balloon stitch:
- Yarn over and work 6 DC halfway into the same chain space (you’ll have 7 loops on your hook).
- Yarn over and pull through all 7 loops.
- Chain 1 to secure.
- Repeat this sequence for the remaining chain spaces until you have 8 petals.
- Flip the flower, and admire the neat petals on the right side!

Stem
After finishing the last petal, don’t slip stitch to join yet. Switch to green yarn to create the stem:
- Insert the hook into the same space at the base of a petal and pull up green yarn.
- Chain 12 to form the stem.
- Skip the first chain and work slip stitches (SL ST) into the next 5 chains.
Leaf
- After completing the 5 slip stitches, chain 6.
- Skip the first chain, then:
- Slip stitch into the next stitch.
- Work 1 single crochet (SC) into the following stitch.
- Work 2 half-double crochets (HDC) in the next 2 stitches (this forms the chunky part of the leaf).
- Slip stitch back into the original chain space, then slip stitch down the remainder of the stem.

Final Touch
- Add a pearl bead to the center of the flower using a sewing needle and thread for an elegant finish.
- Tie off and weave in all loose ends.