Crochet Strawberry Stitch Headband Pattern Free
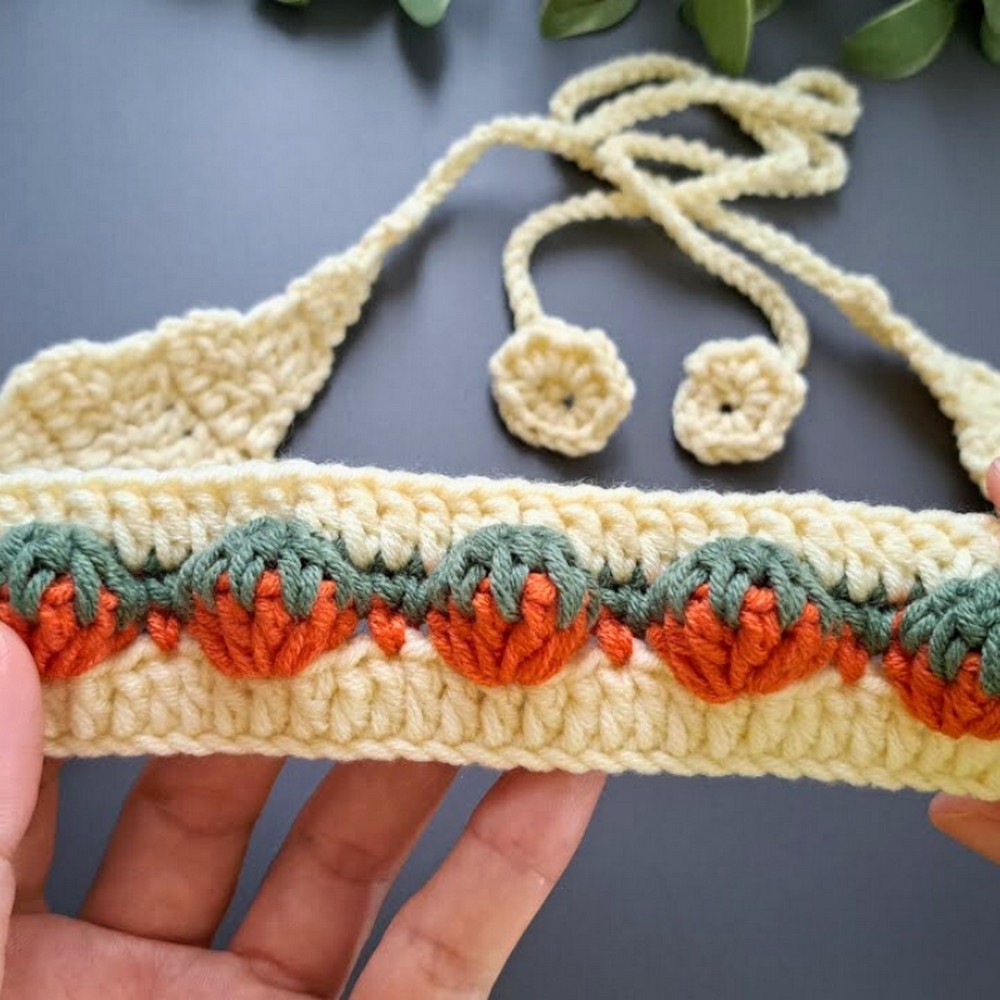
Want a sweet summer accessory? This strawberry stitch headband layers red berry shells, green leaf clusters, and cream borders over adjustable tie straps.
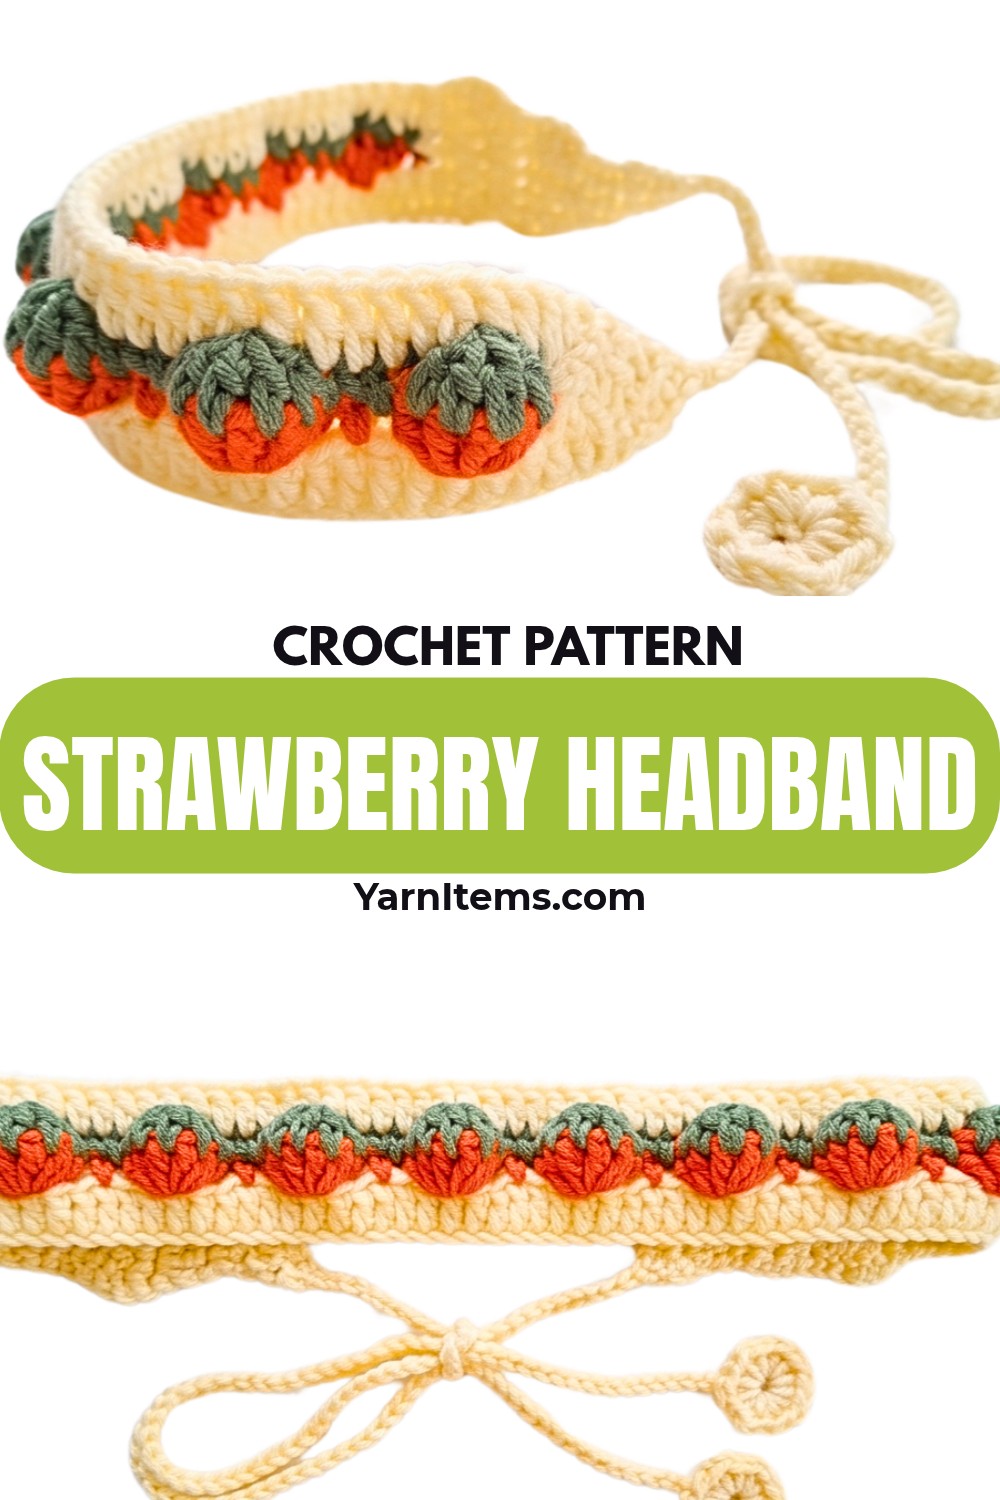
Strawberry-shaped crochet stitches give this headband its cheerful character without requiring complicated individual fruit pieces. The red shells create the rounded berries, while the green clusters sit neatly above them to suggest leafy tops.
You’ll work the design in four visual rows, moving from the cream base to the crochet strawberries, leaves, and final border. The 61-stitch band suits an average adult or teen head, while the long tie straps make the fit easy to adjust. Along the way, the stitch counts help you keep each crochet strawberry section lined up correctly.
Credit Crochet & Crafts Therapy by Chompu
Materials & Tools Needed
- Yarn: 5-ply Eco-Friendly Hand Knitting Cotton Yarn (Milk Cotton) in three colors:
- Cream or off-white for the base and border
- Red or orange for the strawberries
- Green for the strawberry leaves
- Crochet Hook: Size 6/0 (3.50mm) Tulip hook
- Scissors
- Stitch markers
- Tapestry/Yarn needle: For weaving in ends
Finished Size & Customization
The main decorated band is worked over 61 stitches, creating a width that fits across the top of an average adult or teen head. The 50-chain ties provide the adjustable part of the fit.
For a longer or shorter decorated band, adjust the foundation chain in multiples of 6 + 1 so the strawberry stitch repeat continues to fit correctly.
If you prefer a wider headband, add an extra row of double crochet in the cream base color before beginning the strawberry stitch.
The tie length can also be adjusted by changing the number of chains. The pattern uses 50 chains for each strap, but you can add or remove chains to suit the wearer.
Pattern Abbreviations
- ch: Chain
- st(s): Stitch(es)
- sc: Single crochet
- dc: Double crochet
- sk: Skip
- dc5tog: Double crochet 5 together
- sl st: Slip stitch
- rep: Repeat
Step-by-Step Crochet Strawberry Stitch Headband
Row 1: Create the Cream Base
The first row establishes the full width of the headband and provides the foundation for every strawberry repeat above it. Keep the chain relaxed enough that the finished band does not pull inward.
Step 1: Make a slip knot with the cream/off-white yarn and ch 61.
Step 2: If helpful, place a stitch marker in the 3rd chain from the hook to make the turning-chain area easier to identify later.
Step 3: Skip the first 3 chains, which count as the first dc, then place 1 dc in the 4th chain from the hook.
Step 4: Place 1 dc in each chain across the entire foundation row.
Stitch Count: 60 dc + 3 ch = 61 stitches total.

Fasten off and weave in the cream yarn tail.
Before moving on, check that the row lies reasonably straight. This 61-stitch foundation determines how evenly the strawberry shells will repeat across the headband.
Row 2: Crochet the Strawberry Shells
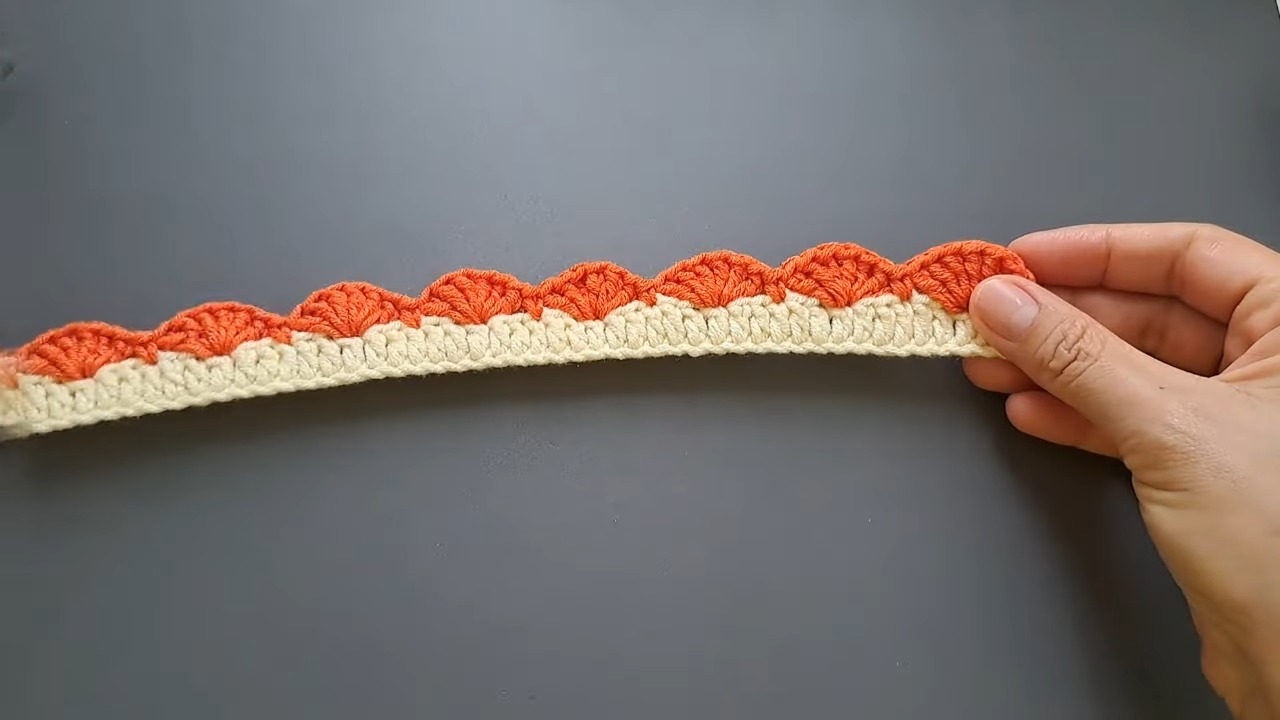
Switch to the red or orange yarn. This row creates the rounded strawberry shapes using groups of 6 dc.
Step 1: Attach the red yarn with a slip knot to the very first stitch of Row 1, at the top of the starting ch-3.
Step 2: Ch 1, then place 1 sc in that same stitch.
Step 3: Skip 2 sts, then place 6 dc into the next stitch. These six double crochets form one full, rounded strawberry shell.
Step 4: Skip 2 sts, then place 1 sc in the next stitch.
Step 5: Repeat sk 2 sts, 6 dc in next st, sk 2 sts, 1 sc in next st across the row.
The row should finish with 1 sc in the final stitch. Fasten off the red yarn.
As you work, the 6-dc groups should puff outward while the single crochets create the spaces between them. If one shell looks noticeably different from the others, check that all six dc were worked into the same stitch.
Row 3: Add the Green Leaves
The green row transforms the rounded red shells into the strawberry motif. The dc5tog gathers the tops of the first five double crochets in each shell into one leaf-like cluster.
Step 1: Attach the green yarn to the first sc made in Row 2.
Step 2: Ch 1, then place 1 sc in the same stitch.
Step 3: Work a dc5tog across the first 5 dc of the first 6-dc shell. For the decrease, yarn over, insert the hook into the first dc and pull up a loop, yarn over and pull through 2 loops; repeat across the next 4 stitches until 6 loops are on the hook, then yarn over and pull through all 6 loops.
Step 4: Ch 2 to close and span the gap.
Step 5: Place 1 sc into the sc from the previous row between the strawberries.
Step 6: Repeat dc5tog over the next shell, ch 2, 1 sc in the next sc across the row.
Fasten off the green yarn.
The green clusters should now sit directly over the red strawberry shells. The ch-2 spaces help separate each motif, so avoid accidentally working into the wrong gap when moving from one strawberry to the next.

Row 4: Add the Cream Top Border
Return to the cream/off-white yarn for the final decorative row. This row fills the spaces around the green leaf clusters and restores the band to its original stitch width.
Step 1: Attach the cream yarn to the first sc of Row 3.
Step 2: Ch 3, which counts as 1 dc, then place 1 dc in the same stitch.
Step 3: Place 1 dc directly into the top of the leaf cluster created by the dc5tog.
Step 4: Place 2 dc into the ch-2 space.
Step 5: Place 1 dc into the next sc.
Step 6: Repeat 1 dc in leaf cluster, 2 dc in ch-2 space, 1 dc in the sc across the entire top edge.
Stitch Count Check: You should have exactly 61 stitches again.
Do not fasten off. The working cream yarn will continue directly into the first tie.
At this stage, flatten the headband and look across the whole piece. You should see the cream base underneath, a row of red strawberry shells, green leaf clusters above them, and the cream border forming the top edge.
Make the Adjustable Tie Straps
First Strap
Continue from the last stitch of Row 4 rather than cutting the yarn.
Step 1: Chain 50.
Step 2: Starting in the 2nd chain from the hook, work 1 sc in each chain back toward the headband, giving you 49 sc.
Step 3: Once you reach the side of the headband, work 1 sc evenly into each row end down the short side until you reach the opposite corner.
Step 4: Slip stitch to join to the corner stitch and fasten off.
The first tie should now extend from one end of the decorated band and provide a long strap for tying the headband around the head.
Second Strap
Attach the cream yarn to the opposite short edge of the headband.
Step 1: Chain 50.
Step 2: Starting in the 2nd chain from the hook, work 1 sc in each chain back toward the headband.
Step 3: Work sc evenly across the short edge of the headband until you reach the corner.
Step 4: Slip stitch to the corner stitch and fasten off.
Check both straps side by side. They should be approximately the same length so the headband can be tied comfortably and evenly.
Optional Flower or Circle Tie Ends
For a small finishing detail at the ends of the straps, you can add simple cream circular motifs.
Step 1: Make a magic ring with cream yarn.
Step 2: Ch 1, then place 6 sc into the magic ring.
Step 3: Pull the ring tight and slip stitch to the first sc to join.
Step 4: Fasten off and sew the small circular motif directly onto the tip of a tie strap.
Repeat for the other strap if you want matching ends.
Finishing & Shaping
Use your tapestry needle to weave in the cream, red, and green yarn tails. Whenever possible, hide each end within the matching color section so the back remains neat.
For a cleaner strawberry texture, lay the finished headband flat and gently smooth the strawberry shells and leaf clusters with your fingers. Lightly blocking the piece can help the decorative rows settle into an even shape.
Before wearing it, hold the headband across the intended head size and tie the straps comfortably at the back. If the band feels too tight or loose, the tie length can be adjusted on a future version without changing the strawberry stitch itself.
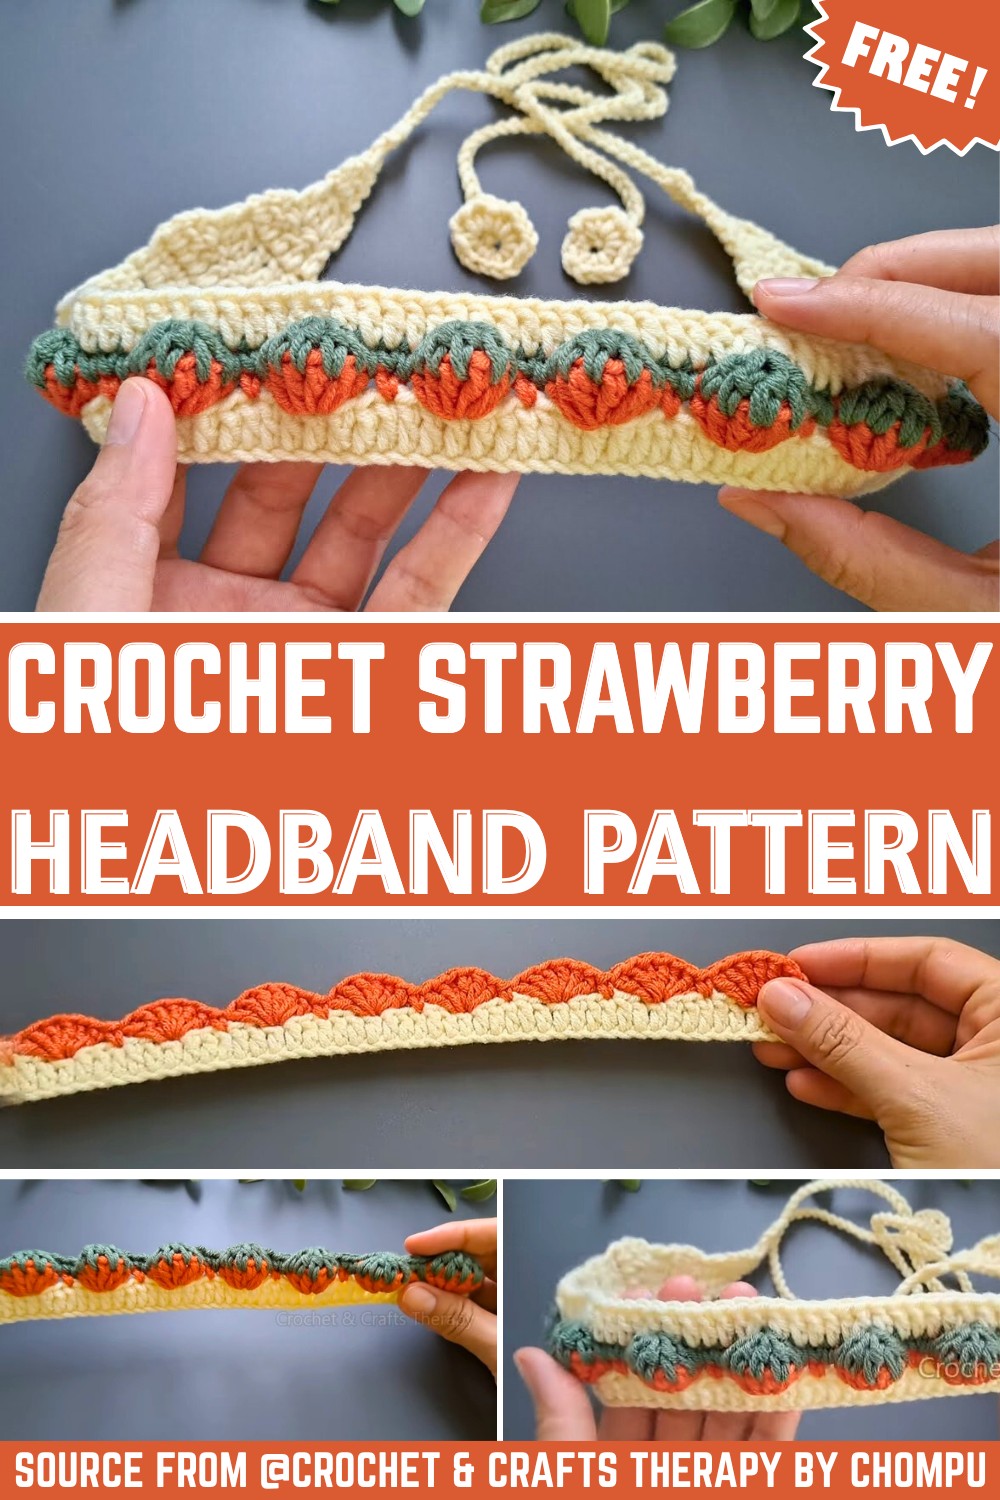
The finished headband combines a simple cream base with colorful strawberry motifs, leafy green tops, and adjustable ties, making it a cheerful accessory for spring and summer.