Durable Beanie Hat Crochet Tutorial – Warm, Stylish & Easy
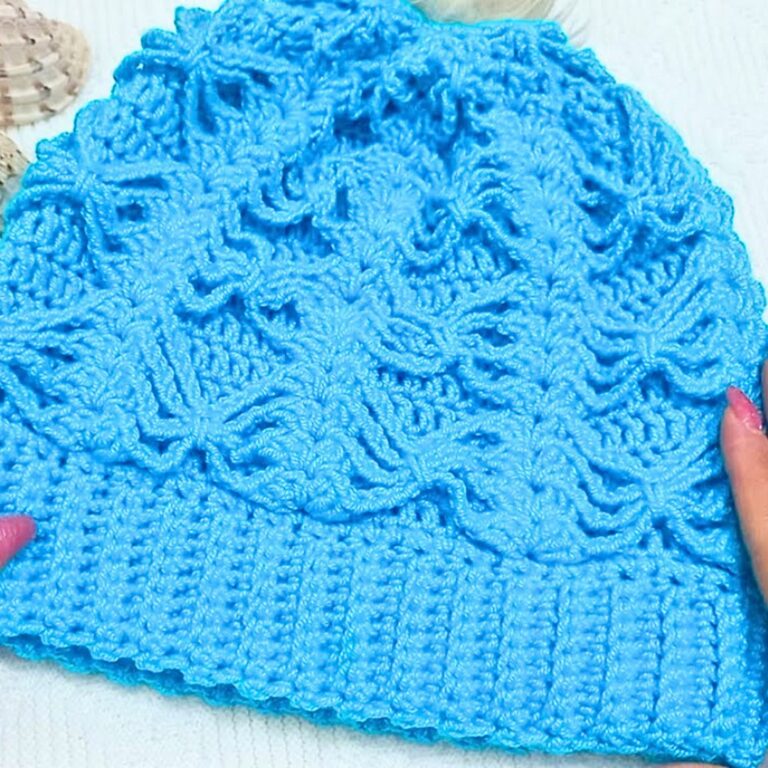
A simple crocheted strip slowly turns into a cozy everyday beanie, with a small crown section shaping the top while the body gives it comfortable, wearable stretch.

A crochet hat like this has a slightly surprising beginning: instead of immediately working in rounds, you build it back and forth in rows. Most of the row becomes the body of the hat, while the last seven stitches are worked differently to form the crown section.
That small difference is what makes the construction easier to understand once you see it. The 7 crown stitches stay together, worked in BLO slip stitches, while the rest continues in FLO half double crochet. As you repeat those two sections and measure the growing crochet piece, the flat strip gradually becomes the shape you need to close into an adult-size beanie.
Credit anxin_crochet
Materials & Tools
- Yarn: 1 ball of 8-strand Lover Cotton yarn in Dark Gray; one ball is sufficient for an adult-size hat
- Crochet Hook: 4.5 mm
- Measuring Tape / Ruler
- Tapestry / Suture Needle
- Stitch Markers: Recommended for beginners
- Scissors
- Optional: Custom leather label
Finished Size & Fit
The unsewn, flat piece measures approximately 28–30 cm (11–11.8 inches) in height.
The intended adult head circumference is approximately 55–58 cm (21.6–22.8 inches).
For a smaller adult head, work the rows until the piece reaches approximately 55 cm. For a larger adult head, continue until it reaches approximately 58 cm.
Because crochet tension can change the finished measurements, use the tape measure as your guide rather than relying only on a fixed row count.
Simple Ways to Customize the Finish
- Turned-Up Brim: The 28–30 cm length allows the lower edge to be rolled or folded upward.
- Crown Styling: Pinch 5–6 folds at the top center for a flower-like shape, leave it gathered and simple, or add a pom-pom.
- Leather Label: Sew an optional leather label onto the folded brim.

Abbreviations
- ch: Chain
- hdc: Half Double Crochet
- sl st: Slip Stitch
- BLO: Back Loop Only – inner half-loop
- FLO: Front Loop Only – outer half-loop
- st(s): Stitch(es)
Step-by-Step Instructions
Before the First Row: Notice the Two Parts
There is one thing worth understanding before you begin: the row is divided into two working areas.
The first 7 stitches form the crown section. These are always treated as loose BLO slip stitches.
The remaining 34–35 stitches form the body. These are worked as FLO hdc.
That division stays with you as you repeat the rows. Once you can recognize those seven crown stitches at the edge, you do not have to rethink the construction every time you turn your work.
Foundation Chain: Pull the yarn from the inside of the ball; make a slip knot on the 4.5 mm hook; work 41–42 loose chains; if your tension is tight, add 2 chains, or if your tension is loose, subtract 2; lay the chain flat without stretching it and check that it measures approximately 28–30 cm.
Keep the foundation chain loose enough to lie naturally. A tight chain can pull the beginning of the hat out of shape and make the measurement misleading.

Build the First Row
Row 1: Hold the last chain loop with your finger; work ch 2; yarn over, insert the hook into the 3rd chain from the hook and work 1 hdc; continue with 1 hdc in each chain until 7 chains remain; in the remaining 7 chains, work 1 loose sl st in each chain; work ch 1; 34–35 hdc + 7 sl st = 41–42 sts total.
Those final seven slip stitches are not just the end of the row—they are the beginning of the crown section. If you are using stitch markers, this is a useful place to mark that section so you can find it immediately when you turn.
Make the Crown Section Consistent
Row 2: Turn the fabric; skip the turning chain; work 1 loose BLO sl st in each of the 7 crown stitches; if helpful, place stitch markers in the 1st and 7th crown stitches; yarn over and work 1 FLO hdc in each remaining body stitch to the end; work ch 2; 7 BLO sl st + 34–35 FLO hdc = 41–42 sts total.
The two sections should now be easy to see.
The crown is softer and flatter due to the slip stitches, while the longer body section features taller hdc stitches. You are deliberately creating two different textures in the same row.
Row 3: Turn the fabric; skip the 2 turning chains; work 1 FLO hdc in the FLO of each body stitch until you reach the 7 crown stitches; work 1 BLO sl st in each of the 7 crown stitches; work ch 1; 34–35 FLO hdc + 7 BLO sl st = 41–42 sts total.
Because the fabric has been turned, the body section appears first, and the crown section comes at the end.
Do not let that change in order make you think the crown has moved. It is still the same seven-stitch section you have been working at the edge of the fabric.

Continue the Rows
Rows 4–Final: Repeat Rows 2 and 3 in sequence; always work the 7 crown stitches in BLO sl st, work the remaining 34–35 body stitches in FLO hdc, use ch 1 after the crown-side row and ch 2 after the body-side row, and continue until the flat piece measures approximately 55–58 cm in total width.
At this stage, the fabric can start looking like a simple strip rather than a hat. That is exactly what you should expect.
Instead of trying to judge the finished hat from its appearance right now, measure the flat piece. When it reaches the intended 55–58 cm, the length is ready for the crown gathering and side seam.
If you are making the smaller size, stop around 55 cm. For the larger size, continue toward 58 cm.

Gather the Crown
Crown Closing
Gathering: After completing the final row, leave the yarn loop open; insert the hook through each stitch loop along the top crown edge, including the 7-slip-stitch section; pull the working loop continuously through all the top loops to cinch the opening closed; work ch 1, stretch the loop, and tie the gathered yarn securely twice.
Pull the top together gradually so the gathers spread around the crown rather than bunching heavily in one spot.
Join the Side Seam
Side Seam
Joining: Align the foundation edge with the final-row edge with the wrong side facing out; using a tapestry needle, join the edges stitch-for-stitch by inserting the needle into the outer half-loop of each corresponding stitch on both sides; for the final stitch at the brim edge, pick up the complete full stitch loop to secure the corner; tie a knot, weave the yarn tail through several nearby stitches on the inside, trim the excess, and turn the hat right side out.
Matching the edges stitch-for-stitch helps the bottom of the hat sit more evenly once it is turned right side out.

Optional Crown Accent
Pinched Crown
Crown Accent: Thread a needle with matching yarn; pinch 5–6 small folds evenly around the gathered top center; pass the needle through all 5–6 folds, pull firmly, tie twice on the inside to hold the shape, and hide the remaining yarn tails inside.
You can leave the crown gathered without this extra step if you prefer a cleaner finish. The pinched folds simply give the top a flower-like shape.

Finish the Beanie
Roll the bottom edge upward to create the turned-up brim.
You can leave the hat simple and understated, or add a leather label to the folded brim or attach a pom-pom to the crown.
The finished construction is intentionally simple: the long body section gives the hat its wearable fabric, while the smaller crown section controls how the top gathers together.
The main thing to remember while making it is the division between the two sections: 7 crown stitches → BLO slip stitches 34–35 body stitches → FLO hdc
Once that division becomes familiar, the repeated rows become much easier to follow, and you can concentrate on the measurement and shaping rather than constantly wondering where each section belongs.