Learn How to Crochet a Soft and Simple Baby Hat Pattern
This cozy, textured baby hat is a versatile accessory, designed to keep little ones warm in style. It’s perfect for gifting or creating matching sets for any occasion.
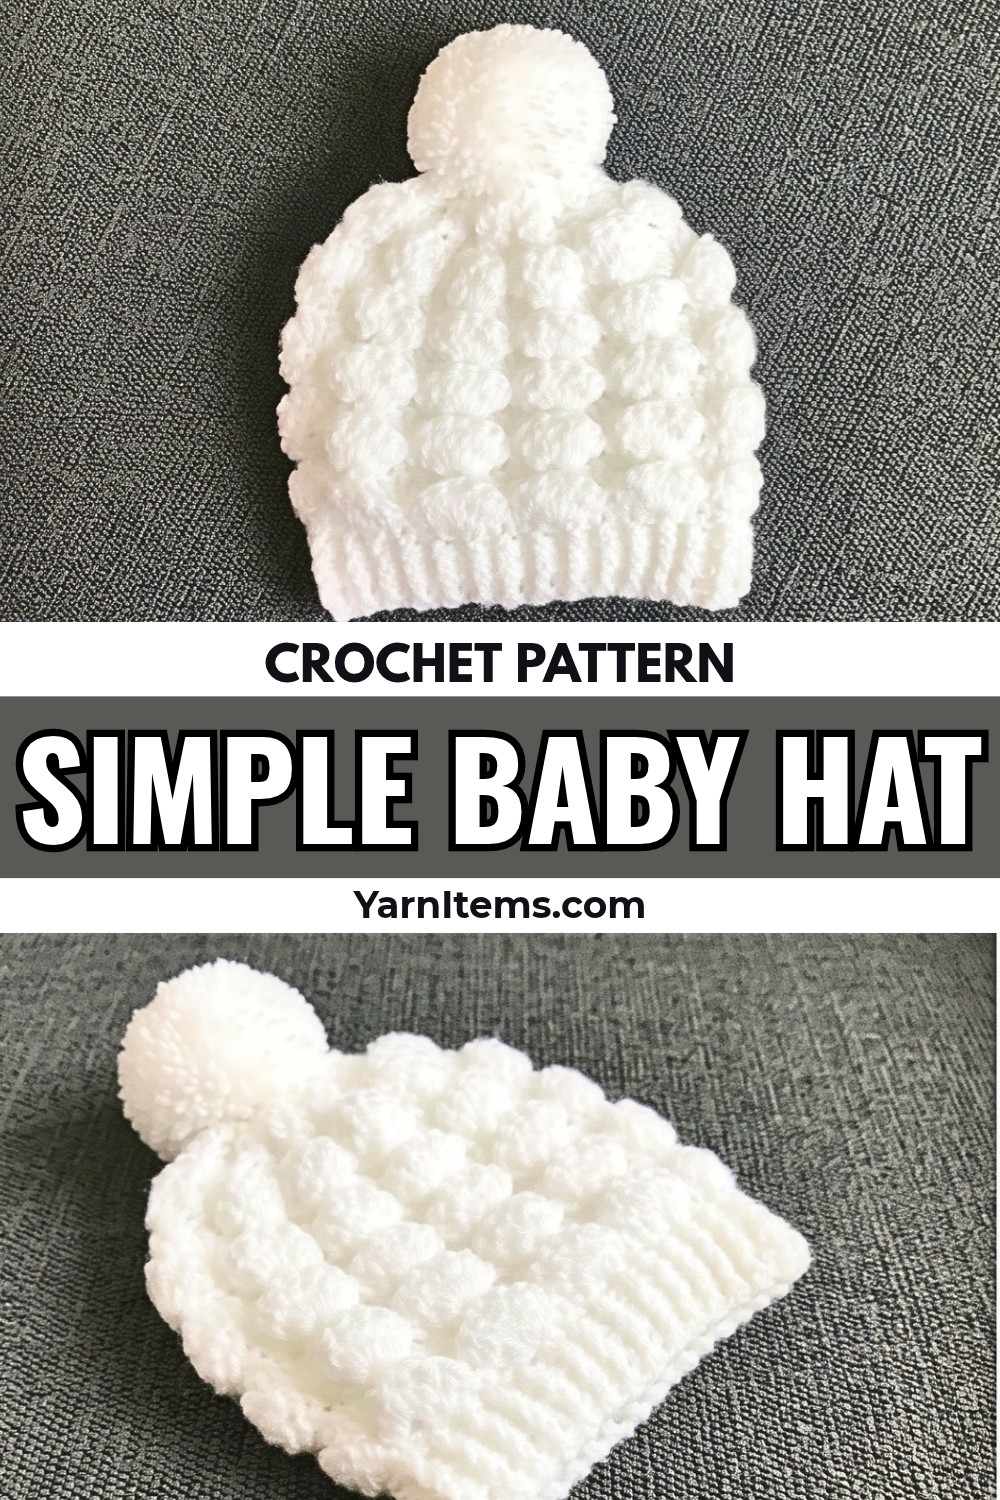
This crochet baby hat is soft, cozy, and wonderfully gentle for little ones. Made with delicate yarn, it provides comfort and warmth, making the crochet hat perfect for babies during cooler days. If you’re crocheting it as part of a matching set or to keep a newborn snug, this baby hat is not only practical but also a delightful addition to a baby’s wardrobe.
Crochet Baby Hat Pattern
What makes this crochet hat pattern special is its simplicity, so easy that even beginners can follow along. Using a repeat of just two rounds, it’s quick to create and customizable for five different sizes, ranging from newborn to 2 years old. You can finish the crochet hat with or without a pom-pom, adding a touch of playful style or a minimalist look.
Credit Crochet For Life
Key Features of the Pattern:
- Size versatility: Instructions for five sizes – newborn to 2 years.
- Main techniques: Double crochet, front post double crochet, and back post double crochet create a lovely texture.
- Simple repeat: A two-round repeating pattern makes it easy to follow – even for beginners.
- 3D shell texture: The hat gains a unique and dimensional look with shell-like stitches formed by modern double crochet.
- Customization options: Add an optional pom-pom for extra sweetness or leave it off for a simpler look.
This adorable baby hat begins with a foundation chain matched to the desired size, ranging from 9 shells for a newborn to 13 shells for toddlers. Using a 4mm crochet hook and double knitting (DK) yarn, the pattern is worked in the round starting with rows of basic double crochet (DC). You’ll join the rounds seamlessly to create a smooth base for the hat.

From the second round, the magic begins: front post and back post double crochet stitches create a stretchy ribbing that gives the hat its snug yet comfortable fit. This ribbing continues for three rounds as the foundation for the textured shell pattern.

The standout feature of this design is its gorgeous 3D shell pattern. Alternating rounds of seven-stitch “modern double crochets” and five-stitch double crochet rows create a soft, raised effect. As you progress, the shell pattern grows in layers until you reach the hat’s total height, with 4–7 rows of shells depending on the size you’re making. The subtle 3D texture makes this a standout piece in any baby wardrobe.

To finish, four decreasing rows gently gather the top of the hat. The shells reduce smoothly, transitioning to smaller clusters and then single crochet to close the crown tightly. You can choose to stop here for a clean and classic look or attach a 5.5 cm pom-pom to the top for an extra dollop of cuteness.

Video Tutorial
Step-by-Step Pattern
Materials
To make this baby crochet hat, you’ll need:
- Yarn: Double knitting yarn (recommended: 100g, 330m per skein). You will use approximately 20g for one hat.
Suggested Yarn Color: White (but feel free to use any color you like). - Hook Size: 4 mm crochet hook.
- Optional Tools:
- Pom-pom maker (5.5 cm size, if you choose to add a pom-pom).
- Yarn needle for sewing and finishing.
- Scissors.
- Measuring tape (to check the size).

Pattern Instructions
Follow these detailed steps to create the baby hat.
Foundation (Starting Chains):
- Start with a slip knot.
- Chain the required number of stitches based on your desired size (e.g., 62 chains for 0 to 3 months).
- Turn the chain to work into the back bumps.
Row 1:
- Skip the first 3 chains.
- Work 1 double crochet (dc) into the 4th chain from the hook.
- Continue working 1 double crochet (dc) into each chain across.
- By the end of this row, you’ll have the same number of stitches as your starting chain.
- Slip stitch into the 3rd chain at the beginning of the row to form a circle.
Row 2:
- Chain 3 (counts as the first double crochet).
- Alternate between front post double crochet (fpdc) and back post double crochet (bpdc) around each stitch of the previous row.
- Example: Insert your hook for fpdc for one stitch, then bpdc for the next stitch, repeating the pattern.
- Join the round with a slip stitch in the 3rd chain of the starting chain.
Row 3 and Ongoing:
- Chain 3 to start each new round.
- For even-numbered rows, repeat Row 2 by alternating fpdc and bpdc.
- For odd-numbered rows, maintain alignment:
- fpdc goes into an fpdc of the previous row.
- bpdc goes into a bpdc of the previous row.
- Repeat this two-row pattern until you reach the desired height (e.g., 8 rounds for 0-3 months).
Final Touches:
Reducing Stitches (Shaping the Crown):
For the last 4 rounds, reduce stitches as follows:
- Row 1 of Decrease: Work 5 modern double crochets per shell.
- Row 2 of Decrease: Work 3 double crochets per shell.
- Row 3 of Decrease: Work 3 modern double crochets per shell.
- Final Row: Join all remaining loops with single crochet stitches to close the top. Fasten off the yarn and weave in the tails.
Adding a Pom-Pom (Optional):
- Use a 5.5 cm pom-pom maker or create a handmade pom-pom.
- Attach the pom-pom to the center of the hat using a strong knot.
- Trim the ends evenly with the pom-pom for a neat finish.
Customization Ideas:
- Skip the pom-pom for a clean and classic design.
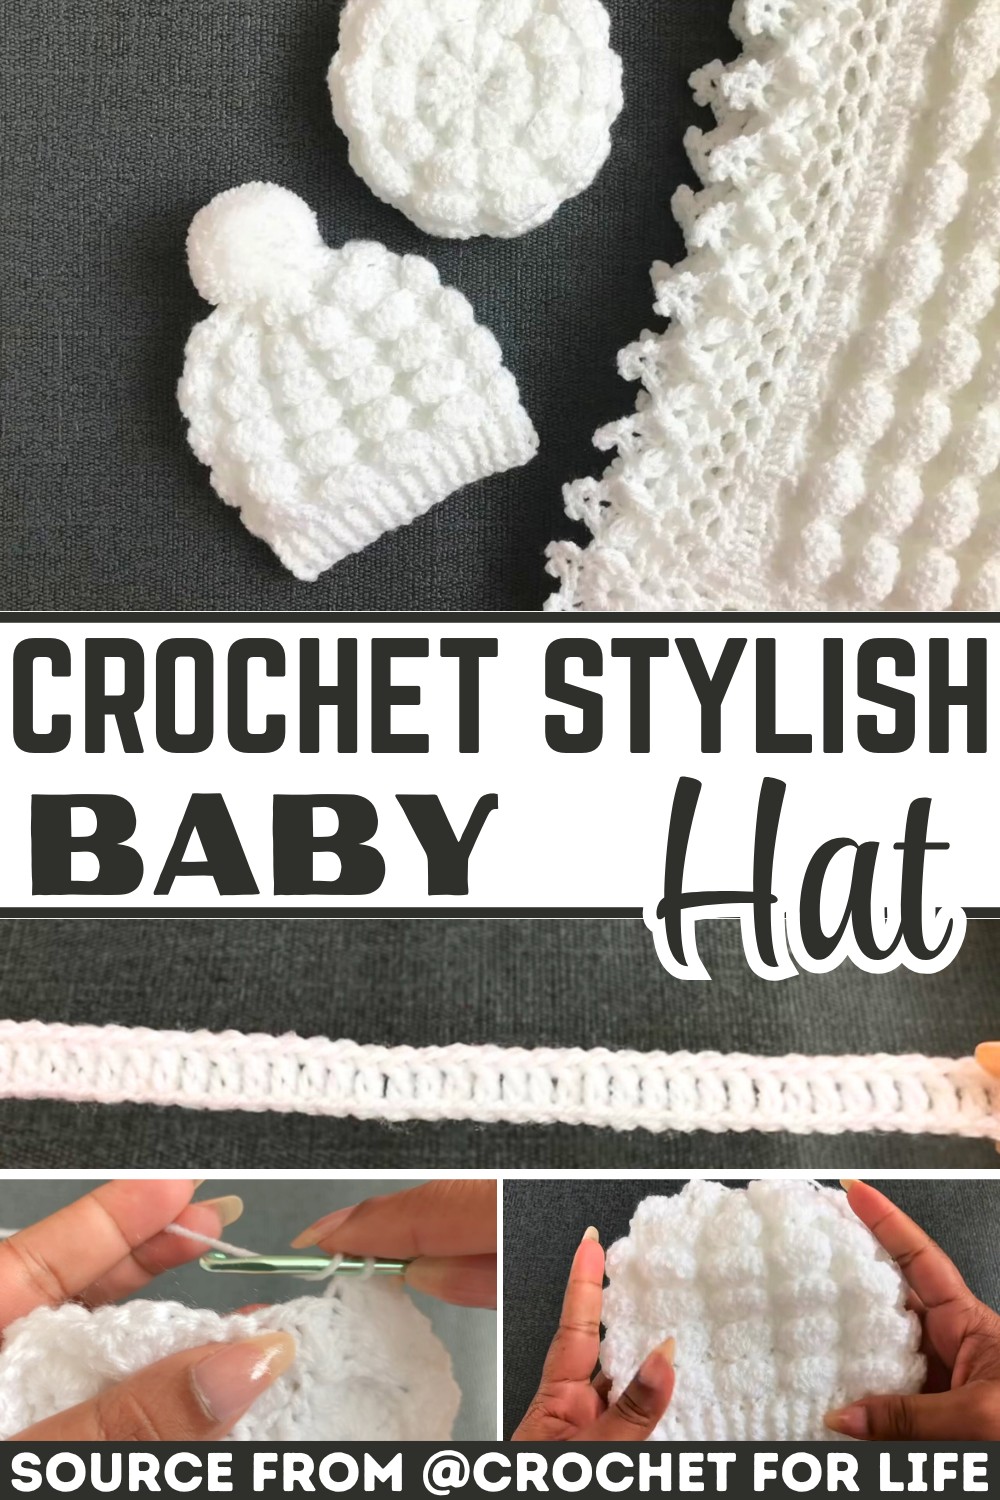
- Crochet a matching cardigan or blanket using a similar pattern (check the video description for links).
Troubleshooting and Suggestions:
Common Issues
- Uneven stitches in ribbing: Ensure consistent tension when working front and back post double crochet to maintain a clean and uniform texture.
- Loose or visible joins at the start of each round: Try using an invisible join technique or pay close attention to where you slip stitch.
- Shell shape clarity: Remember to skip two stitches between shells to maintain the 3D definition.
Creative Modifications
- Color Play: Use variegated yarn for a colorful, whimsical effect, or alternate between two colors for bold stripes.
- Embellishments: Add appliques, small buttons, or embroidered details to personalize the hat.
- Adapt the texture: For an understated look, omit the shells and stick with the ribbing.
- Matching set: Pair this hat with a coordinating cardigan or blanket, as highlighted in the pattern tutorial, to create a thoughtful baby shower gift.