Free Crochet Mini Snowman Decoration Pattern
Need a tiny handmade touch for your Christmas tree? This mini crochet snowman features a colorful hat, sweet facial details, and an easy hanging loop.

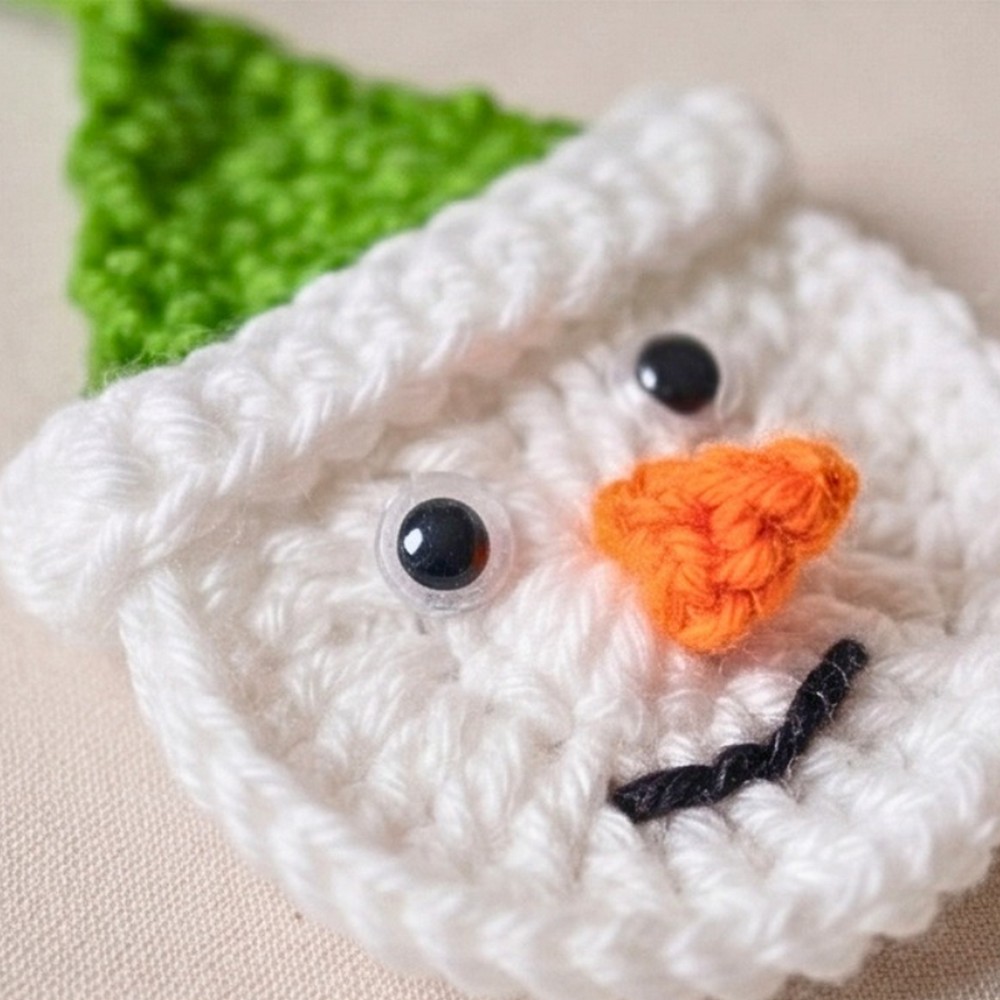
Winter decorations become even more charming with little handmade crochet snowmen. This mini crochet snowman has a round white face, a colorful shaped hat, and a tiny carrot nose for a cheerful seasonal look. Its lightweight size makes it lovely for Christmas trees, gift toppers, and holiday garlands.
Inside this tutorial, you’ll crochet the snowman’s base, shape the hat with short rows, and make the textured white brim and orange nose separately. Once the crochet pieces are ready, you can add the eyes, embroidered smile, and hanging loop to complete your decoration.
Credit Crochet Mili
Materials & Tools Needed
- Yarn Colors: White (snowman body), Hat color of choice (e.g., green or red), Orange (carrot nose), and Black (facial embroidery).
- Crochet Hook: 4.0 mm hook.
- Notions: Scissors, yarn needle for weaving ends, googly eyes (optional or use black yarn), and a glue gun for assembly.
Pattern Abbreviations & Terminology
- ch: Chain
- sl st: Slip stitch
- sc: Single crochet
- hdc: Half double crochet
- dc: Double crochet
- st(s): Stitch(es)
- rnd/row: Round or row
Color Placement at a Glance
Keep the four yarn colors ready before beginning so each part of the snowman has its intended appearance:
- White: Used for the main snowman body and fluffy hat trim.
- Hat Color: Used for the brim section and shaped hat.
- Orange: Used for the small carrot nose.
- Black: Used for the embroidered facial details.
Step-by-Step Crochet Instructions
1. Crochet the Snowman Body & Hat Base
White Yarn
The snowman’s rounded base begins with two double crochet rounds. In the third round, the single crochet stitches help shape the lower part while the hat section is worked in its chosen color.
Rnd 1:
- Begin with a magic ring.
- Chain 3, then work 11 double crochets (dc) into the ring.
- Join with a slip stitch into the 3rd chain of the starting chain-3.
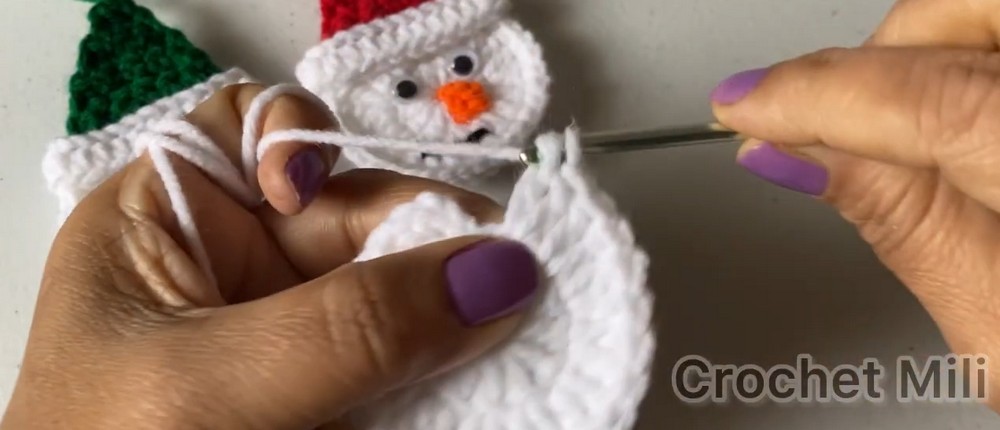
Total: 12 sts
Rnd 2:
- Chain 3.
- Work 1 dc into the exact same stitch as the join.
- Work 2 dc into every stitch around.
- Join with a slip stitch into the 3rd chain of the starting chain-3.
Total: 24 sts
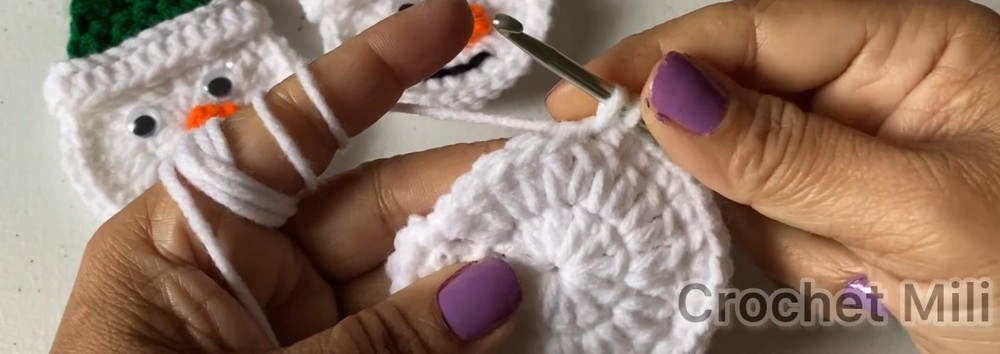
Rnd 3:
- Chain 1, work 1 single crochet (sc) into the same stitch.
- Work 2 sc into the next stitch.
- Work 1 sc in each of the next 2 stitches, followed by 2 sc in the next stitch.
- Repeat this pattern around the body base.
- Switch to your hat color yarn when starting the hat brim section across the top.
- Work 1 sc into each remaining designated hat stitch, and join with a slip stitch into the first single crochet.
- Fasten off and cut the white yarn.
2. Shape the Hat
Hat Color Yarn
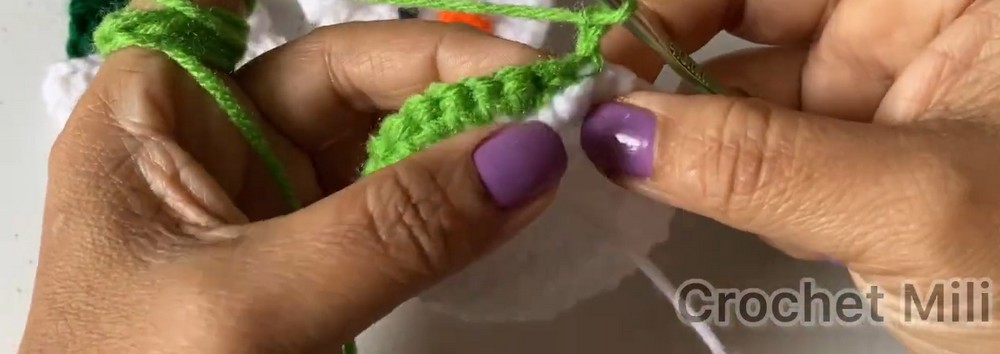
After completing the base, the hat takes shape through a series of short rows. Each new row begins with a chain and a turn, followed by skipping the first stitch and working fewer single crochets as the hat narrows.
Row 4:
- Chain 2, turn.
- Work 1 half double crochet (hdc) into the next stitch.
- Work 1 sc decrease.
- Work 1 sc into each of the next 2 stitches.
- Work 1 sc decrease.
- Finish with 1 hdc into the next stitch.
Row 5:
- Chain 1, turn.
- Skip the first stitch.
- Work 1 sc into each of the next 5 single crochets.
Row 6:
- Chain 1, turn.
- Skip the first stitch.
- Work 1 sc into each of the next 4 stitches.
Row 7:
- Chain 1, turn.
- Skip the first stitch.
- Work 1 sc into each of the next 3 stitches.
Row 8:
- Chain 1, turn.
- Skip the first stitch.
- Work 1 sc into each of the next 2 stitches.
Row 9:
- Chain 1, turn.
- Skip the first stitch.
- Work 1 sc into the final stitch.
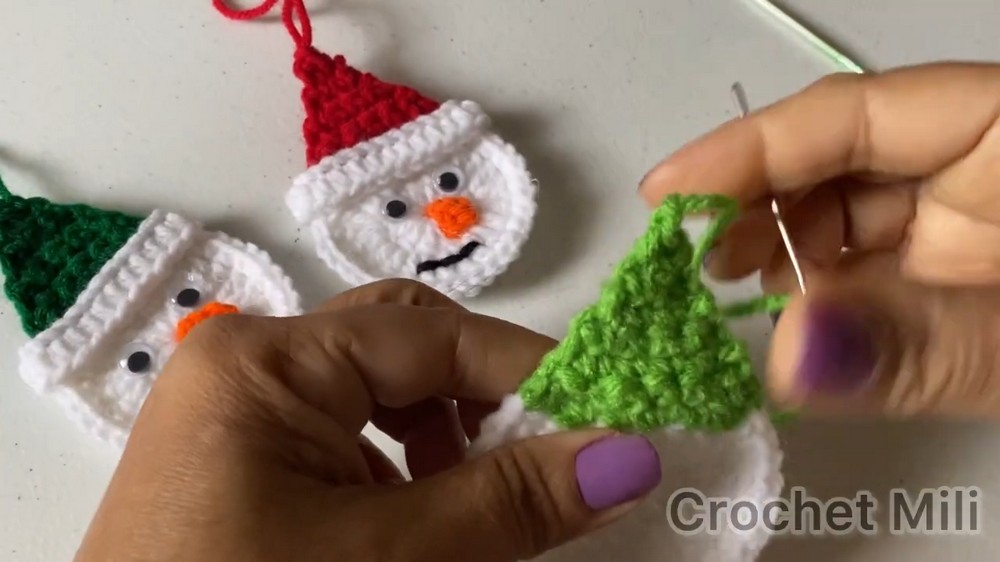
- Fasten off and cut the yarn.
Hanging Loop:
- Using a yarn needle, thread a short strand of yarn through the absolute tip of the hat.
- Knot it securely to form a loop for hanging.
- Trim any excess tails.
3. Make the White Hat Trim
White Yarn
The fluffy strip adds a soft, textured border where the colored hat meets the snowman’s head.
- Make a slip knot.
- Chain 27.
- Work 1 hdc into the 3rd chain from the hook.
- Continue working 1 hdc into every remaining chain across.
- Fasten off, leaving a short tail.

4. Crochet the Carrot Nose
Orange Yarn
A short chain forms the base of the tiny carrot nose, with two different stitches giving it its simple pointed shape.
- Make a slip knot.
- Chain 3.
- Work 1 slip stitch into the 2nd chain from the hook.
- Work 1 sc into the final chain.
- Fasten off, leaving a tail for attaching.
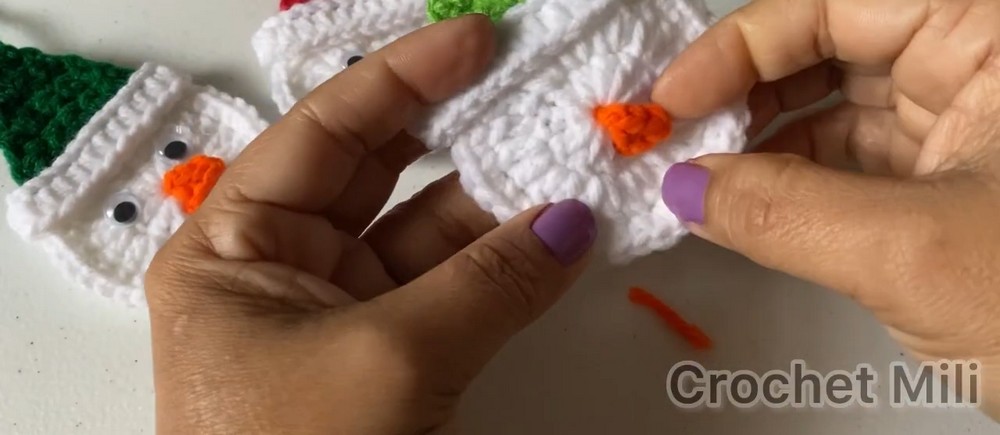
Assemble the Snowman
Once the crocheted pieces are ready, arrange them in their intended positions to bring the little snowman together.
Attach the Hat Trim
- Use a glue gun to attach the white textured fluff strip horizontally across the base of the hat where it meets the snowman’s head.
Position the Carrot Nose
- Securely glue the orange carrot nose right into the center of the snowman’s face area.
Add the Facial Features
- Glue googly eyes just above and slightly to the sides of the carrot nose.
- Using black yarn and a yarn needle, embroider a cute smiling mouth stitched underneath the nose.
Finish the Back
- Weave in any remaining loose ends on the back of the decoration to give it a clean, finished look.
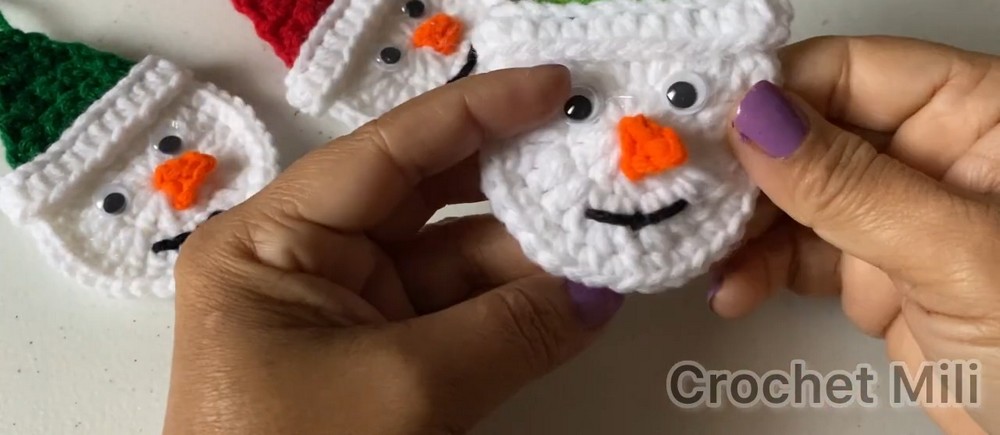
Finished Size & Customization Ideas
Finished Size: Approximately 3 to 4 inches tall, making it lightweight and perfect for tree hanging, gift toppers, or holiday garlands.
Ways to Customize:
- Swap out traditional red or green hat colors for pastel pink, icy blue, or buffalo plaid vibes.
- Add a miniature pom-pom to the tip of the hat instead of a simple yarn loop.
Your mini snowman is ready to bring a cheerful handmade touch to Christmas decorations, gift wrapping, or a festive garland!