How to Crochet in the Round for Beginners – Easy Guide
Looking to master crochet rounds? Learn how to start with a magic ring, increase stitches evenly, and create a neat foundation for amigurumi.

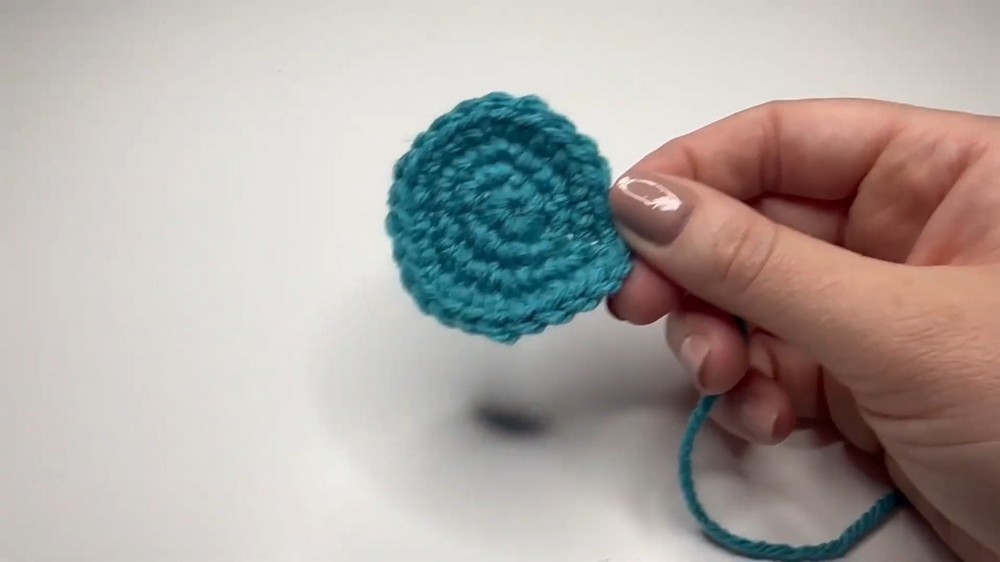
Crocheting in the round is a useful technique for making flat bases and shaping three-dimensional pieces. Starting with six single crochet stitches gives you a compact foundation that can grow into amigurumi parts, plushie heads, and other small crocheted shapes.
With a 4.0 mm hook, a few basic stitches, and a stitch marker, you can learn how each crochet round expands while keeping track of your stitch count. Follow the instructions below to make your magic circle, build the first six rounds, and understand how to continue increasing.
Credit Hobby Aubrey
Materials & Tools Needed
- Yarn: Worsted weight or yarn of choice (working end and tail end).
- Crochet Hook: 4.0 mm crochet hook.
- Accessories: Stitch marker (to keep track of your rounds/stitches).
- Tools: Scissors and a tapestry needle (if sewing pieces together).
Finished Size & Ways to Customize
- Finished Size: Adjustable depending on how many rounds you work. Starting with a 6-stitch base creates a compact, hexagonal flat disc ideal for 3D amigurumi components.
- Customization Ideas:
- Use for amigurumi bases, spheres, and plushie heads (e.g., turkey heads, pie bases, and small toys).
- Easily scale up by continuing the incremental single-crochet-to-increase progression.
- Switch yarn colors at the start of any new round for striped amigurumi effects.
Pattern Abbreviations & Terminology
- st / sts: Stitch / Stitches
- ch: Chain
- sc: Single Crochet
- inc: Increase (work 2 single crochet stitches into the exact same stitch)
- sl st: Slip Stitch
- MR: Magic Ring / Magic Circle
- [ ]: Repeat instructions inside the brackets for the specified number of times

Step-by-Step Crochet Instructions
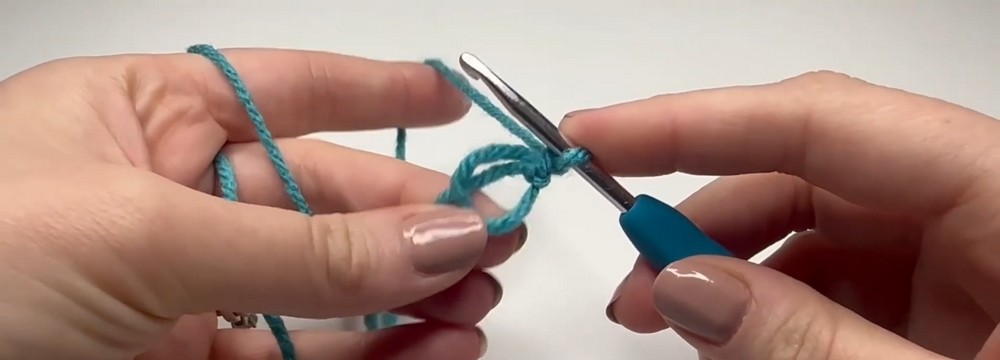
Step 1: Make the Magic Circle
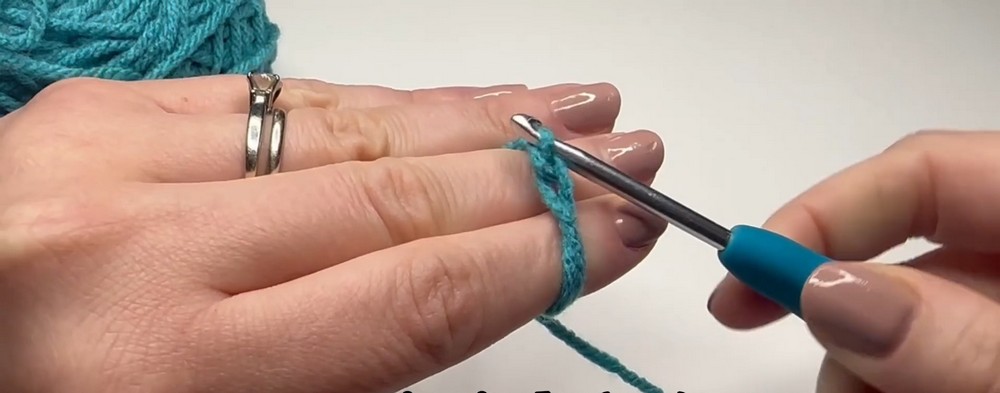
- Hold the tail end of your yarn between your two fingers and thumb.
- Wrap the working end around your fingers to form an X on the front side and keep the strands parallel on the reverse side.
- Insert your 4.0 mm hook under the yarn closest to your fingertips.
- Grab the yarn closest to your knuckles and pull it through.
- Turn your hook, grab that same piece of yarn closest to your knuckles, and pull it through the loop on your hook.
- Hold the working yarn and tail securely, yarn over, and pull through to lock.
- Pull the tail end to cinch the magic circle completely closed.
Step 2: Work the First Round
Round 1: Foundation Stitches (6 Stitches)
- Work 6 single crochet (sc) stitches directly into the magic circle. Ensure the tail end is trapped or positioned neatly between the stitches.
- Pull tightly on the tail end to cinch the magic circle tightly closed.
Stitch count: 6 sts
Step 3: Increase to 12 Stitches
Round 2: First Increase Round (12 Stitches)
- Work an increase (inc)—which is 2 single crochet stitches—into the very first stitch (this stitch may feel slightly tight due to cinching).
- Work an inc into each of the remaining 5 stitches around.
- Place your stitch marker in the last stitch (or first stitch/loop depending on your preference) to mark your working row.
Stitch count: 12 sts
Step 4: Expand the Base
Round 3: Gradual Expansion (18 Stitches)
- Work 1 sc in the first stitch.
- Work an inc in the next stitch.
- Repeat the pattern
[1 sc, inc]around.
Stitch count: 18 sts
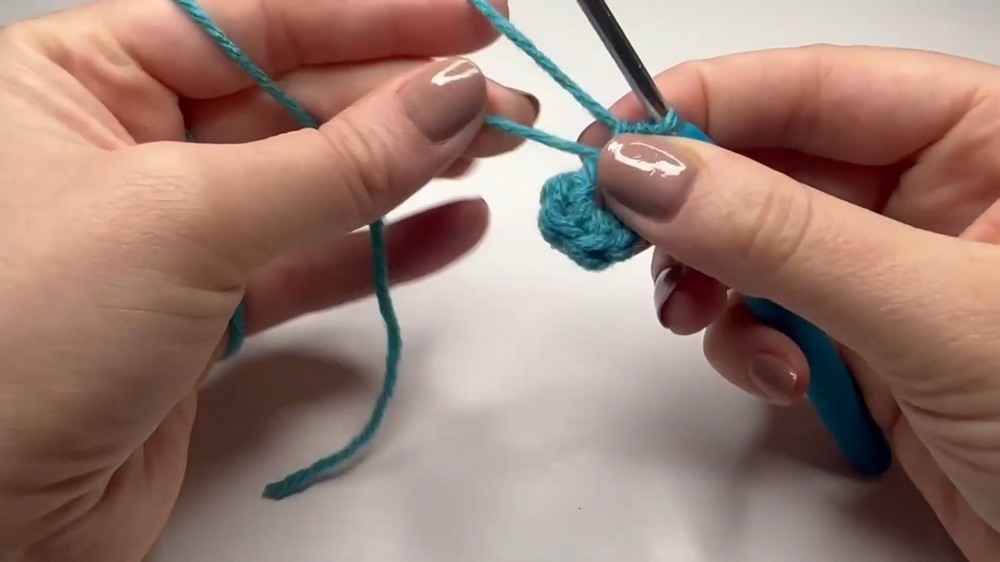
Round 4: Expanding Further (24 Stitches)
- Work 1 sc in each of the next 2 stitches.
- Work an inc in the 3rd stitch.
- Repeat the pattern
[2 sc, inc]around.
Stitch count: 24 sts
Continue Increasing in Each Round
Once the first four rounds are complete, the same increase principle can be used to make the base wider. Add one more single crochet between increases with each new round.
- Round 5 (30 sts):
[3 sc, inc]repeated around. - Round 6 (36 sts):
[4 sc, inc]Repeated around.
Understanding the Shape: Each round adds 6 stitches to the previous stitch count. With this consistent increase placement, the flat piece will naturally form a hexagon rather than a mathematically perfect circle.

Fastening Off
When you have finished the desired number of rounds, use the following steps to secure your yarn.
- Slip Stitch (sl st): Insert your hook into the final stitch, yarn over, and pull straight through both the stitch and the loop on your hook to close the round.
- Chain 1: Yarn over and pull through to lock the knot.
- Cutting Yarn:
- Cut the yarn short if you are weaving in your ends immediately.
- Leave a long tail (6-12 inches) if you plan to use the tail to sew this crocheted component onto another part of an amigurumi project.