Adorable Crochet Santa Decoration For Christmas
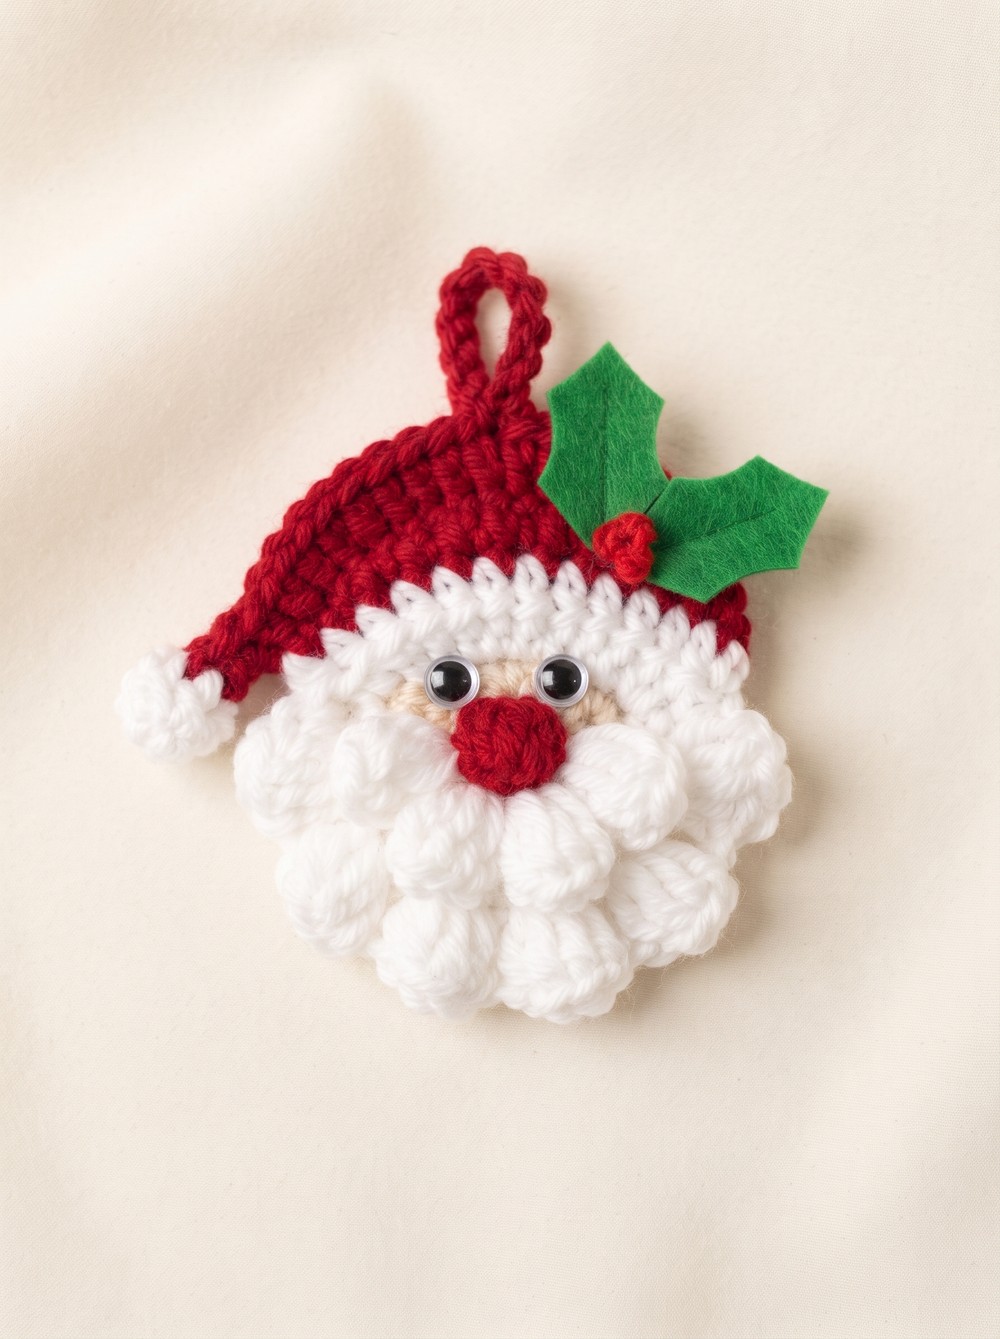
Want a cheerful handmade touch for your Christmas tree? Crochet this adorable Santa decoration with a textured beard, bright red hat, and hanging loop.

This little crochet Santa brings classic Christmas colors together in a charming flat decoration. Its beige face, layered white beard, and red hat create a recognizable crochet Santa look, while the small red details add a playful finishing touch. Hang it on your Christmas tree, add it to a wreath, or use it to decorate a wrapped gift.
The pattern uses a 4.0 mm crochet hook and three yarn colors. You’ll begin with a small beige face, build the beard with alternating chain spaces and textured stitches, and then shape the red hat with its own hanging loop. The final details are made separately and attached with a glue gun, making each stage easy to follow.
Credit Crochet Mili
Materials & Tools Needed
- Yarn: Beige or skin color, white, and red
- Crochet Hook: 4.0 mm
- Notions: Scissors, yarn needle, googly eyes, and a glue gun
Pattern Abbreviations
- ch: Chain
- sl st: Slip stitch
- sc: Single crochet
- dc: Double crochet
- hdc: Half double crochet
- st(s): Stitch(es)
- rnd/row: Round or row

How the Beard Rows Create Texture
The white beard is made with two alternating stitch patterns. First, chain spaces are formed along the base. The next row fills each space with a group of single and double crochets, creating the rounded, scalloped texture.
This sequence is repeated as the beard grows. Keep the chain spaces easy to identify before beginning the following row, since they are the spaces used for the textured stitch groups.
Step-by-Step Crochet Santa Instructions
1. Crochet the Beige Face Base
Row 1
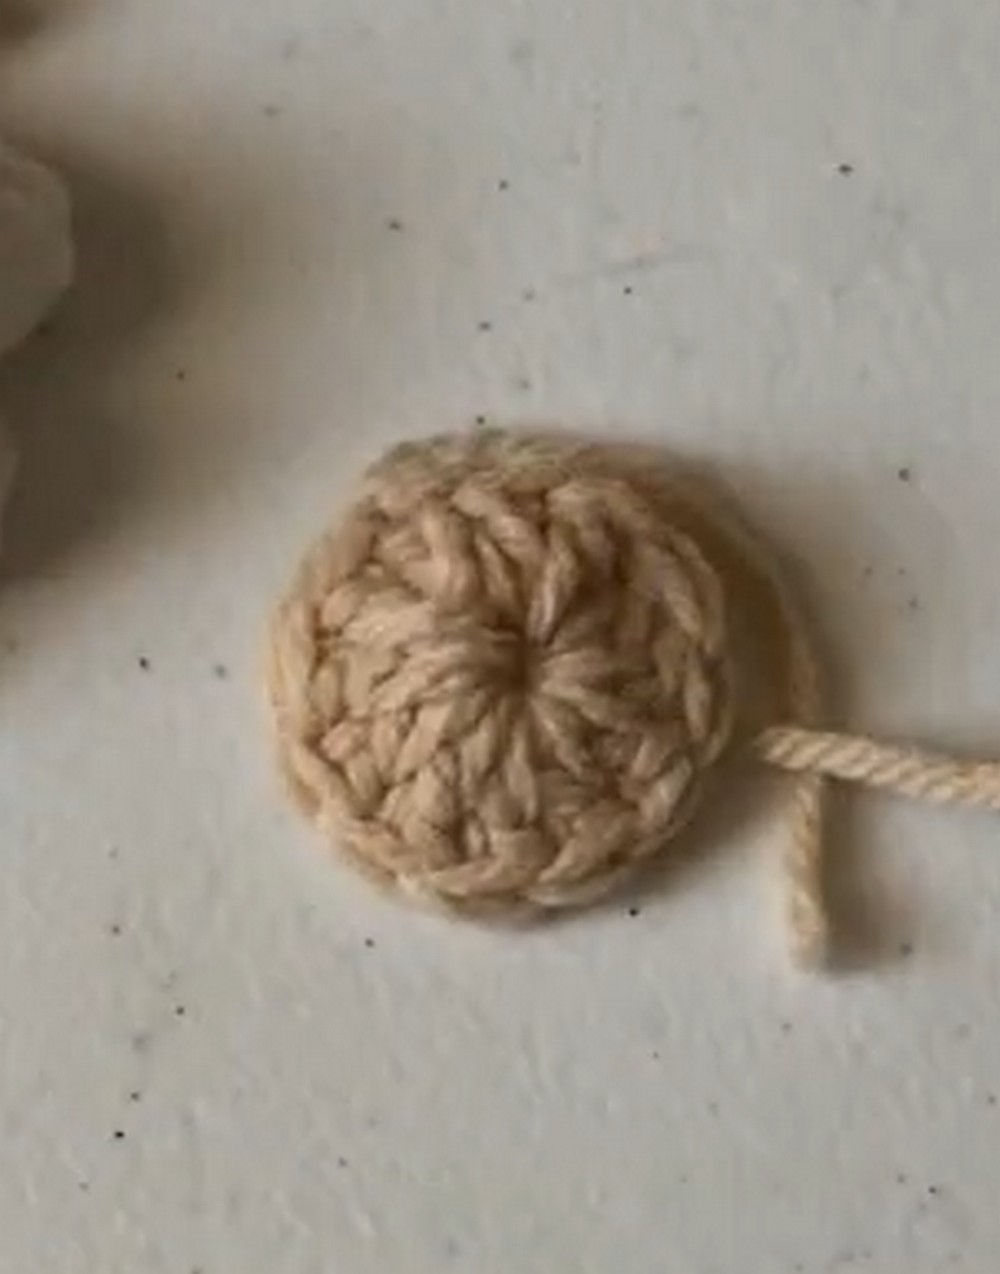
With beige yarn, create a magic ring.
- Chain 3.
- Work 11 double crochets (dc) into the magic ring.
- Slip stitch into the 3rd chain to join the round.
- Cut the yarn.
Yarn cut
The beige circle forms Santa’s face and gives you the base for adding the white beard.
2. Make the White Beard
Join white yarn to the beige face base.
Row 2
- Chain 1.
- Work 2 double crochets into every stitch around.
- Slip stitch into the first double crochet to join.
Join
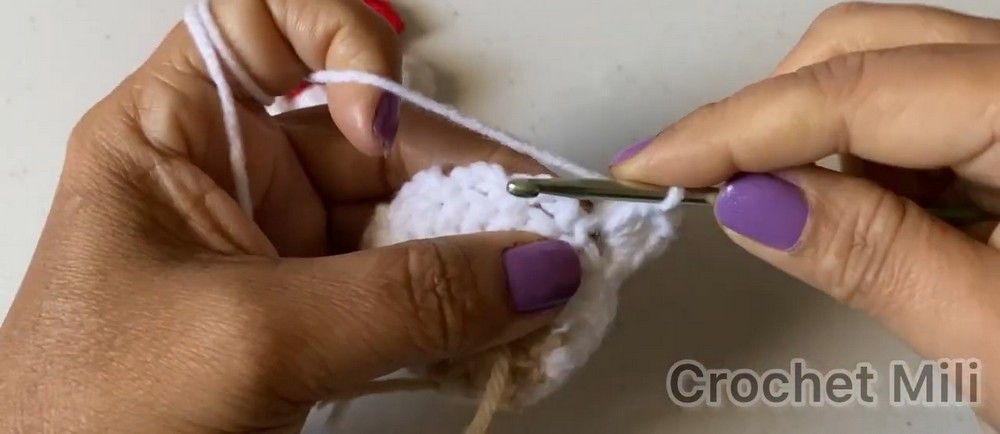
Row 3
- Chain 3.
- Skip 1 stitch.
- Slip stitch into the next stitch.
- Repeat this sequence 4 more times around.
These chain sections create the spaces for the next textured row.
Row 4
- Chain 1 and turn.
- Work the following group into the same chain space: 1 single crochet, 3 double crochets, and 1 single crochet.
- Repeat the same group – 1 sc, 3 dc, and 1 sc – in every chain space around.
Each group fills a chain space and forms a rounded section of the beard.
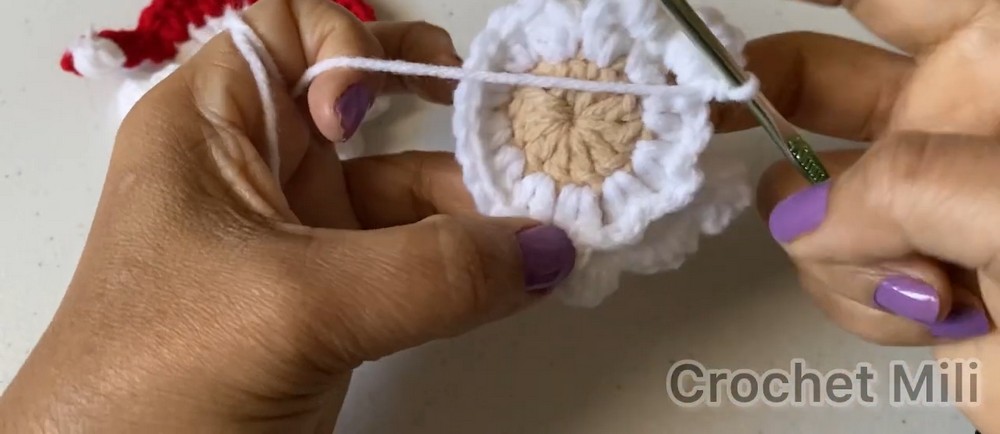
Row 5
- Chain 1 and turn.
- Slip stitch into the indicated base stitch.
- Chain 3.
- Skip 1 stitch and slip stitch into the next stitch.
- Repeat this sequence 2 times.
Row 6
- Chain 1 and turn.
- Work 1 single crochet, 3 double crochets, and 1 single crochet into every chain space around.
Row 7
- Chain 1 and turn.
- Slip stitch into the indicated stitch.
- Chain 3.
- Skip 1 stitch and slip stitch into the next stitch.
- Repeat this sequence 2 times.
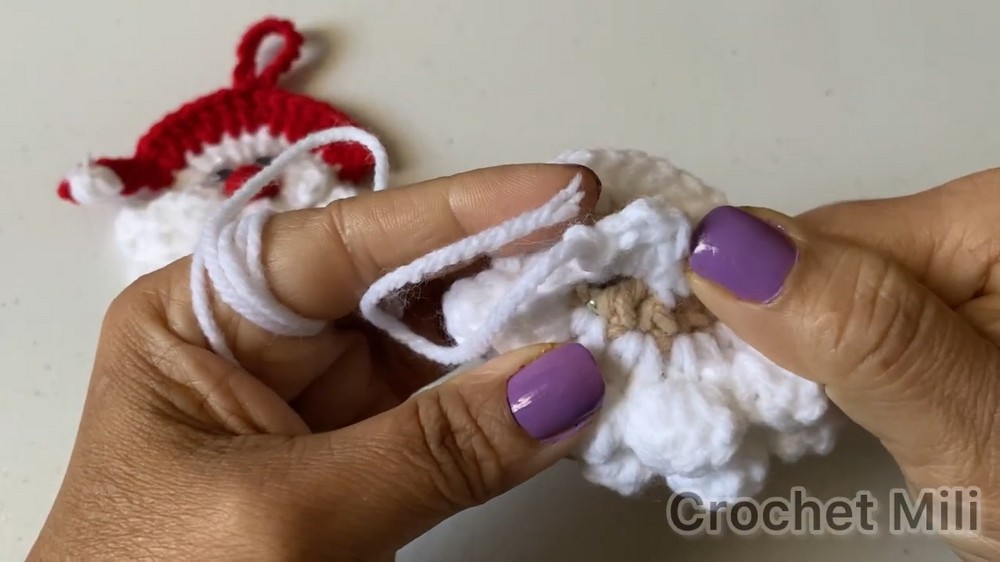
Row 8
- Chain 1 and turn.
- Work 1 single crochet, 3 double crochets, and 1 single crochet into every chain space.
- Cut the yarn.
Cut yarn
The repeated stitch groups complete the textured white beard.
3. Shape the Red Santa Hat
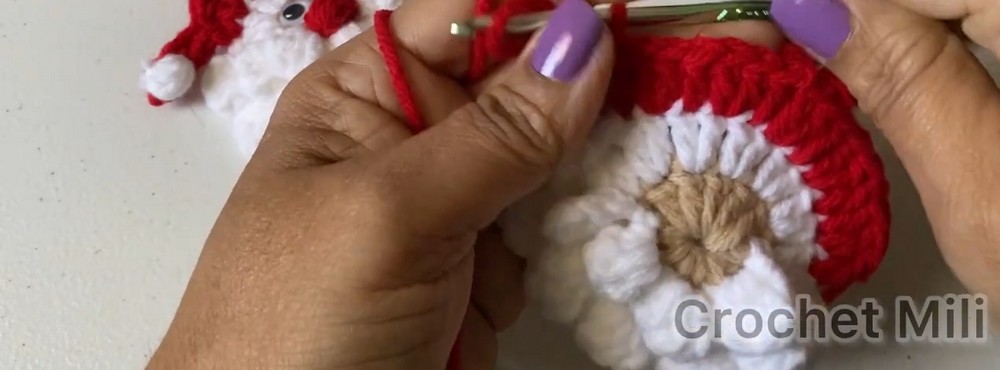
Join red yarn to the designated top section of the head and beard base.
Hat Shaping
Work the following stitches in order:
- Work 1 double crochet.
- Work 2 double crochets into the next stitch.
- Work 1 double crochet into the next stitch.
- Work 2 double crochets into the next stitch.
- Work 1 double crochet into the next stitch.
- Work 2 double crochets into the next stitch.
This sequence forms the upper red section of Santa’s hat.
Make the Hanging Loop
- Chain 11.
- Slip stitch into the top of the double crochet to form the hanging loop.
Continue Down the Hat Edge
- Chain 6.
- Work 1 single crochet into the 3rd chain from the hook.
- Work 1 single crochet into every remaining chain.
- Slip stitch into the next stitch along the hat base.
- Cut the yarn.
The chain loop gives the decoration a way to hang from a Christmas tree branch or wreath.
4. Make the Two Red Pom-Poms
Make 2 pom-poms with red yarn: one for the tip of the hat and one for Santa’s nose.
Pom-Poms
For each pom-pom:
- Chain 2.
- Work 3 half-double crochet puff stitches into the 1st chain.
Puff Stitch Detail
- Cut the yarn.
- Pull tight and secure the yarn to form a small round puff.
Secure the Pom-Pom
Repeat the same instructions to make the second pom-pom.
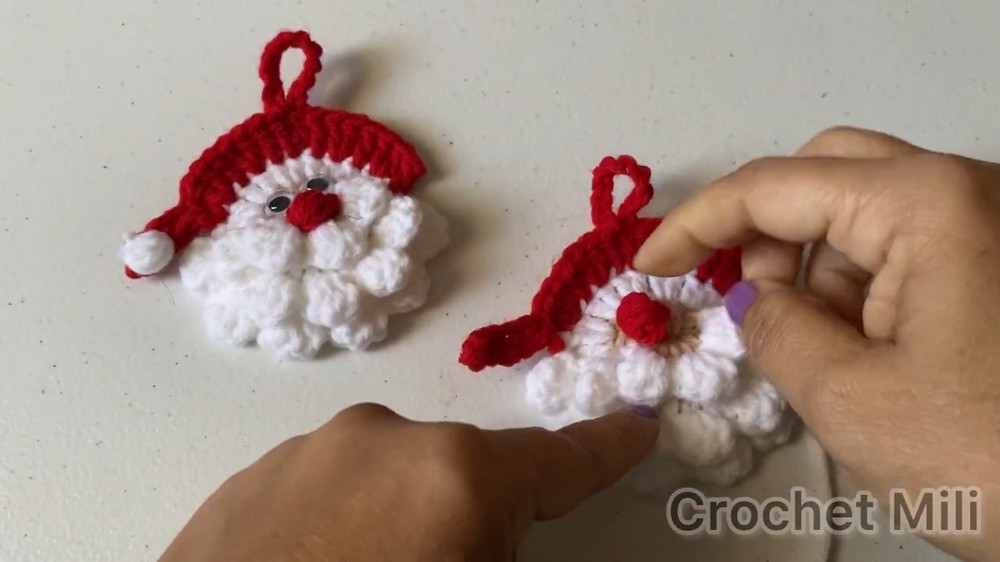
Assemble Your Crochet Santa
Once the crochet pieces are ready, arrange the small details before attaching them.
Attach the Hat Pom-Pom
Use a glue gun to attach one red pom-pom to the tip of Santa’s hat.
Attach the Nose
Glue the second red pom-pom to the center of the beige face to create Santa’s nose.
Add the Googly Eyes
Glue the googly eyes directly above the beard and beneath the hat brim.
Check that the eyes sit evenly and that the red nose is centered on the face before the glue sets.
Finished Size & Ways to Customize
This lightweight Santa decoration makes a lovely handmade addition to your Christmas decorations. Hang it on a Christmas tree, add it to a wreath, or use it as a festive embellishment on a wrapped gift.
You can also personalize the finished decoration:
- Sparkly yarn: Choose a glittery red or white yarn for an extra festive look.
- Embroidered eyes: Replace the googly eyes with embroidered French knots for a stitched facial detail.
- Holiday brooch: Attach a pin back to turn Santa into a Christmas brooch.
The finished Santa is ready to bring a little handmade Christmas cheer wherever you choose to display it.