Crochet Baby Ruffle Headband with Adjustable Ties & Scallop Ends
This crochet baby headband pairs airy mesh with a gathered ruffle and long tie strings, making it easy to adjust from newborn through toddler sizes.
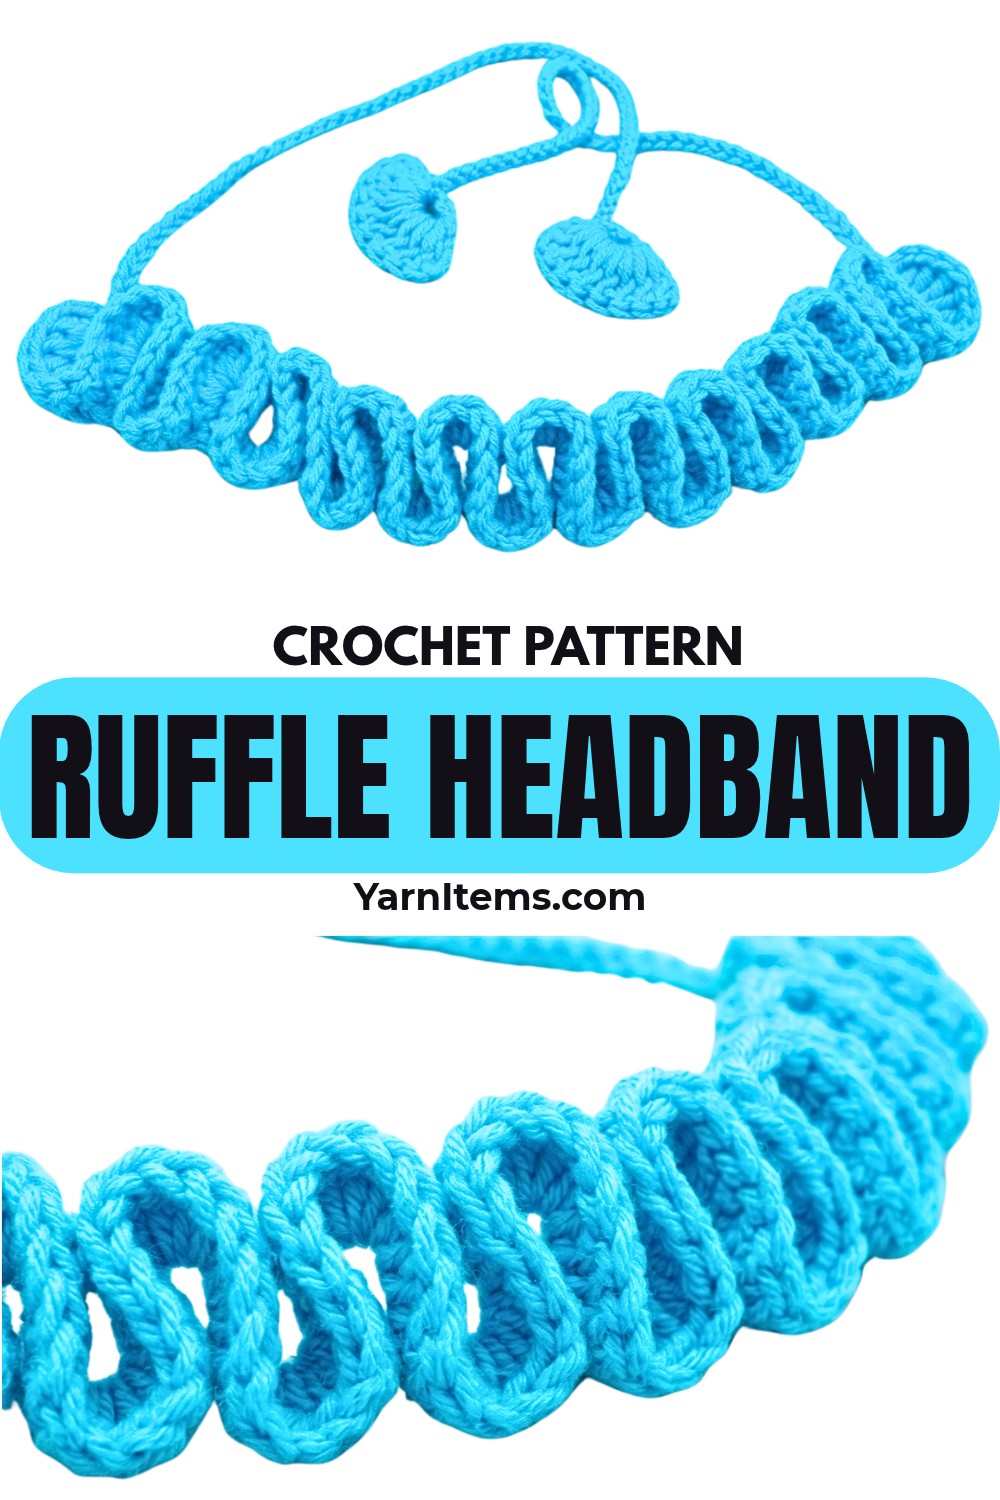
Lightweight Cotton Milk Yarn turns into an airy mesh base before four double-crochet clusters transform it into a full, springy ruffle. Long chain ties keep the fit adjustable, so this crochet headband style can work from newborn through toddler years.
What makes this crochet headband especially simple is how each section connects directly into the next. Once the mesh is complete, ruffle stitches are worked into its open spaces, followed by 50-chain ties and matching scalloped ends. No sewing is needed for assembly.
Credit Crochet & Crafts Therapy by Chompu
Materials & Tools Needed
- Yarn: Cotton Milk Yarn, 4-ply, using light blue/cyan in tutorial
- Hook: 3.0 mm, Size No. 5 crochet hook
- Scissors
- Tapestry needle: For weaving in loose ends
Finished Size & Customization
Central ruffle section is designed to sit across the top/front of head, while two 50-chain strings tie at back. This adjustable design can suit newborns through toddlers.
For more length in the ruffled section, increase the starting chain in multiples of 2. This keeps mesh spacing consistent while giving the ruffle more room to extend.
For fuller volume, work 5 or 6 dc into each mesh space instead of 4. More stitches in each space create stronger gathering and a fuller ruffle.
For two-tone styling, change yarn color when beginning Row 2. This places contrasting color directly into the ruffle section while leaving the mesh base in the original shade.
Pattern Abbreviations & Terminology
- ch: Chain
- dc: Double Crochet
- sk: Skip
- sl st: Slip Stitch
- st(s): Stitch(es)
- sp: Space

Creating Mesh Headband Base
Foundation Chain
Start with a slip knot and ch 50.
This chain establishes the length of the mesh strip. Since later ruffle stitches will be worked into chain-1 spaces, keeping chain tension even here helps mesh spaces stay consistent.
Row 1 – Mesh Strip
Skip the first 5 chains from the hook. Work 1 dc into 6th ch.
Ch 1, sk 1, 1 dc in next ch.
Continue this sequence – ch 1, sk 1, 1 dc – all the way across the foundation chain.
Open square mesh spaces should now run along the strip. These spaces are important because the entire ruffle section will be worked directly into them next.

Building Full Ruffle
Row 2 – First Ruffle Row
Ch 3, turn.
Chain 3 counts as first dc. Work 3 more dc into first mesh space, giving 4 dc total in that space.
Move to next mesh space and work 4 dc.
Continue placing exactly 4 dc into every mesh space across the strip.
As extra stitches are packed into each open space, fabric will naturally begin curling and gathering. This increasing stitch density creates a full ruffle without needing separate shaping.
Continue until the final mesh space has been filled with 4 dc.
Ch 2, sl st into side of final space to anchor ruffle edge neatly.
Do not cut yarn.

Ruffle Volume Check
At this stage, ruffle should already look noticeably fuller than mesh base. Gentle curling is expected rather than being something that needs to be flattened.
If ruffle looks too loose, check whether every mesh space received 4 dc. Missing one cluster can create an uneven section. If you want even more fullness next time, 5 or 6 dc per space can be used.
First Tie & Scalloped End
First 50-Chain Tie
From the point where the ruffle was anchored, immediately ch 50.
This long chain becomes the first adjustable tie, extending from one side of the headband.
Creating Loop
Ch 3, then work 1 dc into 4th ch from hook.
This creates a small loop at the end of the tie.
Scallop Shell
Ch 3.
Work 8 dc directly into center of loop created by previous chain-and-dc section.
Eight dc packed into this small loop create a rounded shell that forms a decorative tie end.

Closing Scallop
Ch 3, sl st into center of loop to close shell.
Pull loop snug, then cut yarn and pull yarn through to fasten off.
Second Tie & Matching Scallop
Re-attach yarn at exact opposite end of ruffled headband base — side where initial slip knot was made.
Secure yarn with sl st, then ch 50 to create second tie.
Repeat scallop sequence: Ch 3, 1 dc in 4th ch from hook, ch 3, 8 dc into loop, ch 3, sl st into loop.
Pull loop tight, cut yarn, and fasten off.
Both sides should now have matching 50-chain ties with rounded scallop ends.

Finishing & Assembly
No sewing is needed because mesh, ruffle, and ties remain connected as one continuous piece.
Use tapestry needle to weave in loose yarn tails at both scallop ends and at yarn attachment point for second tie. Trim excess fuzz once ends are secure.
Final Fit Check
Place ruffled section across top/front of intended wearer’s head and bring both ties toward back. Adjust tension evenly on both sides before tying.
A small bow can sit at back or slightly toward one side, depending on preferred styling. Since ties provide adjustment, avoid pulling them excessively tight around baby’s head.

Styling Detail
Tie both 50-chain strings into small bow at back or side of head. Let scalloped ends remain visible so decorative shells frame bow naturally.
For another version, keep same stitch sequence but change color at Row 2 so ruffle contrasts with mesh base. This creates two-tone definition without altering shaping or finishing.